How to Clean Leather Sneakers: A Complete Guide with Proven Steps and Tips
Cleaning leather sneakers safely starts with gentle methods that protect the material while removing dirt and stains. Use soft brushes or cloths and specialized leather cleaners, then condition your shoes to keep the leather supple. Allow the sneakers to air dry completely before wearing them again for the best results.
This information is for anyone who owns leather sneakers and wants to maintain their look and durability at home without causing damage. You’ll find practical steps, recommended materials, and tips to avoid common cleaning mistakes, helping your leather sneakers stay fresh and last longer.
Key Takeaways
- Use a soft brush or cloth with leather-specific cleaner to avoid damaging sneaker surfaces.
- Apply conditioner after cleaning and let it absorb for 10-15 minutes to nourish the leather.
- Air dry leather sneakers at room temperature for 24 to 48 hours to prevent warping.
- Run a brush along seams and soles to remove dirt from hard-to-reach areas thoroughly.
- Use saddle soap or mink oil sparingly, letting it sit 15 minutes before wiping off.
- Avoid harsh chemicals like bleach or undiluted vinegar that can dry out or discolor leather.
How to Clean Leather Sneakers Safely and Effectively
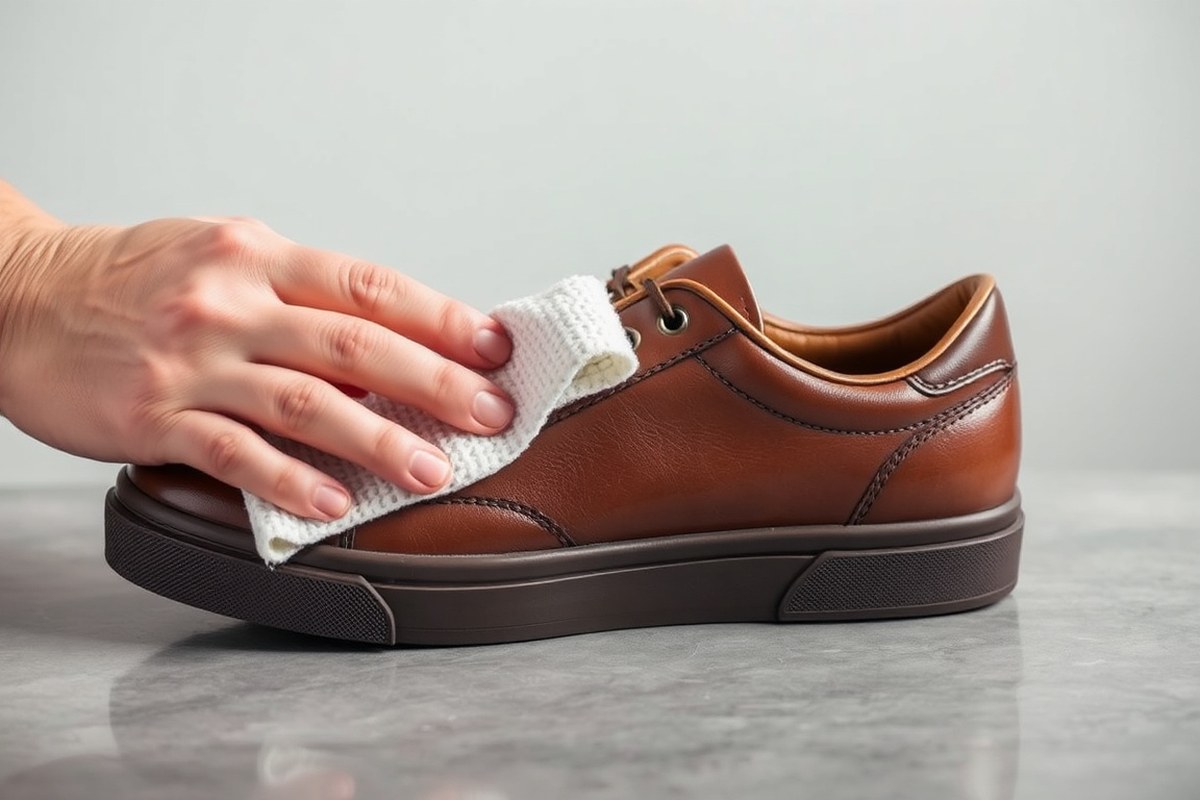
Cleaning leather sneakers safely and effectively requires using gentle products meant for leather or mild soap mixtures made at home. A blend of mild detergent and water forms a solution that cleans without removing the leather’s natural oils, preserving its flexibility and strength. Use a soft cloth or brush soaked in this solution to carefully clean your sneakers, avoiding too much water. Let your sneakers dry on their own in an airy spot away from sunlight or heat that can cause the leather to dry out or crack.
Household solutions like white vinegar and baking soda can be used cautiously and selectively on leather sneakers. White vinegar, diluted in water, is effective in tackling stains and lightly deodorizing leather but should only be applied in small amounts with a soft cloth to avoid damaging the finish. Baking soda works well when made into a paste with water for removing surface stains and odors, especially on white or light-colored leather. However, always test these remedies in an inconspicuous spot first, because some leathers, like suede or very smooth finishes, may react differently or discolor.
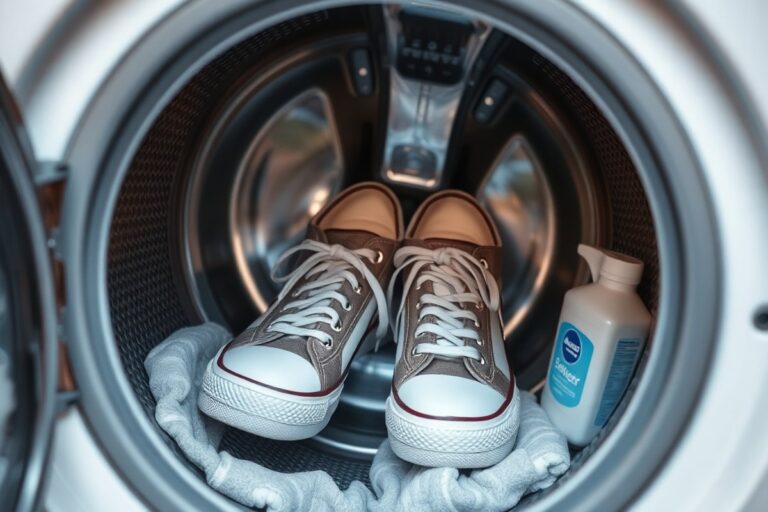
Cleaning leather sneakers in a washing machine is not recommended. The agitation, water saturation, and heat during a machine wash can warp the leather, cause it to lose its shape, or lead to cracking over time. Instead, focus on spot-cleaning by hand. Using leather-specific wipes can be convenient for quick touch-ups, but wipes designed for other surfaces or heavy-duty cleaning products often contain harsh chemicals that could dry out or damage the leather’s finish. For everyday maintenance, soft cloths dampened with a mild cleaner or water work best to preserve the leather while removing dirt.
Start cleaning leather sneakers by brushing off dirt with a soft cloth or brush. Combine a few drops of mild dish soap with a cup of water and dip a clean cloth into the mix, wringing out as much liquid as possible. Clean the shoes gently, paying attention to dirty spots, and use a lightly dampened toothbrush to reach seams and crevices. Rinse away soap with a cloth moistened with plain water, then allow the sneakers to dry naturally for several hours. Finish by applying leather conditioner to keep the leather hydrated and flexible.
Effective cleaning takes patience and the right products rather than aggressive methods or household chemicals used without dilution. While baking soda and vinegar have their place, overuse or strong concentrations can dull or damage leather finishes. Proper cleaning and conditioning keep your leather sneakers looking good and lasting longer, preserving both their appearance and comfort without risking harm from unsuitable methods or equipment.
Materials and Tools Needed to Clean Leather Sneakers Properly

Cleaning leather sneakers requires gentle materials and careful handling to avoid damaging the leather’s natural surface. You need soft cloths to prevent scratches and a leather cleaner or mild soap solution tailored for leather. Avoid harsh chemicals or abrasive brushes, which can leave marks or remove the leather’s protective finish.
Start with a soft-bristled brush to remove loose dirt without scratching. Then apply a small amount of cleaning solution, about a teaspoon per shoe, onto a clean cloth or the brush. Too much liquid can stain or warp the leather. Gently work the cleaner in small circular motions, focusing on soiled areas. Rinse the cloth frequently with water to avoid spreading grime, then wipe the sneakers with a damp microfiber cloth to remove residue.
Shoestrings should be removed before cleaning. To clean laces, soak them in warm water with a few drops of mild detergent for 15 to 30 minutes. After soaking, gently rub and rinse them thoroughly before air drying. This approach avoids wetting the leather and keeps laces fresh without risking discoloration or weakening.
- Soft, lint-free cloths or microfiber towels
- Soft-bristled brush for dirt removal and cleaning
- Leather cleaner or a mild soap solution with water
- Warm water for rinsing cloths and laces
- Small bowl for mixing cleaning solution
- Container for soaking shoelaces
Use only a small amount of cleaning solution on your cloth or brush each time to avoid saturating the leather and causing damage.
After cleaning, do not expose sneakers to direct heat or sunlight. Air drying at room temperature allows the leather to dry evenly without cracking. Conditioning the leather after drying is important to restore moisture and flexibility. You can find leather conditioner products starting around $10, which help maintain softness and prevent future dirt buildup.
Step-by-Step Cleaning Process for Leather Sneakers
Cleaning leather sneakers carefully preserves their look and extends their life. Start by removing surface dirt, then apply a gentle cleaning solution. Testing any product on a hidden spot first prevents discoloration or damage.
Removing Dirt and Dust
Begin by removing loose dirt and dust from your leather sneakers to avoid scratching the surface during cleaning. Use a soft-bristled brush or a dry microfiber cloth to gently sweep away debris from all parts, including seams and crevices.
Take the time to untie and remove the laces, as leather cleaners and soaps can stain fabric. Cleaning the shoes with the laces off also allows you better access to tricky areas like the tongue and eyelets.
Applying Cleaner to the Leather
Mix a mild soap with water or use a leather cleaner designed for full-grain leather. This helps remove stains without stripping the natural oils from the leather. Always test your cleaning solution on a small hidden spot first, waiting 5 to 10 minutes to check for any color change or damage.
Dampen a microfiber cloth slightly and put a small amount of cleaning solution on it. Excess moisture can soak into the leather and lead to damage or color changes, so use the cleaner sparingly to avoid over-wetting. For stubborn spots, gently buff with a soft cloth or try a household cleaning eraser suitable for leather surfaces.
Wiping and Preparing for Drying
After applying the cleaner, remove dirt and excess solution by wiping the sneakers with a clean, slightly damp cloth. This step removes residues that could leave streaks or spots once dried. Avoid harsh wiping that could damage the grain or finish.
Once wiped clean, leave the sneakers to air dry in a well-ventilated, shaded area away from direct heat or sunlight. This prevents cracking or fading. Avoid using a hair dryer or heater, as rapid drying can harm the leather’s texture and appearance.
- Remove the laces from your sneakers.
- Use a soft-bristled brush or dry microfiber cloth to brush away dirt and dust.
- Prepare a mild soap-and-water solution or use a leather cleaner.
- Test the cleaning solution on a hidden spot; wait 5 to 10 minutes for color reaction.
- Dampen a microfiber cloth lightly with the solution and gently apply it to the leather.
- Rub stubborn stains gently with the cloth or a cleaning eraser designed for leather.
- Wipe the shoes with a clean, damp cloth to remove excess cleaner.
- Let the sneakers air dry away from sunlight or direct heat.
How to Dry and Condition Leather Sneakers Correctly
Leather sneakers typically take 12 to 24 hours to dry thoroughly after cleaning, depending on the thickness of the leather and the drying environment. Proper drying prevents shrinkage, cracking, and other damage caused by moisture. Once dry, applying a leather conditioner restores essential oils, keeping the leather supple and helping it last longer.
Proper Air Drying Techniques
After cleaning, use a clean cloth to absorb any leftover moisture from your leather sneakers. Keep them away from direct heat like radiators or sunlight to prevent the leather from drying too fast and cracking.
Place your sneakers in a well-ventilated area at room temperature, ideally between 65°F and 75°F. Insert shoe trees or stuff the shoes lightly with acid-free paper to help maintain the shape as they dry. Thicker leather sneakers may need more time, up to 24 hours, while thinner leather usually dries in about 12 hours.
Avoid using high heat or hair dryers as they can remove natural oils and damage the finish. Keeping your leather sneakers dry helps prevent shrinkage and preserves their appearance and functionality.
Applying Leather Conditioner
Once your leather sneakers are completely dry, it’s time to apply a leather conditioner to replenish lost moisture. Using a good-quality conditioner helps keep the leather soft, prevents cracking, and restores its natural shine. Follow these steps for applying conditioner:
- Use a clean, soft cloth to pick up a small amount of leather conditioner.
- Apply the conditioner evenly over the entire leather surface using gentle circular motions.
- Pay extra attention to areas that bend or crease during wear, as these spots dry out faster.
- Avoid over-applying; a thin, even layer is enough to moisturize the leather.
- Let the conditioner absorb for at least 30 minutes to penetrate fully.
Limit conditioning to every few months or after each deep cleaning to avoid buildup. Excessive conditioner can clog the leather pores, resulting in a sticky or dull appearance.
Buffing for a Polished Finish
After the conditioner has absorbed for at least 30 minutes, buff your sneakers to revive their natural luster. Use a clean, dry cloth or a horsehair brush and gently work in circular motions across the leather.
Buffing removes excess conditioner, improve shine, and leaves a smooth finish. For sneakers with thicker leather, spend a little more time buffing to ensure the conditioner is evenly distributed and fully absorbed. Sticky spots or patches can be cleaned by buffing, which removes leftover conditioner that didn’t soak in and keeps dirt from accumulating later.
Cleaning Different Types of Leather Sneakers: What You Need to Know
Different types of leather require specific cleaning methods and products to maintain their look and durability. Understanding the characteristics of your leather sneakers helps you avoid damage like shrinking, dulling, or staining. Knowing how to treat full-grain, patent, suede, and white leather correctly ensures you get the best results without costly mistakes.
Full-Grain vs. Finished Leather
Full-grain leather is the highest quality leather and retains the natural grain. It is durable but sensitive to excess water and harsh chemicals. Finished leather has a protective coating that makes it more resistant to stains and moisture, but it can be less breathable.
When cleaning full-grain leather sneakers, avoid soaking with water. Use a soft brush or cloth to remove surface dirt first, then apply a specialized leather cleaner following the product’s instructions. Finish by conditioning the leather to keep it supple. Finished leather can tolerate mild water cleaning but still benefits from leather-specific products.
Patent Leather Cleaning Tips
Patent leather is coated with a plastic layer that gives it a glossy finish. This surface repels water, so a damp cloth can clean dirt easily without soaking the leather. Mineral oil-based cleaners are effective and affordable alternatives to patent-specific products, helping maintain shine and flexibility.
Because patent leather is less porous, avoid using traditional leather conditioners that absorb into the material, as they won’t penetrate the plastic layer. Quick cleaning with a soft, damp cloth followed by a mineral oil wipe usually suffices.
Suede Leather Cleaning Considerations
Suede is a type of leather with a napped finish created by sanding the inner surface. This texture requires gentle care because water and conventional leather cleaners can damage the soft surface, causing stains or stiffness.
Use a suede brush or a special eraser designed for suede to remove dirt and scuffs gently. Avoid liquids as much as possible. If staining happens, specialized suede cleaners can be applied following precise instructions, but test a hidden area first.
Cleaning White Leather Sneakers
White leather sneakers need a careful cleaning approach to avoid yellowing or discoloration. Mild soap solutions or dedicated sneaker cleaners work best. Gently scrub with a soft brush or cloth, then wipe off with a clean damp cloth.
For persistent stains, a baking soda and water paste can be applied carefully, allowing it to sit for 10 minutes before wiping off. Always condition white leather after cleaning to restore moisture and prevent cracks. Use the table below to compare the best cleaning tools and products by leather type for effective and safe sneaker care.
| Leather Type | Cleaning Method | Recommended Tools/Products | Key Cautions |
|---|---|---|---|
| Full-Grain | Soft brush or cloth, specialized leather cleaner | Leather cleaner, leather conditioner, soft brush | Avoid excessive water; condition to prevent drying |
| Finished Leather | Mild water cleaning, gentle leather cleaner | Mild soap, soft cloth, leather conditioner | Avoid harsh chemicals; do not saturate with water |
| Patent Leather | Damp cloth wipe, mineral oil cleaner | Soft damp cloth, mineral oil-based cleaner | No traditional conditioners; protect glossy layer |
| Suede | Dry brushing, suede eraser; specialized suede cleaner if needed | Suede brush, suede eraser, suede cleaner | Avoid water and liquids; test cleaners first |
| White Leather | Soft scrubbing with mild soap solution, baking soda paste for stains | Mild soap, soft brush/cloth, leather conditioner | Avoid harsh whiteners; condition to avoid cracking |
Choosing the appropriate tools and methods respects the leather’s structure and finish, preventing damage like color fading, texture loss, or water marks. Correct cleaning revitalizes your sneakers, keeping them looking fresh without risking expensive repairs.
Do not use water directly on suede sneakers, as it can cause permanent stains and stiffness.
Common Mistakes When Cleaning Leather Sneakers and How to Fix Them
One frequent mistake when cleaning leather sneakers is using harsh cleaners or household detergents. These can strip natural oils and damage the leather’s surface, causing it to dry out or become sticky. To fix dry or sticky leather, apply a small amount of leather conditioner with a soft cloth after cleaning. Let it absorb fully, usually within 15 to 20 minutes, and buff gently. Conditioning restores moisture and flexibility, making the leather feel soft again. Avoid over-conditioning, which can lead to a greasy texture.
Another common error is over-wetting the sneakers during cleaning. Excess water can cause the leather to warp or lose color and make it susceptible to mold or mildew. Instead of saturating the entire shoe, focus on repeating cleaning steps on specific dirty spots. Use a lightly dampened cloth or sponge, then wipe dry immediately with a clean towel. This approach preserves the leather’s natural finish and prevents damage.
- Avoid using harsh chemicals or bleach-based products.
- Do not skip conditioning after cleaning to keep leather supple.
- Clean only the dirty areas instead of soaking the whole shoe.
- Store leather sneakers away from direct sunlight and heat sources.
- Don’t wear leather sneakers in extreme weather or muddy environments to prevent premature wear.
- Address scuffs promptly using a leather repair cream or polish matching your shoe color.
Scuffed or discolored areas on leather sneakers can be treated with a leather repair cream or polish. Choose a product that closely matches your sneaker color and apply it in thin layers using a soft cloth. Buff the treated area gently after drying, which usually takes about 10 minutes. This method fills in scratches and evens out color, helping the shoes look newer. Avoid aggressive rubbing, which can worsen discoloration.
Neglecting proper storage can also harm your leather sneakers. Keeping them in a humid or too-dry environment leads to cracking or mildew growth. Use shoe trees or stuff the sneakers with acid-free paper to maintain their shape. Store them in a breathable cloth bag or original box in a cool, dry area.
Maintenance Tips to Preserve Leather Sneakers for Longer
Cleaning your leather sneakers regularly is essential, but routine maintenance is just as important for keeping them in top shape. Aim to clean your sneakers every two to three weeks if you wear them often. This schedule helps remove dirt and oils that, over time, can damage the leather’s surface. Conditioning your leather every six months is recommended by the Leather Conservation Centre to keep it supple and prevent cracks.
Proper storage plays a key role in keeping your sneakers looking good and lasting longer. Keep them somewhere cool and dry, away from sunlight or heat that can cause the leather to dry out and lose color. Insert shoe trees or fill the insides with acid-free tissue paper to help keep their shape and stop wrinkles. Don’t store them in plastic bags since leather requires airflow to prevent moisture and mold growth.
In addition to cleaning and storing, several routine habits protect your sneakers and help them stay fresh. A simple brush-off after each wear removes surface dust and dirt. Using a soft cloth to buff the leather keeps it shiny and removes minor scuffs. Waterproofing sprays designed specifically for leather provide a protective barrier against stains and water damage, especially during wet seasons.
- Brush off dust and dirt after each use
- Condition leather every six months to prevent drying and cracking
- Store sneakers in a cool, ventilated space with shoe trees or tissue to hold shape
- Apply a leather-safe waterproof spray before wearing in wet conditions
- Buff leather with a soft cloth to maintain shine and remove light scuffs
- Avoid excessive exposure to direct heat or sunlight to prevent fading and drying
Following these maintenance habits will help your leather sneakers remain resilient and looking new for longer. Neglecting routine care can lead to stiff, cracked leather and permanent stains that professional cleaning may not fully remove. Regular upkeep requires only a bit of time and effort but yields noticeable benefits in the shoes’ comfort and appearance.
When to Seek Professional Help for Leather Sneaker Cleaning or Repair
Recognizing when your leather sneakers need professional cleaning or repair is important to avoid causing further damage. A good rule to follow is to call a professional if the leather shows deep stains that don’t come out with mild cleaning, significant discoloration, or if there are cracks and deep creases. Also seek help when the leather feels dry and brittle despite conditioning or when water stains and salt marks persist after standard cleaning attempts. These signs indicate damage beyond routine sneaker care and may require specialized products or equipment.
Assessing the severity of damage is your first step in deciding between DIY cleaning and professional services. When you see heavy dirt stuck in seams or soles after brushing, use a saddle soap made for unfinished leather to clean it. When dirt won’t come off or the leather texture changes, like becoming rough or peeling, getting help from a professional is best. Likewise, scratches too deep to buff out or persistent odors despite deodorizing efforts call for expert care.
The cost of professional leather sneaker cleaning or repair typically ranges from $30 to $100 depending on the severity of the issue and location. Services may include deep cleaning, conditioning with industrial-grade products, scratch repair, and sole restoration. Spending on quality professional care can extend the life of sneakers significantly and restore appearances better than most home methods.
A simple way to decide is to perform a test cleaning on a small, hidden area with your usual products. When the leather finish worsens or the stain won’t vanish, stop the DIY cleaning and reach out to a professional. Professionals also provide advice on ongoing care to prevent repeat problems. Keep receipts and notes on the condition before and after to monitor effectiveness.
Finding the right professional involves researching local cobblers or shoe repair shops with good reviews specializing in leather products. Many also offer mail-in services if no local options are accessible. Confirm the materials and products they use comply with your sneaker’s leather type to avoid damage. Avoid quick fixes such as harsh chemicals or generic repair kits that often worsen leather issues.
Do not attempt aggressive cleaning or repairs on cracked or stiff leather; this often worsens damage and voids warranties.
Step-by-Step Action Plan for Cleaning Your Leather Sneakers
Follow these steps to safely clean and maintain your leather sneakers, keeping them in great shape for daily wear.
- Before you start: Gather a soft brush, mild soap or leather cleaner, microfiber cloths, and leather conditioner. Having the right tools ensures effective cleaning without damage.
- Day 1: Remove laces and brush off loose dirt gently. Your sneakers should feel smooth and free of surface dust before wet cleaning.
- Day 1: Dampen a cloth with soap and water solution, wiping the leather in small sections. The leather should look clean but not soaked.
- Day 1: Let your sneakers air dry at room temperature, away from direct sunlight or heat. The leather should feel dry but supple when touched.
- Day 1: Apply a thin layer of leather conditioner evenly with a clean cloth. After 10 minutes, the leather should appear nourished and not stiff.
- Weekly: Wipe your leather sneakers with a dry microfiber cloth to remove dust and maintain appearance.
- Monthly: Repeat the cleaning and conditioning process. Well-maintained sneakers will resist cracks and maintain their color.
- As needed: Address stains immediately using a cleaner specific to the leather type, or consult a professional if stains persist.
Frequently Asked Questions
How Often Should I Clean My Leather Sneakers?
Clean your leather sneakers every two to four weeks to keep them in good condition. Regular cleaning prevents dirt buildup and maintains their appearance.
Can I Use Baking Soda to Remove Odors from Leather Sneakers?
Yes, baking soda can help eliminate odors from leather sneakers. Sprinkle some inside the shoes and let it sit overnight before shaking it out.
Is It Safe to Put Leather Sneakers in the Washing Machine?
No, leather sneakers can be damaged in the washing machine. Hand cleaning with mild detergent and a soft brush is safer to preserve the material.
How Long Does It Take for Leather Sneakers to Dry After Cleaning?
Leather sneakers typically take 24 to 48 hours to air dry fully. Dry them at room temperature away from direct heat to avoid cracking or warping.
What Type of Brush Should I Use to Clean Leather Sneakers?
Use a soft brush to clean leather sneakers. This helps remove dirt without scratching the leather or damaging seams.
Can I Condition Leather Sneakers Immediately After Cleaning?
Wait until your leather sneakers are completely dry before applying a conditioner. Conditioning wet leather can trap moisture and cause damage over time.
Final Thoughts
Cleaning and caring for your leather sneakers with the right steps helps them stay comfortable and looking good longer. Start by removing loose dirt gently and condition your shoes after drying for best results. Taking this simple action today will boost your sneakers’ lifespan and keep them ready for your next outing.