How to Clean Sneakers Properly: A Complete Guide with Proven Steps
To clean sneakers properly, start by removing dirt gently with a soft brush and use mild soap with water to clean without damage. Clean laces separately by soaking them in warm water for 10 to 15 minutes, and always air dry sneakers for 8 to 12 hours depending on the material. Avoid harsh chemicals and do not machine wash unless advised for that material.
This guide helps sneaker owners who want to maintain their shoes at home safely and effectively. You’ll learn how to clean different materials, tackle tough stains, care for laces and insoles, and understand drying times and cleaning frequency.
Key Takeaways
- Use a soft horsehair brush like Folada’s 6.7-inch model to avoid damaging sneaker fabrics.
- Soak dirty shoelaces in warm water for 10 to 15 minutes before washing for better cleaning.
- Scrub tough stains with a toothbrush and cleaner for 2, 3 minutes, then wipe with a damp cloth.
- Allow fabric sneakers to air dry for 8 to 12 hours; thicker pairs may need up to 24 hours.
- Use mesh laundry bags when machine washing to protect sneakers from damage.
- Apply a sneaker protector spray every 4, 6 weeks to repel water and stains effectively.
How to Clean Sneakers Safely and Effectively at Home

Cleaning your sneakers at home can restore their look and extend their wear. Proper preparation ensures you avoid damage, especially on delicate materials. You’ll need about 20 to 40 minutes for cleaning, plus drying time depending on your shoe type. Use mild soap with warm water and a soft brush to tackle dirt without harming the fabric or sole. Removing laces and brushing off loose dirt first makes the cleaning more effective and prevents grime from setting in deeper. After washing, allow sneakers to air dry for 8 to 12 hours to maintain shape and comfort.
- Remove the laces and insoles. This helps you clean thoroughly and prevents damage to the laces. Soak laces separately in warm, soapy water for at least 10 minutes.
- Brush off loose dirt and debris. Use a soft-bristle brush or an old toothbrush to gently remove dry dirt from the upper, midsole, and outsole. For heavy dirt, brush longer but carefully to avoid scratching.
- Mix a cleaning solution. Combine a few drops of mild dish soap with warm water in a small bowl. Avoid harsh chemicals, which can discolor or damage sneaker materials.
- Clean the sneakers. Dip a soft brush or cloth into the solution and scrub the sneaker in gentle circular motions. Start with the upper, then move to the sole. Avoid soaking the shoe to protect glue and delicate fabrics.
- Wipe off soap residue. Use a clean, damp cloth to remove excess soap from the sneakers. This prevents soap stains and helps the shoes dry faster.
- Allow the sneakers to air dry. Place them in a well-ventilated area at room temperature, away from direct sunlight or heat sources, which can warp or fade materials. This can take 8 to 12 hours depending on fabric thickness and weather.
- Reassemble your sneakers. Once dry, put the insoles and laces back in. If the laces are still dirty, you can replace them or wash again.
Adjust cleaning intensity for different dirt levels by spending more time brushing tougher grime before washing. Avoid machine washing unless the sneaker label or brand website explicitly states it’s safe. Proper drying is critical, drying with heat can shrink or harden fabric and glue. Following these steps will keep your sneakers fresh, odor-free, and looking close to new without risking damage.
Essential Tools and Cleaning Supplies You Need
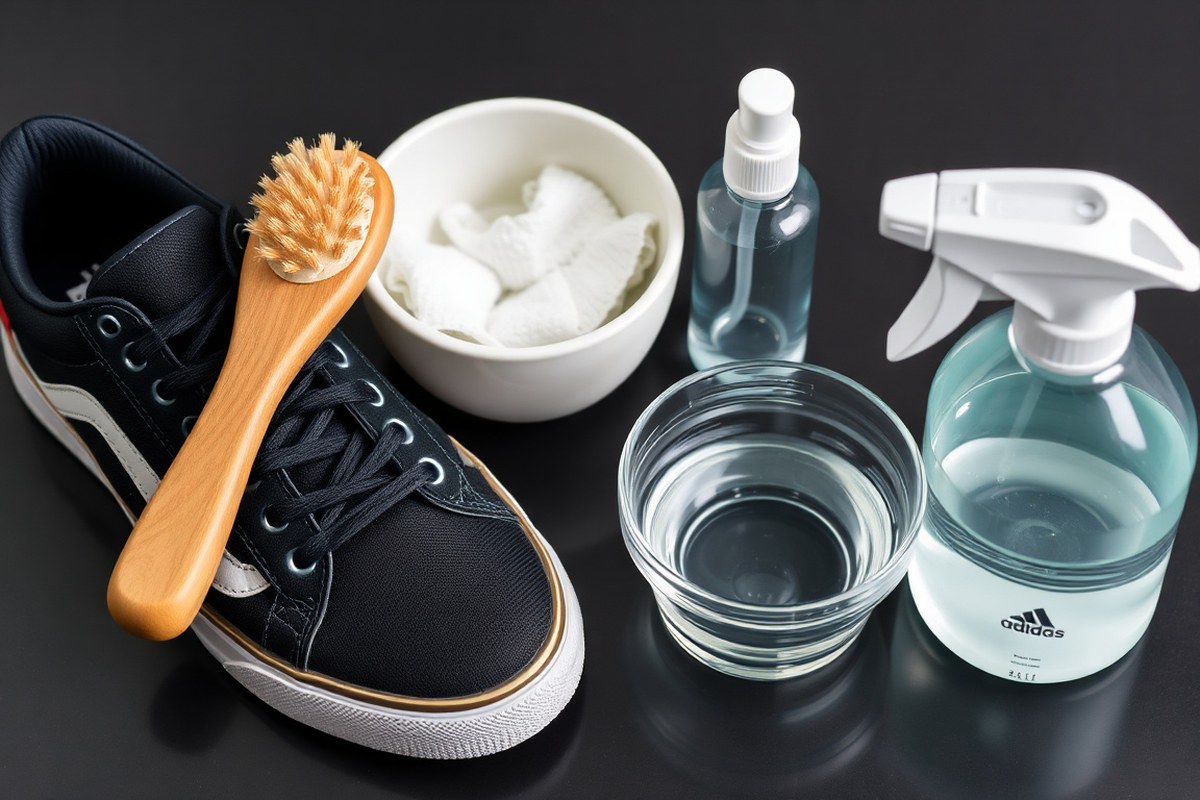
Effective sneaker cleaning starts with having the right tools and cleaning solutions tailored to your sneaker’s material. A soft-bristle brush is essential for removing surface dirt without damaging fabrics. Brushes made from synthetic blends, boar hair, or horsehair suit different textures, with suede requiring a special suede brush. Microfiber cloths work well for gentle wiping, especially on delicate leather surfaces. Removing laces and insoles before cleaning provides access to all areas and prevents stains from setting.
Choosing the right cleaning solution depends on your sneaker’s material. Mild soap mixed with lukewarm water generally works for canvas and mesh. Leather calls for damp microfiber cloths and specialized leather cleaners, avoiding harsh soaps that can dry or crack the material. Suede requires a dry-cleaning approach, using a suede brush and eraser for stains instead of water-based products. For a cost-effective method, you can create a DIY cleaner by mixing a small amount of mild detergent with water, usually about a teaspoon of detergent per cup of water, applied sparingly with a soft brush. Stronger cleaners or commercial kits like Jason Markk or Reshoevn8r are popular for stubborn dirt and come with tools designed to protect sneaker fabrics without damage. Typical prices for cleaning kits start near $10 for basic tools and solutions.
| Item | Use | Material Compatibility |
|---|---|---|
| Soft-bristle brush | Remove dirt and grime with gentle scrubbing | Canvas, mesh, leather (synthetic brushes) |
| Suede brush | Lift dirt without water damage | Suede |
| Microfiber cloth | Wipe surfaces, apply cleaners | Leather, mesh, canvas |
| Sneaker cleaning solutions (mild soap or commercial kits) | Remove stains and dirt safely | Depends on product; check label (gentle on leather and fabric) |
| Eraser | Remove water spots and stains on delicate fabrics | Suede |
Your choice between mild soap and stronger cleaners should depend on your sneaker’s condition and material. Start with mild soap for regular cleaning; switch to specialized or stronger cleaning kits only if stains remain after repeated mild cleaning. Overuse of strong cleaners can harm delicate materials such as suede or leather, causing fading or stiffness. DIY cleaning solutions work well for light dirt but avoid excessive soaking, especially for canvas sneakers, as prolonged exposure to water can weaken adhesion and cause distortion.
Dry-brush your sneakers first to remove loose dirt before applying any cleaning solution, which helps avoid pushing dirt deeper into the fabric.
How to Clean Different Sneaker Materials Without Damage
Each sneaker material reacts differently to cleaning methods. Leather and suede require gentle hand cleaning to avoid damage, while canvas and mesh are often sturdy enough for machine washing. Synthetic materials vary, so it’s best to adapt your cleaning approach to preserve each fabric’s look and feel.
Cleaning Leather Sneakers
Leather sneakers need careful, gentle cleaning to avoid drying out or cracking. Harsh scrubbing or soaking can damage the material and ruin its finish. Use soft brushes or cloths and a mild cleaner designed for leather to maintain moisture and flexibility.
Start by removing loose dirt with a soft brush. Mix a few drops of mild liquid soap in warm water (around 80°F), dip a soft cloth into the solution, then wring it out well. Gently wipe down the leather surface, avoiding excessive moisture. For stubborn stains, use a specialty leather cleaner sparingly.
- Brush off dirt and dust with a soft-bristled brush or dry cloth.
- Mix mild liquid soap in warm water (no hotter than 80°F).
- Dip a soft cloth in solution and wring it out thoroughly.
- Wipe leather gently to clean, avoiding soaking the material.
- Blot any excess moisture with a dry towel immediately.
- Apply a leather conditioner after drying to keep leather supple.
- Air dry in a well-ventilated area, away from direct heat or sunlight.
Leather requires no machine washing or soaking. Expect about 15, 20 minutes for cleaning and a few hours for air drying. Proper care keeps leather sneakers supple and looking new without cracking.
Care for Suede Sneakers
Suede sneakers demand the most delicate treatment as their texture easily stains and scuffs. Avoid water as much as possible since moisture can cause dark spots and ruin the nap. Instead, work gently with a suede brush and eraser to lift dirt and stains.
Start by brushing dirt off with a dry suede brush, always brushing in one direction. Use a suede eraser or a clean pencil eraser on spots or stains by rubbing gently. If stains persist, a small amount of white vinegar on a cloth can be dabbed on, then dried quickly with a paper towel. Never soak or machine wash suede.
- Use a suede brush to remove loose dirt, brushing in a single direction.
- Gently rub spots with a suede or pencil eraser to lift stains.
- Dab tough stains with a lightly white vinegar, dampened cloth, do not soak.
- Let dry fully at room temperature, away from sunlight or heat.
- Brush the nap again after drying to restore texture and fluffiness.
- Apply a suede protector spray to repel stains and water.
Suede should never go into a washing machine or be soaked at all. Cleaning takes about 10, 15 minutes plus drying time. With proper care, suede stays soft, clean, and stylish for months.
Cleaning Mesh and Canvas Sneakers
Mesh and canvas sneakers are more durable and often safe for machine washing. The porous nature means dirt can cling, but gentle cycles and air drying prevent damage. Use mild detergent and cold water to avoid fabric shrinkage or colour fade.
Before washing, remove laces and insoles, and knock off loose dirt by tapping soles together outdoors. Mesh bags protect your shoes during the wash. Use a gentle cycle with cold water and mild detergent limit to every 4, 6 weeks to prevent wear.
- Remove laces and insoles; tap shoes to dislodge dirt.
- Place sneakers in a washable mesh laundry bag to protect seams.
- Use cold water and mild detergent on a gentle or delicate cycle.
- Air dry completely outside direct sunlight to avoid shrinking or fading.
- Clean laces and insoles separately by hand or in the mesh bag.
- Spot clean with a soft cloth and soapy water between machine washes.
Regular gentle washing keeps mesh and canvas bright and flexible without shrinking. Avoid bleach or harsh detergents, which can break down fabric fibres and cause colour loss.
Handling Synthetic and Hybrid Materials
Synthetic sneakers include materials like faux leather, nylon mesh, and blends. These materials resist staining and water better, so you can use light scrubbing and soft brushes with mild detergent safely. Avoid harsh chemicals that damage synthetic finishes.
For hybrids made of mixed fabrics, apply cleaning techniques tailored to the most delicate material. Always avoid soaking and never machine wash if leather or suede details are present. Spot cleaning followed by air drying preserves structure and appearance.
- Identify the materials present; prioritize the gentlest cleaning method needed.
- Use a soft brush or cloth with mild soap and warm water for spot cleaning.
- Gently scrub dirty areas avoiding heavy soaking.
- Wipe off detergent residue with a damp cloth.
- Air dry naturally away from heat sources to prevent warping.
- Avoid machine washing if any leather or suede is included in the shoe.
Synthetic shoes often dry faster and resist stains but require avoiding bleach and abrasive scrubbing. Careful, targeted cleaning keeps the finish smooth and shoes comfortable to wear.
| Material | Do’s | Don’ts |
|---|---|---|
| Leather | Use soft cloth/brush, mild soap, conditioner, and air dry | Machine wash, soak, scrub harshly, expose to heat |
| Suede | Brush gently, use suede eraser, spot clean with vinegar, protect with spray | Soak, machine wash, use water liberally, scrub roughly |
| Mesh | Machine wash cold on gentle, soft brush for spot cleaning, air dry | Hot water, bleach, rough scrubbing |
| Canvas | Machine wash cold gentle cycle, mild detergent, air dry | Hot water, soak overnight, bleach |
| Synthetic | Soft brush, mild soap and water, spot clean | Abrasive cleaners, bleach, machine wash if leather/suede parts present |
How to Remove Tough and Common Sneaker Stains
Removing tough stains like mud, grease, grass, ink, coffee, and yellowing from sneakers requires targeted cleaning methods and timely action. Use specific products such as baking soda for oil absorption, acetone for ink removal, and sneaker care solutions for yellowing. Soak and scrub times usually range from 2 to 30 minutes depending on the stain’s severity.
Removing Grease and Oil Stains
Grease and oil penetrate sneaker fabrics quickly and can leave stubborn marks. Start by sprinkling cornstarch or baking soda directly on the stain. These powders absorb oil effectively, minimizing residual grease. Leave the powder on the stain for 30 minutes before brushing it off gently with a soft toothbrush.
Afterward, mix mild liquid soap with warm water and scrub the area lightly for 2 to 3 minutes using a soft toothbrush. Wipe with a damp microfiber cloth and allow the shoe to air dry. Avoid soaking the entire shoe, as excess water can weaken adhesives.
Best Methods for Ink and Grass Stains
Ink stains demand prompt treatment since they dry quickly. Dip a cotton swab lightly in acetone (nail polish remover without additives) and gently dab the ink stain. Do not rub hard as acetone can damage some materials. Limit acetone exposure to under 2 minutes and wipe it off immediately with a damp cloth.
Grass stains can be tricky on mesh or canvas materials. Apply a mixture of baking soda and mild detergent to form a paste. Spread this gently over the stain and allow it to sit for 15 minutes. Use a soft toothbrush to scrub in circular motions for 2 to 3 minutes, then rinse the area with warm water and blot dry.
Whitening Yellowed Areas on Sneakers
Yellowing is common on white rubber soles and fabric. Specialized sneaker cleaners like SneakErasers Overnight Soak have formulas that break down yellow stains and brighten white areas. Soak just the yellowed parts for about 8 to 12 hours following the product’s instructions. After soaking, lightly scrub with a soft brush and rinse.
For a DIY approach, a careful application of diluted white vinegar may lighten stains but test a small spot first to avoid discoloring fabric. Never submerge the entire sneaker in water to prevent damage. Apply water and stain repellent spray after whitening to reduce future yellowing.
How Long to Soak and Scrub Stains
The soaking and scrubbing times depend on stain type and material:
- Oil/grease: Sprinkle powder for 30 minutes, then scrub for 2, 3 minutes
- Ink: Dab acetone for under 2 minutes, wipe promptly
- Grass: Let paste sit for 15 minutes, scrub 2, 3 minutes
- Coffee: Treat immediately with mild soap and warm water, scrub 2 minutes
- Yellowing: Soak with sneaker-specific cleaner for 8, 12 hours
Quick cleaning yields the best results. Tackling stains within the first hour can prevent deep setting. Avoid over-soaking, which may damage adhesives or dyes.
Recommended Cleaning Supplies for Tough Stains
Use these products to safely and effectively treat common sneaker stains:
- Cornstarch or baking soda for grease and odor absorption
- Cotton swabs and acetone for ink removal
- Mild liquid soap mixed with warm water for general scrubbing
- Soft toothbrush to gently scrub small areas
- SneakErasers Overnight Soak or other sneaker-specific whiteners for yellowing
- Microfiber cloth to wipe away dirt without scratching
- Water and stain repellent spray to protect cleaned sneakers
Keep these items handy to address stains promptly and maintain your sneaker’s appearance over time.
Best Practices for Cleaning Sneaker Laces and Insoles
Cleaning sneaker laces and insoles separately is key to removing dirt and odor without damaging your shoes. Laces can usually be washed safely by hand or machine, while insoles need gentle cleaning and thorough drying to stay fresh. Proper care extends the life of your sneakers and keeps them comfortable to wear.
Soaking and Washing Laces
Start by removing the laces from your sneakers to clean them thoroughly. White laces can be machine washed in cold water or soaked and hand washed to restore brightness. Colored laces require gentle treatment to avoid fading. Using mild soap and warm water loosens dirt and grime effectively.
- Untie and remove the laces from your shoes.
- Fill a small bowl with warm water and add a few drops of mild liquid soap.
- Soak the laces in the solution for 15 to 30 minutes to loosen dirt.
- Gently scrub the laces with a soft brush or your fingers to remove stubborn dirt.
- Rinse the laces thoroughly under cold running water to remove all soap.
- To machine wash, put the laces inside a mesh laundry bag and use a gentle, cold cycle.
- Lay the laces flat or hang them to air dry completely before rethreading.
Machine washing laces inside a mesh bag prevents tangling and reduces wear on delicate fibres.
Cleaning and Deodorizing Insoles
Insoles absorb sweat and bacteria, making them a major source of shoe odor. Remove them and clean carefully using the same mild soap solution as for laces. Avoid soaking or saturating insoles, as excess moisture can cause warping or breakdown. Instead, use a soft brush or cloth to clean and deodorize.
- Pull out the insoles from your sneakers.
- In a bowl, combine warm water and a little mild liquid soap to make a cleaning solution.
- Dip a soft brush or microfiber cloth into the soapy water and gently scrub the surface of the insoles.
- Use a clean damp cloth to wipe away soap residue.
- Sprinkle baking soda lightly over dry insoles to absorb odor; leave for a few hours or overnight.
- Brush off the baking soda before placing the insoles back into your shoes.
Avoid soaking or machine washing foam or gel insoles to prevent warping and loss of cushioning support.
Drying and Reassembling
Complete drying of laces and insoles before putting them back in your sneakers stops odor and bacterial growth. Air drying at room temperature is best. Avoid direct heat sources or sunlight, which can damage materials or cause shrinking. Confirm that lint or dust is wiped off before reassembly.
- After rinsing, place laces flat on a clean towel or hang them up to air dry fully.
- Set insoles in a well-ventilated area to dry completely; this may take 24 hours depending on thickness.
- Do not use direct heat or a dryer, as this can damage the materials.
- Once everything is dry, reinsert the insoles carefully into the shoes.
- Thread the clean, dry laces back through the eyelets, tying them securely.
Ensure both laces and insoles are fully dry before reassembling to prevent mold growth and lingering odors.
How Long Does It Take for Sneakers to Dry Completely?
Drying time for sneakers varies mainly by material and environment. Typically, sneakers take between 8 and 24 hours to dry completely. Fabric sneakers usually dry faster, while leather and suede can take longer due to their thickness and water absorption. Proper drying is essential to avoid damage, odor, or deformities. Here’s a timeline for drying durations by common sneaker materials under average indoor conditions:
| Material | Typical Drying Time | Notes |
|---|---|---|
| Canvas/Fabric | 8 to 12 hours | Dries fastest; air-drying recommended |
| Mesh | 8 to 12 hours | Similar to fabric; good airflow speeds drying |
| Leather | 18 to 24 hours | Dry slowly to prevent cracking or stiffening |
| Suede | 24+ hours | Needs gentle drying away from direct heat and sunlight |
| Rubber soles | 1 to 3 hours | Dries quickly; usually no special care needed |
Environmental factors influence drying time significantly. Warm, dry air and good airflow speed the process. To optimize drying, place your sneakers in a well-ventilated room, ideally around 70°F (21°C) with a low humidity level. Avoid enclosed, damp spaces that slow drying and cause odor build-up.
Use paper towels or cloth to stuff the inside of the sneakers after cleaning to absorb moisture and maintain shape. Replace the stuffing every few hours until dry. Removing insoles and laces helps air circulate better and reduces drying time.
Avoid drying sneakers by heater vents, hairdryers, or placing them in direct sunlight. Heat can cause leather or glue to crack and distort, and sunlight can fade colors or stiffen suede. Never wear sneakers before they are fully dry inside to prevent odor and infections.
Electric shoe dryers designed for sneakers offer controlled, gentle heat and airflow. They can reduce drying time but usually cost $20 to $50. If speed matters, this is a safer option than household heating devices.
How Often Should You Clean Sneakers Based on Usage?
Sneaker cleaning frequency depends largely on shoe type, how often you wear them, and the level of dirt exposure. Running or gym shoes often get sweat and grime buildup quickly, requiring more frequent cleaning to maintain both appearance and performance. Casual sneakers worn occasionally or in cleaner environments can go longer between cleanings. Waterproofing your sneakers slows down dirt and water absorption, cutting down the need for frequent washes. To help you plan cleaning sessions, here’s a usage-based schedule for different sneaker types and conditions:
| Sneaker Type | Usage Pattern | Typical Cleaning Frequency | Notes |
|---|---|---|---|
| Running/Gym Shoes | Frequent workouts (3+ times per week) | Every 1, 2 weeks | Use a gentle brush to remove dirt without damaging fabric |
| Running/Gym Shoes | Occasional use (1, 2 times per week) | Every 3, 4 weeks | Immersion or brushing to maintain freshness and performance |
| Casual Sneakers | Daily wear in urban/crowded areas | Every 2, 3 weeks | Regular wipe down and spot cleaning to avoid buildup |
| Casual Sneakers | Light use, clean environments | Monthly or longer | Focus on visible dirt and stains for targeted cleaning |
| Waterproof Sneakers | Any use level | Extend usual frequency by 30, 50% | Waterproofing helps repel dirt and water, reducing cleaning |
| Suede Sneakers | Regular wear | When water marks, scuffs, or dirt stains appear | Spot clean instead of frequent full washes to preserve texture |
Look out for visible dirt, water stains, scuff marks, or an unpleasant smell as signs it’s time for a deep clean. These issues indicate that surface cleaning won’t keep your sneakers in good shape. Scheduling brief wipe-downs after outings helps prevent long-term buildup that can wear down materials.
Regularly brushing or wiping sneakers, especially if you use them often outdoors or in the gym, helps extend their lifespan and keeps them looking fresh. Avoid letting grime dry on surfaces, as hardened dirt can be harder to remove and could damage fabrics or soles. When a thorough cleaning is due, use tools and techniques suited to the sneaker’s material to avoid unnecessary wear.
Common Cleaning Mistakes and When to Call a Professional
A common mistake is soaking sneakers excessively, which can damage adhesives and change materials like suede and mesh. Use a clean towel to blot away extra water, then let the shoes air dry at room temperature, keeping them away from direct sunlight or heat sources. Avoid vigorous scrubbing since it can wear down surfaces; choose a soft brush or sponge with gentle detergents instead.
Another error is using harsh cleaners or bleach, especially on colored or delicate sneakers, causing color fading or material breakdown. Test any cleaner on a small hidden area first. Avoid submerging sneakers with glued components, as this can cause parts to come loose. Regularly removing laces and insoles for separate cleaning helps maintain the whole shoe.
- Using hot water that can warp or shrink sneaker materials
- Ignoring manufacturer cleaning instructions or sneaker material types
- Drying sneakers by tossing them in a dryer or placing near a heater
- Skipping routine light cleaning leading to tougher stains and wear
- Using stiff brushes that can fray fabric or scratch leather
Always air dry your sneakers naturally; machines or direct heat sources can cause irreversible damage.
Deciding when to stop cleaning and replace sneakers depends on their structural integrity and comfort. When soles show significant wear, cushioning no longer supports your feet, or the upper has permanent tears and stains that cleaning can’t fix, it’s time to think about replacing your sneakers. Sneakers that no longer provide adequate cushioning pose risks for foot injury.
Professional cleaning services can be a good investment for valuable, limited-edition, or high-end sneakers, especially after heavy soil like mud. Industrial cleaning uses specialized detergents and equipment that remove deep stains while preserving materials better than home methods. Prices typically range from $30 to $100 depending on sneaker condition and service level, so weigh this against replacement costs.
For sneaker owners dealing with high-value pairs or complicated materials like suede, professional care prevents costly DIY mistakes. For everyday or less expensive sneakers, follow cleaning routines and fix mistakes promptly to extend shoe life and appearance without extra expense.
Step-by-Step Action Plan for Cleaning Your Sneakers
Use this plan to keep your sneakers clean and fresh based on how often you wear them and the type of dirt they encounter.
- Before you start: Gather all your cleaning tools and choose the right cleaner for your sneaker material to avoid damage.
- Day 1: Remove the laces and insoles, then brush off loose dirt. This prepares your sneakers for deep cleaning.
- Day 1, after brushing: Clean the sneakers with a gentle cleaner applied by a soft brush or cloth. Check that stains are visibly reduced without damaging material.
- Day 1, drying phase: Air dry the sneakers indoors away from direct sunlight or heaters. They should feel dry within 12 to 24 hours.
- Day 2: Clean the laces and insoles separately using mild detergent. Make sure they are odor-free and visibly clean before reinserting.
- After 1 week: Spot clean any new stains promptly to prevent buildup and use a protector spray suited to your sneaker material.
- After 2 weeks: Inspect your sneakers for general dirt and repeat a gentle full cleaning if needed, especially after heavy use or exposure to mud.
- Monthly check: Evaluate your sneakers for wear affecting cleaning effectiveness, and seek professional care if damage or persistent stains appear.
Frequently Asked Questions
How Do I Prevent Discoloration When Cleaning White Sneakers?
Use a mild cleanser and avoid bleach or harsh chemicals, which can yellow white sneakers. Clean them gently with a soft brush to maintain brightness without damage.
Can I Clean My Sneakers with Household Items Like Vinegar or Baking Soda?
Yes, diluted vinegar or baking soda paste can remove odors and stains but test on a small spot first. Overuse may weaken materials or affect color.
Is It Okay to Use a Washing Machine for All Sneaker Types?
No, machine washing is fine for durable materials like canvas but harms suede and leather. Always check manufacturer advice before machine cleaning.
How Do I Dry Sneakers Quickly Without Damaging Them?
Air dry at room temperature away from direct sunlight or heat sources to prevent warping. Avoid hairdryers or heaters as they can crack soles or shrink fabric.
Can I Protect Sneakers After Cleaning to Stay Cleaner Longer?
Applying a sneaker-specific water and stain repellent helps keep shoes cleaner by repelling dirt and moisture. Reapply after each deep cleaning for best results.
What Should I Do If My Sneakers Develop a Bad Odor Despite Cleaning?
Remove insoles and soak them in mild detergent; let everything air out thoroughly. Persistent odor may mean replacing insoles or using sneaker-specific deodorizing sprays.
Key Points to Remember
Cleaning your sneakers carefully using the right methods extends their life and preserves their look. Start by choosing the appropriate cleaner and tools for your sneaker material before attempting any stain removal. Maintain regular care to keep your sneakers fresh, and replace or seek professional help if deep stains or damage occurs beyond simple home cleaning.