How to Wash Sneakers Safely and Effectively: 8 Essential Steps
Washing sneakers safely and effectively means using gentle cleaning methods and the right tools to avoid damage. Start with mild soap and warm water, gently scrub or soak the shoes depending on the material, and dry them properly to keep their shape. This approach prevents discoloration, warping, and material breakdown while maintaining your shoes’ appearance and comfort.
These instructions are ideal if you wear sneakers regularly or want to keep occasional-use pairs fresh. You’ll learn to prepare your sneakers, choose cleaning solutions suited for different fabrics, and handle the drying process correctly to extend the life of your footwear.
Key Takeaways
- Lightly clean daily-wear sneakers every 1, 2 weeks to prevent dirt buildup and odor.
- Use warm water (80-90°F) with mild dish soap and avoid harsh chemicals for most sneaker materials.
- Remove laces and soak them separately for about 15 minutes to ensure thorough cleaning.
- Spot-test cleaning agents like toothpaste on a small area before applying broadly.
- Soaking fabric or mesh sneakers for a couple of hours softens dirt for easier removal.
- Allow sneakers to dry for at least 24 hours, replacing paper inside every few hours if wet.
1. Best Methods to Wash Sneakers Without Damage

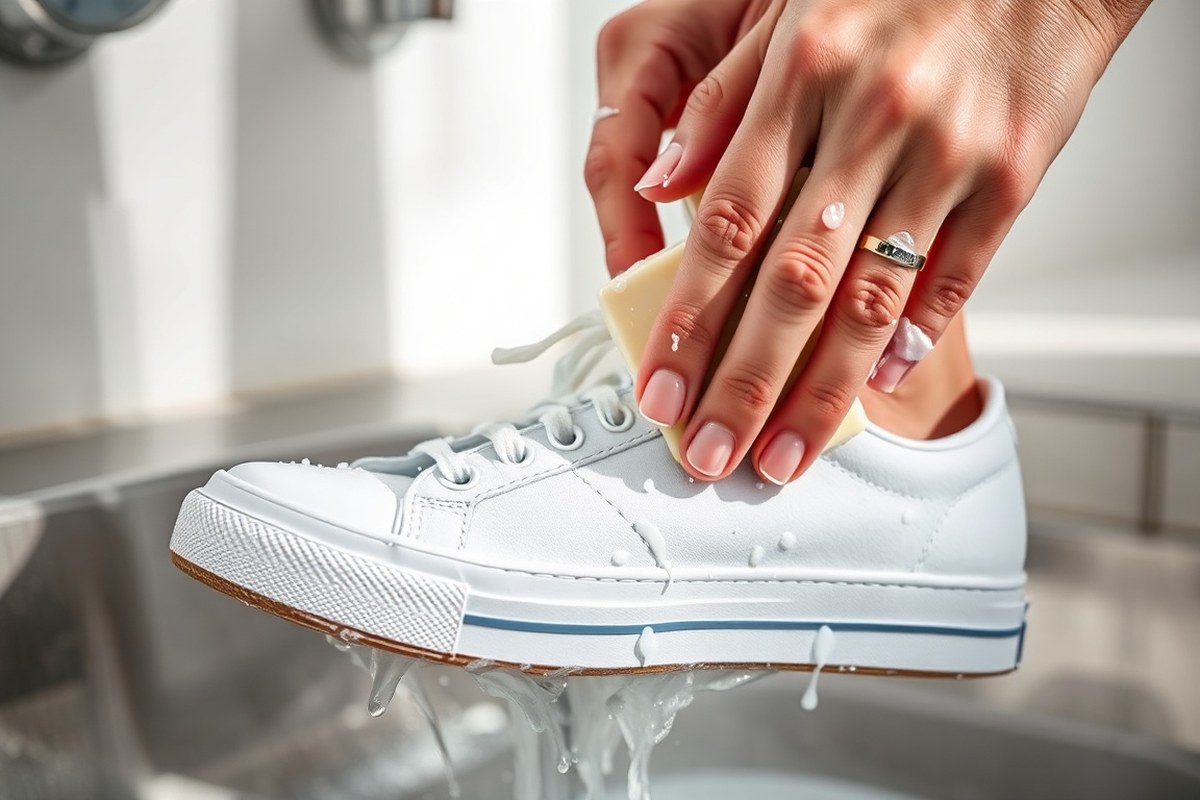
The safest way to wash sneakers depends greatly on their materials and construction. For most fabric or synthetic sneakers, hand washing offers the gentlest and most controlled cleaning method. Use a soft brush or cloth with mild detergent and warm water to scrub away dirt, which lowers the risk of damage compared to aggressive machine cycles. This approach lets you target the dirtiest spots without soaking the shoes completely, preserving shape and structure.
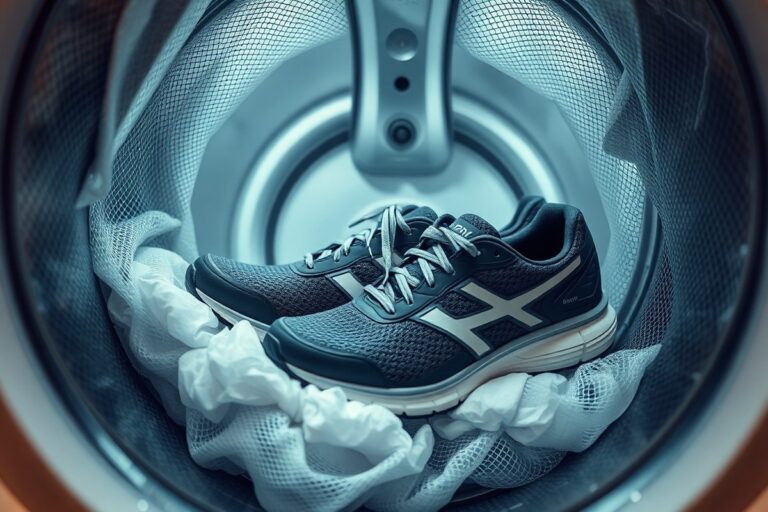
Machine washing is only advisable for certain sneaker types, like canvas or nylon, known for their durability in water and agitation. When using a machine, place your shoes and laces inside a mesh laundry bag to reduce impact. Select a cold water cycle with gentle detergent and add oxygen bleach to brighten whites, but avoid harsh chemicals that may strip color or weaken glue and fabric fibers. Avoid hot water or heavy spin cycles because heat and force can warp soles or shrink fabric.
Never machine wash leather, suede, or sneakers with glued joints that are not explicitly labeled as machine safe. These materials can become stiff, cracked, or lose their texture if soaked or tumbled. Suede, for example, requires a dedicated cleaning kit designed specifically to lift dirt without flattening its nap. Foam or fabric insoles often can be washed separately in cold water using a gentle cycle; however, insoles made from memory foam or gel should only be hand cleaned to avoid losing cushioning properties.
To avoid damage during cleaning, start with surface dirt removal using a soft brush or cloth. Remove laces and insoles beforehand for thorough cleaning and better drying later. Skipping the washing machine entirely for delicate or unverified sneaker types reduces risk and extends shoe lifespan. Rushing to machine wash can result in shape loss, material breakdown, or color fading, which hand washing sidesteps.
Cost and time investment for hand washing are low, a mild detergent and warm water cost just a few dollars, and a thorough cleaning session takes 15 to 30 minutes depending on grime levels. Machine washing may save time but risks expensive long-term wear. You’ll know the cleaning went well when your sneakers appear fresh without stiff or warped areas, retain original shape, and have no surface cracks or discoloration. Signals of cleaning damage include peeling, hardened spots, or misshapen soles.
2. Tools and Cleaning Solutions You’ll Need

To properly wash your sneakers without causing damage, gathering the right tools and cleaning solutions is essential. Basic supplies include a soft-bristle brush, mild detergent or sneaker cleaning soap, a microfiber cloth, and access to clean water. Soft brushes prevent scratching delicate materials like mesh or leather, while sneaker-specific cleaning soaps ensure substances don’t strip away finishes or weaken adhesives.
Baking soda works well as a deodorizer and mild cleaner. Sprinkle about one to two tablespoons inside your shoes, spread evenly, and leave it to sit overnight, usually around 8 hours, to absorb odors effectively. For targeted stain removal, mix three tablespoons of baking soda with two tablespoons of water into a paste, then gently scrub with a soft brush. Avoid mixing baking soda directly with vinegar as their reaction creates bubbles that agitate dirt but can be unpredictable and ineffective for cleaning alone.
White vinegar serves as a natural deodorizer and antibacterial agent but requires caution. It’s safe to use on canvas and synthetic fabrics by diluting one part vinegar with two parts water. Apply using a spray bottle or cloth, then rinse promptly. Avoid applying vinegar directly or excessively on leather or suede, as it can cause discoloration or material damage. When used correctly, vinegar helps eliminate bacteria and odor, especially inside the shoe.
- Soft-bristle brush for scrubbing without scratching
- Mild detergent or sneaker cleaning soap suited to shoe material
- Microfiber cloth for wiping and drying surfaces gently
- Measuring spoons to prepare baking soda paste accurately
- Spray bottle for diluted vinegar application
- Sneaker cleaning kits designed for specific materials like leather
- Cedar shoe inserts or baking soda sachets for ongoing deodorizing
Do not mix baking soda and vinegar directly; use them separately for safer and more effective sneaker cleaning and deodorizing.
Acquiring a cleaning kit tailored to your sneaker’s material can improve results and protect shoe life. For leather sneakers, a dedicated leather cleaning kit includes balms and brushes designed to maintain texture and finish. Consistent use of these tools lets you freshen your sneakers weekly with baking soda or deep clean with soap and water as needed. Using proper products and correct doses keeps your shoes looking fresh and prevents damage from harsh chemicals or over-saturation.
3. How to Prepare Sneakers for Washing
Preparing your sneakers properly before washing helps protect their materials and keeps them looking their best. Start by loosening and removing loose dirt, then take out the laces and insoles to clean them separately. Always spot test any cleaning solution on a hidden area before treating the entire shoe to avoid unwanted damage or discoloration.
Removing and Cleaning Laces
Take out your sneaker laces before washing to clean them thoroughly and prevent tangling. Laces can collect dirt, sweat, and oils, so cleaning them separately improves overall shoe hygiene.
Place the laces in a delicates bag or a pillowcase tied securely. Then, run them through a washing machine cycle using warm water and a small amount of detergent. Hand washing is also effective: soak laces in warm water mixed with a drop or two of liquid dish soap for about 15 minutes, gently scrubbing if needed. Let them air dry completely to avoid shrinking or damage.
Taking Out and Caring for Insoles
Remove insoles to clean and dry them separately from the shoe. This prevents moisture damage inside the shoe and allows you to treat odors or stains more effectively.
- Pull the insoles out gently from each sneaker.
- Soak insoles in warm water mixed with a mild detergent or a specialized sneaker cleaner for 10 to 15 minutes.
- Swish the insoles occasionally during soaking to loosen dirt.
- Rinse thoroughly with clean water to remove soap residue.
- Pat dry with a towel to remove excess moisture.
- Let insoles air dry at room temperature in a well-ventilated area, avoiding direct sunlight or heat sources.
- Check for cracks, permanent odor, or worn areas that cleaning doesn’t fix; replace insoles every 6 to 12 months or sooner if needed.
Basic replacement insoles typically cost between $10 and $20 and can save you time and maintain sneaker comfort.
Spot Testing Cleaning Solutions
Always test a small hidden part of your sneaker before applying any cleaning solution widely. This step prevents unexpected damage like color fading, shrinkage, or texture change, especially on delicate materials like mesh, leather, or suede.
Use a cotton swab or a clean cloth to apply a small amount of the chosen cleaner in an inconspicuous spot. Wait 5 to 10 minutes to observe any reaction such as discoloration or material stiffness. If no adverse effect occurs, proceed with cleaning. Avoid soaking or applying excessive moisture to sneakers with leather or synthetic leather panels, as these materials can be damaged more easily.
4. Cleaning Techniques for Different Materials
Cleaning sneakers properly depends on the material they are made of, such as leather, canvas, mesh, or suede. Each requires a tailored approach to avoid damage and maintain their appearance. Knowing how to handle tough stains and keep white sneakers bright helps preserve their look and durability.
Leather and Synthetic Leather Cleaning
Leather sneakers need gentle cleaning to avoid drying or cracking. Use a soft-bristled toothbrush or cloth with a mild soap solution, applying it carefully to avoid soaking the leather. Avoid submerging leather shoes in water or using harsh detergents. After cleaning, rinse the cloth with plain water and wipe away soap residue.
Once dry, apply about a dime-sized amount of a leather conditioner per shoe to keep the material soft and prevent cracking. Avoid heat during drying to prevent warping or glue damage. For synthetic leather, treat it similarly but test an inconspicuous spot first, as some coatings may react differently.
Canvas and Mesh Fabric Care
Canvas and mesh sneakers can tolerate more water and detergent but still require gentle treatment to avoid discoloration or damage. Use a soft or medium stiffness brush with a gentle soap solution. For white fabric shoes, use a dedicated white sneaker cleaning kit to lift stains without causing yellowing.
Soak these shoes for a couple of hours in water with mild detergent, then rinse thoroughly. Let them air dry for at least 24 hours to ensure all moisture is gone. Avoid over-wetting or leaving cleaning residues, as these can cause new marks or color changes.
| Material | Cleaning Method | Tools | Drying Time | Special Tips |
|---|---|---|---|---|
| Leather | Soft cloth or soft-bristled toothbrush with mild soap | Soft cloth, mild soap, leather conditioner | Air dry, avoid heat | Apply leather conditioner after drying |
| Canvas | Soft/medium brush with gentle detergent, soaking optional | Soft brush, mild detergent | 24+ hours air dry | Use white sneaker kit for white shoes |
| Mesh | Gentle soap solution, soaking recommended | Soft brush, soap solution | 24+ hours air dry | Choose mesh-specific cleaner like SneakERASERS Soak |
| Suede | Dry brush, suede eraser, avoid water | Suede brush, eraser, Kiwi Suede Waterproofer | Air dry without moisture exposure | Avoid baking soda or soaking |
This table summarizes what cleaning tools and methods work best for different sneaker materials with timing and special care instructions.
Special Care for Suede Shoes
Suede is delicate and sensitive to moisture, making it the trickiest sneaker material to clean. Avoid water to prevent stains and damage. Instead, use a suede brush or eraser to remove dirt and stains gently. For tough stains like grease or ink, specialized suede cleaners or erasers provide the best results without harming the nap.
After cleaning, apply a waterproofer such as Kiwi Suede Waterproofer, which helps protect the shoes from future stains and water damage. Do not use baking soda or other powders, as they may leave white marks that won’t come off. Let suede dry naturally, away from heat or direct sunlight to maintain texture and shape.
5. How to Clean and Deodorize the Inside of Sneakers
Cleaning and deodorizing the inside of sneakers helps keep feet healthy, prevents foul odors, and extends the life of your shoes. Using gentle, home-friendly methods like baking soda and vinegar ensures you don’t damage sneaker materials or insoles. For athletic or foam insoles, extra care is needed to avoid moisture buildup that can cause odor and deterioration.
Soaking and Cleaning Removable Insoles
Removable insoles let you deep clean inside your sneakers without soaking the whole shoe. Athletic insoles often contain foam that can absorb water and break down, so avoid prolonged soaking. Instead, gently clean with mild soap and water, then air dry completely before returning them to your shoes.
- Remove the insoles and brush off any loose dirt or debris.
- Fill a basin with warm water (around 90°F) and add a few drops of mild detergent.
- Dip a soft cloth or sponge in the solution and gently scrub the insoles, focusing on areas with sweat or stains.
- Rinse the cloth and wipe the insoles again to remove soap residue.
- Pat the insoles dry with a towel and let them air dry flat in a well-ventilated area, away from direct heat or sunlight.
- Before reinserting, check the insoles are completely dry to prevent mold or odor.
Do not put foam or athletic insoles in the washing machine or dryer; water and heat can ruin their shape and support.
Using Baking Soda for Deodorizing
Baking soda is a natural deodorizer that absorbs moisture and neutralizes odors instead of just masking them. It’s especially effective after exercise or long wear when sweat creates a damp environment for bacteria and odor to develop.
Add 1 to 2 teaspoons of baking soda into each shoe, allowing it to rest for several hours or overnight. Athletic footwear usually demands nearly 2 teaspoons, whereas dress shoes need less. Once time has passed, remove the powder by shaking out the shoes or using a vacuum.
- Wipe the inside of your sneakers with a dry cloth to remove any surface dirt or moisture.
- Sprinkle baking soda evenly inside each shoe according to type and size.
- Let the baking soda sit undisturbed for at least 8 hours, overnight works best.
- Remove the baking soda by shaking out the shoes or using a vacuum with a hose attachment.
- Repeat this process once a week if you wear the sneakers often and notice persistent odors.
Use baking soda sparingly on damp sneakers to avoid creating clumps that are hard to remove.
Safe Vinegar Sprays for Odor Control
Vinegar solutions kill up to 99% of odor-causing bacteria and 82% of mold species that thrive in sneakers. A diluted spray is a safe way to disinfect and deodorize without harsh chemicals. Avoid applying vinegar directly to sensitive materials like suede or natural leather; test a small hidden spot first.
- Mix one part white vinegar with two parts water in a spray bottle.
- Lightly spray the inside lining of your sneakers, avoiding soaking the material.
- Let shoes air dry fully in a ventilated space away from heat sources.
- For persistent odors, repeat treatment once per week or after heavy use.
- Remove insoles before spraying and clean them separately following their care instructions.
Do not over-saturate sneakers with vinegar spray; excess moisture can weaken adhesives and fabrics over time.
6. Proper Drying Techniques to Maintain Shape
Drying sneakers properly helps prevent shrinkage, warping, and unpleasant odors that occur if moisture lingers inside. The drying process usually takes between 12 and 24 hours, depending on the material and how wet the sneakers are.
To keep your sneakers’ shape intact, insert adjustable shoe trees right after washing. Shoe trees provide structure support and reduce the chance of the sneaker collapsing or losing form as they dry. Replace the shoe trees if they become damp. Without shoe trees, fill your sneakers loosely with dry paper towels or newspaper, swapping the paper every few hours to soak up moisture and keep their shape.
- Remove insoles and laces before drying to speed drying and prevent odors.
- Place sneakers in a well-ventilated area away from direct sunlight or heat sources to avoid material damage.
- Change stuffing materials like paper every 2-3 hours if the sneakers get very wet.
- Use shoe trees or paper stuffing to support the sneaker shape during drying.
- Avoid using a dryer or heaters, as high temperatures can warp or shrink materials.
- Should your sneakers smell musty after drying, sprinkle baking soda inside overnight and shake it out before wearing.
When your sneakers become very wet during cleaning, drying sooner is essential. Extract excess water by pressing gently with a towel before inserting shoe trees or stuffing. Air drying remains the safest method, but expect the process to take longer with heavy moisture. Avoid rushing the drying phase to reduce the risk of mold growth and odor buildup. Maintaining a cool, shaded drying spot with good airflow optimizes drying speed and protects the sneaker’s structure.
7. Signs Your Sneakers Need Special Care or Replacement
Replacing worn insoles is one of the easiest ways to maintain sneaker comfort and support. Insoles typically last between 6 and 12 months with regular daily wear. For runners or people who spend most of their day on their feet, replacing insoles every 3 to 4 months is advisable. Dress shoe insoles or sneakers worn less frequently, such as once a week, can last over a year. Old or compressed insoles lose cushioning and can contribute to foot pain, blisters, and even back issues, making timely replacement more affordable than dealing with medical problems or needing to replace the entire sneaker.
Look for visible signs like thinning material, uneven wear, or persistent odors that cleaning doesn’t fix. When your sneaker’s interior feels less supportive or causes discomfort, remove the insole to inspect its condition. When the padding fails to bounce back or develops hard spots, you need to replace it. Replacement insoles generally cost between $10 and $30 and can be found online or in local shoe stores. Installing new insoles is simple: take out the old insoles, insert the new ones, and adjust for a snug fit without bunching.
Certain parts of your sneakers, such as laces, tongue padding, and soles, also have limits to their usable life. Worn-out laces should be replaced when they fray or no longer hold up your sneaker securely. The outsole can last several years with moderate use, but check for deep cracks, holes, or areas where the tread is completely worn down. When the sole loses its grip, slipping and accidents become more likely, indicating it’s time for a new pair.
Professional cleaning works best when your sneakers have stubborn stains, delicate or mixed materials, or structural dirt inside the shoe that home methods can’t easily remove. Experts use specialized equipment and cleaning agents suited to different materials, which can restore sneakers to like-new condition and extend their lifespan. Expect professional cleaning to cost anywhere from $25 to $60 depending on the service and sneaker type. This is often worth it for high-value or favorite pairs, especially white sneakers, which require gentler, more frequent care to prevent yellowing or discoloration.
To extend the life of your sneakers, clean them regularly but carefully, store them with shoe trees to maintain shape after wear, and replace insoles promptly when comfort declines. Avoid harsh detergents or heat drying, as these can break down fabrics and adhesives. Store sneakers in a cool, dry place after cleaning to prevent mold and odor. Keeping up consistent care significantly slows wear and can delay the need for costly replacements.
8. Common Cleaning Mistakes and How to Avoid Them
One of the most frequent mistakes when cleaning sneakers is skipping the inspection before washing. Checking your shoes for dirt spots, stains, and scuffs helps you choose the right cleaning method for each area, preventing damage like discoloration or texture loss. You should also never ignore the manufacturer’s instructions; many sneakers are not meant for machine washing because the water, detergent, and tumbling can cause glue weakening, sole separation, or fabric fading.
Using harsh household cleaners or bleach can damage the material, so selecting cleaning solutions designed specifically for sneakers or gentle soaps is recommended. Another common error is not removing the laces and insoles before washing, which can trap moisture and cause bad odors or mildew. Lastly, people often let their sneakers dry too quickly by placing them near direct heat or in the sun, which can warp the shape or crack materials.
- Always check the shoe’s care label before deciding on machine washing.
- Use a soft brush or cloth to focus on dirty spots instead of submerging the entire shoe.
- Remove laces and insoles to clean and dry separately.
- Choose mild detergent and avoid bleach or strong chemicals.
- After rinsing, stuff sneakers with paper towels to maintain shape while drying.
- Air dry at room temperature away from direct heat sources or sunlight.
Machine washing sneakers that do not allow it can lead to serious damage. For example, running shoes often have foam midsoles that absorb water and break down after repeated cycles. The mechanical action of the washer drum can also degrade stitching or loosen glue, reducing the shoe’s lifespan. Instead of machine washing unauthorized shoes, use spot cleaning methods and let them air dry naturally to keep them in good shape.
Put paper towels inside your sneakers after washing to absorb moisture and help maintain their shape during air drying.
Scuff marks might tempt you to scrub hard, but aggressive cleaning can harm the surface. Soft brushes and gentle circular motions are safer and just as effective for removing marks without scratching. After cleaning, apply a product suited for your sneaker’s material, like a protective cream or conditioner, to prevent stains and extend the time between cleanings. This maintenance step can save you time and money by keeping your shoes looking newer, longer.
Step-by-Step Action Plan for Cleaning Your Sneakers
Follow these steps to clean your sneakers effectively and keep them looking fresh.
- Before you start: Remove laces and insoles to clean separately and inspect for damage. This ensures a thorough clean and helps spot any need for repair or replacement.
- Day 1: Brush off dirt and debris using a soft brush. Check that visible debris is gone before moving on to washing.
- Day 1: Apply a suitable cleaning solution based on material type (mild detergent for fabric, specialized cleaner for leather). Let it sit for 5, 10 minutes to loosen stains.
- Day 1: Gently scrub using a soft brush or cloth, focusing on stained areas. Inspect stains fading as you scrub.
- Day 1: Rinse carefully with clean water avoiding soaking, or wipe clean with a damp cloth. Confirm no soapy residue remains.
- Day 1: Stuff sneakers with paper towels or a shoe tree to keep shape and let them air dry in a ventilated area away from direct heat or sunlight. Check periodically for dryness and shape retention.
- After drying: Clean and deodorize the insoles and laces separately; replace if they remain worn or smelly.
- Weekly or monthly: Repeat brushing and spot cleaning to prevent buildup and prolong sneaker life.
Frequently Asked Questions
What Is the 3 Shoe Rule?
The 3 shoe rule means not wearing the same pair every day to let them air out and dry, reducing odor and wear. Rotating your sneakers helps them last longer by preventing moisture buildup and material breakdown.
How Do I Clean Suede Sneakers?
Clean suede sneakers by gently brushing with a suede brush to remove dirt and avoid water, which can damage the material. Use special suede cleaners and avoid baking soda as it may leave white marks.
Is Baking Soda Good for Cleaning Sneakers?
Baking soda works well for deodorizing and mild stain removal on most sneakers, especially white leather ones, by rubbing gently with a wet brush. Avoid using baking soda on suede or delicate materials to prevent residue marks.
How to Get Dirt Stains Out of Shoes?
Use a soft brush or cloth with warm water and mild soap to scrub away dirt stains, focusing on the sole and fabric surfaces. For tougher stains on white leather, gently rub with baking soda and a wet brush.
Can I Put All Sneakers in the Washing Machine?
Not all sneakers are machine washable; avoid machine washing leather, suede, and delicate fabrics to prevent damage. Check material care guidelines before washing to keep sneakers in good condition.
How Often Should I Deep Clean My Sneakers?
Deep clean your sneakers every few weeks or after heavy use to remove buildup and odors. Frequent cleaning keeps materials fresh and extends the life of your shoes.
Before You Go
Cleaning your sneakers carefully according to their material and drying them properly can help maintain their look and extend their lifespan. Start by removing dirt gently and using the right cleaner for your sneaker type. Next, make a habit of regular maintenance to keep your sneakers comfortable and fresh. Try cleaning a pair today using this plan to see the difference.