How to Clean a Couch Safely: 8 Expert Methods for Best Results
Cleaning a couch safely starts with knowing your fabric type and following proper cleaning methods to avoid damage and stains. Use gentle products and techniques suited for your couch material to get the best results without fading or shrinking. Simple steps like vacuuming, spot-treating stains, and deep cleaning regularly will keep your couch fresh and extend its life.
This guide is designed for homeowners and renters looking for practical, reliable ways to clean a couch effectively. You will learn how to identify your couch fabric, prepare it for cleaning, remove dirt and stains safely, deep clean different sofa types, deodorize naturally, speed up drying, and recognize when to hire a professional.
Key Takeaways
- Check your couch’s cleaning code sticker to choose the safe cleaning method for its fabric.
- Vacuum the entire couch carefully to remove dirt and pet hair before applying any cleaners.
- Spot-treat stains by spraying cleaner directly on the mark and blotting gently within five minutes.
- Use baking soda on the couch to absorb odors; let it sit for 20 minutes before vacuuming.
- Deep clean your couch every 1 to 2 months, increasing frequency if used daily or with pets.
- Open windows or run a fan to speed up drying time, which usually takes 8 to 12 hours.
1. Identify Your Couch Fabric and Cleaning Codes

Knowing what type of fabric your couch has and understanding its care instructions is essential before starting any cleaning. This prevents damage like color fading, shrinkage, or weakening of the material. Most couches have a sewn-in tag with cleaning codes that guide you on which cleaning methods and products are safe to use.
Fabric identification matters because each material responds differently to water, solvents, and heat. For example, leather requires gentle conditioners, while fabric with a “W” code means water-based cleaners work best. Ignoring these codes can lead to costly repairs or permanent stains. Follow these steps to identify your couch fabric and decode its cleaning instructions:
- Locate the Couch Tag. Check under cushions, along seams, or on the back or bottom of the couch for a fabric care label. This tag often contains fiber content and a cleaning code.
- Read the Cleaning Code. The codes generally include:
- W, Safe to use water-based cleaning solutions.
- S, Use solvent or dry-clean only; avoid water.
- WS, Can use either water-based or solvent-based cleaners.
- X, Vacuum only; no water or solvents.
- Identify the Fabric Type. The tag may indicate materials like cotton, polyester, linen, microfiber, leather, or suede. Check your purchase information or the manufacturer’s website for fabric details when the tag is missing.
- Research Fabric Care Needs. Look up specific cleaning methods for your fabric type. For example, linen requires gentle blotting without scrubbing, while microfiber typically cleans well with water and mild soap.
- Test a Hidden Area. Before using any cleaner, try a small amount on a less visible spot to check for colorfastness or damage. Wait 10-15 minutes to observe any adverse reactions.
- Select the Right Cleaning Method. Refer to the cleaning code to determine if you should use water-based, solvent-based, or professional cleaning options. For instance, materials marked with a W code are safe to clean with a solution made from ½ cup warm water, ½ cup distilled white vinegar, and 1 teaspoon gentle dish detergent.
- Note Special Care for Leather and Suede. Leather often needs products designed to preserve its oils, while suede requires a dry cleaning method to avoid stains or texture changes.
Investing time in this step saves money and preserves your couch’s appearance. Couch tags and codes are your roadmap for cleaning safely. Ignoring them could cause irreversible damage or void manufacturer warranties.
2. Prepare Your Couch and Tools for Cleaning
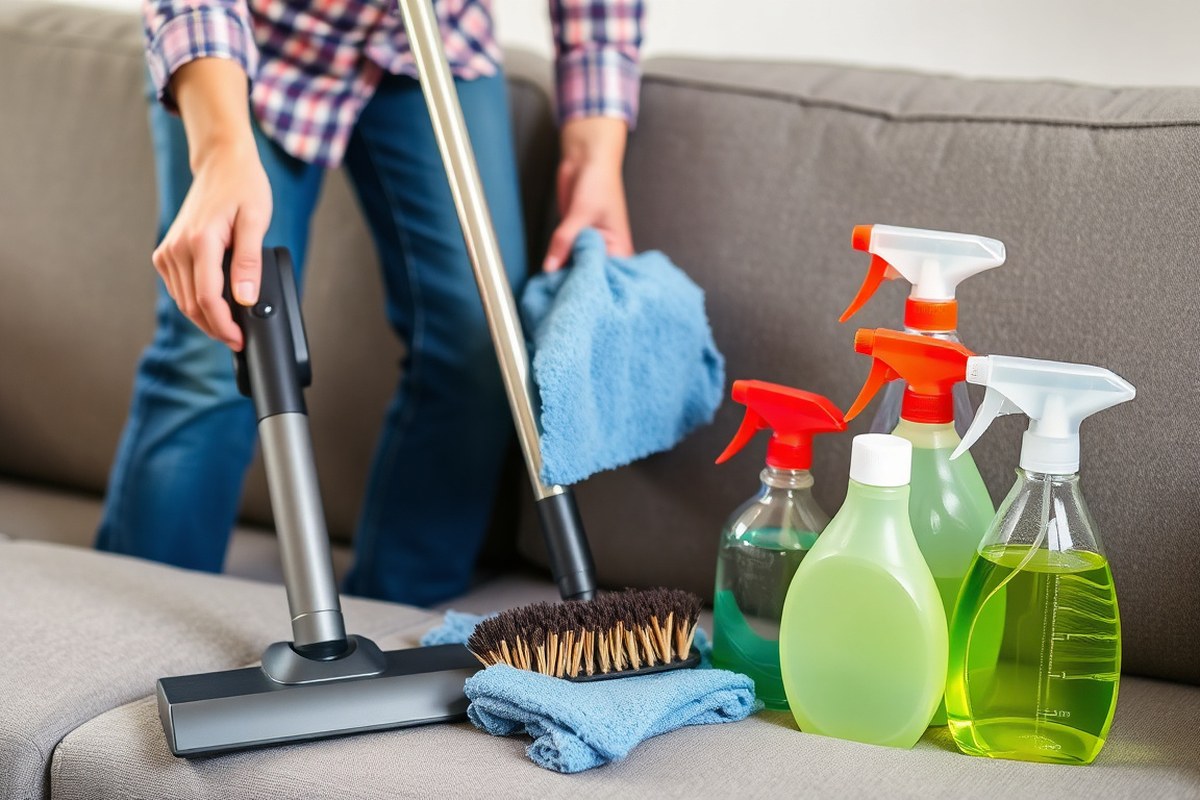
Preparing your couch and the right tools before cleaning is key to achieving a thorough and safe cleanup. Having everything ready saves time and prevents damage to the fabric. Start by gathering the proper vacuum attachments, selecting suitable cleaning solutions, and performing a spot test to avoid surprises.
Gather Upholstery Vacuum and Attachments
Begin with a vacuum that includes an upholstery brush and crevice tool. These attachments are designed to lift dust, pet hair, and crumbs efficiently from the couch surface and in between cushions. Using just a regular vacuum nozzle risks leaving dirt behind.
Vacuum all parts of the couch, including underneath cushions and the sides. This step removes materials that cleaning solutions can’t dissolve, such as pollen and dry dirt. A handheld vacuum with an upholstery tool is helpful if your main vacuum doesn’t have specialized attachments. Regular vacuums usually cost $30 to $150, depending on features and brand, but investing in one with these tools improves your cleaning results.
Choose Appropriate Cleaning Solutions and Cloths
Select cleaning solutions suited to your fabric type. For couches marked with a “W” or “WS” code, water-based or mild detergent cleaners work well. Avoid water-based cleaners on “S” or “X” coded fabrics, which require solvent cleaners or professional care. Use spray bottles to apply the cleaner evenly. Natural options like baking soda and vinegar work on many fabrics but always check compatibility.
Prepare microfiber cloths and a scrap sponge for wiping and blotting. Clean white cloths prevent color transfer onto your couch. Avoid rough brushes on delicate fabrics; soft bristle brushes are best for lifting dirt without damage.
- Spray bottle for applying cleaning solution
- Handheld or upright vacuum with upholstery attachments
- Soft bristle scrub brush or microfiber cloths
- Clean white rags or paper towels for blotting
- Natural cleaning ingredients like baking soda and vinegar (optional)
- Gloves to protect your hands from irritants
- Plastic sheet or old towels to protect flooring
Setting everything out in advance avoids rushing through the process and reduces risk of accidental spills or stains.
Perform a Spot Test and Clear the Area
Test any cleaner on an inconspicuous part of the couch, such as inside a cushion seam, before proceeding. Spray a small amount, wait 3 to 5 minutes, then blot with a white cloth. Check for discoloration or fabric damage. Spot testing prevents costly mistakes on visible areas.
Clear the cleaning area by removing small items like pillows, blankets, and decorative covers. If possible, place towels or plastic sheets under the couch to catch drips and debris during cleaning. Open windows or use fans for ventilation when using chemical cleaners, and always follow product label instructions closely.
Try cleaning a hidden spot on your couch first to avoid unexpected fabric fading or damage from your cleaner.
3. Vacuum and Remove Surface Dirt and Pet Hair
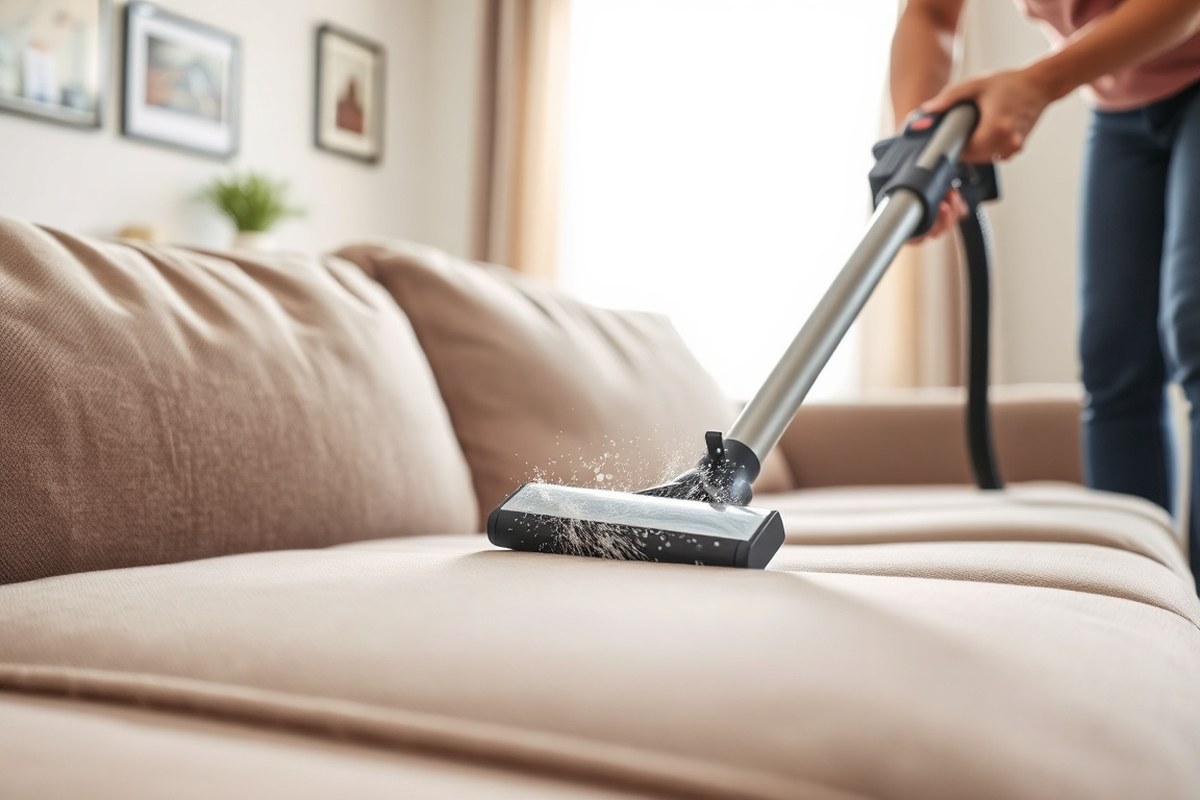
Vacuuming your couch regularly is key to removing dust, crumbs, and pet hair that accumulate over time. Using the right tools and techniques helps protect your couch fabric while ensuring deep cleaning around cushions, seams, and crevices. Pet hair can be especially stubborn, so combining vacuuming with other gentle methods improves results. A weekly routine generally keeps your couch fresh and extends its life. For the most effective couch cleaning, follow these steps carefully to avoid damaging your upholstery and to remove surface dirt and pet hair:
- Select the right vacuum attachment. Use an upholstery or brush attachment to prevent fabric snagging or damage. Avoid spinning brush heads that can pull or tear delicate materials.
- Remove cushions if possible. Detach any removable cushions to vacuum both sides thoroughly and expose hidden debris underneath.
- Vacuum seams and crevices. Use the narrow crevice tool to reach between cushions and along armrests where dust and crumbs often settle.
- Vacuum the entire couch surface. Move slowly and overlap your passes to lift embedded dust and hair, covering arms, back, and seat areas with extra care.
- Address pet hair with gloves or rollers. Run a slightly damp rubber glove over the upholstery in long strokes to loosen hair. Alternatively, use a lint roller to pick up remaining strands before vacuuming again.
- Vacuum beneath and around the couch. Check under the furniture for pet hair and dirt hiding in hard-to-reach spots.
- Vacuum weekly or more often if needed. Weekly vacuuming prevents buildup, but homes with shedding pets may require twice weekly or daily spot cleaning with a lint roller.
- Clean vacuum attachments regularly. Detach and rinse brush heads or wipe suction parts to maintain suction power and avoid spreading debris back onto your couch.
Choosing the right vacuum tools minimizes the risk of damaging fabric fibers or pulling upholstery threads. Paired with removing cushions and targeting crevices, this process reduces allergens and keeps your sofa looking tidy. For stubborn pet hair, rubbing the surface with a damp rubber glove loosens hairs the vacuum can then safely remove.
4. Spot-Treat and Remove Stains Safely
Removing stains on your couch safely involves identifying the stain, choosing the right cleaner, and following careful application and removal steps. Using either homemade or commercial solutions, you can tackle common tough stains like grease, wine, and pet urine without damaging your fabric.
Identify the Stain Type and Appropriate Cleaner
Knowing what kind of stain you’re dealing with helps you pick the best treatment and avoid damage to your couch fabric. Water-safe fabrics handle mild soap solutions and water well, while solvent-clean-only fabrics require alcohol-based treatments. For protein stains like pet urine, using an enzyme cleaner is more effective than general-purpose cleaners.
Grease and oil stains need special attention since water alone won’t remove them. Wine, coffee, or juice stains often respond well to vinegar-based solutions. Always check the couch’s cleaning code before applying any cleaner to prevent fabric damage or color loss.
Apply Cleaning Solution Carefully and Blot
Directly applying cleaner to the fabric can cause over-saturation and spread the stain. Instead, dampen a clean cloth with your chosen solution and gently blot the stained area starting from the outside edges and moving inward. This prevents the stain from spreading further.
Blotting absorbs the stain instead of grinding it deeper into the fabric. After applying the cleaner, use a fresh damp cloth to blot away any residue then pat the area dry with a clean towel. Avoid scrubbing or rubbing harshly, as that may damage fibers or set the stain permanently.
Use Baking Soda or Cornstarch for Oil-Based Stains
For grease and oily spills, sprinkling baking soda or cornstarch over the stain helps absorb the oils before cleaning. Let it sit for 15 to 20 minutes, or up to an hour for deeper stains, then vacuum it off thoroughly.
This step reduces the oil content, allowing subsequent cleaning to be more effective. Baking soda also neutralizes odors, which is helpful when stains come from pet accidents or spills that smell. After removing the powder, you can apply a mild soap solution (¼ teaspoon dish soap mixed in 1 cup warm water) or a commercial enzyme cleaner for pet stains.
Repeat If Necessary and Avoid Rubbing Harshly
Stubborn stains might require multiple treatments. Repeat the blotting process with your chosen cleaner until the stain fades, but never rub or scrub hard. Harsh rubbing risks damaging fibers and embedding the stain deeper.
If the stain persists after two or three tries, consider using a specialized upholstery cleaner or consulting a professional. For solvent-clean-only fabrics, use rubbing alcohol on a damp cloth for spot treatment and test in an inconspicuous area first.
Consistency helps maintain your couch’s appearance and longevity. Regular spot treatment combined with gentle cleaning prevents stains from setting and keeps your sofa looking fresh.
- Identify the stain type and read your couch’s cleaning code.
- Sprinkle baking soda or cornstarch on greasy or oily stains; let it sit 15, 60 minutes.
- Vacuum off the powder thoroughly to remove absorbed oils and odors.
- Mix a mild homemade cleaner (¼ teaspoon dish soap + 1 cup warm water) or use an enzyme cleaner for pet stains.
- Dampen a clean cloth with the solution; blot the stain gently from edges inward.
- Use a fresh damp cloth to blot away cleaning residues, then pat dry with a towel.
- Repeat the blotting steps if necessary, avoiding harsh scrubbing or rubbing.
- Allow the area to air dry completely before using the couch again.
5. Deep Clean Fabric, Microfiber, and Leather Sofas
Deep cleaning methods vary depending on the material of your couch. Fabric and microfiber sofas can often handle water-based cleaning, including steam cleaning, while leather requires gentler, conditioner-based care. Tailoring your approach helps preserve appearance and durability over time.
Deep Cleaning Fabric and Microfiber Sofas
Fabric and microfiber sofas typically respond well to water-based cleaning methods if their cleaning code is “W” or “WS.” Start by vacuuming thoroughly to remove surface dirt and pet hair. Next, you can either steam clean or use a DIY cleaning solution made with mild detergent and water. Steam cleaning lifts embedded dirt and kills germs, but make sure to avoid soaking the fabric to prevent damage and mold growth.
The TikTok laundry capsule hack is a useful alternative if you don’t own a steam cleaner. Dissolve half a laundry capsule in hot water, dip a microfiber cloth into the solution, wring it out, and gently wipe the fabric. Always test a small hidden area first before applying the solution to the entire couch.
Cleaning and Conditioning Leather Couches
Leather sofas need specific care to maintain their shine and flexibility. Use a gentle leather cleaner, saddle soap or Castile soap diluted in water are good options. Apply the cleaner with a soft cloth, wiping gently without oversaturating. Rinse with a clean damp cloth, then dry promptly with a dry towel.
After cleaning, apply a leather conditioner to replenish oils and prevent cracking. Conditioners prevent the leather from drying out over time, especially in dry climates or heated rooms. Regular care, about every three to six months, keeps the leather supple without sticky residue or buildup.
Safe Steam Cleaning Guidelines and Tips
Steam cleaning is effective for fabrics coded “W” or “WS” but avoid it on dry-clean-only fabrics labeled “S” or “X.” Use a steam cleaner with adjustable temperature and pressure settings. Typical steam temperatures around 210°F (99°C) help sanitize without damaging fibers.
Keep the steam nozzle moving continuously to prevent water pooling, which can cause stains or fabric distortion. After steaming, open windows or use fans to speed drying, reducing the risk of mildew. Avoid steam cleaning leather, as excess moisture can damage it.
Always test a small, hidden spot before steam cleaning the entire couch to check fabric response and colourfastness.
Different materials need various treatment levels and cleaning agents. The table below summarizes suitable approaches.
| Material | Cleaning Method | Recommended Products | Notes |
|---|---|---|---|
| Fabric (W, WS codes) | Steam cleaning, water-based cleaning | Mild detergent, steam cleaner | Test for colourfastness, avoid soaking |
| Microfiber | Water-based cleaning, DIY solutions, steam | Laundry capsule solution, mild soap | Effective against pet hair, gentle wiping |
| Leather | Gentle cleaning with specific cleaners | Saddle soap, Castile soap, leather conditioner | Do not steam clean, avoid excess water |
| Dry clean only fabric (S, X codes) | Solvent cleaning, spot treatment | Specialty solvent cleaners | Avoid water and steam |
Following these tailored methods safeguards your couch, helping it stay clean and comfortable for years.
6. Deodorize and Refresh Your Couch Naturally
Neutralizing odors on your couch can be done effectively using natural ingredients like baking soda and white vinegar. Baking soda absorbs odors and moisture, while vinegar disinfects and breaks down tough smells, making them a safe, chemical-free option for many couches. These natural methods help refresh the fabric without harsh chemicals, which is especially important if you have pets, allergies, or young children at home.
Start by sprinkling baking soda evenly over the surface of your couch. Focus on areas that tend to absorb more smells, such as the arms, cushions, and any spots where food or pets frequently rest. Let the baking soda sit for at least 15 to 30 minutes to allow it to absorb odors. For lingering or stronger smells, you can combine baking soda with a diluted vinegar spray for deeper deodorizing.
- Sprinkle ¼ to ½ cup of baking soda evenly over your entire couch, including cushions and arms. Turn off any fans to prevent the powder from blowing away.
- Let the baking soda sit undisturbed for 15 to 30 minutes. This gives it time to absorb odors and moisture naturally.
- Mix a natural cleaning spray by combining 1 part white vinegar with 1 part water, and add 2 teaspoons of baking soda slowly into about 1 cup of this solution to reduce fizzing. Pour this mixture into a spray bottle.
- Spray the vinegar solution lightly and evenly over the couch surface where baking soda was applied. Avoid soaking the fabric; a light mist is enough.
- Gently blot the sprayed areas with a clean cloth to lift away loosened odors and refresh the fabric.
- Allow your couch to air dry completely, which usually takes between 1 to 2 hours depending on room ventilation and fabric type.
- Vacuum the entire couch thoroughly to remove all baking soda and any lingering particles. Repeat if needed for stubborn odors.
- Place a small packet of baking soda under the couch cushions to absorb odors over time and keep your couch smelling fresh between cleanings.
These natural ingredients cost just a few dollars for basic household quantities and require minimal effort. Use white vinegar and baking soda cautiously on couches with a “W” cleaning code to avoid fabric damage. For couches labeled “S,” relying on dry baking soda deodorizing without liquid sprays is safest.
Overuse of liquid vinegar solutions can dampen and discolor delicate fabrics. If the smell persists after treatment, airing the couch outdoors or using a fabric-safe deodorizer may help further. Always test any spray in a hidden area first to ensure no colour change or damage happens.
7. Dry Your Couch Safely and Speed Up Drying Time
Drying your couch typically takes between 8 and 12 hours, though this depends largely on the fabric type and the room’s humidity level. Higher humidity slows drying because moisture in the air reduces evaporation, while breathable fabrics like cotton dry faster than denser materials such as leather or microfiber. Avoid rushing this process by using heat sources, since applying direct heat to your couch could cause fabric damage or set stains permanently.
To speed up drying safely, start by blotting any damp areas thoroughly with a clean, absorbent towel. Pressing gently and repeating this step helps draw out moisture without saturating the fabric further. Remove the cushions from your couch if they are removable and set them on a drying rack, turning them every 4 to 6 hours. This promotes even airflow around all sides, preventing damp spots and odors.
Additional passes with a water extractor or wet vacuum can also reduce drying time. After the initial steam cleaning, run the extractor over the fabric again without using steam to pull out excess water. This technique is especially useful if the sofa is heavily soaked, cutting several hours off the total drying time. Practicing good airflow by opening windows and doors further aids evaporation.
Avoid using hairdryers, space heaters, or placing the couch near radiators, as these methods risk fabric shrinkage or discoloration. Instead, position fans nearby to circulate air, which speeds evaporation while keeping temperatures stable. In cooler or humid climates without easy ventilation, a dehumidifier can also effectively reduce drying time by lowering indoor moisture levels.
Well-dried couches will feel cool to the touch and have no damp or musty smells. Limp or stiff areas often signal uneven drying or residual moisture, which can attract dust mites or mold over time. Notice persistent dampness after 12 hours? Let the cushions dry longer with good airflow or think about a professional cleaning service that uses specialized drying tools.
8. When to Call a Professional Couch Cleaner
Call a professional cleaner when your couch shows signs of stubborn stains, unusual odors, or wear that DIY methods can’t fix safely. Upholstery can be delicate, and using the wrong technique risks damage that lowers the furniture’s lifespan or appearance. For example, if you suspect bed bugs, contact a pest control expert immediately instead of attempting to wash or treat the couch yourself, since this requires specialized equipment and chemicals.
Hard-to-remove stains like deep-set grease, ink, or wine often require the solvents and machinery professionals use. Professionals also handle extensive dirt buildup or mold growth resulting from spills or humidity that home cleaning products can’t fully penetrate. If your couch fabric is tricky or costly to clean, such as silk blends or certain microfiber finishes, a pro’s expertise reduces the chance of damaging the material while restoring it effectively.
Consider the cost against the risks and benefits. Professional couch cleaning services typically charge about $160 on average, which covers thorough cleaning, stain treatment, and deodorizing. This price also reflects technicians’ training and their access to commercial-grade tools like hot water extraction machines or specialized brushes. While it costs more than DIY attempts, it often saves money long-term by preventing fabric damage or the need for replacement.
Professionals bring a range of services not generally available for home use. This includes deep steam cleaning that sanitizes and removes allergens embedded in cushions and frame areas. They also apply conditioners for leather sofas that restore suppleness and prevent cracking. Experts can treat multiple materials on one couch correctly, addressing both fabric sections and leather or wood trim safely in the same appointment.
Decide to hire a pro if your previous deep cleaning efforts didn’t revive the couch, if you are dealing with persistent odors, or if an expensive or heirloom couch is involved. Trigger events like discovering bed bugs or serious mold also require experts. Standard rule: when the couch’s value or your health is at stake, err on the side of professional intervention.
Scheduling seasonal professional cleanings, every three to four months, can maintain your couch’s look and hygiene more effectively than occasional spot treatments. This helps avoid buildup and extends fabric life. Before a professional service, vacuum the couch thoroughly at home. That prepares it for deeper work and can lower the service time slightly.
Do not use excessive water or harsh chemicals on your couch yourself; this risks shrinking or staining upholstery and might void any fabric warranty.
Step-by-Step Action Plan for Cleaning Your Couch
Follow these clear steps to safely clean your couch and keep it looking fresh.
- Before you start: Identify your couch fabric and check cleaning codes to avoid damage during cleaning.
- Day 1: Vacuum your couch thoroughly to remove loose dirt, dust, and pet hair. You’ll know this worked when the surface feels cleaner and looks visibly free of debris.
- Day 1: Spot-treat any stains using the appropriate method for your fabric. Success means the stain fades or disappears without damaging the fabric.
- Day 2: Deep clean your couch based on its material, fabric, microfiber, or leather. The couch should look revitalized without water spots or residue.
- Day 2: Apply a natural deodorizer like baking soda, then vacuum it off to refresh odors. You’ll notice a cleaner smell.
- Day 3: Dry your couch thoroughly in a well-ventilated area or use fans to speed drying. Avoid sitting until it’s fully dry.
- After 3 days: Inspect your couch for any stubborn stains or damage. If issues remain, schedule a visit with a professional cleaner for safe and effective treatment.
Frequently Asked Questions
Can I Clean My Couch with Homemade Cleaning Solutions?
Yes, you can use solutions like a mix of vinegar, water, and mild soap for fabric couches, but always test on a hidden spot first to avoid damage. Avoid harsh chemicals, especially on delicate fabrics or leather.
How Often Should I Deep Clean My Couch?
Deep clean your couch every 1 to 2 months if you use it daily to remove embedded dirt and allergens, helping to extend the life of your couch. Regular vacuuming between deep cleans also keeps it fresh.
Is Steam Cleaning Safe for All Couch Fabrics?
Steam cleaning works well for some fabrics but can damage others like velvet or silk, so check the cleaning code on your couch first. Avoid holding the steamer in one spot too long to prevent damage.
How Can I Speed Up My Couch’s Drying Time After Cleaning?
Opening windows, doors, or setting up a fan to create airflow helps dryness after cleaning. Typical drying takes 8 to 12 hours, so avoid sitting on it until fully dry to prevent stains or mildew.
What’s the Best Way to Remove Pet Hair from a Couch?
Use a vacuum with a brush attachment or a lint roller for effective pet hair removal. Brushing gently with a stiff brush also helps lift hair before vacuuming for better results.
Can I Clean My Leather Couch at Home Without Damaging It?
Yes, use a cleaner made for leather or mild soap and water, applied gently with a soft cloth. Avoid soaking the leather and never use bleach or ammonia-based products to prevent damage.
Before You Go
Cleaning your couch carefully protects your investment and keeps your living space comfortable. Start with the right cleaning method based on your couch’s fabric to avoid mistakes. Try spot-treating a small, hidden area first before deep cleaning the whole couch to prevent damage. Maintaining your couch regularly can extend its life and appearance, so set a reminder for routine cleaning soon.