How to Clean Underarm Stains: 8 Proven Methods That Work for All Fabrics
How to clean underarm stains starts with pretreating the fabric using home remedies like baking soda paste or hydrogen peroxide for whites. Rub the solution into the stain, let it soak for at least 10 to 30 minutes, then wash as usual to effectively remove yellow or dark sweat marks.
This advice helps anyone struggling with underarm sweat stains on shirts of any fabric. You’ll find proven methods suitable for different clothing materials and tips to avoid setting stains permanently with improper drying.
Key Takeaways
- Mix baking soda with warm water to create a paste, then apply it to the stains and leave it for 15 minutes up to overnight before washing.
- Use 3% hydrogen peroxide only on white clothing to bleach out sweat stains safely.
- For dark shirts, soak stains in a solution of Tide with Ultra Oxi Powder and warm water for 5 minutes before laundering.
- Scrub underarm stains gently with a toothbrush after applying stain remover to help break down deposits.
- Avoid using a dryer on stained clothes before confirming stain removal to prevent setting stains permanently.
- Check if your deodorant contains aluminum, which can contribute to underarm stain formation.
1. Effective Home Remedies to Remove Underarm Stains
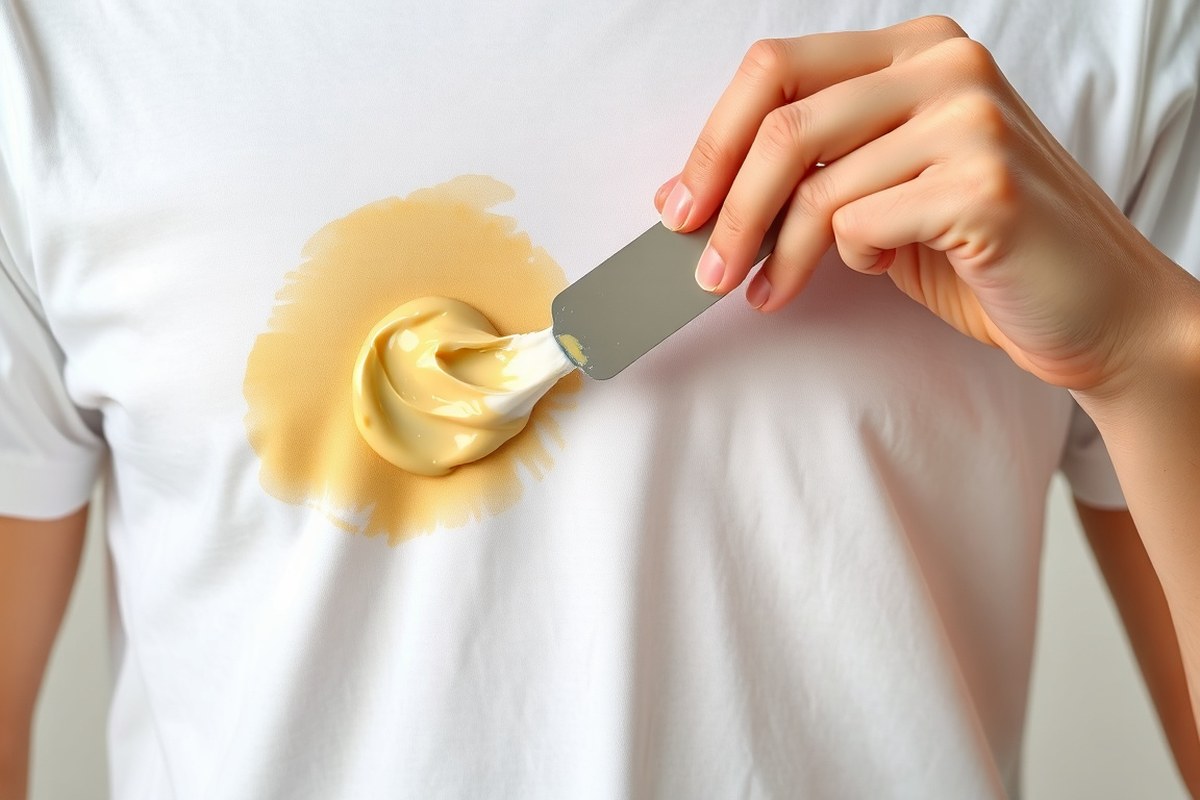
You can remove underarm stains effectively using common household items like baking soda, white vinegar, and hydrogen peroxide. These provide different options for stain removal depending on fabric type and stain severity. Preparation involves mixing specific ratios, applying treatments carefully, and allowing enough time for the solution to act before washing.
Making and Using Baking Soda Paste
Baking soda is a gentle abrasive and deodorizer that works well on cotton but should be avoided on silk or wool. It lifts stains by breaking down sweat residue without damaging stronger fabrics. For better stain removal, mix baking soda with either water or hydrogen peroxide depending on whether your shirt is white or colored.
To create the paste, combine two parts baking soda with one part water for colored fabrics or an equal mix of baking soda, 3% hydrogen peroxide, and water for white cotton shirts. Avoid using hot water at this stage to prevent setting the stain.
- Mix ½ cup baking soda with ¼ cup water (or ⅛ cup hydrogen peroxide and ⅛ cup water for white fabrics) to make a thick paste.
- Apply the paste generously to the underarm stains, rubbing it gently into the fabric using a soft cloth or your fingers.
- Let the paste sit on the stain for 15 minutes up to overnight for older stains, depending on how severe the discoloration is.
- Rinse the garment with cold water to remove the paste.
- Wash the clothing as usual in cold or warm water according to the care label.
For stubborn stains, repeat the treatment before drying because heat can set remaining stains permanently. Be cautious with delicate fabrics and spot-test the paste on an inconspicuous area.
Vinegar Soak Method
White vinegar helps break down mineral deposits and deodorizes fabric, making it a good option for cotton and linen but not recommended for elastic or delicate fibers. Diluting the vinegar prevents fabric damage while still allowing it to work on sweat buildup.
Prepare a soak using a mixture of two parts water to one part distilled white vinegar. Keep the soak time to 30 minutes to avoid weakening the fabric fibers especially with linen.
- Fill a basin with cold or room-temperature water and add white vinegar according to the 2:1 water-to-vinegar ratio.
- Submerge the stained underarm sections fully in the solution.
- Let the garment soak for 30 minutes, checking periodically to ensure there is no fabric distress.
- Remove the shirt and rinse thoroughly with cold water to eliminate vinegar residue.
- Wash normally following the garment’s care instructions.
This method is safe, inexpensive, and effective when stains are recent or mild. Avoid prolonged soaking or use on elastic parts, and always air dry to monitor stain removal success.
Hydrogen Peroxide Spot Treatment
Hydrogen peroxide acts as a mild bleaching agent that brightens white fabrics but can cause fading on colored materials. Use 3% hydrogen peroxide cautiously, mixing it with baking soda and water to form a paste that targets older, set-in stains. This treatment specifically works by breaking down the aluminum and protein compounds common in underarm stains.
- Mix equal parts 3% hydrogen peroxide, baking soda, and room-temperature water until you form a thick paste.
- Apply the paste directly to the underarm stain, rubbing gently to work it into the fabric fibers.
- Allow the paste to penetrate the stain for 45 to 60 minutes without drying out.
- Rinse the area well with cold water to remove all paste residue.
- Launder the shirt on a cold machine cycle or according to fabric care instructions.
Always test this mixture on an inconspicuous fabric area first to check for colorfastness. This method tends to be effective for white cotton shirts but should be avoided on polyester blends or colored fabrics to prevent discoloration.
2. Choosing the Right Method for Different Fabric Types

Cleaning underarm stains requires choosing methods tailored to your fabric to avoid damage and ensure effective stain removal. Different materials like cotton, polyester, and silk react uniquely to cleaning agents, so selecting the right approach helps protect your clothing and removes stains efficiently. Some fabrics, especially delicate ones, need gentler treatments to prevent weakening or discoloration.
Fabric Types and Stain Vulnerability
Understanding the fabric’s composition is key because stain resistance and breathability affect how stains set and how easily they come out. Natural fibers such as cotton breathe well and handle cleaning agents better, while synthetics like polyester resist stains less but are less breathable. Delicate fabrics, including silk, require special care to avoid damage from harsh chemicals or heavy scrubbing.
| Fabric Type | Breathability | Stain Resistance | Best Use |
|---|---|---|---|
| Cotton | High | Moderate | Everyday wear |
| Linen | Very high | High | Hot climates |
| Polyester | Low | Low | Avoid for long wear |
Blends combine traits of their fibers, so you should treat them cautiously, especially if they contain synthetic fibers. Keep in mind that delicate fabrics like silk or fine blends decompose more quickly if exposed to bleaching agents or high temperatures.
Recommended Cleaning Agents per Fabric
Cotton and polyester can handle a wider range of stain removers, including chlorine bleach for whites and oxygen bleach for colors. Using Clorox™ Bleach is acceptable on white or colorfast cotton and polyester, while Clorox 2™ provides color-safe removal for whites with a small amount of spandex.
Oxygen-based bleach offers a safer alternative for both white and colored fabrics, removing yellow stains without the risks chlorine bleach poses. For colored clothes, vinegar solutions mixed 1:1 with water work well as a pretreatment, acting as a mild stain remover and fabric softener.
Silk and other delicate fabrics should never be treated with bleach or harsh chemicals. Instead, use gentle methods such as soaking in natural detergents or specialized fabric rinses like Tide Clean Boost Fabric Rinse, which is safe for all fabrics and inspired by vinegar’s properties but more effective. Hydrogen peroxide at 3% concentration helps remove sweat stains on white cotton safely but must be avoided on colored or delicate textiles to prevent discoloration.
Testing Products on Hidden Fabric Areas
Before applying any stain remover, always test it on a small, hidden section of the fabric. Apply the product, let it sit for 5 to 10 minutes, then rinse and check for color change or damage. This step prevents visible harm and fading.
If you see any discoloration or texture change, switch to a milder alternative or use a professional cleaning service. For delicate fabrics, spot-testing is even more important since these materials respond poorly to most chemicals.
Never mix bleach with vinegar or hydrogen peroxide; combining these can create harmful gases and increase the risk of fabric damage.
3. Why Underarm Stains Form and How Sweat Chemistry Affects Them
Yellow underarm stains form when your sweat combines with ingredients found in deodorants, especially aluminum compounds. These chemicals react with proteins and other elements in sweat, creating a discoloration that sets into fabric, particularly after exposure to heat. Sweat chemistry and the type of deodorant you use both influence how severe these stains become.
The Chemistry Behind Yellow Sweat Stains
Underarm stains mainly result from a combination of sweat and deodorant ingredients. Your sweat contains proteins, salts, water, and fats. When sweat mixes with aluminum compounds in many antiperspirants, like aluminum zirconium, these molecules bind to sweat proteins and attach to fabric fibers.
This reaction forms a buildup that appears as yellow staining on clothing, especially noticeable on white shirts. The stain forms because aluminum compounds react with organic compounds like sebum and sweat, oxidizing over time. This is why stains often darken or deepen after a day or two of wearing the same shirt.
How Deodorants Contribute to Stain Formation
Most antiperspirants contain aluminum-based ingredients designed to block sweat glands. While effective for controlling moisture, these aluminum compounds bond with sweat components and fabric fibers. The bonding causes residues that build up and discolor clothing.
Deodorants without aluminum generally cause fewer yellow stains, as they lack the metallic compounds responsible for these chemical reactions. However, some deodorants with other ingredients may leave white crusty marks instead of yellow stains. The buildup from aluminum compounds tends to be more stubborn and discoloured.
Why Heat Sets Underarm Stains
Heat plays a significant role in setting underarm stains permanently into fabric. When stained clothing is placed in a dryer or exposed to high temperatures above 120°F (49°C), the heat causes the proteins and aluminum compounds to bond tightly with fabric fibers. This process makes the stain much harder to remove.
For this reason, it’s best to air-dry shirts with any underarm stains until you’ve fully treated them. Once the stains are heat-set, typical washing methods may not eliminate discoloration, resulting in yellow marks that last through repeated washes.
Variations in Sweat Chemistry Affect Stain Severity
Sweat composition differs from person to person based on diet, genetics, and activity levels. Sweat has varying degrees of protein, salt, and fat content, which can increase or decrease how intensely stains form. Higher protein or salt levels in sweat generally make stains more pronounced when combined with deodorant chemicals.
People who sweat more during workouts or live in hot climates may experience more frequent or darker underarm stains. Your choice of deodorant and washing routine also plays a role in managing these stains based on your unique sweat chemistry.
4. Step-by-Step Guide to Pretreat and Wash Stained Shirts Properly
Proper pretreatment and washing can significantly improve the removal of underarm stains without harming your shirts. These stains often consist of a protein-lipid-aluminum complex, which can become permanent if exposed to heat above 104°F (40°C). To avoid this, pretreating the stain before washing and not using high dryer temperatures are key. Soaking in an acidic solution helps break down the stain gently, and using a washing cycle with moderate temperature maximizes stain removal without risking damage. Follow these steps to pretreat, soak, and wash your stained shirts safely and effectively:
- Mix a pretreatment solution: Combine equal parts white distilled vinegar and water. This acidic mix helps to demineralize the stain without harming the fibers.
- Apply the solution: Gently scrub the underarm area with a soft-bristled brush or old toothbrush to loosen residues. Then, soak the stained area in the vinegar solution for 30 to 60 minutes to allow it to break down the stain fully.
- Prepare the wash: Use a detergent formulated for your shirt’s fabric type. Avoid bleach on colored fabrics unless it’s a color-safe formula designed for stain removal.
- Set the washing cycle: Choose a warm water setting around 90°F to 104°F (32°C to 40°C). Higher temperatures risk setting the stain permanently, while lower temperatures might not remove it effectively.
- Wash the shirt: Run the washing machine on a normal or gentle cycle depending on the fabric. Protein and body oil residues respond best when pretreatment precedes washing.
- Inspect before drying: Check that the stain is fully gone before using the dryer. Avoid heat exposure early on, as residual stains can set permanently when dried above 104°F (40°C).
- Air dry the garment: Hang or lay flat to dry naturally. This prevents any remaining stain from baking into the fabric and keeps your shirt looking fresh longer.
Costs for these steps are minimal, mainly the price of vinegar and standard detergent. The process takes about an hour of soaking time plus typical washing and drying durations. Good results include visibly lighter or eliminated stains without weakening or discoloring fabric. Skipping pretreatment or using high dryer heat can lead to stains setting permanently and fabric damage.
5. Using Commercial Products for Tough Underarm Stains
Commercial stain removers can be very effective for treating tough underarm stains, especially when home remedies fall short. Oxygen-based bleaches are a top choice because they break down yellow stains on whites without harsh chemicals that chlorine bleach uses. Products like Clorox 2™ for Colors Laundry & Fabric Stain Remover are formulated to be safe on colors and fabrics containing spandex, unlike regular bleach, making them a safer option for mixed-fabric garments.
Using stain removers correctly helps protect your clothes while tackling stains effectively. Apply the remover straight onto the underarm stain and allow it to sit for 10 to 30 minutes before washing. This resting period lets the oxygen agents work into the fabric to break down the stain particles. You can boost cleaning by first treating the stain with a detergent or baking soda paste before using an oxygen-based remover. After soaking, wash the garment in your usual detergent, preferably one made for stains and odors like Tide Ultra Oxi Powder or Tide Clean Boost Fabric Rinse.
| Product or Method | Use Instructions | Best For | Safety Notes |
|---|---|---|---|
| Clorox 2™ for Colors Bleach-Free Stain Remover | Rub into stain, soak 10+ minutes, then wash | Colored fabrics with spandex | Safe on most colors, avoid mixing with chlorine bleach |
| Oxygen-Based Bleach (generic) | Mix with water, soak 10, 30 minutes | Whites and colorfast fabrics | Avoid on delicate fabrics, always check label |
| Tide Ultra Oxi Powder + Tide Clean Boost Fabric Rinse | Wash with detergent and additive per package directions | Odor and stain removal on cotton and synthetics | Follow manufacturer instructions, rinse well |
| Dishwasher Detergent | Rub gently onto stain, soak briefly before washing | Stubborn underarm stains | Use powder form without bleach for colors |
| Isopropyl Alcohol | Dip or blot on stain before washing | Very stubborn or set-in stains | Test on fabric first to avoid damage |
Applying commercial stain removers correctly depends on checking the fabric care label first. For example, if your shirt has delicate fibers, oxygen-based bleaches might cause fading or fabric weakening. Avoid mixing ammonia and bleach products directly; even natural household ammonia can create harmful fumes when mixed improperly. Never use chlorine bleach on spandex or colored fabrics as it can cause permanent damage. Instead, choose color-safe options like Clorox 2™.
Start by rubbing a small amount of your chosen stain remover into an area slightly bigger than the stain using a soft brush. This ensures full coverage and better stain breakdown. Let it sit for the recommended time, at least 10 minutes for oxygen-based products, up to 30 minutes for stubborn stains. Then wash with your regular detergent, ideally one designed for stain removal and odor control.
Always test commercial stain removers on a hidden area first to prevent unexpected fabric damage.
6. Preventing Underarm Stains with Lifestyle and Laundry Habits
The choice of deodorant plays a key role in preventing underarm stains. Products containing aluminum compounds often react with sweat, creating yellowish marks on fabric. Switching to an aluminum-free deodorant reduces this chemical reaction and lowers the chance of discoloration. Look for deodorants clearly labeled “aluminum-free,” which typically cost between $5 and $15 depending on the brand and size.
Fabric type also influences sweat and stain buildup. Breathable fabrics like cotton or moisture-wicking blends allow air circulation, which helps sweat evaporate faster and reduces prolonged dampness. This lowers the odds of stain formation and unpleasant odors. Avoid synthetic materials that trap moisture, especially for undershirts or activewear worn daily.
Laundry habits significantly impact future stains. Wash shirts promptly after wearing, especially if you sweat heavily. Leaving sweat-soaked clothes unwashed for multiple days can cause stains to set firmly. Use warm water, around 104°F to 113°F (40°C to 45°C), which is effective for most cotton and synthetic blends without causing damage. Heavy-duty detergents specifically formulated to remove body oils work best; they often cost $10 to $15 for a standard bottle. Avoid fabric softeners in the underarm area as they can trap residue and worsen staining over time.
- Switch to aluminum-free deodorant to reduce stain-causing chemical reactions.
- Choose breathable fabrics like cotton or moisture-wicking blends for shirts.
- Wash worn clothes within 24 hours to prevent sweat residue buildup.
- Use warm water and heavy-duty detergent for effective cleaning.
- Avoid fabric softeners in underarm areas to prevent residue buildup.
- Allow shirts to dry completely in open air or use low heat to prevent fabric damage.
- Replace garments showing persistent stains or fabric thinning to maintain appearance and hygiene.
Drying methods make a difference as well. Air drying in a well-ventilated area helps remove residual moisture that encourages stain formation. Using a dryer on low heat prevents fabric damage and shrinkage that could make stains more prominent. Replace shirts that show consistent staining that doesn’t respond to cleaning or have worn fabric in the underarm area. Regular garment replacement every 1 to 2 years is common for frequently worn shirts, helping you maintain both style and hygiene.
7. When to Seek Professional Cleaning or Fabric Repair
Deeply set underarm stains often require professional cleaning, especially when you’ve tried multiple home treatments without success. Stains that have been building up over many wears or are thick and yellowed into the fabric can become impossible to fully remove with typical household products. Clothes made from delicate or structured fabrics like silk, wool, or garments labeled dry-clean-only are good candidates for professional care, as home washing methods risk damaging them further.
Professional cleaners use specialized mechanical extraction tools and solvent-based treatments that lift embedded sweat and deodorant residues without harsh agitation. These methods help preserve fabric integrity while targeting stains that resist baking soda, oxygen boosters, vinegar soaks, or commercial stain removers. For example, dry cleaning can effectively treat stained structured suits or wedding gowns where water immersion would harm the garment’s shape or finish.
To decide if you should seek professional stain removal, use this checklist: first, verify the garment’s care label, if it says dry clean only or specifies delicate fabrics, take it to a cleaner. Next, assess your home treatment results; if multiple washes, overnight soaks in solutions like one part white vinegar to two parts water, or application of targeted products have failed, professional services may be necessary. Also, if your fabric shows signs of damage like thinning, color fading, or rough texture near the stain, do not attempt further home treatments, which could worsen the problem.
Finding a reliable cleaner involves checking local reviews and confirming the business’s expertise with delicate fabrics and stubborn stains. Established cleaners often provide consultation before accepting items, explaining what methods they’ll use and expected outcomes. Costs generally range from $10 to $30 per garment for stain removal, with higher prices for specialty items or expedited service.
Professional stain removal can sometimes restore faded fabric color and texture through gentle deep cleansing and careful handling. However, it’s important to set realistic expectations: severe discoloration or fabric breakdown might not be fully reversible. When a stain stays after professional treatment, check if they provide repeat cleaning or fabric repair services. Some specialty cleaners provide fabric restoration or dye touch-ups, but these services add to the cost and require additional time, often several days to a week.
After professional cleaning, always air-dry the garment and inspect the underarm area closely. Avoid machine drying, which can set any remaining stain further. Should the stain still be visible, talk over next steps with the cleaner; they might suggest alterations or protective treatments to stop it from coming back. Combining professional cleaning with improved laundry and lifestyle habits helps prolong the garment’s life and appearance over time.
8. Common Mistakes and Myths About Removing Underarm Stains
Chlorine bleach is not safe for all fabrics, especially colored or delicate ones. Using it on colors can cause fading or yellowing, which makes stains worse instead of better. For these fabrics, oxygen-based bleach or milder stain removers work better and protect your clothes’ colors and fibers.
Drying clothes with underarm stains still visible can set those stains permanently. Heat from dryers or direct sunlight can make stains nearly impossible to remove later. Always make sure stains are gone or significantly faded before tumble drying or ironing.
Natural remedies do help remove underarm stains, but not all are equally effective. Baking soda and lemon juice work well on sweat and deodorant buildup, while some other home ingredients may only mask odor without removing stains. Also, some natural acids can weaken fabric if used too often or left on too long.
- Avoid chlorine bleach on colored or sensitive fabrics; use color-safe options instead.
- Don’t dry clothes with fresh underarm stains; air dry first to check stain removal.
- Test natural remedies on a hidden spot to prevent fabric damage.
- Read fabric care labels before applying any stain remover.
- Pre-treat stains promptly; old stains require stronger or repeated treatments.
- Use lukewarm water for soaking, hot water can set protein-based stains.
- Never mix bleach with ammonia or vinegar as it creates harmful fumes.
Ignoring fabric type leads to damage or poor stain removal results. For example, cotton withstands stronger treatments than silk or wool. Tailoring your cleaning method to fabric ensures the stain is treated effectively without ruining your garment’s texture or fit.
Check underarm stains after washing before drying, heat sets stains permanently.
Properly addressing underarm stains takes patience and care. Avoid strong or inappropriate chemicals unless the fabric can handle them. Use milder options for delicate clothes and always check progress between steps. This approach helps protect your clothing’s life and appearance over time.
Step-by-Step Action Plan to Tackle Underarm Stains Today
Follow this simple timeline to remove underarm stains effectively and protect your clothes from future damage.
- Before you wash: Pretreat the stain using a mixture of liquid detergent and water or a stain remover designed for your fabric type. Check that the stain starts to fade.
- Immediately after pretreating: Let the solution sit on the stain for 15 to 30 minutes to break down oils and proteins that cause yellowing.
- Wash day: Use the warmest water safe for your garment and a good-quality detergent. Confirm the stain is noticeably lighter after washing.
- After washing: Air dry the garment to avoid setting any remaining stain. Avoid using the dryer until the stain is completely gone.
- Following the first wash: Inspect the stained area closely. If the stain persists, repeat pretreatment and washing once more before drying.
- Weekly care: Incorporate regular stain prevention habits such as applying antiperspirant before dressing and rinsing or soaking shirts worn during heavy sweating.
Frequently Asked Questions
Can I Remove Underarm Stains Without Harsh Chemicals?
Yes, natural remedies like lemon juice and baking soda can effectively lift underarm stains while being gentle on fabrics. These methods also avoid unwanted fabric damage from harsh chemicals.
Are Underarm Stains Caused Only by Sweat?
No, they result from a chemical reaction between sweat and deodorant ingredients, which can cause yellow discoloration. Understanding this helps choose the right cleaning approach.
How Often Should I Pretreat Underarm Stains Before Washing?
Pretreat freshly visible or older stains by rubbing in your chosen stain remover and letting it sit for at least 10 minutes before washing. This boosts stain removal success.
Can I Use Chlorine Bleach on White Shirts with Yellow Underarm Stains?
Chlorine bleach can sometimes damage fabric or worsen stains, so use it cautiously and only if the fabric label permits bleach use. Always test on a hidden area first.
What’s the Risk of Drying Shirts with Underarm Stains in the Dryer?
Heat can set stains permanently if they aren’t fully removed first, so air-dry stained shirts until you confirm the stains are gone.
How Do Fabric Types Affect Underarm Stain Removal Methods?
Delicate or synthetic fabrics need milder stain treatments and cooler wash cycles to avoid damage, while cotton can generally handle stronger methods.
Wrapping Up
Removing underarm stains takes consistent care using the right cleaning steps and prevention habits. Start by pretreating soon after wearing and use suitable washing methods for your clothes. Taking this action now can keep your shirts looking fresh longer and save you from stubborn stain headaches later.