How to Clean Deodorant Stains on Shirts 8 Proven Methods That Work
To clean deodorant stains on shirts quickly, apply a baking soda and hydrogen peroxide paste, let it sit for 30 minutes, then wash as usual. For stubborn stains, soak the shirt in a vinegar, dish soap, salt, and hot water mix for up to an hour before laundering. These methods work well on white and colorfast fabrics and help remove both fresh and set-in marks.
This guide is for anyone who wants effective, practical solutions to erase deodorant stains without damaging their shirts. You’ll find proven approaches tailored to different fabrics and colors to keep your wardrobe looking fresh and clean.
Key Takeaways
- Combine 3% hydrogen peroxide, baking soda, and water in equal amounts to make a paste that removes stains from white shirts.
- Let the deodorant stain treatment sit between 15 minutes up to overnight for tough buildup.
- For extra-tough stains, soak shirts in vinegar, hot water, dish soap, and salt for one hour before washing.
- Use old nylon tights to gently rub and lift fresh deodorant stains before treatment.
- Apply the cleaning solution thoroughly and check stains occasionally during treatment to avoid fabric damage.
- Adjust the soaking time from 30 minutes to two hours depending on stain severity and fabric type.
1. How to Get Deodorant Stains Out of Shirts Quickly
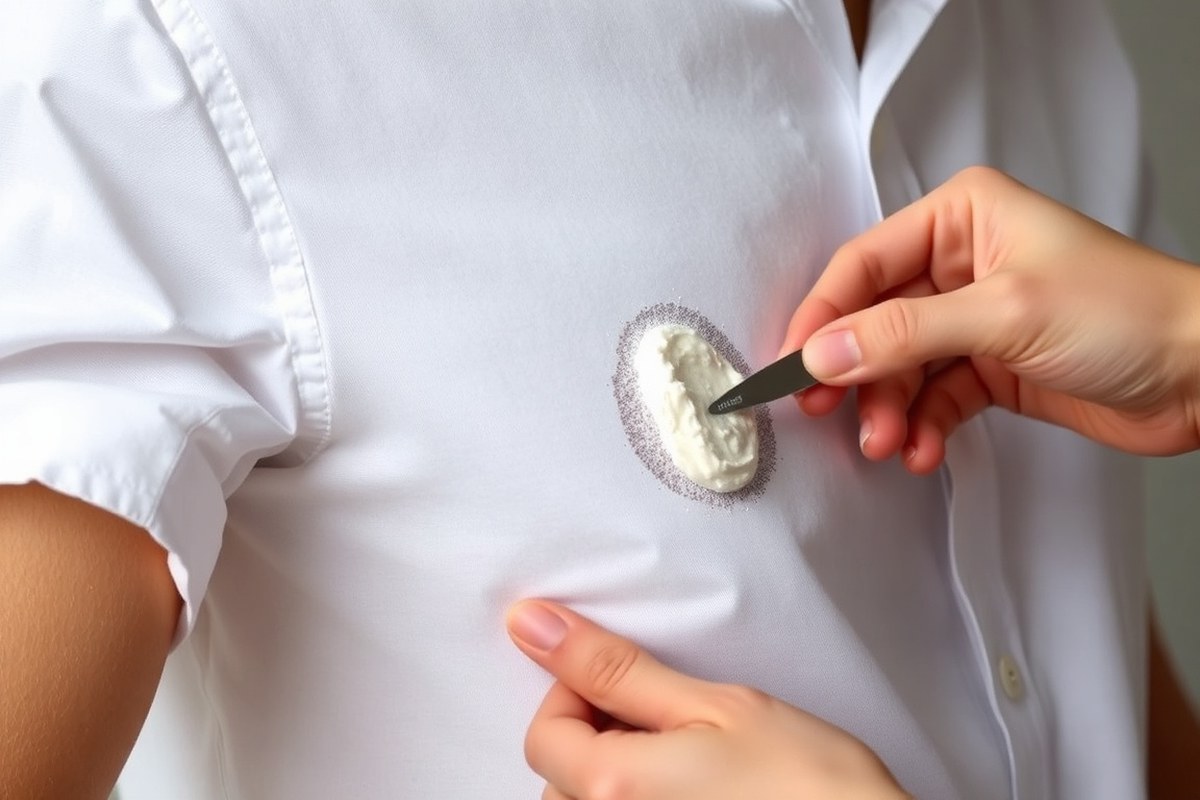
Removing deodorant stains from shirts quickly requires prompt action and the right materials. Using common household ingredients such as baking soda and hydrogen peroxide can be very effective, especially on white shirts or light colors. These substances break down the stain components and lift them from fabric fibers. Timing is key, the stain treatment should typically sit on the fabric between 15 to 30 minutes before washing. Applying a paste or solution directly onto the affected area helps concentrate the cleaning power for better results. Here is a clear step-by-step method to remove deodorant stains from shirts efficiently:
- Create a stain-removing paste or solution. For white shirts, blend equal amounts of 3% hydrogen peroxide, baking soda, and water to make a paste. For colored shirts, combine baking soda and water in a 3:1 ratio to form a paste that won’t bleach the fabric.
- Apply the mixture directly to the stain. Use a clean cloth or your fingers to rub the paste thoroughly onto the deodorant stain, ensuring even coverage. For liquid solutions, gently pour or dab it on.
- Let it sit for 15 to 30 minutes. Allow the paste or solution enough time to break down the stain. Do not let it dry completely unless the instructions specify, as this could make removal harder.
- Scrub the area lightly if needed. For tougher stains, gently scrub the spot with a soft brush or cloth to help loosen residue without damaging the fabric.
- Rinse or launder as usual. After treatment, wash the shirt in cold or warm water according to the care label. Cold water helps preserve fabric and colours, while warm water can provide better stain removal for durable fabrics.
- Inspect the shirt before drying. Check if the stain is gone before placing the shirt in the dryer. Heat can set stubborn stains permanently, so repeat the treatment if necessary.
One method is to combine 3 tablespoons of dish soap with 6 tablespoons of 3% hydrogen peroxide, apply this mixture directly to the stain, and leave it for around an hour before laundering. This technique works well on white shirts and tough stains, but try it on a concealed area first. Be careful not to let hydrogen peroxide sit too long on coloured fabrics since it may cause fading.
2. Why Do Deodorant Stains Form on Shirts?

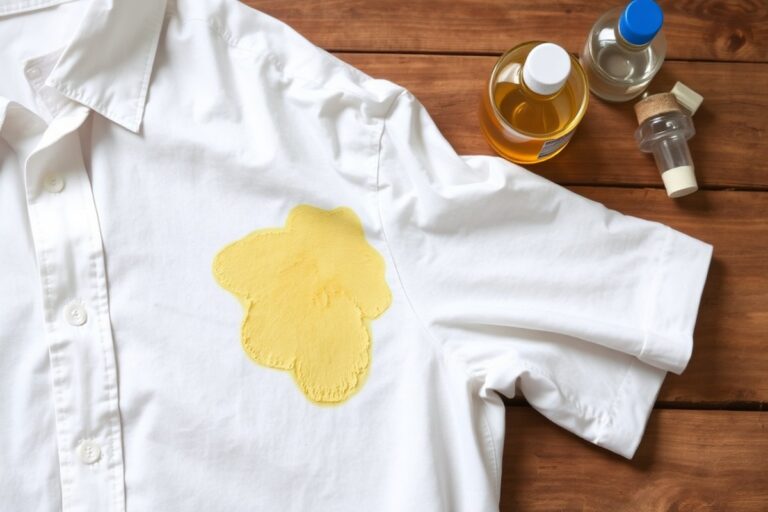
Deodorant stains form mainly because of the ingredients in antiperspirants and how they interact with your sweat and shirt fabric. Two common types appear on shirts: white marks and yellow stains. The white residue comes directly from the deodorant product transferring onto the fabric. This usually happens when the deodorant hasn’t dried completely or if you apply too much. You’ll notice these white marks particularly on dark clothing, where the residue is more visible.
Yellow stains develop in a different way. They result from a chemical reaction involving sweat, aluminum salts found in many antiperspirants, and your shirt’s fabric. Aluminum compounds help block sweat glands, but they can bind with sweat proteins and body oils. Over time, this mixture causes discoloration that shows as yellowish stains, typically in the underarm area. These stains are more noticeable on white or light-colored shirts because the contrast is higher. The yellow-ing effect is due to the breakdown products of sweat interacting with the aluminum, combined with oils and dirt trapped in the fabric fibers.
Sweat plays a significant role beyond just moisture. It contains minerals and proteins that, when mixed with the aluminum in antiperspirants, create a residue that clings stubbornly to fabric. This interaction doesn’t just leave marks on the surface; it changes the chemical makeup of what’s stuck on the shirt. Bacteria living in sweat can also worsen staining by breaking down sweat components into acids and other compounds, which accelerate fabric discoloration. That’s why prolonged exposure without washing speeds up yellow stain formation.
The friction from your shirt rubbing against the underarm area also helps embed deodorant, sweat, and oils deeper into the fibers. This makes stains tougher to remove after they set. The combination of deodorant ingredients, sweat chemistry, and fabric texture determines how fast and how deeply the stains form. For example, shirts made from natural fibers like cotton tend to absorb more of this mixture than synthetic fabrics, showing stains more clearly.
To reduce yellow stains, wash shirts promptly after wearing and consider switching to deodorants without aluminum, as these avoid the chemical reaction that causes discoloration.
Understanding these causes explains why deodorant stains don’t just vanish with regular washing. The chemical reactions mean stains can become permanent without targeted treatment. That’s why removing deodorant stains often requires specific methods that break down the residue and restore the fabric color before it settles in completely. Paying attention to the interaction between sweat and deodorant ingredients is key to managing and preventing these common clothing issues.
3. Best Methods for Different Shirt Colors and Fabrics
Choosing the right method to remove deodorant stains depends on your shirt’s color and fabric to avoid damage and fading. White shirts tolerate mild bleaching agents, while dark or colored shirts need gentler approaches that preserve color. Delicates require minimal abrasion and spot cleaning with mild products to prevent weakening the fibers.
White Shirts: Bleaching and Stain-Fighting Agents
Hydrogen peroxide works well on white shirts by softly lightening stains through breaking apart proteins and aluminum in deodorant. Combine 6 tablespoons (89 mL) of hydrogen peroxide with 3 tablespoons (44 mL) of liquid dish soap, then apply the mixture to the stain with a small brush. Allow the solution to rest for a few minutes before rinsing it off.
Avoid using hydrogen peroxide on even slightly colored areas to prevent fading. Baking soda is another safe option for white fabrics. You can also use oxygen-based bleach, which brightens whites without harsh chemicals. For especially stubborn stains, soak the shirt for 1 hour in a mix of hot water, white vinegar, dish soap, and salt before washing as usual.
Dark and Colored Shirts: Gentle, Color-Safe Options
Dark and colored shirts require mild methods that won’t cause fading or bleach spots. Use dish soap or diluted white vinegar to treat deodorant stains without harming colors. Soak the stained area in diluted vinegar first, then gently rub with dish soap if needed. Avoid hydrogen peroxide, which has bleaching effects.
One helpful tip is to stretch a pair of nylon stockings or similar sheer fabric over the stain while scrubbing gently. This reduces abrasion that can dull the fabric. Baking soda helps neutralize odor and gently lift stains, but be careful as it may leave white residue on dark shirts. Test any product on a hidden spot to confirm it won’t alter color.
Delicate Fabrics: Minimal Abrasion and Careful Testing
Delicates such as silk, lace, or “dry clean only” shirts need extra care. Skip harsh chemicals and abrasive brushing, which can damage fibers. Instead, do spot cleaning with mild detergent mixed in cool water. Dab gently with a soft cloth rather than rubbing hard. Avoid soaking unless the care label allows.
Test all treatments on an inconspicuous area before applying to the stain. Sometimes professional cleaning is the safest option for delicate or synthetic fabrics that react poorly to home remedies. Below is a comparison of stain removal options by shirt type, highlighting key precautions and effectiveness:
| Shirt Type | Recommended Stain Removers | Precautions | Effectiveness |
|---|---|---|---|
| White | Hydrogen peroxide + dish soap, baking soda, oxygen bleach | Avoid on colored areas, test first, no chlorine bleach | Strong for breaking down protein and aluminum stains |
| Dark/Colored | Dish soap, diluted white vinegar, baking soda (with caution) | No peroxide or chlorine bleach, test for colorfastness | Mild removal, odor neutralization, minimal fading |
| Delicate/Synthetic | Mild detergent, spot cleaning only | No soaking if labeled dry clean only, avoid abrasives | Gentle stain lift without fabric damage |
Choosing the right care method based on fabric and color helps you avoid worsening the stain or damaging your shirt. Always test treatments on small hidden areas before applying them broadly to keep your shirts looking their best.
4. Household Ingredients That Remove Deodorant Stains Effectively
Common household ingredients like baking soda, white vinegar, and hydrogen peroxide can effectively remove deodorant stains when used correctly. These substances break down residue, lift built-up stains, and help restore the fabric’s appearance without harsh chemicals. Proper preparation and application ensure better results and keep your shirts safe.
Baking Soda Paste for Lifting Stains
Baking soda neutralizes odors and gently lifts deodorant stains, especially yellow underarm marks. Mixing it into a paste concentrates its cleaning power, making it easier to apply and scrub into the fabric. To prepare and use baking soda paste:
- Pour about 1/4 cup of warm water into a small bowl.
- Add 4 tablespoons of baking soda gradually and stir to form a thick paste.
- Spread the paste directly on the deodorant stain, covering it evenly.
- Allow the paste to remain on the stain for a minimum of 20 minutes so the baking soda can effectively break down the residue.
- Gently rub the stain with a soft brush or clean fingers to loosen buildup.
- Rinse well with cold water.
- Wash the shirt as usual to remove any remaining paste.
Fresh stains respond well to this method, but for set-in stains, repeat or combine with other treatments. Baking soda is inexpensive, usually under $1 per use, and safe on most fabrics except silk and wool.
White Vinegar Soak for Residue and Odor
White vinegar’s acidity dissolves deodorant buildup and neutralizes odor while being gentle on various fabrics and colors. Using a diluted solution prevents damage and helps loosen the residue for easier removal. Use this process for white and colored shirts:
- Mix 1 cup (237 mL) of white distilled vinegar with 2 cups (473 mL) of water in a basin or sink.
- Submerge the stained part of your shirt in the solution completely.
- Allow the garment to soak for about 1 hour to break down deodorant buildup.
- Use an old, clean toothbrush to gently brush the stained area, lifting residue.
- Rinse thoroughly with cool water.
- Wash the shirt as directed on its care label.
This method suits most fabric types without bleaching color. Avoid soaking delicate fabrics like silk for extended periods. Vinegar costs about $0.10 per cup and is a versatile household cleaner.
Hydrogen Peroxide for Whitening and Stain Breakdown
Hydrogen peroxide helps remove yellowing and whitens white fabric by oxidizing deodorant and sweat stains. It should be used carefully to avoid fabric damage or discoloration, primarily on white shirts. Follow these guidelines for safe use:
- In a small container, combine 1/2 cup (120 mL) hydrogen peroxide, 1/2 cup (120 mL) baking soda, and 1/2 cup (120 mL) tap water to form a spreadable paste.
- Apply this paste evenly to the stained areas of the white shirt.
- Let it sit for about 20 minutes to work on the fabric.
- For deeply set-in stains, prepare a soak with equal parts hydrogen peroxide and water, and submerge the stain for up to 1 hour.
- Rinse the garment thoroughly with cold water after treatment.
- Launder as usual immediately afterward.
Do not use hydrogen peroxide on colored fabrics without testing first, as it may bleach or weaken fibers. A 3% hydrogen peroxide solution, commonly sold for under $2 per bottle, is recommended for this use.
5. How to Prevent Deodorant Stains from Forming in the First Place
Preventing deodorant stains on shirts starts with the type of deodorant you choose and how you apply it. Products labeled “stain-free,” “clear,” or “invisible” are designed to leave less residue, which helps avoid those white or yellow marks on your clothes. Aerosol sprays, gel roll-ons, and clear formulas typically cause fewer visible stains than traditional solid or antiperspirant sticks, which often contain aluminum compounds that interact with sweat and fabric.
Applying deodorant correctly also makes a big difference. Use just enough to cover your underarm skin, about a one-second swipe per side is usually enough. Allow the deodorant to dry completely before putting on your shirt; this can take 2 to 5 minutes depending on the formula and room temperature. Dressing too soon traps wet product against your fabric, increasing stain risk.
Wearing shirts made from tightly woven fabrics or synthetic blends can be more prone to showing stains, especially dark or brightly colored clothes. Better breathability reduces sweat buildup, cutting down on stain formation. Choose looser cuts around the armpits to reduce skin contact with deodorant and the shirt whenever possible.
- Opt for deodorants labeled “stain-free” or “clear” to reduce residue.
- Apply a thin, even layer of deodorant; avoid overdosing the area.
- Wait at least 2 to 5 minutes for deodorant to air dry completely before dressing.
- Avoid spraying or applying deodorant directly onto your shirt fabric.
- Wear breathable, tightly woven fabrics and looser cuts to reduce sweat accumulation.
- Consider switching to odor-control-only deodorants if you don’t need antiperspirant protection.
- Wash shirts soon after wearing to prevent buildup that causes stains over time.
Let your deodorant dry fully before putting on a shirt to stop fresh stains from forming on your fabric.
Choosing deodorants without aluminum helps because aluminum salts react with sweat and fabric, leading to yellowish stains that become harder to remove over time. Trying an aluminum-free formula can reduce buildup when you often deal with stubborn marks. Applying deodorant only to clean, dry underarms also reduces excess product and sweat mixing to form stains. When you have time, washing shirts after each wear minimizes residue accumulation and keeps fabric looking fresh longer.
6. Common Mistakes When Removing Deodorant Stains and How to Fix Them
One common mistake is waiting too long to wash the shirt after treating deodorant stains. The longer stains sit, the more they bond with the fabric, making removal harder and sometimes impossible without damaging the shirt. Aim to launder the shirt within a few hours after applying any stain remover for the best results.
Another error is using baby wipes or stain removal wipes containing moisture, which can push waxy deodorant particles deeper into the fabric fibers. This causes the stain to set more firmly. Instead, use dry cloths or apply cleaning solutions designed specifically for deodorant stains before washing.
Using harsh chemicals, bleach, or abrasive scrubbing can also damage fabric or cause discoloration, especially on colored or delicate shirts. To test if a method is safe, apply a small amount of the cleaner on an inconspicuous area and wait 5 to 10 minutes. Look for any fading, color changes, or fabric weakening before treating the stained area.
If your first stain removal attempt doesn’t work, don’t keep scrubbing or soaking the shirt repeatedly, as this can worsen fabric damage. Instead, try a different method, such as a gentle enzyme-based cleaner or a paste of baking soda and water. Repeat treatment once or twice with washing after each, but beyond that, consider professional cleaning advice for delicate or expensive garments.
- Do not wait days to wash treated shirts; wash within hours.
- Avoid using wet baby or stain removal wipes on deodorant stains.
- Test stain removers on a hidden fabric spot first.
- Don’t scrub too hard or use bleach on colored fabrics.
- Switch methods if the first treatment fails instead of repeating aggressively.
- Follow garment care labels strictly during stain removal.
- Consult a professional if stains are old and stubborn.
Checking fabric labels helps you select safe removal techniques and prevents unintended damage. Treat newer stains promptly and gently to avoid permanent marks. Old, bonded stains can require professional cleaning methods rather than home remedies. Remember that repeated harsh treatment risks fabric thinning or color loss, so moderation and patience are key.
7. When to Choose Professional Cleaning over Home Treatment
Seek professional cleaning when deodorant stains affect expensive or delicate shirts, particularly those labelled as dry-clean-only. Home treatments risk damaging fabrics such as silk, wool, or certain synthetics that are sensitive to water, heat, or common stain removers. Attempting to clean these at home could lead to color loss, shrinking, or fabric weakening, making professional care a safer choice.
Professional cleaners use specialized solvents and techniques tailored to fabric type and stain composition. They can safely remove deodorant residues without harsh chemicals like bleach, which is not recommended on yellow deodorant stains because it can worsen discoloration. Experts also handle aged or set-in stains more effectively, reducing the chance of permanent marks.
If a shirt shows signs of damage from previous home attempts, such as color fading, fabric thinning, or persistent stains despite repeated washing, stop further DIY cleaning and consult a professional. This avoids adding more harm and increases the chance of restoring the shirt.
Consider professional cleaning when dealing with large or stubborn stains that have been left untreated for weeks or months. The longer a stain sets, the more difficult it is to remove at home. Professionals may use processes like gentle steam cleaning, targeted solvents, and controlled drying methods designed to protect shirt quality while tackling tough stains.
Costs for professional stain removal vary widely but expect to pay around $10 to $30 per garment on average, depending on fabric and stain severity. Some dry cleaners charge extra for treating deodorant stains specifically. Investing in professional care makes sense for valuable garments or sentimental items that require careful handling.
When deciding, test your shirt’s care label, fabric type, stain age, and previous treatment history. For example, a cotton T-shirt with a fresh deodorant mark can often be cleaned at home safely, while a silk blouse with long-standing stains benefits more from expert attention. Avoid using bleach or harsh scrubbing on delicate fabrics as a first step.
In short, prioritize professional cleaning if your shirt is delicate, expensive, or has suffered from home cleaning mistakes. Experts’ targeted methods and safer chemicals reduce the risk of further damage and often achieve better stain removal results. This approach preserves your shirt’s appearance and extends its lifespan, making the extra cost worthwhile in many cases.
8. Tools and Quick Fixes to Remove or Hide Deodorant Stains Without Washing
You can reduce or remove deodorant stains on shirts without running a full wash by using simple, accessible tools that target fresh or dry marks. These quick fixes rely on gentle abrasion, spot treatments, or concealing methods to manage visible stains until you can properly clean the shirt. Acting promptly with the right tools improves the chances of avoiding a washing cycle.
Rubbing with Nylon Stockings or Microfiber Cloths
Light abrasion with nylon stockings or microfiber cloths works well to lift fresh deodorant residue before it sets. The fine, slightly abrasive texture of nylon tights or a dry microfiber cloth helps to loosen white marks from solid deodorant products, especially on dark fabrics. Gently rubbing the stained area with these materials can remove visible streaks without moisture, which might otherwise set the stain further. For fresh or dry stains, try these steps:
- Use an old or ripped pair of nylon stockings or a clean microfiber cloth.
- Rub gently in circular motions on the deodorant stain.
- Apply light pressure to avoid damaging delicate fabrics.
- Repeat until the whiteness diminishes or disappears.
- Allow the shirt to air out before putting it back on.
Dry rubbing is especially useful if you don’t have time for spot cleaning with liquids. This method is low-cost, requires no special products, and works quickly for fresh deodorant marks.
Using Stain Remover Sprays or Detergent Wipes
Targeted stain removers can break down deodorant buildup without soaking the entire shirt. Applying a small amount of liquid laundry detergent or a stain remover wipe directly on the affected area helps loosen the residue fast. For best results, turn the shirt inside out and gently rub the solution with a soft-bristled toothbrush or your finger to work it into the fabric.
Let the treatment sit for about 5 to 10 minutes before blotting with a clean cloth or rinsing if possible. Products like Tide Ultra Stain Release Liquid contain enzymes that break down deodorant compounds efficiently. Stain remover wipes also provide a convenient, portable option for quick action at work or on the go. Steps to apply stain remover sprays or detergent wipes:
- Turn the garment inside out to access the stain from the reverse side.
- Apply a small amount of liquid detergent or use a stain remover wipe on the stain.
- Gently rub with a soft toothbrush or cloth to penetrate the stain.
- Wait 5 to 10 minutes for the product to break down residue.
- Blot excess moisture with a clean, dry cloth.
Always check garment care labels before using stain removers to avoid color fading or fabric damage.
Concealing Stains Until Proper Cleaning
You can hide deodorant stains temporarily if immediate cleaning isn’t an option. Layering a jacket, cardigan, or scarf over the stained area can cover marks and keep your outfit polished. Light fabric sprays with a matte finish may also reduce the visibility of white streaks on dark garments.
For minor smudges on collars or underarms, switching to a patterned shirt or adding accessories might help divert attention. These solutions work best for short periods and should not replace stain removal. Useful methods to conceal deodorant stains include:
- Wearing an outer layer like a blazer or sweater.
- Using scarves or bandanas around the neck or shoulders.
- Applying light fabric sprays that reduce shine or whiteness.
- Choosing patterned clothing to disguise light marks.
- Adjusting your collar or cuffs to hide stains.
Step-by-Step Action Plan for Removing Deodorant Stains
Follow these clear steps to tackle deodorant stains effectively and keep your shirts looking fresh.
- Before washing: Gently scrape off any excess deodorant with a dull knife or credit card to avoid spreading stains.
- Within 30 minutes: Blot the stained area with cold water to prevent setting. If it’s a fresh sweat stain, this step helps reduce odor and discoloration.
- Same day: Apply a paste made from baking soda and water on the stain. Let it sit for 15 minutes; you’ll see the stain start to lift.
- Before machine washing: Use a detergent formulated for stain removal, or add white vinegar to the wash cycle. Check for stain fading after the wash before drying.
- After washing: Inspect the stain; if it remains, repeat treatment or apply a stain remover designed for your shirt’s fabric type.
- Drying: Air dry only if stains persist; heat from dryers can make stains permanent.
- Ongoing care: Switch to clear or spray deodorants and allow them to dry fully before dressing to prevent future stains.
Frequently Asked Questions
Can Deodorant Stains Cause Permanent Damage to My Shirts?
Yes, especially yellow stains from underarm deodorant can become permanent if untreated. Act quickly with proper cleaning methods to avoid setting the stain.
How Can I Tell If a Deodorant Stain Is from Aluminum Compounds?
Aluminum compounds often cause yellowing and residue buildup on shirts, particularly underarms. Using an aluminum-free deodorant can help reduce these stains.
Is It Safe to Use Bleach on Deodorant Stains?
Bleach may damage colored fabrics and worsen stains; it’s safer for whites only. Test on a small area first or use alternative stain removers like baking soda for colors.
Can the Type of Fabric Affect Deodorant Stain Removal Success?
Yes, delicate fabrics like silk or wool require gentler stain treatments to avoid damage. Use specialized cleaners and avoid harsh scrubbing on these materials.
How Soon Should I Wash a Shirt After Noticing Deodorant Stains?
Wash shirts as soon as possible to prevent stains from setting. Delaying washing can make stains harder to remove and possibly permanent.
Does Perspiration Make Deodorant Stains Worse on Shirts?
Yes, sweat interacts with deodorant creating tougher stains, especially in underarm areas. Washing sweaty shirts promptly reduces stain formation and fabric damage.
Before You Go
Cleaning deodorant stains is about acting fast and choosing the right method for your fabric and stain type. Trying a simple household ingredient like baking soda or vinegar can save your shirt without harsh chemicals. Next time you notice a stain, start treatment immediately before washing to increase your chances of removing it completely.