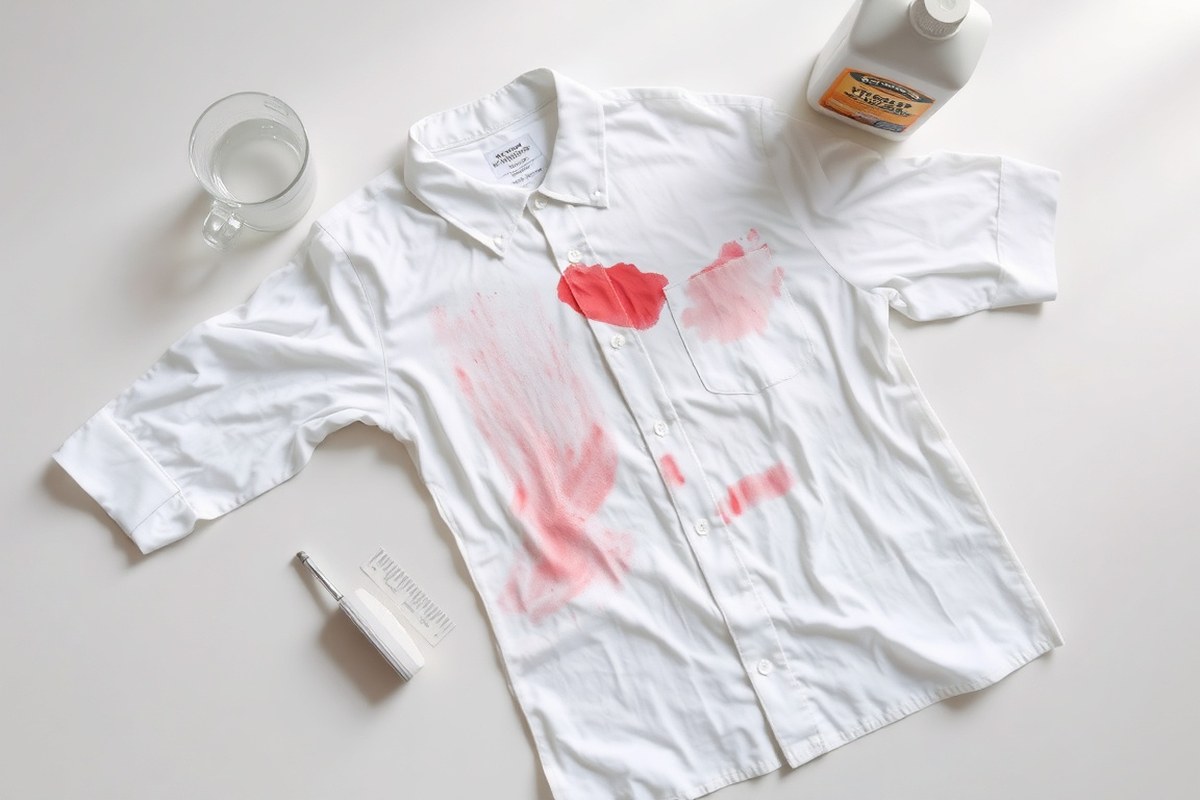
How to Get Red Stain Out of White Shirt: 8 Proven Steps That Work
To get a red stain out of a white shirt quickly, start by treating the stain with a mixture of white vinegar and castile soap or a commercial stain remover. Let the solution sit for at least 15 minutes before washing the shirt in cold water. Avoid drying the shirt until you confirm the stain is completely gone, as heat can set the stain permanently. This method works best on fresh or slightly dried stains and is safe for most white cotton shirts labeled “bleachable.”
This advice suits anyone dealing with red stains on their white clothing, whether from wine, juice, or sauce. You’ll find proven steps to remove different red stains effectively, what supplies you need, and how to handle your white shirts without causing damage.
Key Takeaways
- Soak red-stained white shirts in a mix of one tablespoon white vinegar and one teaspoon castile soap for 30 minutes.
- Use a stain remover on the red stain, allowing it to soak for a minimum of 15 minutes prior to laundering.
- Use cold water to wash stained shirts to prevent setting the stain.
- Air dry your shirt instead of using a dryer until the stain is completely gone.
- For stubborn stains, soak shirts overnight in a solution of oxygen booster and cleaning concentrate.
- Scrub stain treatments into the fabric and let it sit for 1-2 hours for tough stains.
1. How to Remove Red Stains from White Shirts Quickly
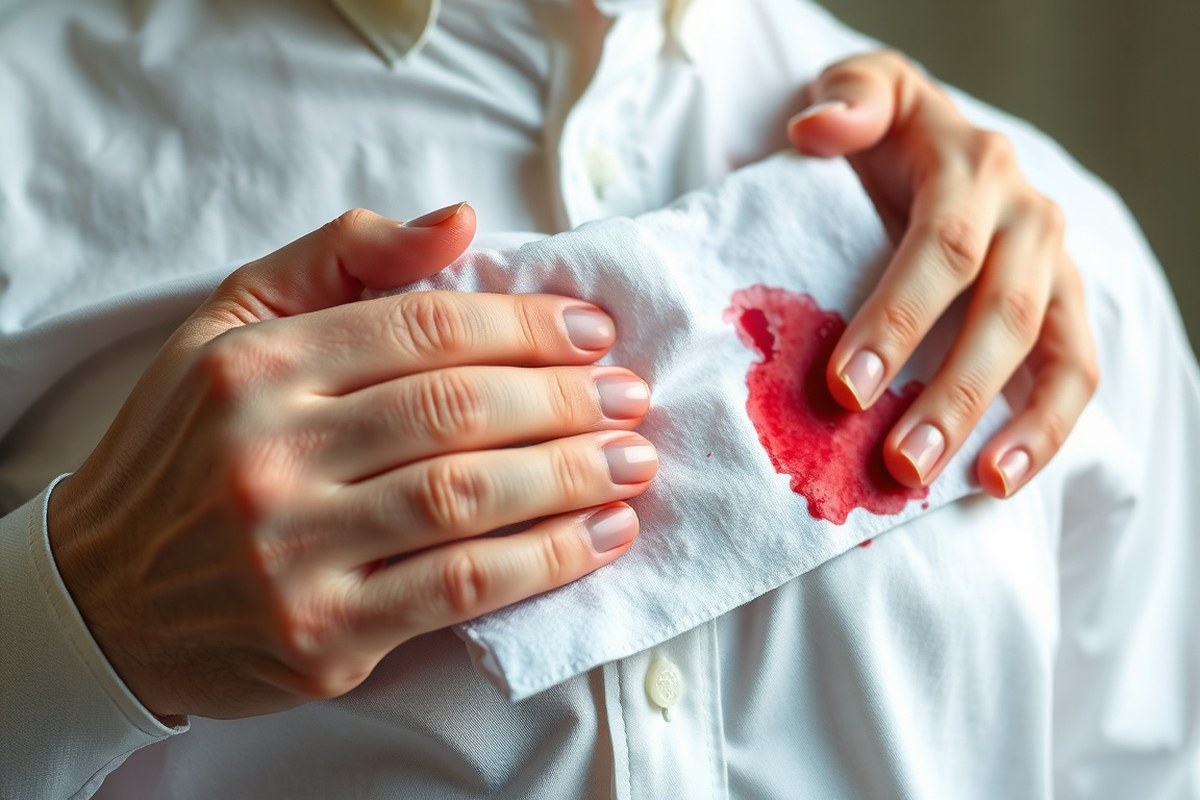
Acting quickly is key to stopping red stains from setting into your white shirt. As soon as the spill happens, you want to prevent the stain from drying, which makes removal much harder. Using cold water right away helps dilute and lift the red pigment while blotting avoids pushing the stain deeper into the fabric. Certain household items like baking soda and white vinegar can break down pigments and acids in red stains effectively if applied soon after the spill. Here’s a clear step-by-step process to tackle fresh red stains fast:
- Gently press on the stain. Take a clean white cloth or paper towel and dab the red stain to soak up as much liquid as you can without scrubbing. Scrubbing may cause the stain to spread and sink deeper into the fabric.
- Rinse the stained area under cold running water. Hold the fabric so the water runs from the back of the stain to the front, which helps push the color out instead of through the fabric.
- Make a paste using baking soda and water. Mix about 1 tablespoon of baking soda with enough water to form a thick paste. Apply it directly onto the stain.
- Let the paste sit for 10 to 15 minutes. This gives the baking soda time to lift the stain. Avoid letting it dry completely on the fabric to prevent residues.
- Rinse off the baking soda paste with cold water. Use moderate pressure to remove the paste and any loosened stain particles.
- Apply white vinegar to the stain if it persists. Use a small amount on a clean cloth to dab the spot. Vinegar’s mild acid helps break down the red dye compounds without damaging cotton or polyester blends.
- Rinse the area again with cold water. This removes vinegar and any remaining stain, preparing the shirt for regular washing.
- Check the stain before drying. Drying can set a stain permanently. When the red stain is still noticeable, apply the cleaning steps again before drying or ironing the shirt.
Cold water is recommended because warm or hot water can cause red pigments to set, creating permanent stains. Using common household items like baking soda and vinegar costs only a few cents per application, making this quick method affordable and accessible for most people. Successful results look like noticeable lightening or removal of the red area before washing. Avoid scrubbing aggressively to prevent fabric damage and spreading the stain.
2. Types and Sources of Red Stains on White Clothing

Red stains on white shirts come from various sources such as food, drinks, bodily fluids, and cosmetics. Knowing the exact type of stain will help you choose the right method to remove it effectively without damaging your fabric.
Common Red Stain Types and Their Characteristics
Typical red stains include red wine, tomato sauce, blood, and makeup. Red wine stains contain tannins, which bind tightly to fabric fibers, making them tough to remove. Tomato sauce and ketchup are oily and acidic, often leaving a sticky residue after drying. Blood stains are protein-based and react negatively to heat, so cold water is essential for treatment. Makeup stains vary but often include pigments and oils that can set quickly if not addressed.
Each type requires a somewhat different approach. For example, red wine stains respond well to a brief soak in white wine or vinegar before washing, while blood stains need cold water rinsing and a detergent pretreatment. Makeup generally requires lifting excess product gently and applying a stain remover suited to oily or pigment-based substances.
Identifying Your Red Stain
Knowing the stain’s source is critical. Start by thinking about how the stain appeared: was it from eating, a spill, or makeup application? Check these clues:
- Red wine: Usually a dark red-purple splotch that spreads outward.
- Tomato sauce or ketchup: Thicker, sometimes with chunks and a sticky feel.
- Blood: A darker, sometimes brownish or rusty shade when dry.
- Makeup: Often has an uneven texture or smears, typically found around collars or sleeves.
- Other: Berries or paint can leave similar red marks but may have different textures or smells.
Accurately identifying the stain guides you to select the appropriate cleaning agent and avoid spreading or setting it further.
Why Different Red Stains Need Different Treatments
Red stains differ chemically. Red wine’s tannins create stubborn stains because they bind to fabric fibers. Tomato-based stains contain oils and acids that require different ingredients to break down. Blood’s proteins coagulate and bind when exposed to heat, so hot water will set the stain rather than remove it. Makeup combines pigments with oils and waxes, which must be treated separately to avoid color transfer or fabric damage.
Using the wrong cleaning method can cause the stain to set or ruin fabric fibers. For example, applying hot water or bleach to blood stains can make them permanent. Knowing the stain type lets you pick the right cold or warm water treatments, type of detergent, or soaking solution.
Practical Tips to Identify and Prepare Red Stains for Removal
Begin by gently dabbing the stain with a damp, white cotton cloth to see if color lifts without spreading. Avoid rubbing, which can make the stain penetrate deeper. Consider the following quick checklist to prepare your stain for treatment:
- Assess the stain’s texture and smell to differentiate between food-based and body-based stains.
- Note when the stain occurred, as older stains can be harder to remove.
- Check clothing labels for fabric care instructions to avoid damage during treatment.
- Avoid applying heat until the stain is completely removed.
- Do a spot test with your chosen stain remover on a hidden area first.
Test stain removers on an inconspicuous area before full application to avoid fabric discoloration or damage.
Examples of Red Stain Origins
Sources of red stains vary but often come from common activities like eating, drinking, or cosmetic use. Red wine is popular at meals and celebrations, while tomato sauce or ketchup is frequent in everyday cooking. Blood stains may appear after minor cuts or injuries, and makeup stains happen during dressing or touch-ups.
The origin often hints at the necessary care steps. For example, stains from food and drink usually benefit from pretreatment with enzymes or detergents to break down organic compounds, while blood and makeup may need a combination of cold water rinsing and specialized stain removers to avoid setting.
3. Essential Supplies Needed for Red Stain Removal
To effectively remove red stains from a white shirt, you need a set of specific cleaning supplies designed to treat such stains without damaging delicate fabrics. The right products and tools make the cleaning process more efficient and increase the chances of completely erasing the stain. Knowing which supplies to use and how they work for white fabrics will help you restore your shirt’s brightness.
Cleaning Agents for Red Stain Removal
Start with a stain remover that suits white fabric to avoid discoloration or damage. A 50-50 mix of white vinegar and water is a versatile, affordable home remedy that breaks down many red stains without bleaching the fabric. Alternatively, a mild detergent designed for white clothing helps lift stains gently yet effectively. For organic red stains, such as from fruit or wine, a 3% hydrogen peroxide solution may work because it has mild bleaching properties, but test a small hidden area first to ensure no damage occurs.
Commercial stain removers labeled safe for whites are convenient but check the label for fabric compatibility, avoid harsh chemicals on delicate fibers like silk or wool. When your shirt is delicate, apply a gentle stain remover or a solution of mild soap and vinegar to avoid damaging the fabric.
Essential Tools and Their Uses
Besides liquid cleaners, tools help you apply treatments efficiently and prevent stain spread. Blotting paper is ideal for absorbing excess stain without rubbing it deeper into fibers. A soft-bristled brush or an old toothbrush gently agitates the stain remover into the fabric, increasing its effectiveness. For scraping off dried stains, use a spoon or plastic knife carefully to avoid fabric damage.
Microfiber or cotton cloths are perfect to dab the stained area during treatment steps. Avoid harsh rubbing with towels that could fray the fabric or make stains worse. Cold water is important to rinse out stain removers as warm water can set certain protein-based stains.
Recommended Cleaning Supplies Checklist
Having these supplies ready before starting gives you better control over the stain removal process. Here is a checklist of must-have items:
- White vinegar (for dilution and soaking)
- Mild laundry detergent formulated for whites
- 3% hydrogen peroxide (test first on fabric)
- Blotting paper or paper towels
- Soft-bristled brush or old toothbrush
- Spoon or plastic knife (to lift dried residues)
- Microfiber or cotton cloth for dabbing
- Cold water supply for rinsing
Each item plays a specific role: vinegar and peroxide treat stains chemically, brushes and spoons apply physical support, and proper wipes help prevent spreading stain particles.
How to Use These Supplies Correctly
First, blot the stain gently with blotting paper to remove any excess liquid or residue without rubbing. Prepare a cleaning solution, such as the vinegar and water mix (half cup vinegar and half cup water), and soak the stained area for 15 to 30 minutes. Use a soft brush to work the solution into the fabric lightly but do not scrub aggressively to avoid fiber damage. For tougher stains, apply hydrogen peroxide sparingly, then rinse immediately with cold water.
After treatment, apply detergent directly on the stain and let it sit for 5 to 10 minutes before washing the shirt on a cold water cycle. Always handle red stains delicately and use cold water during rinsing and washing to prevent setting them deeper in the fabric.
Variations for Different Fabric Types
For white cotton shirts, the vinegar solution and mild detergent approach works well and causes no harm. Synthetic fabrics like polyester benefit from the same treatments but may require avoiding peroxide to prevent yellowing or damage. For delicate natural fibers like silk or wool, skip the peroxide entirely and use a gentle soap mixed with white vinegar in low concentrations. Avoid any abrasive tools or vigorous scrubbing on delicate clothes.
Test any cleaning agent on a small, hidden section before applying it to the stain. Should the color or texture alter, try a milder cleaning method or seek advice from a professional cleaner.
4. Step-by-Step Methods for Treating Different Red Stains
Different red stains require different treatments to achieve the best results without damaging your white shirt. Wine, tomato sauce, blood, and makeup each need specific approaches. Using the right home remedies and commercial products at the right time is key to fully removing these stains.
Removing Red Wine Stains Effectively
Red wine stains are acidic and can penetrate fabric fibers quickly. Acting fast helps prevent the stain from setting. Treating red wine stains with cold water and specific stain removers reduces their visibility significantly.
- Blot the stain immediately with a clean cloth to absorb excess wine without rubbing it.
- Pour cold water directly onto the back of the stain to push the wine out of the fabric.
- Mix a solution of one tablespoon of dish soap with two cups of cold water.
- Use a clean cloth or sponge to apply the solution gently to the stain in a blotting motion.
- Rinse the treated area with cold water to remove soap residue.
- Soak the shirt overnight in a mixture of ¼ cup hydrogen peroxide, ¼ cup white vinegar, and 1 tablespoon baking soda dissolved in one quart of cold water to help remove any lingering stains.
- Wash the shirt normally after soaking, but avoid using hot water until the stain is gone.
Using hydrogen peroxide and vinegar together breaks down the pigments, while baking soda helps lift the stain. Avoid rubbing, which can spread the stain or push it deeper.
Treating Tomato Sauce and Food-Based Stains
Tomato sauce contains oils and acids that can bind tightly to fabric fibers. An enzyme detergent or commercial stain remover designed for food stains works well here. Using home remedies with baking soda and dish soap can help break down the oils.
- Scrape off any excess tomato sauce carefully without spreading it.
- Flush the stained area under cold running water from the back to push the stain out.
- Create a paste by combining baking soda with a few drops of water, spread it over the stain, and allow it to sit for 15 minutes.
- Rub a liquid enzyme detergent or dish soap into the paste and let it rest for another 15 minutes.
- Rinse thoroughly with cold water and check if the stain lightened.
- Repeat the paste application or switch to a commercial stain remover spray if needed, following the product instructions.
- Launder the shirt according to the fabric care label, washing in cold to warm water.
Enzyme detergents contain proteins that break down food stains effectively. Avoid hot water before removing the stain because it can set tomato-based stains permanently.
Handling Blood and Makeup Stains Safely
Blood and some makeup stains respond best to cold water and enzyme-based products. Blood contains proteins that can coagulate and bind to fabric fibers, requiring careful treatment.
- Rinse the stain under cold water immediately to remove as much blood or makeup as possible.
- Soak the shirt in cold water for 30 minutes to loosen dried proteins.
- Apply an enzyme detergent directly to the stain or use a homemade mix of equal parts dish soap, hydrogen peroxide, and baking soda.
- Allow the solution to sit on the stain for 15 to 30 minutes.
- Rinse with cold water, then repeat if necessary, taking care not to use hot water until the stain is fully removed.
- Launder the shirt as usual in cold water with a good detergent.
Hydrogen peroxide works as a mild bleach here but test on an inconspicuous area first. Avoid hot water or harsh scrubbing that can embed blood stains further.
Using Home Remedies: Vinegar, Baking Soda, and Hydrogen Peroxide
These natural products offer affordable, effective stain removal for many red stains. Vinegar helps break down acids, baking soda lifts stains gently, and hydrogen peroxide serves as a mild bleach and disinfectant.
Combine equal amounts of dish soap, hydrogen peroxide, and baking soda to make a paste. Apply this mixture onto the stain and wait for 30 minutes before rinsing it off.
- Combine ¼ cup hydrogen peroxide, ¼ cup white vinegar, and 1 tablespoon baking soda in a basin of cold water.
- Soak the stained shirt in the solution overnight for tough or older stains.
- Remove the shirt and gently rub the stained areas to loosen residue.
- Rinse thoroughly with cold water.
- Launder the shirt following fabric care instructions.
- Apply a paste made from vinegar and baking soda to the stain and let it sit for 30 minutes prior to washing the shirt again.
This method costs just a few dollars for supplies and uses common household ingredients. It works on stubborn stains from food, blood, and wine but may slightly lighten very delicate fabrics. Always test these remedies on a small, hidden spot to prevent damage.
5. Optimal Washing and Drying Practices After Stain Treatment
Use cold or lukewarm water for washing your white shirt after treating red stains. Hot water can actually set stains further, making them harder to remove. Set your washing machine to a gentle or normal cycle based on your shirt’s fabric label, using a detergent formulated for whites or one with enzymes to break down protein-based stains like food or wine.
After applying a stain remover or detergent to the red mark, let it sit about 15 to 30 minutes before laundering. This waiting time allows the cleaning agents to work effectively. Oxygen-based bleach can be a good option for persistent or set-in stains, but avoid chlorine bleach unless the garment’s label explicitly says it’s safe. Use a diluted solution of one part bleach to three parts water to protect fabric fibers and prevent yellowing.
- Use cold or lukewarm water to avoid setting stains.
- Apply liquid detergent directly to the stain and wait 15, 30 minutes before washing.
- Choose enzyme-based detergents for protein or food stains.
- Dilute oxygen or chlorine-based bleach per product instructions, only if safe for your shirt.
- Always check the care label before choosing water temperature or bleach.
- Air dry the shirt until you’re sure the stain is completely gone.
- Repeat treatment if the stain remains before drying.
Air drying after washing is important. Heat from a dryer can permanently set any remaining traces of a red stain, so avoid tumble drying until you’ve confirmed the stain’s removal. Lay your shirt flat or hang it up to dry in indirect sunlight or a well-ventilated area. Once dry, inspect the stained area closely. If leftover discoloration is visible, retreat the spot and wash again.
Always air dry your white shirt until the stain is 100% removed to prevent permanent setting from dryer heat.
Keep in mind that enzyme detergents are effective on many red stains but may not work well with oily or tannin-based marks, where specialized stain removers or oxygen bleach might be needed. Also, consider that some delicate fabrics require cold water only and gentle cycles, so adjust your washing machine settings accordingly. Following these steps should preserve your shirt’s brightness while achieving the best possible stain removal results.
6. How to Check for Residual Stains and When to Re-Treat
After washing a white shirt, it’s important to carefully inspect the fabric for any leftover red stain traces before putting it in the dryer. The best way to check is under natural light, as indoor lighting might mask faint stains. Hold the shirt up and look closely at the area that was stained, paying attention to any slight discoloration or shadow that could indicate the stain hasn’t completely lifted. Run your fingers gently over the spot to feel for any different texture that might signal residual residue. When the stain seems faded but remains visible, you’ll probably need to treat it again.
Signs that a stain needs to be treated again include a persistent pinkish or reddish tint on the white fabric, as well as any blurry outlines where the original stain was. Sometimes a stain appears gone when wet but reappears once dry. Before drying, place the shirt flat against a white background to catch subtle remnants. This extra step prevents disappointment after drying, since heat from a dryer can set stains permanently, making them much harder or impossible to remove later. The risk of drying a shirt with even faint stains is losing the chance to restore the fabric’s brightness.
Spot leftover stain after washing? Apply your stain remover or soak the shirt again promptly, preferably within a few hours. Re-treatment typically involves soaking the shirt for 30 minutes to an hour in a solution suited to the stain type, such as diluted oxygen bleach or a targeted stain remover, and then rewashing as usual. Avoid waiting too long; fresh stains respond better to multiple treatments. For drying, air-dry the shirt until you are sure the stain is gone to avoid setting it with heat.
In cases where the stain is stubborn and resists removal after several attempts, consider using a specialized enzymatic cleaner designed for organic stains. Be sure to follow product instructions and test any cleaner on a hidden area first to prevent fabric damage. Remember to avoid harsh scrubbing, as it can weaken fibers and cause discoloration. Instead, apply treatments with gentle dabbing motions and check progress regularly.
Effective stain removal depends not only on the chosen method but also on timely and thorough inspection after washing. Taking the time to catch residual stains before drying is a small step that protects the long-term appearance of your white shirts. Consistent, careful checking and prompt retreatment will help keep your white shirts bright and free of red stains.
7. Common Mistakes and How to Avoid Damaging White Shirts
Using bleach on white shirts can cause damage if not done correctly. Bleach is strong and may weaken fabric fibers or cause yellowing, especially if left on too long or used on the wrong type of fabric. Always check your shirt’s care label before applying bleach. When the label shows the material is not safe for bleach, avoid bleach and opt for oxygen-based stain removers instead.
Another frequent mistake is using hot water on red stains. Hot water can set the stain permanently into the fabric, making it much harder to remove. Instead, use cold or lukewarm water to treat the stain initially. This keeps the stain from bonding more deeply with the fibers and allows stain removers to work better.
Overlooking the drying process is a common error that can ruin your efforts. Placing a stained or partially treated white shirt in the dryer will set the stain due to heat, making it nearly impossible to remove later. Air-dry the shirt until you’re certain the stain is gone. Spot any residue after washing? Treat the stain again before you put the shirt in the dryer.
- Do not apply bleach directly on the stain without diluting it according to product instructions.
- Always test bleach or stain remover on a hidden area before full use.
- Avoid mixing bleach with other cleaning chemicals; it can release harmful fumes.
- Use cold or lukewarm water when rinsing or pre-treating stains instead of hot water.
- Allow stain removers to sit only as long as recommended, usually 5 to 10 minutes, to avoid fabric damage.
- Air-dry stained shirts after washing to prevent heat setting stains.
- Check the care label and fabric type before choosing your cleaning products.
Protect your fabric by following these steps carefully. Correct bleach use involves diluting it properly and adhering strictly to the instructions on the label to minimize damage. Oxygen-based bleach or non-chlorine stain removers are generally safer alternatives for delicate cotton or blends. Treat stains promptly, and always rinse thoroughly after stain removal to get rid of any leftover chemicals that might weaken the shirt.
Taking time to read product labels and using cold water treatments reduce the chance of stains setting and preserve your shirt’s brightness. Avoid repeated harsh treatments or prolonged exposure to strong chemicals, as these can cause yellowing or fabric thinning over time.
8. Tips to Prevent Red Stains from Setting and Future Protection
Acting quickly is one of the best ways to prevent red stains from setting permanently on your white shirt. The moment you notice a stain, gently blot it with a clean white cloth or paper towel. Avoid rubbing, which can push the stain deeper into the fibers. If you have access to cold water, rinse the stained area right away to stop the dye from bonding with the fabric.
Using a protective spray designed for fabrics can add a valuable barrier against stains. Look for stain repellents that are safe for cotton or the specific fabric of your shirt. These sprays typically cost between $10 and $20 and can be found in the laundry aisle or online. Apply the spray according to the instructions, usually by spraying evenly on clean, dry shirts and letting them air dry before wearing. This treatment helps liquids bead up and prevents stains from settling into the fabric.
Adopting habits that reduce the chance of red stains can save time and keep your white shirts bright. Avoid eating or drinking highly pigmented foods and beverages like tomato sauce, red wine, or berries while wearing your white shirt. When you do, use a napkin and try to keep the shirt away from your mouth and hands. When laundering, separate whites from colored clothes to prevent dye transfer, and wash on the warmest temperature the fabric can tolerate, typically 104°F to 140°F for most cotton shirts.
Check the care label before washing and drying your shirt, especially if it says “dry clean only.” In those cases, do not try to remove stains yourself; instead, carefully blot any solids and take the shirt to a professional cleaner as soon as possible. For washable shirts, avoid drying the garment until you are sure the stain is gone, heat from the dryer can permanently set stains that were not fully removed.
Regularly treating your shirts with oxygen-based bleach tablets or powders can keep whites bright without harsh chemicals. Use according to package directions, usually adding them to your wash cycle along with your regular detergent. Avoid chlorine bleach on colored trims or delicate fabrics, as it can weaken fibers and cause yellowing over time.
Preventing red stains requires a mix of quick action, protective products, and good care habits. By addressing spots immediately, applying stain repellent sprays periodically, and following proper laundry routines, you reduce the risk of stains becoming permanent and keep your white shirts looking fresh longer.
Always blot tough stains gently with a clean cloth right away and avoid heat drying until you confirm the stain is completely removed; heat can make red stains impossible to remove.
Step-by-Step Action Plan for Removing Red Stains from Your White Shirt
Follow these clear steps to tackle red stains on your white shirt effectively and safely at home.
- Immediately after the stain occurs: Blot the stain gently with a clean cloth or paper towel to absorb excess liquid. Confirm the stain is less wet and not spreading further.
- Within 10 minutes: Rinse the stain under cold running water from the back of the fabric. The stain area should appear visibly lighter or partially removed.
- Before washing: Apply a stain remover suitable for the stain type (like an oxygen-based bleach for fruit juice or a detergent for tomato sauce). Let it sit for 5 to 15 minutes. Check that the stain looks faded after treatment.
- During washing: Wash the shirt in cold water using a gentle cycle and a mild detergent. Verify that the shirt remains in good condition without color fading.
- After washing: Examine the shirt inside and out for any remaining stain before drying. If the stain persists, repeat the treatment instead of drying.
- Before drying: Air dry the shirt to avoid setting the stain with heat. Confirm the stain is no longer wet or visible before ironing or using a dryer.
- After drying: Inspect the fabric again. Treat any residual marks promptly since dried stains are much harder to remove.
Frequently Asked Questions
Can I Use Bleach to Remove Red Stains from a White Shirt?
Bleach can remove red stains but may damage fabric if used too often. Test on a hidden area first to avoid weakening the shirt or causing yellowing.
How Long Should I Let Stain Remover Sit on a Red Stain?
Let stain remover work for at least 15 minutes before washing. This gives enough time to break down the stain for a better clean.
Can Cold Water Help Remove Red Stains from White Shirts?
Yes, soaking the stain in cold water helps prevent the stain from setting. Avoid hot water, which can cause the stain to become permanent.
Is It Safe to Use Baking Soda and Vinegar on All White Shirts?
Generally yes, but test on a small area first. Baking soda and vinegar remove stains without harsh chemicals but might affect delicate fabrics.
Should I Air Dry or Machine Dry My White Shirt After Stain Treatment?
Air dry your shirt to check if the stain is gone. Machine drying can set remaining stains permanently, making them harder to remove later.
Will Red Wine Set Faster Than Tomato Sauce on White Fabric?
Red wine usually sets faster due to its pigment and acidity. Treat red wine stains immediately to improve removal chances.
Key Points to Remember
Successfully removing red stains from your white shirt depends on prompt and appropriate action tailored to the stain type. React quickly, use the right cleaning agents, and avoid heat until the stain is gone to protect your shirt’s appearance. Start with blotting and rinsing now, then carefully treat and wash the shirt following these steps for the best results.