How to Get Armpit Stains Out of Shirts: 8 Effective Methods That Work
To get armpit stains out of shirts, treat the affected area quickly using a stain remover paste made from baking soda and water or soak the shirt in a mixture of water and white vinegar before laundering. For white shirts, applying 3% hydrogen peroxide can help break down the stain without damage. These approaches work best when matched to your shirt’s fabric and combined with proper washing habits.
This advice helps anyone dealing with yellow or white armpit stains caused by sweat and deodorant residue. You’ll learn effective methods tailored to different fabrics, what causes these stains, and how to prevent them for longer garment life.
Key Takeaways
- Soak stained shirts in one cup of white vinegar and two cups of water for 30 minutes to weaken armpit stains.
- Use a baking soda paste on stains, let it sit for 15 minutes to overnight, then wash normally for best results.
- Apply 3% hydrogen peroxide on white shirts for five minutes before laundering to target sweat stains safely.
- Choose stain removal methods based on fabric type to avoid damage and improve cleaning effectiveness.
- Check if your deodorant contains aluminum, which contributes to stubborn yellow stains on shirts.
- Let paste or soak treatments sit 20 to 30 minutes or longer for stubborn, set-in stains.
1. Best Ways to Remove Armpit Stains from Shirts

Removing armpit stains effectively depends on the fabric type and whether the shirt is white or colored. Homemade remedies such as baking soda, white vinegar, lemon juice, and hydrogen peroxide offer practical, affordable solutions. Baking soda works by breaking down residue, especially when mixed into a paste with hydrogen peroxide on white shirts. For colored shirts, vinegar soaks combined with gentle detergents tend to be safer to avoid fading. Hydrogen peroxide can bleach colors, so it’s best reserved for whites. Using these household items correctly requires proper steps to avoid damaging fabrics and to maximize stain removal.
Here’s a reliable method to treat armpit stains using common ingredients. The process varies slightly for white versus colored shirts. Older, set-in stains might need repeated treatment or overnight soaking. Avoid mixing bleach with vinegar or hydrogen peroxide, as this combination produces harmful fumes. For delicate fabrics like wool or linen, avoid hot water and strong bleach, opting instead for diluted vinegar or cold water soaks.
- Identify the fabric: Check the care label on your shirt. Use hydrogen peroxide and baking soda paste for white cotton or polyester shirts. For colored shirts or delicate fabrics like linen and wool, choose a vinegar soak or enzyme-based cleaner.
- Prepare a stain remover paste: For whites, mix ½ cup baking soda, 1 tablespoon salt, and 1 tablespoon hydrogen peroxide. For colored fabrics, soak the armpit area in 2 cups warm water with 1 cup white vinegar for 30 minutes.
- Apply the paste or soak: Spread the paste evenly over the stain if using the baking soda mixture, or soak the shirt’s armpit area if using vinegar. Gently rub the paste in to help break down the stain.
- Let it sit: Allow the paste to rest on whites for at least 30 minutes or up to one hour. For vinegar soaks, 30 minutes is sufficient to loosen the stain, but you may extend this to an hour for tougher stains.
- Rinse carefully: Rinse the treated area with cold water, avoiding hot water as it can set stains. Gently blot to remove residue without scrubbing harshly.
- Wash normally: Wash the shirt based on the care label instructions, using a mild detergent. Avoid using chlorine bleach on colored fabrics to prevent fading.
- Check before drying: Inspect the shirt after washing but before placing it in the dryer. Heat can set any remaining stain permanently. If the stain persists, repeat treatment before drying.
- Dry according to fabric: Air drying is safer, especially for delicate fabrics. For cotton or polyester, tumble dry on low or air dry, which helps preserve fabric integrity and prevent set stains.
This method uses inexpensive household ingredients with a typical cost under $5 for baking soda, vinegar, and hydrogen peroxide. The biggest benefit is controlling stain removal safely at home without harsh chemicals, but results may vary depending on stain age and fabric condition. Repeated treatments or commercial stain removers may be needed for older or tougher stains. Following fabric-specific instructions helps avoid weakening fibers or causing colour loss.
2. How Sweat and Deodorant Cause Armpit Stains
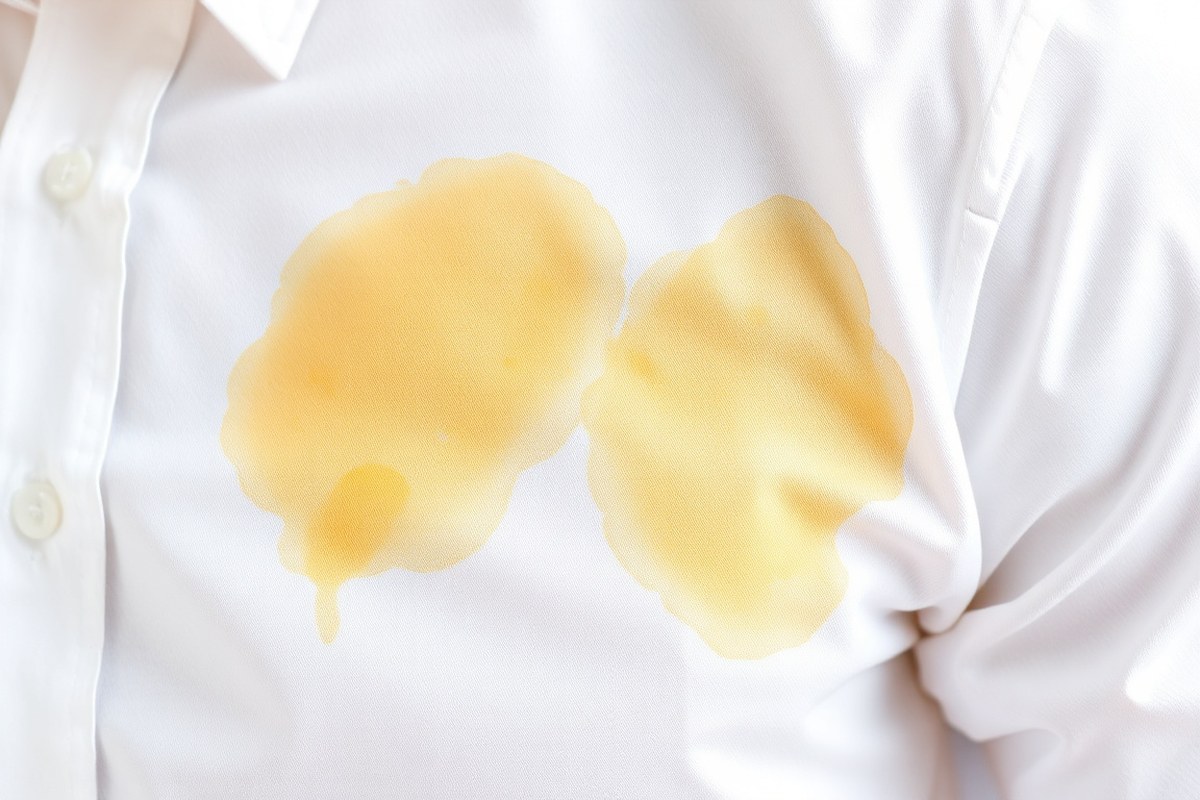
Armpit stains form when sweat interacts with deodorant and fabric fibers, creating a chemical bond that leaves behind discoloration. Sweat itself is mostly water mixed with salts, oils, and proteins from your body. When sweat mixes with antiperspirants containing aluminum compounds like aluminum zirconium, the aluminum binds with sweat components and fabric fibers. This reaction causes yellowish stains, especially on white and light-colored shirts, and can create a buildup that resists simple washing.
Deodorants vary in how much they stain because some contain more aluminum-based compounds than others. Anti-perspirants, which reduce sweating by blocking sweat glands, usually have higher aluminum levels. These compounds form tough residues that cling to fabric and attract body oils and dirt, creating stubborn discoloration. Deodorants without aluminum tend to cause fewer yellow stains, as they do not react chemically with sweat.
Hard water also contributes to stain formation. Minerals like calcium and magnesium in hard water can bind with sweat and deodorant residues. This mineral buildup on the fabric worsens staining and odor retention. Washing shirts in hard water might not rinse away these residues completely, making stains harder to remove over time. Using water softeners or detergents formulated for hard water can help reduce this effect.
Over time, repeated exposure to sweat, deodorant, and hard water minerals causes buildup that becomes crusty and difficult to lift out with regular washing. This is why stains grow more noticeable and resistant as shirts age. Frequent washing with cold water helps prevent sweat stains from setting. Washing warm or hot water can sometimes cause proteins in sweat to bind tighter to the fabric, making removal harder. It is important to follow the fabric’s care label to avoid damage while treating stains.
Applying a pretreatment, like soaking stains in a solution of lemon juice and warm water or a fabric rinse designed to break down residues, loosens the chemical bonds before laundering. Oxygen-based or enzymatic stain removers may also help remove set-in stains, especially when used at the hottest water temperature safe for your shirt’s fabric. Prompt washing after wearing can prevent the residues from forming dense stains that require more effort and cost to remove or might permanently damage your shirt.
Wash your shirts in cold water as soon as possible after use to prevent sweat and deodorant stains from setting and becoming permanent.
3. Choosing the Right Stain Removal Method by Fabric Type
Removing armpit stains depends on the fabric type and color of your shirt. White cotton or polyester shirts generally tolerate stronger stain removers like bleach, while delicate or synthetic fabrics need gentler treatments to avoid damage. Colored shirts require stain removal methods that protect the original dye from fading. A targeted approach based on these factors helps you safely and effectively remove stains without ruining your garment.
Cotton and Polyester Guidelines
Cotton and polyester are the most common fabric types in shirts and usually handle standard stain removal methods well. For white cotton or polyester, a diluted bleach solution works best to break down yellow sweat stains and deodorant buildup. Adding about 1/3 cup of Clorox™ Bleach during the wash cycle helps lift tough stains while brightening the fabric.
Older stains may require pre-treatment with a stain remover spray formulated for protein or grease stains before washing. Cotton fabrics withstand higher temperatures, so washing with warm water (around 104°F to 113°F) improve stain removal without fabric damage. Polyester tolerates similar conditions but avoid hot water to prevent shrinking or distortion.
Delicate and Synthetic Fabrics Care
Fabrics like rayon, silk, or those labeled as delicate need a gentler touch. Strong bleach or harsh chemicals can weaken fibers or cause discoloration. Use Woolite or specialized detergent for delicates, combined with cold water washing to preserve the fabric.
Synthetic fabrics such as polyester or nylon often trap sweat odors even after the stain is gone, so an enzymatic cleaner or OxiClean product targeted for old stains can help reduce smell. Patience is key, as synthetic materials do not always release stains and odors in one treatment. Always check the garment care label and spot test first on a hidden area to avoid surprise damage.
Color-Safe Treatment Options
Colored shirts present special challenges because stain removers with bleach may strip or fade dyes. Use oxygen-based bleach alternatives like Clorox 2™ for Colors Laundry & Fabric Stain Remover, which is safer on colored and blended fabrics, including those with a bit of spandex.
Pre-treat the stained area with a color-safe stain remover spray before washing on a gentle cycle in cold water. Avoid bleach or hot water to protect colors. For light deodorant marks, rubbing them with a dryer sheet or baby wipe can help remove residue without harsh chemicals.
Monitor the stain and fabric after each treatment. If fading or fabric stress appears, discontinue the method and switch to milder options or professional cleaning. Use the table below to quickly select the right stain removal approach based on the shirt’s fabric type and color.
| Fabric Type | Recommended Stain Removal Method | Water Temperature | Bleach Use | Color Safety | Additional Tips |
|---|---|---|---|---|---|
| White Cotton | Pre-treatment + Wash with Clorox™ Bleach (1/3 cup) | Warm (104°F-113°F) | Allowed | Not an issue | Use standard wash cycle per care label |
| White Polyester | Pre-treatment + Wash with Clorox™ Bleach (1/3 cup) | Warm (under 113°F) | Allowed, avoid hot water | Safe | Gentle agitation recommended |
| Colored Cotton/Blends | Pre-treatment + Clorox 2™ for Colors or Oxygen Bleach | Cold | Use color-safe bleach only | Required | Avoid chlorine bleach and hot water |
| Delicate Fabrics (Silk, Rayon, Wool) | Woolite or Gentle Detergent, pre-treatment if needed | Cold | No | Required | Test stain remover on hidden area first |
| Synthetic Fabrics (Polyester, Nylon) | Enzymatic cleaner or OxiClean for old stains | Cold to warm, below 113°F | No bleach | Required | May need repeated treatments to remove odor |
Following these guidelines allows you to match each shirt’s fabric and color with the safest and most effective stain removal method. This tailored approach reduces the risk of damage while maximizing stain removal success.
4. Step-by-Step Process for Treating Armpit Stains Effectively
Removing armpit stains from shirts involves pretreating the stain, soaking the garment, scrubbing if needed, rinsing, and washing according to the fabric’s care instructions. The whole process typically takes about one to several hours, depending on stain severity and method, with soaking times ranging from 15 minutes to overnight. Using cool or lukewarm water helps prevent stains from setting while working effectively with stain removers.
Preparing the Cleaning Solution or Paste
Choosing the right cleaning solution depends on your fabric and stain severity. Vinegar and baking soda offer effective, inexpensive DIY options, while commercial products like Tide with Ultra Oxi Powder provide powerful stain-fighting capabilities. Preparing a paste allows targeted pretreatment that penetrates deeply into the stain.
To make a baking soda paste, mix four tablespoons of baking soda with roughly one cup of lukewarm water until it forms a spreadable consistency. For vinegar soaking, fill a large bucket with cool water and add one cup of white distilled vinegar. Use a commercial oxygen-based cleaner by dissolving the recommended amount in warm water as directed on the product label.
Application and Soaking Times
First, apply the cleaning paste or spray to the armpit stain and allow it to sit long enough to break down the discoloration, generally between 15 minutes and 30 minutes. For stubborn or older stains, leaving the paste on overnight can improve results.
Soak the shirt completely in a vinegar or oxygen bleach solution for at least 30 minutes. Oxygen-based solutions can require soaking overnight for best stain lift and odor removal. Make sure to follow the shirt’s care label for water temperature limitations.
Washing and Drying Instructions
After pretreatment and soaking, rinse the shirt with cold water to remove loosened stain material and excess cleaning agent. Load the shirt into the washing machine and select a wash cycle using cold water, which helps prevent stain-setting. Use a detergent suitable for your fabric type, and avoid fabric softeners that might lock in residual stains or odors.
Avoid machine drying until the stain is fully removed; heat can permanently set stains. Instead, air dry the shirt and inspect the stain. Should the stain persist, repeat the pretreatment and washing steps. Once clean, turn the shirt inside out and sprinkle baby powder on the armpits after drying to absorb moisture and odors for future wear.
- Test your chosen cleaning solution on an inconspicuous area of the shirt for colorfastness.
- Apply the paste or spray the cleaning solution directly onto the stained armpit area.
- Allow the treatment to soak: 15 to 30 minutes for paste or spray; 30 minutes to overnight for soaking methods.
- Gently rub or scrub the treated area with a soft brush or cloth to loosen the stain.
- Rinse the shirt thoroughly with cold water to remove residue.
- Wash the shirt on a cold water cycle using appropriate detergent and settings for the fabric.
- Air dry the garment, avoiding heat sources that set stains permanently.
- Once dry, apply baby powder inside out on armpits if desired to help absorb future sweat and odors.
5. Common Mistakes with Armpit Stain Removal and How to Fix Them
Mixing bleach with vinegar, ammonia, or hydrogen peroxide is a common and dangerous mistake. These combinations can release harmful gases, so never combine them in the same cleaning process or basin. Instead, use oxygen bleach on whites, but always separately from vinegar or peroxide treatments. This prevents chemical reactions that could damage your clothes or pose health risks.
Washing stained shirts in hot water might feel like a good idea, but it often sets armpit stains deeper into the fabric. Stains caused by sweat and deodorant mixtures bond more firmly when exposed to heat. Use cold or lukewarm water instead, especially before treating the stain. This keeps the stain from becoming permanent and improves the effectiveness of your stain remover.
Skipping or rushing pretreatment usually leads to poor stain removal results. Armpit stains are made of sweat, body oils, and deodorants that penetrate fabric fibers. Applying a pretreatment solution like a mixture of water and hydrogen peroxide, or a crushed aspirin soaked in warm water for two to three hours, breaks down these residues before washing. Without this step, the stain often remains or reappears.
- Avoid combining bleach with vinegar, ammonia, or hydrogen peroxide because this can create dangerous gases.
- Use only cold or lukewarm water when washing stained shirts to prevent setting stains.
- Apply pretreatment solutions thoroughly and allow time to soak for best results.
- Avoid drying stained shirts in the dryer until stains are fully removed; air dry instead.
- After treating with vinegar, spray distilled water on the fabric and blot with a microfiber cloth to remove vinegar odors.
- Soak heavily stained shirts in ½ cup of vinegar diluted in hot water for 30 to 60 minutes before washing.
- Always wash shirts soon after treatment to prevent stains from setting in.
Drying stained shirts in the dryer is another error that fixes stains permanently. The high heat from dryers bonds the stain molecules into the fibers, making them almost impossible to remove later. After pretreating and washing, air dry your shirt to check if the stain is gone. Should the stain remain after the first treatment and wash, repeat these steps before applying any heat to dry the garment.
Avoid mixing any bleach with vinegar or peroxide and always air dry your shirt until the stain is completely gone to prevent permanent setting.
Tackling armpit stains requires patience and careful attention to chemical interactions and temperature. Using cold water, proper pretreatment, and separate cleaning agents will reduce the chance of staining mistakes and save your shirts from permanent damage.
6. Preventing Armpit Stains: Tips on Deodorants and Washing Habits
Stopping armpit stains before they start saves time and keeps your shirts looking fresh longer. A big cause of these stains is the reaction between aluminum compounds in most antiperspirants and your natural sweat. These ingredients can mix with body oils and laundry detergents to leave yellow or crusty marks. Switching to aluminum-free deodorants can reduce this chemical reaction and lower the chances of stains forming.
Choosing the right deodorant matters as much as how you care for your clothes. Look for products labeled “aluminum-free” or mineral salts deodorants like the Farmers’ Almanac mineral salts deodorant stone. Its 100% potassium alum formula prevents odor by creating an invisible film that inhibits bacterial growth yet leaves minimal residue that can stain fabrics. While these may cost a bit more, spending $5 to $10 on a safer deodorant is worth it compared to replacing stained shirts.
Beyond deodorants, how you wash and dry your shirts affects stain prevention. Stains can set permanently if shirts with underarm sweat aren’t treated before drying. Using cold water (under 80°F) helps preserve fabric and prevents the reaction that causes stains. Air-drying your shirts instead of using a dryer also stops staining from becoming permanent, especially on delicate fabrics.
- Switch to aluminum-free or mineral salt deodorants
- Wear breathable fabrics like cotton or moisture-wicking blends
- Check and pre-treat underarm areas before washing
- Use cold water cycles for laundry
- Air-dry shirts instead of using a dryer
- Follow fabric care labels closely to avoid damage
- Wash shirts promptly after wearing to prevent stains from setting
Breathable fabrics help by reducing sweat buildup that leads to staining. Moisture-wicking blends or natural fibers like cotton allow air circulation and keep skin drier. Be sure to check the underarms of your shirts each wash to catch spots early. Applying a stain remover or soaking those areas briefly before tossing them in the wash makes stains easier to eliminate.
Good laundry habits don’t just clean your shirts but protect them. Avoid high heat which can bake stains in and make them tougher to remove. If in a hurry, at least confirm the underarm stains are gone before drying. Following these tips consistently can significantly reduce discoloration over time and extend the life of your favorite shirts.
7. Homemade and Commercial Solutions Compared for Stain Removal
Both homemade solutions and commercial stain removers can effectively target armpit stains, but their pros and cons differ. Homemade remedies are often affordable and use natural ingredients, which lowers the risk of harmful chemicals affecting your clothes. Commercial products tend to be stronger and tailored for specific stain types but may carry higher costs and require careful use to avoid fabric damage.
Baking Soda and Vinegar Solutions
Baking soda is a popular household item for removing sweat and deodorant stains due to its mild abrasive and deodorizing properties. Mixing baking soda with water to form a paste and applying it to the stain can help lift color and odors after about 30 minutes of sitting time. Vinegar, diluted with water, can break down stain residues but should be thoroughly rinsed to avoid fabric damage.
Use a scrub brush designed for laundry or an old toothbrush to softly rub the baking soda paste into the fabric, focusing on a spot a bit bigger than the stain. After applying, wash the garment as usual. Using these natural cleaning agents can help protect your fabric from fading since they don’t contain strong chemicals, though tough stains might need several applications.
Hydrogen Peroxide vs Oxygen Bleach
Hydrogen peroxide at a 3% concentration works well on white shirts with protein-based sweat stains due to its bleaching action. You can create a paste by mixing hydrogen peroxide with baking soda and a mild soap, then scrubbing it into the fabric. Oxygen bleach is a milder alternative suitable for colored fabrics and allows a soak for 30 minutes to several hours, depending on stain severity. Both options help break down stain molecules but using peroxide on colors risks bleaching, so testing on a hidden area first is advisable.
Avoid combining hydrogen peroxide directly on top of vinegar-treated areas without rinsing, as this can reduce effectiveness and cause unwanted reactions. These treatments are more potent than basic homemade mixtures and usually require accurate measurements and careful timing to prevent fabric damage.
Top Commercial Stain Removers
Commercial products like Persil ProClean Stain Fighter are designed specifically for tough protein-based stains, including armpit marks. These products often contain enzymes and surfactants tuned for grease and sweat stains, providing a faster, more reliable solution. Applying a spray or gel before washing helps penetrate the fibers effectively.
Commercial removers may cost more than homemade solutions but reduce the number of treatments needed and offer convenience. Always follow label instructions, especially regarding fabric compatibility and wash temperature, to avoid damage. The table below compares popular homemade remedies and commercial solutions on key factors to help you decide what works best for your situation.
| Method | Key Ingredients | Best For | Estimated Cost | Application Time | Risks |
|---|---|---|---|---|---|
| Baking Soda Paste | Baking soda, water | Light to moderate stains on whites and colors | Less than $1 per treatment | 30 minutes before washing | Possible fabric abrasion if rubbed hard |
| Vinegar Solution | White vinegar, water | Odor removal and mild stains | Less than $1 per treatment | Soak 15-30 minutes, rinse well | Can weaken fabric if not rinsed |
| Hydrogen Peroxide Paste | 3% hydrogen peroxide, baking soda, mild soap | Stubborn stains on white shirts | About $0.50-$1 per treatment | Apply 10-15 minutes before washing | Risk of bleaching colored fabrics |
| Oxygen Bleach Soak | Oxygen bleach powder or solution | Colored fabrics and whites, moderate stains | $1-$2 per soak | 30 minutes to several hours soak | Overuse can weaken fabric fibers over time |
| Commercial Stain Remover | Enzymes, surfactants (varies by brand) | Severe or protein-based stains | $3-$7 per bottle (multiple uses) | Apply directly, wait 5-15 minutes before washing | May cause skin irritation; can damage delicate fabrics |
The choice between homemade and commercial stain removers depends on stain severity, fabric type, cost, and the chemicals you prefer to use. Homemade methods suit mild to moderate stains and regular maintenance with minimal expense. Commercial products offer targeted formulas for heavy stains but require careful application and a higher budget. Understanding these tradeoffs helps you pick the right approach for your shirts.
8. When to Seek Professional Cleaning or Replace Your Shirt
Professional cleaning can be helpful when home stain removal methods fail to completely lift armpit stains, especially those that have set after multiple washes. Dry cleaners use specialized solvents and targeted treatments that penetrate deep into fabric fibers without damaging the garment. These processes often involve pre-treating the stain with industrial-strength detergents and soaking the shirt at precise temperatures that are safe for the fabric type. For delicate materials like silk or wool, professional cleaners can apply gentle, fabric-appropriate techniques that safely remove odors and stains without shrinking or discoloring the shirt.
Knowing when to seek professional help depends on the stain’s severity and the shirt’s fabric. A dark or large stain, especially with a yellow buildup from sweat proteins and deodorant that’s resisted home treatment, calls for a professional cleaner. This becomes especially relevant with expensive or delicate shirts where aggressive home treatments risk damaging the fabric. Typical dry cleaning costs range from $5 to $15 per shirt, depending on location and fabric type. Rinse the shirt to clear away extra residue before taking it to the cleaner quickly to prevent the stain from setting.
On the other hand, replacing the shirt is advisable when the stain has deeply penetrated the fabric over many wears or when the fabric is already weakened or damaged. Signs that a shirt may be beyond cleaning include persistent discoloration after repeated treatment, areas where the fabric goes thin or breaks down, or an overwhelming odor that remains despite thorough washing and soaking. Shirts made from highly absorbent fabrics like cotton may suffer from these issues more frequently. At this point, continued attempts at stain removal risk wearing out the shirt further and wasting time and resources.
A professional’s approach usually starts with identifying the fabric type and nature of the stain. They use a combination of pre-soaking, enzyme-based detergents, and solvents tailored to the material. For stubborn sweat stains and odors, technicians often rely on hot water treatments at the highest safe temperature, as recommended by the American Cleaning Institute, combined with oxygen-based and enzymatic cleaning agents to break down the protein-based stains. This method offers a more powerful cleaning boost than typical home laundering. Following this, the garment is carefully dried and pressed to restore its condition.
Always check the garment’s care label before applying heat or chemical treatments to avoid fabric damage during professional or home cleaning.
Step-by-Step Action Plan to Remove Armpit Stains from Shirts
Follow these steps to tackle armpit stains effectively and bring your shirts back to life.
- Before washing: Apply a stain remover or a homemade paste of baking soda and water directly on the stain. Let it sit for 15-30 minutes to break down the residue.
- During washing: Wash the shirt in cold or warm water using a detergent designed for stain removal. Check the care label to avoid shrinking or damage.
- After washing: Inspect the stain before drying. If it’s still visible, repeat the pretreatment and wash again. Drying can set the stain permanently.
- For stubborn stains: Soak the shirt in an oxygen bleach solution (safe for whites and colors) for up to 8 hours, then wash again. The stain should lighten or disappear.
- Weekly maintenance: Use an enzyme-based detergent regularly and avoid fabric softeners in the armpit area to prevent buildup that causes stains.
- Before wearing: Choose a deodorant without aluminum compounds or let your deodorant dry completely to minimize yellowing over time.
- Monthly check: Examine your shirts for early signs of stains and treat promptly. Early action means easier removal.
Frequently Asked Questions
Can I Use Bleach on White Shirts to Remove Armpit Stains?
You can use non-chlorine bleach on white shirts if the fabric care label allows it. Chlorine bleach may weaken fabric fibers or cause yellowing, so test a small area first to avoid damage.
How Can I Remove Armpit Stains Caused by Deodorant Buildup?
Use a mix of baking soda and water to create a paste, then gently scrub the area. This helps break down deodorant residue without harming the fabric.
Are Natural Remedies as Effective as Commercial Stain Removers?
Natural remedies like vinegar or baking soda can be effective but may take longer. Commercial stain removers often contain enzymes that target protein-based stains like sweat for faster results.
Is It Safe to Use Hot Water When Washing Stained Shirts?
Avoid hot water; cold water prevents stains from setting deeper into fabric fibers. Hot water can cause armpit stains to become permanent, especially on protein or deodorant-based stains.
Will Repeated Washing Remove Old Armpit Stains on Cotton Shirts?
Repeated washing might not fully remove old stains; pretreating with stain remover or soaking in a special solution often works better. Cotton is durable but needs targeted stain treatment for best results.
How Often Should I Wash Shirts to Prevent Armpit Stains?
Wash shirts after each wear to prevent sweat and deodorant buildup that cause stains. Frequent washing with cold water and proper detergent keeps fabrics fresh and reduces stain risk.
Wrapping Up
Removing armpit stains takes patience and the right approach, but consistent care can keep your shirts looking fresh longer. Start by treating new stains quickly and adjust your deodorant and washing methods to prevent buildup. Taking one step today toward proper stain care can save your favorite shirts from permanent damage. Try pretreating your most stained shirt now, and see the difference in your laundry results.