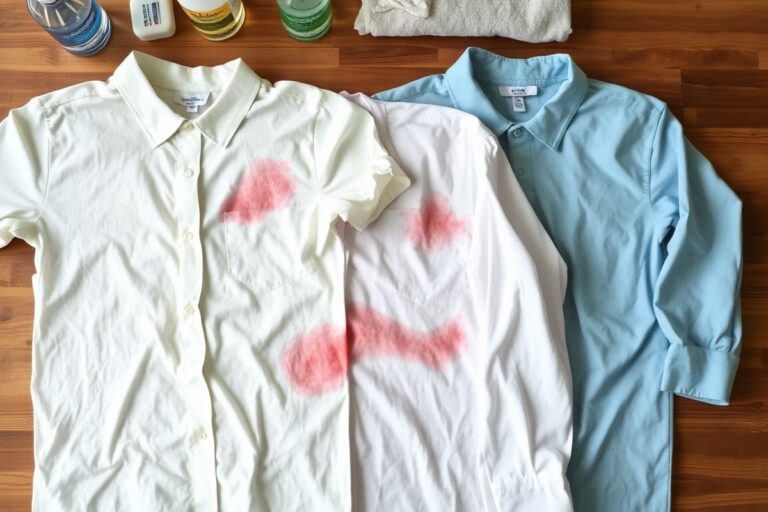
How to Dry Wash Clothes at Home: Complete Guide with Expert Tips
Learning how to dry wash clothes at home lets you clean delicate garments safely without trips to the dry cleaner. Using mild detergents and home kits designed for dry-clean-only items preserves fabric quality while saving money. This method suits people who want to maintain their wardrobe’s look and feel without relying on professional services.
This guide helps homeowners and renters with delicate or dry-clean-only clothes learn safe, effective techniques. You’ll get clear advice on fabric care, stain treatment, proper tools, and when to choose professional cleaning instead of DIY.
Key Takeaways
- Use lukewarm water and a mild detergent to hand wash 100% cotton and silk garments gently at home.
- Turn clothes inside out and soak them for 15 to 20 minutes before washing to minimize damage.
- Consider at-home dry cleaning kits like Dryel for safe cleaning of multiple loads without harsh chemicals.
- Follow garment care labels closely, especially dry cleaning symbols, to avoid fabric shrinkage or fading.
- Always test stain treatments on an inconspicuous area to prevent damage before full application.
- Dry clothes on low heat and air dry when possible to preserve fabric integrity and shape.
How to Dry Wash Clothes at Home Safely and Effectively

Dry washing clothes at home requires careful handling to protect fabrics while achieving a fresh, clean result. Using home dry cleaning kits designed for a tumble dryer offers a practical way to clean delicate garments marked “dry clean only,” especially those made from materials like silk, wool, or polyester. These kits typically include a specially designed bag and moist cleaning cloths that help release dirt and odors without harsh chemicals.
The basic process involves placing the garment inside the bag with the cleaning cloth, then using the dryer’s heat and motion to activate the cleaning agents on the cloth. It’s important to follow all instructions closely and check fabric care labels beforehand. Combining gentle steaming before or after dry washing can help reduce wrinkles and odors but avoid direct steam contact on heat-sensitive fabrics to prevent damage.
- Sort clothes by fabric type and weight to avoid uneven cleaning or damage during drying. Focus on garments labelled as safe for home dry cleaning or those you have tested for colorfastness.
- Insert the cleaning cloth into the special bag included in the dry cleaning kit. These cloths contain gentle cleaning agents activated by heat and motion inside the dryer.
- Place the garments inside the bag, making sure not to overcrowd it. Overstuffing restricts movement, reducing cleaning effectiveness and increasing the risk of fabric creasing.
- Seal the bag tightly according to the kit instructions. A well-sealed bag traps moisture and steam generated during the drying cycle, which cleans fabrics without rinsing.
- Run the dryer on a medium heat setting, usually for about 30 minutes, or as directed by the kit manual. Avoid high temperatures to prevent shrinkage or weakening of delicate fibers.
- Remove clothes promptly from the bag after the cycle ends to prevent wrinkles. Shake each garment gently to help release any loosened dirt or creases.
- Allow garments to air out on a hanger for 20 to 30 minutes before storing. This step helps remove any lingering odors and ensures garments dry completely.
- Use steam cautiously on garments after dry washing to smooth wrinkles, but keep the steamer at least a few inches away. For fabrics like silk or wool, test steam effects on a hidden area first to avoid water spots or fabric distortion.
Home dry cleaning kits typically cost between $10 and $20 per kit and can be reused for multiple garments, making them more economical than frequent professional cleaning. Look for kits from reputable brands and replace cleaning cloths as recommended. When done correctly, these steps help maintain fabric integrity and appearance while saving time and money.
Which Fabrics and Garments Can Be Dried Washed at Home?

Several fabrics commonly tagged “dry clean only” can be safely dry washed at home when you understand their care needs. Choosing home cleaning versus professional care depends on fabric type, garment construction, and the presence of delicate finishes. Use the table below to sort fabrics by suitability for home dry washing and professional cleaning.
Safe Fabrics for Home Dry Washing
Fabrics like silk, denim, wool, and velvet, despite often being labeled “dry clean,” can be effectively cleaned at home using gentle techniques. These materials tolerate mild detergents and lukewarm water, especially when hand washed or machine washed on a delicate cycle at low spin speeds. For example, washing a three-piece suit on a cold delicate cycle at 800 RPM can mimic dry cleaning effects without harsh solvents.
Cotton and linen, although not always dry-clean-only, also clean well at home with lukewarm water, preserving softness and structure while avoiding heat damage. Cleaning these fabrics at home not only saves money but reduces exposure to chemical solvents used in professional dry cleaning.
Fabrics Best Handled by Professionals
Extremely delicate materials or garments with complex construction usually require professional dry cleaning. Leather, suede, and extremely fine silks often fall into this category. These fabrics can easily shrink, distort, or lose their finish if exposed to improper cleaning or moisture. Structured garments with linings, padding, or glued components can also be damaged by home washing methods.
Professional dry cleaners use specialized solvents and equipment designed to clean without water, preserving fabric integrity and appearance. These services avoid the risks of color bleeding, shrinking, and fabric weakening that may result from home efforts on highly sensitive materials.
Warning Signs of Fabric Unsuitability
Look for garments that show one or more of these signs to decide against home dry washing: very delicate or heavily embellished surfaces, non-solid fabric blends prone to bleeding, or if the care label explicitly states “dry clean only” without a recommended home wash alternative. Garments that react strongly to water or show visible dye transfer when spot tested indicate a need for professional care.
When in doubt, test a small hidden area with water and mild detergent. If the fabric distorts, shrinks, or the color runs, it’s safer to choose professional dry cleaning. Improper home care can cause irreversible damage that shortens clothing life and costs more to repair or replace.
| Fabric Type | Common Label | Home Dry Washing Suitability | Professional Cleaning Recommended |
|---|---|---|---|
| Silk | Dry clean or Dry clean recommended | Yes, with hand washing or delicate cycle in lukewarm water | For fine or intricate silk garments |
| Wool | Dry clean or Dry clean recommended | Yes, gentle hand wash or cold delicate cycle | For heavily structured or heavily felted wool |
| Velvet | Dry clean | Yes, hand wash carefully | For cut pile or luxury velvet |
| Denim | Dry clean recommended | Yes, machine wash gentle or hand wash cold | Only for specialty designer denim |
| Leather & Suede | Dry clean only | No | Yes, mandatory professional care |
| Cotton & Linen | Often washable or dry clean recommended | Yes, lukewarm water and mild detergent | Rarely, only for heavily structured pieces |
Using this table as a decision guide helps you balance safety and effectiveness in cleaning your dry-clean-only clothes at home. It minimizes the risk of damage while supporting sustainable and cost-saving garment care habits.
Test a hidden spot with water and mild detergent before washing the entire garment at home; visible color runs or fabric distortion are red flags to skip DIY cleaning.
How to Treat Stains on Dry-Clean Only Clothes Without Damage
Stain treatment on dry-clean-only garments requires careful handling to avoid damaging delicate fabrics. Start by identifying the type of stain and fabric, then use a spot test to check how the fabric reacts to any remover. Treat stains gently with appropriate removers before proceeding with dry washing or refreshing methods at home.
Performing a Spot Test on Fabric
Spot testing reveals whether the stain remover or cleaning method will harm your garment. Choose an inconspicuous area such as a hem, inside seam, or underneath a collar. Avoid testing on obvious or heavily worn spots.
Use a cotton swab or clean white cloth to apply a small amount of the stain remover. Wait 5 to 10 minutes, then blot with a clean damp cloth. Look for signs of fading, discoloration, fabric texture changes, or residue. If damage appears, do not use that product on the stain.
This step costs nothing save your time and prevents costly damage to valuable clothes. Skipping it risks ruined fabric or color loss.
Choosing the Right Stain Remover
Select removers designed for delicate or dry-clean-only fabrics. Mild, solvent-free formulas are usually best because they avoid harsh chemicals that weaken fibers. For protein-based stains like blood or sweat, enzyme-based stain removers work well but test first.
For grease or oil stains, choose a degreasing spot remover made for fabrics, or use a small amount of mild dish soap diluted with water. Toner marks and ink require special solvent-based removers but only apply them sparingly and always spot test. Avoid bleach or strong alkalines.
Products range in price from $5 to $15 per bottle. Using the right remover reduces the chance of permanent stains and fabric weakening.
Applying Treatment Safely
Follow these steps to spot treat stains without damage. Always use a clean white cloth or cotton swab for precise application and avoid rubbing harshly, which can harm fibers or spread the stain.
- Identify the stain type and select an appropriate mild remover.
- Perform a spot test in an unseen area using the remover and wait at least 10 minutes.
- Blot the stain gently with the remover using a clean cotton swab or cloth. Avoid soaking the fabric.
- Let the remover sit on the stain for 5 minutes, then blot with a dry, clean cloth to absorb loosened stain material.
- Rinse the treated spot lightly with cold water if fabric allows, then blot dry immediately with a white cloth.
- Repeat if necessary, but never exceed three treatments to avoid fabric damage.
- Once dry, check the stain under good light before proceeding with any home dry washing or freshening.
Keeping treatments light and controlled helps maintain the fabric’s integrity and appearance. Overwetting or aggressive scrubbing risks shrinking, distortion, or color loss, especially on delicate garments.
Understanding Dry Cleaning Symbols and Labels on Clothes
Dry cleaning symbols on clothes tell you how the garment should be cared for, especially when you want to avoid shrinking, fading, or damage by water or heat. Most tags include a circle that indicates professional dry cleaning instructions. Different letters inside or below these symbols guide what solvents or methods are safe.
A plain circle means the garment should be dry cleaned professionally using any solvent. A circle with a “P” inside tells you the item must be dry cleaned with perchloroethylene or similar solvents; this is the most common symbol. The letter “F” inside the circle means only petroleum-based solvents should be used, which are gentler than perchloroethylene. An “A” means all solvents are allowed. If the circle has a line underneath, it indicates mild cleaning is recommended, such as using a gentle cycle or lower heat during drying. A circle with a cross over it means no dry cleaning at all.
Decoding these symbols helps you decide whether to attempt dry cleaning at home or if professional care is necessary. For example, garments marked with a “P” or “F” usually require solvents found only in commercial machines, so at-home methods may not fully replicate the cleaning process but often can freshen clothes safely. Symbols with a line underneath suggest you should choose gentler home dry washing products and avoid heat that could damage fabric. Avoid anything marked with a crossed-out circle or those stating “Do Not Wash” or “Dry Clean Only” unless you want to risk damage.
Some labels list a combination of symbols regarding washing, bleaching, drying, and ironing along with dry cleaning directions. Consult the entire tag before deciding. For example, a dry clean symbol with a hand wash symbol means hand washing might be possible with caution. Pay particular attention to materials like leather and suede, which almost always require professional care.
There are cases where you can ignore the dry cleaning symbol cautiously, such as if the item is lightly soiled and made from washable fabric blends like polyester or some silks. Steaming or using home dry cleaning kits designed for mild cleaning works well here. Steaming freshens the garment without wetting it and can be a safe alternative for clothes that are not stained or heavily soiled. Always test on a small hidden area first to check for colorfastness.
Understanding these symbols doesn’t require special equipment but does need careful reading of each tag before cleaning. Taking this step prevents costly shrinkage or fabric breakdown. Decoding and following label instructions ensures your clothes stay in good condition longer and helps you decide which dry cleaning tasks can move from the dry cleaner to your home. Your willingness to follow label instructions often saves wear and tear, even if you choose your own gentle home methods rather than professional solvents.
Essential Tools and Products for Home Dry Washing
For home dry washing, safe cleaning agents are key to protecting delicate fabrics while effectively removing dirt and odors. Mild, water-based detergents specially formulated for delicates work best. Avoid regular laundry detergents with harsh enzymes or bleach, as these can damage fibres. Products labeled as “wool wash” or “silk wash” usually have pH-balanced formulas and gentle surfactants. Mixing a homemade solution with a teaspoon of borax, a tablespoon of vinegar, and a small amount of dry oxygen bleach in about one cup of water creates a mild, eco-friendly cleaning mix suitable for delicate garments. Adding a few drops of your favorite essential oil can provide a fresh scent without staining or residue.
Home dry cleaning kits can be helpful but are not strictly necessary. These kits typically include a reusable bag and cleaning cloths pretreated with solvents designed to freshen clothes in a dryer’s heat. They’re convenient, costing around $10 to $20, and gentle enough for many dry-clean-only fabrics. However, their cleaning power is limited to mild refreshment and slight deodorization rather than heavy stain removal. You can save money by using your own gentle detergent solution combined with manual spot treatment for stains. Choose a kit that specifies non-toxic solvents and has clear instructions for fabric types to avoid damage.
Additional tools can improve your results and reduce risk. A small spray bottle allows you to apply your homemade cleaning solution precisely and avoid oversaturating delicate areas. A soft-bristle brush or cloth lets you gently rub spots without rough friction. For drying, a clean towel to lay garments flat and absorb moisture prevents misshaping. A mesh laundry bag helps hold pieces securely if using a gentle tumble in your dryer with the home dry cleaning kit. Also, a clothing steamer or iron with a steam setting can help remove wrinkles after cleaning without pressing too hard on delicate fibres.
When selecting detergents, read labels carefully. Avoid ingredients such as chlorine bleach, strong alkalis, optical brighteners, and fabric softeners, which can strip finishes or cause discoloration. Detergents with enzymes break down protein-based stains but can damage wool and silk. Test any product on an inconspicuous fabric patch first, allowing it to sit 5 minutes before rinsing to check for adverse reactions. Store all cleaning solutions out of reach of children and pets, and follow product instructions for dilution and use. Use lukewarm water no hotter than 90°F (32°C) when dissolving powders or mixing solutions.
Use a spray bottle to apply cleaning solution only where needed, preventing water marks and fabric distortion during dry washing.
Common Mistakes When Dry Washing at Home and How to Avoid Them
One of the biggest risks when dry washing clothes at home is causing shrinkage or damage by using the wrong method. Over-wetting garments that are labeled “dry clean only” can stretch fibers or cause them to lose their shape permanently. For example, wool should never be soaked completely or hung wet because that encourages distortion. Instead, use just enough cleaning solvent or a gentle water spritz during the dry wash process. Avoid rubbing or wringing fabrics, which weakens fibers and leads to pilling or holes over time.
Using the wrong detergent or hot water can also harm delicate materials. Regular laundry detergents often contain enzymes or brighteners that strip color or damage fabric finishes. Mild, gentle detergents designed specifically for delicates help preserve the integrity of your clothes while still removing soil. Always hand wash with cool or lukewarm water, ideally below 80°F, to prevent heat-related shrinkage. Hot water and harsh chemicals increase the risk of fading and fiber breakage, so they should be avoided entirely for dry-clean-only garments.
Drying technique is another critical factor. High heat, like from a tumble dryer, can cause severe stress on textiles. Air drying flat or on a padded hanger reduces shrinking and maintains the garment’s original shape. Avoid directly hanging wet wool or silk as gravity can stretch the fabric. Instead, gently press out excess moisture with a towel, reshape by hand, then lay flat to dry in a well-ventilated area away from direct sunlight or heat sources.
- Don’t wash dry-clean-only clothes in a regular washing machine cycle.
- Use a mild, delicate detergent instead of standard laundry soap.
- Keep water temperature below 80°F when hand washing.
- Limit moisture, use only a light spray or solvent application.
- Air dry flat or on padded hangers; avoid tumble drying.
- Turn garments inside out inside a mesh bag to reduce abrasion.
- Iron on low heat on the garment’s reverse side if needed.
Following these precautions helps prevent common mistakes like excessive shrinkage, unwanted fading, and broken fabric fibers. They require patience and care but save you from costly damage. Recognizing when the fabric is too fragile or the stain too stubborn to handle at home is also key. Professional dry cleaning remains the safest option for many delicate or structured pieces.
How to Dry and Store Clothes After Dry Washing to Preserve Quality
Drying and storing dry-clean-only clothes carefully after home cleaning helps preserve their shape and fabric quality for a longer time. Air drying away from direct heat and light prevents shrinking, while proper steaming and ironing keep garments looking crisp without damage. Good storage practices protect fabrics from wrinkles and extend freshness.
Air Drying Techniques for Delicate Clothes
Air drying is the safest method to dry dry-clean-only garments. Avoid heat sources like dryers or direct sunlight, which can cause fading, shrinking, or warping. Instead, use a well-ventilated area and suitable drying tools to maintain the original fit and texture. Follow these steps for effective air drying:
- Gently reshape the garment to its original form right after washing or spot cleaning.
- Lay it flat on a clean towel if the fabric is fragile, such as silk or cashmere, to avoid stretching.
- Use a padded hanger or a clothes airer with wide bars to hang sturdier fabrics like wool or polyester blends without deforming the shoulders.
- Place the drying rack or hanger in a shaded, well-ventilated room with moderate temperature (around 65°F to 75°F).
- Turn the garment inside out to reduce colour fading.
- Allow 12 to 24 hours for complete drying, depending on the fabric thickness and room humidity.
- Check periodically for damp spots or mildew and adjust the position to promote even drying.
Air drying keeps delicate fabrics intact and prevents damage from heat or tumbling action. Avoid hanging knits or heavy fabrics by the hem, as this can stretch them out.
Using Steam and Ironing Safely
Steaming is preferable for freshening clothes after air drying. It relaxes fibers and removes wrinkles without direct heat contact. Use a handheld steamer or the steam function on an iron set to the appropriate temperature guided by the care label. When ironing is necessary, lower heat settings and a pressing cloth reduce the risk of shiny marks or burns common on delicate fabrics like silk or wool. Here’s how to proceed:
- Check the fabric care label for recommended ironing temperatures. For example, silk generally requires a low heat setting, while synthetics need medium heat.
- Turn the garment inside out to protect the visible surface from direct heat.
- Place a thin cotton cloth or ironing press cloth over the fabric to create a buffer.
- Test the iron on a hidden area first to ensure no damage occurs.
- Use slow, gentle movements without applying too much pressure.
- For steaming, hold the steamer 6 to 12 inches away from the fabric and move evenly to avoid over-wetting.
- Hang the garment immediately after steaming or ironing to maintain shape.
Steaming costs vary, with handheld steamers priced from $25 to $70. Ironing requires no extra cost but demands more care to avoid fabric harm.
Storage Solutions to Prevent Wrinkles
Proper storage helps keep dry-clean-only clothes fresh and wrinkle-free between wears. The goal is to minimise creasing, protect from dust, and allow fabrics to breathe. Consider these tips:
- Use wide, padded or wooden hangers for jackets, blouses, and dresses. They maintain shoulder shape better than wire or thin plastic hangers.
- Fold knitwear or delicate items like sweaters to avoid shoulder stretching, placing tissue paper between folds to reduce creasing.
- Store clothes in breathable garment bags made of cotton or muslin. Avoid plastic bags that trap moisture and can cause mildew or yellowing.
- Keep storage areas clean, dry, and away from direct sunlight or heat sources that fade color or degrade fabric fibers.
- Rotate seasonal clothes periodically to prevent permanent fold marks and fabric stress.
- Use cedar blocks or lavender sachets inside closets or drawers to deter moths naturally without harsh chemicals.
Following these storage guidelines can extend the life of your dry-clean-only garments, maintaining their fresh appearance and shape through repeated wear and cleanings.
When to Seek Professional Dry Cleaning Instead of DIY
Some clothes and stains are too delicate or complex for home dry washing, making professional dry cleaning the safer choice. Garments with heavy stains, such as oil, ink, or set-in food spots, often require industrial solvents and expertise to remove without damage. Similarly, expensive fabrics like silk blends, intricate beading, or heavily pleated materials carry a higher risk of shrinking, color loss, or structural change if not handled correctly.
Recognizing irreversible damage risks starts with the garment’s care label and understanding the fabric’s sensitivity. Labels stating “Dry Clean Only” usually indicate that water or at-home solvents could harm the fabric or finish. Signs of damage include color bleeding, distortion of shape, or a persistent odor after spot treatment. When stains have been left untreated for weeks or involve substances that penetrate deeply, the chance of removing them with home products decreases, so professional cleaners can offer safer, more effective solutions.
Choosing professional dry cleaning becomes more cost-effective and less risky especially for suits, wool coats, and designer garments where appearance is critical. Since professional machines use thicker drum tubes, clothes avoid wire creases or marks and emerge cleaner. Plus, pros use precise solvent temperatures and times you won’t replicate at home, which preserves fabric strength and shape. The average professional dry cleaning cost ranges between $6 and $15 per item, varying by fabric complexity and location.
Use this decision checklist to determine if professional cleaning is necessary: If the item has heavy, stubborn stains; is made of sensitive fabric like wool or silk; contains embellishments or linings that might be damaged by home solvents; or if the care label specifically forbids water-based or at-home cleaning methods, then professional service is the better choice. Also, if previous at-home attempts caused shrinkage or fabric weakening, avoid repeating DIY methods on that garment.
When looking for a dry cleaner, seek out those with certifications from textile care organizations or positive reviews highlighting careful handling. Ask about their processes, whether they use modern gentle solvents or traditional perchloroethylene techniques, and confirm their experience with your garment type. Trustworthy cleaners will also provide a pre-cleaning inspection and inform you of any risks before proceeding.
Attempting home dry washing on garments with heavy stains or delicate embellishments often leads to irreversible damage, so it’s safer to choose a professional cleaner for these cases.
Step-by-Step Action Plan for Dry Washing Clothes at Home
Follow these steps to start dry washing your clothes safely and confidently. Each phase helps you check if your process is working well.
- Before You Start: Read your garment’s care labels and test a small hidden area with your chosen dry wash product. Look for no color change or fabric distortion.
- Day 1: Gather essential tools like a dry cleaning kit, gentle stain remover, clean towels, and a mesh garment bag. Ensure your workspace is clean and well-ventilated.
- Day 2: Pre-treat visible stains using a suitable stain remover, applying it gently and blotting rather than rubbing. Confirm the fabric’s reaction stays normal.
- Day 3: Place clothes inside the dry cleaning kit bag with the cleaning cloth or solution as per the instructions. Run your dryer on a low heat setting for the recommended time.
- Day 4: Remove the clothes promptly and hang them on padded hangers to air out. Feel for any remaining dampness or odors.
- Day 5: Spot check garments for missed stains or damage. If any issues appear, adjust your stain treatment or consider professional cleaning.
- Weekly: Repeat this process only for suitable fabrics and items you feel confident managing. Track results to refine your approach.
Frequently Asked Questions
How Do People Dry Clean Clothes?
Professional dry cleaning uses chemical solvents instead of water to clean garments gently, protecting delicate fabrics. Home dry cleaning kits use steam and gentle detergents to mimic this process on a small scale.
Why Are My Clothes Still Wet After Being Dried in the Dryer?
Clothes can stay wet if the dryer is overloaded or the lint filter is clogged, reducing airflow. Cleaning the filter and drying smaller loads improves drying efficiency and prevents damp clothes.
Can I Wash and Dry Clothes in 1 Hour?
It’s possible with quick wash and dry cycles, but delicate or dry-clean-only clothes may require longer, gentler care to avoid damage. Use appropriate settings to protect fabrics when in a hurry.
What Is the Correct Order of Doing Laundry?
Sort clothes by color and fabric, treat stains first, wash with suitable detergent, then dry according to fabric care instructions. Proper order protects clothes and improves cleaning results.
Can I Use Regular Detergent for Dry Clean Only Clothes?
Regular detergent is usually too harsh; use mild detergents or products designed for delicate and dry-clean-only fabrics to avoid damage.
Does Dry Washing at Home Remove Odors Fully?
Home dry cleaning can freshen clothes but may not fully eliminate strong odors; professional cleaning is better for tough smells.
Wrapping Up
Dry washing clothes at home saves time and protects many delicate fabrics when done carefully. Start with small, less valuable items to gain experience before tackling your full dry-clean-only wardrobe. Your next step should be to identify which garments you want to try this on first and prepare your dry cleaning kit accordingly.