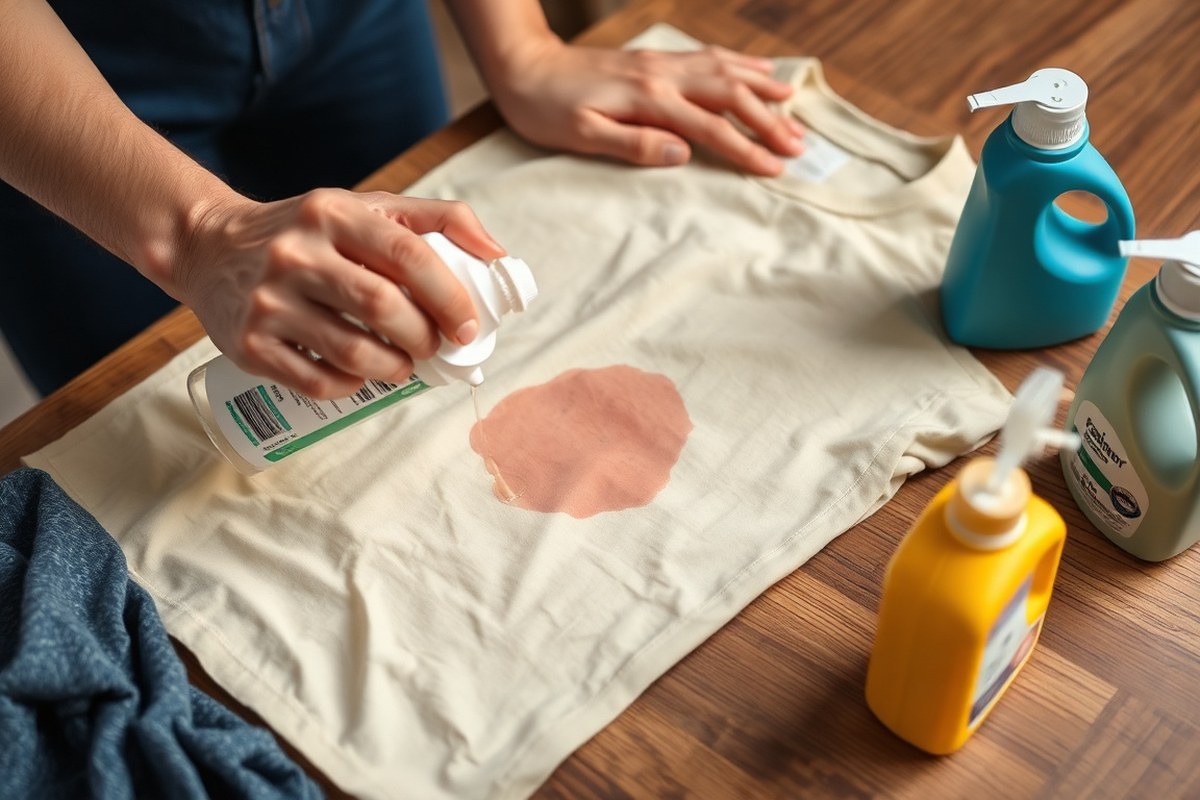
How to Remove Stains from Clothes: 8 Proven Methods for Best Results
Removing stains from clothes effectively starts with quick action, targeted treatment, and using the right cleaning agents. Soak, pretreat, or spot clean stains based on their type and fabric to avoid setting them permanently. Knowing how to remove stains from clothes successfully can save time and keep your garments in good shape.
This advice benefits anyone facing common mishaps like sweat, coffee, or grease stains. You’ll find practical methods tailored to different stain materials, fabric types, and severity levels, helping you restore your clothes with confidence at home.
Key Takeaways
- Start stain removal as soon as possible to prevent permanent setting.
- To tackle sweat stains, immerse the fabric in a solution made of 2 cups water combined with 1 cup white vinegar for 30 minutes before laundering.
- Use cold water and 3% hydrogen peroxide for stubborn protein stains on white fabrics.
- Apply stain-specific products like Carbona Stain Devils for better results on tough stains.
- Let stain paste treatments sit for at least 30 minutes before washing.
- Flipping saturated garments during soaking ensures even stain treatment.
1. How to Remove Stains from Clothes Step-by-Step

Act quickly when a stain appears to improve the chances of removing it completely. Start by checking the care label on your garment, as this will guide you on the safest water temperature and cleaning methods for the fabric. Pretreating the stain and soaking if necessary help break down stain particles before washing. Using enzymatic detergent is key because enzymes target protein-based stains like sweat, food, or blood effectively. Cold water is generally best for rinsing and washing stained clothes to prevent setting the stain further with heat. Follow these steps to tackle most stains from spotting through laundering:
- Blot the Stain Immediately. Use a clean cloth or paper towel to blot (not rub) the stain gently; this lifts excess stain material without spreading it. Avoid hot water, which can set protein stains.
- Check the Fabric Care Label. Confirm the recommended water temperature and any warnings (e.g., no bleach). For delicate fabrics like silk or wool, proceed more cautiously or seek professional help.
- Apply Pretreatment. Use an enzymatic detergent or a dedicated stain remover directly on the stained area. Gently rub it in with your fingers or a soft brush. For tough protein stains, apply a cold water rinse first, then pretreat.
- Soak When Needed. Submerge the item in cold water combined with enzymatic detergent for 30 to 60 minutes. For sweat stains, soak in a solution made from 2 cups of water and 1 cup of white vinegar for half an hour. On tough protein stains found on white fabrics, try soaking in cold water with some 3% hydrogen peroxide prior to treating again.
- Wash on the Appropriate Cycle. After pretreating and soaking, machine wash the garment following care instructions, using cold water and an enzymatic laundry detergent. Adding a little borax for extra stain-fighting power and soaking in the washer for another 30 minutes can help remove tough stains on sturdy fabrics.
- Air Dry and Inspect. Avoid using a dryer until you confirm the stain is gone. Heat can permanently set the stain. Instead, air dry your garment and check. When the stain doesn’t come out, apply pretreatment and wash the garment once more.
This process minimizes damage and improves stain removal success. Acting fast and avoiding heat on stains like coffee, blood, or sweat is essential. Delicate fabrics require gentler treatment and sometimes professional care. Using the right temperature and enzymatic detergents allows stain particles to break down effectively, saving your clothes from permanent marks.
2. Choosing the Right Method for Different Stain Types

Identifying stain types helps you pick the best treatment and avoid damaging the fabric. Stains usually fall into three broad categories: protein-based like blood or poop, oil or grease-based like cooking oil or lipstick, and dye-based like ink or coffee. Protein stains respond well to enzymatic detergents and warm water, whereas oil stains need solvents or specialized removers. Dye stains often require alcohol-based solvents or peroxide treatments. Organic stains from living things, like food or blood, generally behave differently than synthetic stains such as paint or ink, which may need stronger or targeted chemicals.
Matching stain types to treatments depends on fabric type and stain age. For example, fresh grease stains can be treated by blotting excess oil, then applying a high-performing remover like Tide Ultra Oxi Boost, which outperforms many products specifically designed for grease. Ink stains may require specialized removers such as Amodex, which works well on permanent ink and foundation makeup. General-purpose removers like Stingray work across categories but may need repetition for tough grease stains.
| Stain Type | Recommended Treatment | Fabric Suitability |
|---|---|---|
| Protein (blood, poop) | Hydrogen peroxide or enzymatic detergent with warm water (poop stain: use warm water to rinse) | Most washable fabrics; test peroxide first |
| Oil/Grease (cooking oil, lipstick) | Blot excess, then use Tide Ultra Oxi Boost or Kiss-Off Stain Remover (for lipid stains) | Durable fabrics like cotton; delicate fabrics may need gentle solvent spot cleaning |
| Dye-Based (ink, coffee, foundation makeup) | Alcohol-based solvents like Amodex or peroxide-based bleach (test on hidden area first) | Colorfast fabrics; avoid on delicate or non-colorfast items |
| Mixed (blood and grease, coffee and oil) | Pre-treat with general remover like Stingray plus targeted cleaning (e.g., solvent for ink, enzymatic for protein) | Depends on fabric; gentle methods for delicate materials |
| Organic (grass, sweat) | Baking soda and hydrogen peroxide solution or enzymatic detergents | Most fabrics; test peroxide on sensitive ones |
| Synthetic (paint, shoe polish) | Alcohol or solvents for spot cleaning; avoid soaking | Sturdy fabrics; always test solvents on hidden spots |
Choose treatments carefully based on stain type to avoid setting the stain or damaging fabric. For example, peroxide is great for blood but may bleach colored items, so test it first. Removing excess grease by blotting before applying remover reduces chances of spreading the stain. Alcohol-based solvents can dissolve ink or synthetic dyes better than standard detergents but may harm fabric if overused. The cost varies widely: Tide Ultra Oxi Boost and general enzymatic detergents run about $5 to $10 for a bottle, while specialized removers like Carbona’s Stain Devils or Amodex cost around $4 per small bottle, making it practical to keep a few on hand for targeted use.
Always test stain removers on a hidden area before full treatment to prevent fabric damage or discoloration.
3. Safe Home Remedies for Removing Clothes Stains
You can use common household products like baking soda, vinegar, hydrogen peroxide, lemon juice, dish soap, and rubbing alcohol to safely remove stains from your clothes. These remedies often work well on sweat, blood, ink, and grease stains when used correctly. Testing each solution on a hidden area first helps prevent damage to your fabric or color.
Baking Soda and Vinegar Mixtures
Baking soda is a versatile and inexpensive option that helps lift stains by absorbing moisture and neutralizing odors. White vinegar acts as a mild acid that breaks down stain molecules, especially effective against deodorant stains caused by aluminum in antiperspirants. Combining these two ingredients creates a bubbly paste that can loosen various stains safely on most fabrics.
To treat a common stain, combine ½ cup baking soda with 1 tablespoon salt and 1 tablespoon white vinegar to form a paste. Spread the mixture over the stain and gently work it into the fabric. Let it rest for a minimum of 30 minutes before rinsing or laundering as normal.
- Wring out any excess water from the stained garment.
- Mix ½ cup baking soda, 1 tablespoon salt, and 1 tablespoon white vinegar to form a paste.
- Apply the paste evenly over the stain.
- Rub the paste gently with a soft brush or your fingers to work it in.
- Let the fabric sit undisturbed for 30 minutes.
- Rinse the area with cold water.
- Wash the garment according to fabric care instructions.
- Check stain removal before drying and repeat if necessary.
Hydrogen Peroxide and Lemon-Based Treatments
Hydrogen peroxide works as a mild bleaching agent useful for organic stains like blood or wine, but it can cause discoloration on colored fabrics, so always test first. Lemon juice provides a natural whitening effect, especially on berry or juice stains, but extended exposure or sunlight during treatment may fade some fabrics.
To remove blood stains, dab the affected area with cold water, then apply hydrogen peroxide directly to the stain. Let it bubble up and rest for about 5 minutes before blotting it with a clean cloth. Repeat carefully if needed. For berry or juice stains, soak the fabric with lemon juice for 15 minutes, preferably after pouring boiling water over the stain to loosen it.
Alcohol and Dish Soap for Grease and Ink Stains
Grease stains respond well to dish soap, which breaks down oils effectively. A clear dish soap, like Dawn Platinum Dishwashing Liquid, performs well and is cost-efficient. Applying a small squirt and letting it sit for 15 minutes before washing can remove stubborn grease. For ink stains, isopropyl alcohol works by dissolving the ink pigments, although it is best used on durable fabrics.
To treat a grease stain, first blot excess oil, sprinkle some baking soda or cornstarch to absorb fresh grease, then rinse it off. Next, apply dish soap to the greasy area, let it sit for 15 minutes, and wash normally. To tackle ink stains, dampen a cotton ball with rubbing alcohol and gently blot the stain, avoiding rubbing which can spread the ink.
4. Handling Old, Set-In, and Dried Stains Effectively
Old, set-in, and dried stains can often be faded significantly but rarely removed completely, especially if they’ve been dried with heat. Using a soaking method with products containing oxygen bleach or enzyme-based cleaners works best. Plan on soaking clothes for several hours, sometimes up to 24, and repeat treatments to improve stain removal without damaging fabric.
Why Old Stains Are Hard to Remove
Stains that have dried or gone through the dryer become bonded with fabric fibers, making them tougher to break down. Heat from drying sets protein-based stains, oils, dyes, and pigments more permanently. This is why starting stain removal as soon as possible is critical. However, for older stains, prolonged soaking helps loosen these bonds.
Realistic expectations are needed: while some old stains will fade enough to be less visible, deep-set stains often leave faint marks. Knowing when a stain won’t fully disappear helps avoid wasting time or damaging clothes by over-treating.
Soaking Solutions That Work
Use cold or warm water, never hot, unless the care tag allows it, to soak stained garments. Oxygen bleach powders like those found in Dirty Labs Bio Enzyme Laundry Booster or Tide Clean & Gentle Powder make good soaking agents. Adding 2 to 4 tablespoons per gallon of water usually works well. These break down pigments and organic stains without harsh chemicals.
Commercial enzyme-based removers or pretreatment sprays with enzymes also help, especially on protein stains like blood or grass. Allow the garment to soak fully submerged for 6 to 24 hours depending on the stain’s severity. Avoid chlorine bleach except on white, durable fabrics.
Timing and Concentration Guidelines
Set soaking times between 6 and 24 hours to allow thorough stain loosening. For slightly set-in stains, a 6- to 12-hour soak often suffices. More stubborn stains require 24 hours of soaking with fresh solution changed midway.
Be sure to check the water temperature and product concentration, too strong or hot can damage delicate fabric. Follow product label instructions for exact amounts, but err on the side of lower concentration for delicate or colored items to prevent fading.
Repeat Treatments and Progress Checking
After soaking, gently rub the fabric between fingers or with a soft toothbrush to help lift loosened stain particles. Then launder as usual in the warmest water safe for the fabric. Avoid putting the garment in the dryer unless you confirm the stain’s gone, because heat sets stains permanently.
If the stain persists, repeat the soaking and laundering steps. Sometimes multiple cycles are needed for old, set-in stains. Always check after each wash by holding the garment up to light or comparing stained areas to unstained sections.
Adjusting Techniques for Different Stains and Fabrics
Oil stains set in drying can fade with longer soaking in enzyme or oxygen-based cleaners, but stubborn grease might need a degreasing pretreatment. Paint stains on kids’ clothes showed good removal after prolonged soaking with enzyme boosters, as enzyme cleaners break down dried proteins and some pigments.
For colored cotton, use color-safe oxygen bleach and avoid high heat. Protein stains like blood respond best to enzyme soaking at warm temperatures, while pigment-based stains like red wine may need repeated oxygen bleach soaks but might leave some discoloration.
5. Tips for Protecting Fabric and Color While Removing Stains
Protecting fabric and color during stain removal requires careful testing and attention to fabric type. Always check care labels and perform spot tests on hidden areas before full application. Avoid harsh chemicals like bleach on delicate or colored fabrics, and watch for signs of fabric damage during treatment.
Reading and Understanding Fabric Care Labels
Start by locating the care label on the garment to know which cleaning methods and products are safe. This label usually gives you washing temperature limits, bleaching restrictions, and drying instructions. For example, if the label advises against bleach or recommends cold water wash, avoid chlorine bleach and hot water treatments.
Delicate fabrics such as silk, wool, rayon, and acetate often require special care. They may only tolerate gentle, non-bleach stain removers or professional cleaning. Synthetic fabrics like polyester and nylon are generally more durable but still need caution with strong chemicals.
Performing a Spot Test Safely
Before applying any stain remover, pick a small, hidden area of the fabric, like the inside hem or seam, and apply a small amount of the product. Let it sit for 10 to 15 minutes, then check for any changes to color or texture. Avoid using the product on fabrics that discolor, weaken, or become sticky.
This test costs only a few minutes and nothing more than a cotton swab or clean cloth. It helps prevent irreversible damage or fading on the visible front of your clothes.
Choosing Products That Protect Color and Fiber
Traditional chlorine bleach can weaken fibers and strip color, especially if used repeatedly or in large amounts. Alternatives like oxygen-based stain removers (e.g., products with hydrogen peroxide) provide effective cleaning without harsh effects on dyes.
White vinegar is another gentle option, safe for many fabrics if applied carefully and rinsed thoroughly. Avoid using harsh solvents and abrasives on delicate or synthetic fabrics.
Signs of Fabric Damage During Stain Treatment
Watch for these warning signs while treating stains:
- Color fading or spotting in treated areas
- Fabric texture becoming brittle or thin
- Stretching, shrinking, or puckering of fabric
- Sticky residues remaining after rinsing
Notice any of these issues? Stop treatment at once, rinse the garment well with cool water, and lay it flat to air dry. Avoid using heat or scrub walls in these cases, as damage may worsen.
Checklist for Protecting Fabric and Color
- Check the fabric care label for washing and treatment instructions
- Always perform a spot test with the chosen stain remover on an inconspicuous area
- Choose color-safe, non-bleach products for bright or dark fabrics
- Avoid repeated or heavy use of bleach, especially on delicate fabrics
- Rinse thoroughly after treatment to remove residue or chemicals
- Look for changes in color or texture before proceeding with full stain removal
- Unsure about the fabric or stain type? Get advice from a professional cleaner.
Stop treatment immediately if the fabric starts to fade, weaken, or change texture during stain removal.
6. Common Mistakes When Removing Stains and How to Fix Them
Treating stains incorrectly can make them harder to remove or even permanent. Avoid applying heat, like ironing or dryer drying, before the stain is fully gone. Heat causes many stains, such as protein-based or dye stains, to set into fabric fibers. Rinse stained areas gently with cold water first to prevent the stain from binding more tightly.
Over-washing can wear out fabric and cause residual stains to embed deeper. Using harsh chemicals or scrubbing too hard may damage fabric or spread the stain. Applying stain remover repeatedly without rinsing or letting it sit beyond the recommended time can also backfire.
Act quickly when a stain stays after washing. Do not put the garment in the dryer, as the heat will set the stain permanently. Instead, follow these corrective steps based on the type of stain and fabric:
- Rinse the stain with cold water from the back to flush out residue.
- Reapply a suitable stain remover or a mix of mild detergent and water, letting it soak for 10 to 30 minutes.
- Gently blot or rub the treated area without damaging the fabric.
- Wash again on a gentle cycle with appropriate water temperature for the fabric.
- Air dry only after confirming the stain is gone.
Use a decision tree approach for stubborn stains:
- Is the stain fresh? Immediately rinse with cold water before applying any treatment.
- For set-in stains: Pretreat using an enzyme-based stain remover or oxygen bleach that fits the fabric type.
- After washing: Check if the stain persists before drying. When stains persist, repeat pretreatment and washing, or consider specialized treatments (e.g., hydrosulphite for dye stains).
- Fabric sensitive? Skip harsh chemicals; try gentle options like soap and cold water or seek professional cleaning advice.
Failures often happen because of impatience or guessing the stain type. Taking measured, fabric-safe actions can save clothes and prevent costly replacement. Stains like underarm yellowing or ring collar marks show up often, proper timing and temperature control make correction practical and affordable.
7. Removing Stains from Different Fabrics and Colors
Delicate fabrics like silk and wool require gentle stain removal to avoid damage or color loss. Use cold water and avoid harsh detergents or aggressive scrubbing. For silk, test any stain remover on a hidden spot first because many products, such as dishwashing liquids like Dawn, are not recommended for silk. Wool should be treated with mild, wool-friendly detergents and lukewarm water to maintain fiber integrity.
Colored clothes need stain removal methods that protect color vibrancy. Avoid bleach or oxygen-based powders on colored fabrics unless the product specifically states it’s safe for colors. Using dark-colored cloths to blot stains on white or light garments can cause dye transfer, making the stain worse.
Commercial stain removers are not always safe for every fabric. Some contain chemicals that can degrade delicate fibers or fade colors. Products formulated with oxygen bleach tend to be gentler and more effective on delicate fabrics compared to chlorine bleach. For example, Restoration oxygen-bleach-based powder can clean delicate fabrics thoroughly without harshness. Still, always check the product label and test a small hidden area before full application. Below is a table summarizing fabric-specific stain removal tips, with warnings about what to avoid and when to use certain products:
| Fabric Type | Recommended Water Temperature | Safe Stain Removers | Warnings |
|---|---|---|---|
| Silk | Cold water | Mild detergents, specialized silk stain removers | Avoid dishwashing liquids like Dawn, avoid scrubbing, test first |
| Wool | Lukewarm water | Wool-friendly detergents, gentle oxygen bleach products | No bleach, avoid agitation and hot water |
| Colored Fabrics | Cold water unless otherwise specified | Color-safe stain removers, oxygen bleach (if safe for colors) | Do not use chlorine bleach, no dark cloth blotting on light colors |
| White Fabrics | Cold or warm water | Chlorine bleach (if fabric safe), oxygen bleach powders | Avoid using dark-colored cloths to blot stains |
This approach helps keep your clothes safe from damage and color fading during stain removal. Use cold water as a default since it reduces the risk of setting many stains, but adjust according to fabric type and product instructions. Testing stain removers beforehand gives you an idea of how your fabric will react. Avoid aggressive rubbing or using unsuitable stain removers; they can weaken fibers or cause permanent damage.
8. When to Call a Professional Cleaner for Stain Removal
Some stains and fabrics require professional attention because home treatments may cause more damage or fail to remove the stain completely. Permanent stains like those from bleach, dye transfer, or certain inks can be too risky to handle on your own. Fragile fabrics such as silk, wool, and leather often react poorly to water-based or abrasive treatments, making professional cleaners better equipped with specialized solvents and controlled processes.
Recognizing when fabric or dye is fragile is key. Look for care labels stating “dry clean only” or warnings against certain detergents. Fading, bleeding colors, or weak fabric texture also signal caution. Garments with embellishments, sequins, or delicate stitching should not be treated at home because DIY stain removal could ruin their appearance or structure. The decision to go to a professional cleaner should consider these factors:
- Type of stain: permanent marker, bleach spots, or dye stains
- Fabric sensitivity: silk, wool, leather, and embellished materials
- Garment value: costly or sentimental pieces
- Failed home treatment attempts that did not improve the stain
- Label instructions recommending professional cleaning only
- Potential damage from improper cleaning such as shrinking or color bleeding
Professional stain removal generally costs between $10 and $30 per item but can vary based on the garment and stain complexity. Expect advanced techniques including dry cleaning, solvent applications, and careful spotting done manually. The results include restored fabric without color loss or damage. Attempting to get these results without professional tools or knowledge often results in persistent stains, fabric weakening, or uneven discoloration.
Avoid scrubbing a stain on delicate fabric; it can wear away fibers and spread the stain further.
Garments that usually need professional cleaning for stain removal include formal wear, wedding dresses, suits, and vintage clothing. Stains like ink, gum, oil, and wine on these items are best handled by experts to preserve fabric integrity. Calling a professional is safer when the fabric’s dye process is unknown or when unsure about the risk of setting the stain permanently by the wrong treatment. Before sending an item in, point out the stain location and type to help the cleaner choose the most effective method.
Step-by-Step Action Plan for Removing Stains from Clothes
Follow these steps carefully to tackle stains as soon as possible and improve your chances of complete removal.
- Immediately after staining: Blot the stain gently with a clean, dry cloth to absorb excess liquid without rubbing, which can spread the stain.
- Within 10 minutes: Rinse the stained area under cold running water to flush out as much of the stain as possible.
- Before washing: Apply a stain remover or a safe home remedy appropriate for the stain type you identified; let it sit for 5 to 10 minutes to break down the stain.
- During washing: Wash the garment in the warmest water safe for the fabric, checking care labels carefully, to maximize stain removal without damaging fabric or color.
- After washing but before drying: Inspect the garment; if the stain remains, repeat the treatment instead of drying since heat can set the stain permanently.
- For old or set-in stains: Soak the fabric for several hours or overnight in a solution recommended for the stain and fabric type, then proceed with washing.
- When unsure or for delicate fabrics: Test any treatment on a hidden seam first to avoid fading or damage, then continue only if safe.
- If stain persists after multiple attempts: Consider taking the item to a professional cleaner experienced with difficult stains, especially for valuable or delicate clothes.
Frequently Asked Questions
Can a Stain Be Removed After a Long Time?
Some old stains can be removed, but it’s harder and may need stronger treatments. Soaking fabrics longer or using enzymatic detergents can improve results.
What Removes Permanent Stains?
Products like Amodex Ink & Stain Remover work well on tough stains like ink and foundation. Using specialized stain removers often beats regular detergents for lasting marks.
What Is the Hardest Stain to Remove from Clothes?
Permanent ink and dried foundation makeup are among the toughest stains to lift. They often require targeted stain removers and careful treatment to avoid damaging fabric.
What Gets the Tough Stains Out?
Enzymatic laundry detergents combined with early treatment help remove tough stains like grease, oil, and blood. Pretreating promptly improves success.
How Do I Remove Crayon Stains from Clothes?
Scrape off excess crayon, then apply detergent or stain remover before washing. Cooler water prevents melting the wax further.
Can Sunlight Help Remove Stains from Clothes?
Yes, sunlight can lighten stains naturally, especially on whites. Place damp clothes in the sun for a few hours after treating stains.
Before You Go
Removing stains effectively depends on acting quickly and choosing the right treatment for the fabric and stain. Always be cautious with heat and harsh chemicals to protect your clothes’ color and texture. Start by identifying the type of stain you’re dealing with today, treat it gently, and see the difference in your laundry routine. Taking the first step now can save you fabric and frustration later.