How to Upholstery Cleaning 8 Steps for Deep, Safe Fabric Care
Mastering how to upholstery cleaning means using the right tools and methods specific to your furniture’s fabric type. Focus on gentle, effective techniques like vacuuming weekly and spot treating stains promptly. Properly cleaning upholstery protects your investment and keeps your furniture looking fresh longer. This is essential for homeowners and renters aiming to maintain fabrics safely without causing damage.
This article is for those who want to deep clean their upholstered furniture with confidence. You will learn how to identify fabric cleaning codes, choose the best cleaning solutions, tackle stains, and care for your upholstery to extend its life safely and efficiently.
Key Takeaways
- Check the upholstery tag for cleaning codes: W, S, or SW to select the correct cleaning solution.
- Vacuum upholstery weekly to remove dust but do deep clean or stain treat every 3 to 6 months.
- Test any cleaning product on a hidden fabric area to prevent discoloration or shrinkage.
- Use water-based cleaners for W-coded fabrics like polyester and solvent cleaners for S-coded natural fibers.
- Spot treat stains by spraying a cleaner, waiting 5 minutes, then blotting gently with a clean cloth.
- After cleaning, let upholstery air dry completely for at least 4 to 6 hours to avoid mildew.
1. How to Clean Upholstery Safely and Effectively
Cleaning upholstery at home requires a careful approach to avoid damaging the fabric while achieving fresh, stain-free results. Start by checking the upholstery tag for cleaning codes, which guide the safest cleaning method. Always test any cleaner on a hidden area to prevent shrinkage or color loss. Applying solutions gently and allowing enough drying time will protect your furniture and keep it looking its best. Follow these steps for an effective and safe upholstery cleaning process:
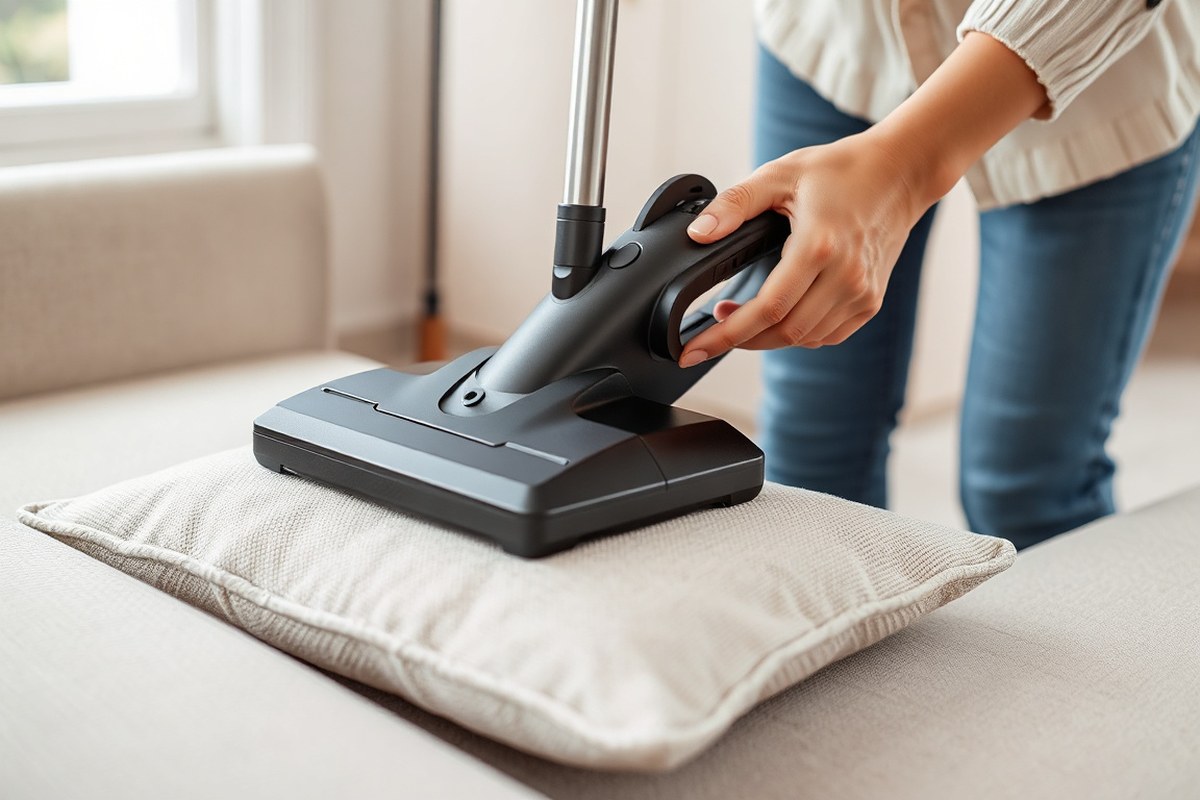
- Use a vacuum fitted with an upholstery tool to clean the fabric well. Remove dust, dirt, and loose particles from the surface to keep grime from settling deeper during cleaning.
- Check the fabric cleaning code. Look for letters on the upholstery tag: W means use water-based cleaners like soap and water; S means solvent-only cleaners, such as dry cleaning solvents; SW allows either water or solvent-based cleaners; and X means vacuum only, no liquids. This step ensures you choose a cleaning method that won’t damage your fabric.
- Prepare or select an appropriate cleaning solution. For W or SW fabrics, mix mild soap with warm water or create a DIY solution using baking soda and white vinegar to freshen and clean stains. For S fabrics, apply a dry cleaning solvent to a clean towel. Avoid soaking the fabric to prevent water damage.
- Apply the cleaning solution gently. Use a soft cloth or sponge dipped in the cleaner and wrung out well. Work in small sections, starting from an inconspicuous spot. Blot or brush lightly instead of scrubbing to protect the fabric fibers.
- Rinse off any soap residue carefully. When using water-based cleaners, lightly dampen a cloth with clean water and blot the area to remove soap. Avoid overwetting as excess moisture can cause shrinking or mold.
- Blot excess moisture and allow time to dry. Use a dry towel to absorb any leftover dampness. Then, let the furniture air dry for 4 to 6 hours in a well-ventilated area. Avoid direct sunlight or heat sources, which can damage delicate fabrics.
- Repeat as needed for heavily soiled areas.Address any leftover stains by spot cleaning according to the fabric’s care label. This approach helps keep the fabric looking uniform and avoids damage.
Monthly vacuuming and yearly deep cleaning help keep upholstery in good condition. Using the correct cleaning method based on fabric type avoids shrinkage, color fading, or weakened fibers. Drying completely after cleaning prevents mold and unpleasant odors, ensuring your upholstered furniture stays fresh and lasts longer.
2. Identifying Upholstery Fabric Types and Cleaning Codes

To clean upholstery effectively without damage, start by finding and understanding the fabric’s cleaning code. This code is on the furniture label and tells you which cleaning methods and products work best for that material. Following the code helps prevent shrinking, color loss, and fabric distortion.
Locating the Upholstery Cleaning Code
Most upholstered furniture has a manufacturer’s tag attached to a seam or underneath a cushion. Check under removable cushions, on the underside of the furniture, or around the frame for a small fabric label. The code is usually a single letter or a combination of letters printed on this tag.
Labels can be hidden or worn, so look carefully with good lighting. If you can’t find a tag, inspect the material type visually or consult the furniture manual. Spot test any cleaning product on an inconspicuous area to avoid surprises.
Meaning of W, S, WS, and X Codes
The cleaning codes guide which solutions and methods are safe:
- W: Use water-based cleaners only.
- S: Use solvent-based cleaners (dry cleaning solvents), no water allowed.
- WS: Water-based or solvent-based cleaners are safe.
- X: Vacuuming only, no water or solvents.
These codes focus on protecting fabric finish, color, and structure. For example, water can cause damage to some natural fibers, while harsh solvents can dissolve dyes or finishes.
Always spot test a cleaning method to avoid unexpected fabric damage or color fading.
Common Fabric Types by Cleaning Code
Understanding fabric blends helps you decide on the safest cleaning. For instance:
- W: Natural fibers like cotton, linen, or blends that handle water-based solutions well.
- S: Silk, velvet, or synthetic upholstery that reacts poorly to water but tolerates dry cleaning solvents.
- WS: Polyester blends or treated fabrics that allow a wider choice of cleaners.
- X: Leather, suede, or delicate antique fabrics, where moisture or chemicals can cause lasting damage.
Knowing the fabric type along with the code helps you select the right product and avoid repeated or aggressive cleaning that damages fibers.
Why Following Cleaning Codes Matters
Disregarding cleaning codes risks shrinking, color bleeding, surface texture loss, and weakness in the fiber structure. Applying water to an S-coded fabric can leave water stains or cause shrinking. Using solvent on a W-coded fabric may dissolve the dye or finish. Over time, ignoring these codes leads to costly repairs or replacement.
Be cautious with moisture. Excess liquid encourages mold and mildew growth inside cushions and frames. Cleaning codes help avoid these problems by guiding you to gentle methods suited to the specific fabric. When you spot clean, use these steps:
- Identify the cleaning code on your upholstery label.
- Select a cleaner that matches the code’s instructions.
- Spot test in a hidden area for 10-15 minutes.
- Dab the stain gently with a cloth; never rub hard.
- Allow time to dry thoroughly before use.
3. Tools and Cleaning Solutions for Upholstery
To clean upholstery effectively, you’ll need the right tools and cleaning solutions tailored to your furniture’s fabric. Essential tools include vacuum attachments, soft brushes, and microfiber cloths. Both homemade and commercial cleaners work well, but selecting the proper type, water-based or solvent-based, depends on your upholstery’s cleaning code, which guides safe use.
Essential Tools for Effective Cleaning
Start with a good vacuum cleaner that has upholstery attachments to remove dust and crumbs. A handheld vacuum or one with a crevice tool helps reach tight areas like seams and under cushions. You’ll also want soft-bristle brushes to loosen dirt gently without damaging fabric fibers. Microfiber cloths are excellent for applying cleaning solutions and blotting excess moisture during spot cleaning.
Other useful tools include a spray bottle for homemade cleaners, a bucket or bowl for mixing solutions, and rubber gloves to protect your skin. For deeper cleaning, a steam cleaner can be used on fabrics rated for water-based cleaning.
- Vacuum with upholstery and crevice attachments
- Soft-bristle brush for gentle scrubbing
- Microfiber or lint-free cloths
- Spray bottle for homemade cleaners
- Bucket or mixing bowl for solutions
- Rubber gloves for skin protection
- Optional: steam cleaner for water-safe fabrics
Having these tools on hand makes the cleaning process more effective and helps prevent damage to delicate upholstery.
Homemade Cleaning Solutions by Fabric Type
Homemade upholstery cleaners can be budget-friendly and effective, using common household ingredients. For fabrics labeled “W” (water-based cleaning), mix a tablespoon of dish soap in a gallon of warm water. Another option for fabric upholstery is a solution of 1/4 cup white vinegar, 3/4 cup warm water, and one tablespoon of dish or Castile soap.
These mixtures work well for general cleaning in small sections. Spray the solution lightly, then gently scrub and blot with a microfiber cloth. Avoid saturating the fabric to prevent damage or water stains.
For upholstery marked “S” (solvent-only), homemade water-based cleaners aren’t safe. You can attempt spot cleaning with a dry cleaning solvent approved for your fabric to avoid damage. Always test any homemade solution on an inconspicuous area before cleaning the entire piece.
Commercial Cleaner Options and Safety
Commercial upholstery cleaners offer specialized formulas for various fabric types. Look for products that specify compatibility with your upholstery cleaning code (“W,” “S,” or “W/S”). Popular brands often provide gentle, fabric-safe formulas or solvent-based options designed for tough stains.
When using commercial products, follow label instructions exactly. Use gloves and ensure proper ventilation if the product contains solvents. Avoid mixing different cleaners as this may cause harmful reactions or fabric damage.
Prices for upholstery cleaners vary, typically between $8 and $20 per bottle, depending on size and brand. Investing in a cleaner suited to your fabric’s type improves results and reduces the risk of damage.
When to Choose Water vs Solvent Cleaners
Check your furniture’s care tag to determine the cleaning code: “W” means use water-based cleaners, “S” means solvent-based only, and “W/S” indicates either type is safe. Upholstery marked “X” should be vacuumed and brushed only, not cleaned with liquids.
Water-based cleaners work well on synthetic and natural fabrics that can tolerate moisture without shrinking or spotting. Solvent cleaners are necessary for delicate or non-water-safe fabrics like silk or certain wools, where water could cause stains or shrinkage.
In practice, start with a water-based cleaner if your fabric allows it. Reserve solvent-based products for persistent stains or when the code specifically requires them. Always spot test any cleaner, work in small sections, and overlap your strokes for even cleaning without oversaturating the fabric.
4. Spot Treating Stains on Upholstery
Identifying the stain type helps you choose the safest and most effective cleaning method. Common stains include oil-based spots like grease or lotion, water-based spills such as coffee or juice, ink marks, and food stains. Look closely: oily stains feel slick, water-based stains may darken when wet, and ink usually appears sharp and saturated. Always check your upholstery’s cleaning code before spot treating. Codes like W or SW allow water-based cleaners, S means use solvent-only products, and X means avoid cleaning solutions altogether to prevent damage.
Spot cleaning small stains quickly prevents permanent damage and makes cleaning less intensive later. To remove stains without spreading them, work from the outer edges toward the center. This tactic confines the stain to its original area instead of enlarging it. Avoid soaking the fabric; use just enough cleaner to treat the stain. A gentle blotting motion works better than rubbing, which can push the stain deeper or fray delicate fibers.
Here is a clear step-by-step routine for treating stains based on your upholstery’s fabric code and stain type. Prepare any specific cleaner according to the label or purchase an upholstery spot cleaner suitable for your fabric. Test it on a hidden patch first for colorfastness and fabric reaction.
- Vacuum the stained area to remove loose dirt or debris that could rub into the fabric.
- Blot any fresh liquid stains immediately with a clean, dry cloth or paper towel without rubbing to absorb as much liquid as possible.
- Apply the correct cleaner according to your fabric code: for W or SW codes, use a water-based cleaner or mild dish soap mixed with water; for S codes, use a dry solvent cleaner intended for upholstery; for X codes, skip any liquid cleaning methods.
- Gently blot the stain with the cleaner using a soft cloth, starting at the edges and moving inward. Do not saturate the fabric, use small amounts and repeat as needed.
- Allow the cleaner to sit on the stain for 5 to 10 minutes to break down the residue.
- Blot the area with a clean, damp cloth (for W or SW fabrics) to remove cleaning residue, then dry by blotting with a dry towel.
- Repeat the process if necessary but avoid over-wetting or scrubbing, which can damage fibers or spread the stain.
- Allow the area to air dry completely, avoiding direct heat or sunlight that might cause fading.
For tough grease or oil stains on water-safe fabrics, sprinkle some baking soda or cornstarch on the spot first to absorb oil before cleaning. Ink marks require solvent-based spot cleaners but test carefully on S-coded fabrics. Food and drink stains usually respond well to mild soaps or oxygen-based cleaners like products containing oxygen bleach, useful on colorfast fabrics. Avoid harsh chemicals like bleach or ammonia unless the upholstery label explicitly permits it.
5. Vacuuming and General Upholstery Maintenance Tips
Vacuuming upholstery at least once a week helps prevent dirt, dust, and debris from settling deep into the fabric, which can cause the material to look grimy and wear out more quickly. Use your vacuum’s upholstery brush attachment to gently clean all surfaces, including cushions, armrests, and backs. The crevice tool is ideal for reaching tight spaces such as between cushions and along seams.
Remove cushions, if possible, to vacuum both the cushions and the frame thoroughly. For cushions with removable covers that the care label permits machine washing, vacuum them first to remove loose dirt before laundering. This approach not only cleans the fabric but also prevents dirt from embedding deeper during washing.
- Vacuum upholstery weekly using the upholstery brush and crevice tool
- Remove cushions to vacuum all sides and nooks
- Check manufacturer’s label before washing removable covers
- Sprinkle baking soda on upholstery and let it sit overnight to reduce odors
- Spot clean stains promptly between regular vacuuming sessions
General maintenance includes quick spot cleaning and airing out cushions regularly to prevent odors and stains from setting. Baking soda is an effective deodorizer, lightly sprinkle it on upholstery and vacuum it off after at least 15 minutes or let it sit overnight for stronger odor control. Avoid harsh scrubbers or excessive moisture during vacuuming as they can damage delicate fibers or push dirt deeper into the fabric.
Under usual household use, professional deep cleaning or spot treatments are only needed every 3 to 6 months or when stains appear. Keeping up with weekly vacuuming reduces the frequency of these more intense cleaning sessions and extends the life of your upholstered furniture.
Always test removable cushion covers for colorfastness before washing and follow care label instructions carefully to avoid shrinking or fabric damage.
6. Drying Upholstery Properly to Avoid Damage
Upholstery usually takes between 8 and 12 hours to dry after cleaning. Proper drying is essential because damp fabric can develop mold, mildew, or unpleasant odors. Dry cushions slowly and evenly to avoid shrinking or warping. Using gentle airflow and moderate temperature helps speed up drying without damaging the fabric or filling.
Fans are a safe and effective way to increase airflow around your upholstery, reducing drying time. Position a fan so air circulates over the surface without blowing dust onto the fabric. Avoid direct heat sources like hair dryers or space heaters on high settings, as they might dry unevenly, cause discoloration, or damage foam cushions inside. Open windows or doors to create natural ventilation if outdoor weather permits.
- Check the fabric care label to confirm any drying recommendations or restrictions. Follow these instructions to avoid voiding warranties or damaging your upholstery.
- Remove loose cushions and pillows and stand them upright in a well-ventilated room. This exposes all sides to air and speeds evaporation.
- Use a fan set on low or medium speed, aiming air toward but not directly on upholstery surfaces. This encourages airflow without roughing the fabric.
- Open windows or doors if weather allows, to bring in fresh air and help moisture escape faster.
- Avoid applying direct heat like hair dryers or electric heaters on upholstery, especially foam cushions, which might shrink or become misshaped if dried too fast or unevenly.
- Allow at least 8 to 12 hours for complete drying. Check cushions by pressing them lightly, if they feel cool or damp, they need more air time.
- After drying, vacuum fabric gently with an upholstery attachment to remove any residual dust or loosened debris from the cleaning.
- Store cushions in a dry area once fully dry to prevent moisture from settling back into the fabric.
If upholstery stays damp longer than 12 hours, it can develop mold or mildew, which not only causes bad smells but also deteriorates the fabric and might pose health risks. Consistently dry your upholstery soon after cleaning to maintain freshness and durability. Using fans and proper ventilation can cut drying times by several hours, allowing you to use your furniture sooner without risk.
7. Common Mistakes and How to Avoid Them in Upholstery Cleaning
One of the most frequent errors when cleaning upholstery is skipping the spot test. Cleaning agents vary widely in their effects on different fabrics, and using a solution without testing can cause irreversible color fading or fabric damage. Always pick a hidden area to apply the cleaner and wait at least 10 minutes to watch for changes like discoloration or texture loss. This quick step costs nothing but saves your furniture from costly mistakes.
Heavy saturation with water or cleaning solutions is another common problem. Excess moisture can lead to shrinkage, warping, or even mold growth inside the cushions. Use just enough cleaner to dampen the fabric lightly and blot gently with a clean, dry white cloth. Avoid colored rags to prevent dye transfer, which can stain the upholstery further.
Using the wrong cleaner is risky since certain solvents, detergents, or homemade remedies may react poorly with upholstery fibers. Check the manufacturer’s cleaning code on your sofa (such as W, S, WS, or X) and use only approved products. For instance, water-based cleaners suit “W” fabrics but may warp “S” types that require solvent-based treatments.
- Always perform a spot test before applying any cleaning product.
- Use clean white cloths to avoid transferring color to your fabric.
- Apply cleaning solutions sparingly to prevent water damage or shrinkage.
- Stick to the recommended cleaner type based on your fabric’s code to avoid damage.
- Avoid letting water or solutions soak into any wood or metal parts of the furniture.
- Blot stains gently instead of scrubbing harshly to prevent fabric wear.
- Allow upholstery to dry fully in a well-ventilated room to prevent mold and odors.
When these precautions aren’t observed, stain treatments can worsen the problem. For example, scrubbing stains with the wrong brush or solution can spread the stain or push it deeper into the fibers. If a treatment causes discoloration, immediately dab a mix of cold water and a little dish soap, then blot dry. Avoid over-wetting to reduce the risk of fabric distortion or color bleeding.
Cleaning machines can provide a deeper clean but require caution. Overfilling a device with solution or failing to clean its filters and pads can deposit residues on upholstery, attracting more dirt. Follow the machine’s instructions carefully, and test on a small area of fabric first. Proper maintenance of equipment helps protect your investment and extends its service life.
8. When to Call a Professional Upholstery Cleaner
Knowing when to hire a professional upholstery cleaner can save your furniture from damage and keep it looking fresh for years. Professionals use specialized equipment and cleaning methods that go beyond what most DIY approaches can achieve. You should consider calling a pro if deep stains, delicate fabrics, or years of buildup are beyond your ability to clean effectively at home.
Signs Your Upholstery Needs Pros
Visible signs tell you when DIY methods have reached their limit. Stubborn, set-in stains that don’t respond to spot treatments or gentle scrubbing often require professional intervention.
Fabric that retains unpleasant odors after regular airing and cleaning also signals the need for deep care. Excessive dirt trapped in the upholstery padding or excessive wear can benefit from a thorough professional cleaning to restore freshness and texture. Look for these indications that professional cleaning is needed:
- Persistent stains after spot cleaning
- Fabric marked with an “X” cleaning code, which means water or solvent-based DIY methods aren’t safe
- Strong odors embedded in the upholstery
- Extensive dirt or dust trapped deep in fibers
- Fabric feels stiff or rough despite routine cleaning
- Annual deep cleaning is due for high-use furniture
Types of Upholstery Requiring Professional Care
Some upholstery fabrics and constructions need more delicate or specialized cleaning than home equipment and solutions can provide. Fabric with a code “X” must only be cleaned by dry cleaning methods, typically offered by pros. These include silk, velvet, or other delicate materials.
Also, if your upholstery has intricate details, thick padding, or layered fabrics, professional cleaning machines can reach deeper than household steamers or portable carpet cleaners like the Little Green® Machine. For example, leather or suede needs specialized treatment to avoid damage, which professionals can safely deliver.
Scheduling Professional Cleaning
Even if your upholstery looks clean, a deep professional cleaning once every 12 to 18 months can extend its life. High-traffic furniture might need it more often, while less-used pieces could go longer between sessions.
A routine cleaning schedule depends on use, environment, and fabric. Pets, smokers in the household, or frequent spills all push the timeline shorter. Regular professional cleanings help manage allergens, stains, and odors that build up over time.
Questions to Ask Before Hiring Pros
Choosing the right cleaning service is important to protect your investment. Here are key questions you should ask before hiring:
- What cleaning methods do you use for fabrics with different cleaning codes?
- Can you provide references or reviews from past upholstery clients?
- Are your technicians trained for delicate fabrics like silk, velvet, or leather?
- What chemicals or solutions do you apply, and are they fabric-safe?
- How long does the cleaning and drying process usually take?
- What is your pricing structure, and are there any additional fees for tough stains?
- Do you offer guarantees or follow-up treatments if stains reappear?
Always check the fabric’s cleaning code before a professional treatment to ensure the service matches your upholstery’s care requirements.
Step-by-Step Action Plan for Cleaning Upholstery
Follow this plan to clean and maintain your upholstered furniture safely and keep it looking fresh over time.
- Before you start: Check the cleaning code label on your upholstery to choose the right cleaning method and solutions.
- Day 1: Vacuum the furniture thoroughly using an upholstery attachment to remove dust and debris.
- Day 1: Treat any visible stains with the appropriate spot cleaner, testing on a hidden area first.
- Day 1: Clean the upholstery using the recommended solution and a soft brush or cloth, avoiding oversaturation.
- After cleaning: Use fans or open windows to dry the upholstery thoroughly within 24 hours to prevent mold or odors.
- Weekly: Vacuum lightly to catch new dirt before it settles deep into the fabric.
- Monthly: Inspect for new stains or damage and address them promptly using safe spot treatments.
- Annually: Consider professional cleaning if your upholstery has heavy soil, strong odors, or delicate fabric that needs expert care.
Frequently Asked Questions
What Is the Best Way to Remove Pet Hair from Upholstery?
Use a rubber glove moistened with water to rub over the surface and lift pet hair easily. This method avoids damaging fabric and helps gather hair into clumps for easy removal.
Can I Use Vinegar to Clean Upholstery?
Vinegar can be used as a mild cleaner for some fabrics but test it in an inconspicuous area first. It helps neutralize odors but may not be suitable for all upholstery types.
How Often Should I Deep Clean My Upholstery?
Deep clean your upholstery every 12 to 24 months depending on use and fabric type. Regular vacuuming in between helps maintain cleanliness and prolongs the time between deep cleaning sessions.
Is It Safe to Steam Clean All Kinds of Upholstery?
Steam cleaning works for many fabrics but always check the cleaning code on the tag first. Some natural fibers like silk or wool are sensitive to heat and moisture and shouldn’t be steam cleaned.
What Should I Do If My Upholstery Gets Wet?
Blot excess moisture with a clean towel and allow it to air dry for 4 to 6 hours. Avoid direct heat to prevent fabric damage and mildew growth.
Can Baking Soda Help with Upholstery Stains?
Baking soda is good for deodorizing and light stain removal but may not remove deep stains. Sprinkle it on, let sit for 15 minutes, then vacuum to freshen upholstery.
Wrapping Up
Cleaning your upholstery properly requires the right tools, attention to fabric types, and consistent maintenance. Tackling stains quickly and drying furniture thoroughly will protect your investment and extend its life. Start with a vacuum and spot test before deeper cleaning, then maintain with regular care to keep your upholstery comfortable and clean for years to come.