How to Get Out Set in Stains: 8 Effective Methods That Really Work
To get out set in stains, treat the stain promptly with a targeted cleaner and soak the fabric in an oxygen-based bleach solution for several hours. For tougher stains, apply a glycerine pre-treatment or soak the fabric in white vinegar before washing. This approach loosens deep stains without damaging the fabric.
This advice is ideal for homeowners, renters, and anyone who frequently launders clothes or cleans upholstery facing stubborn set-in stains. You’ll learn practical methods tailored to different stain types and fabrics for better stain removal results at home.
Key Takeaways
- Apply glycerine directly to set-in stains and let sit for 30 minutes before washing for improved removal.
- Soak stained items for 5 to 6 hours in hot water combined with an oxygen bleach like OxiClean for best results.
- For grass or sweat stains, pre-soak fabric in white vinegar for around 30 minutes before laundering.
- Replace soaking solutions every 12 hours when dealing with very stubborn stains to maintain cleaning power.
- Use a two-step process: pre-treat with stain remover, then follow with a specific cleaner suited for the stain.
- Allow pre-treatment solutions to sit on the stain for 15 to 30 minutes to loosen deeply set areas.
1. How to Remove Set-In Stains Effectively

Set-in stains have soaked deep into fabric fibers, making them tougher to remove than fresh marks. Effectively tackling these stains requires a careful approach that includes pre-treatment and the right stain remover. Acting promptly is still beneficial, but stains over 24 hours old can need more attention and time. Waiting too long allows the stain to bind further, reducing removal success. Different stains and fabrics may call for gentle treatments stepped up to stronger solutions only as necessary. Here is a reliable process to start fixing set-in stains on washable fabrics.
- Identify the fabric type and stain nature. Begin by checking the fabric care label and what caused the stain. For delicate fabrics, opt for mild removers first to prevent damage.
- Prepare a suitable stain remover. For example, mix white vinegar and salt for coffee stains or apply dish soap directly for grease stains. Oxygen bleach can be effective for many discolorations.
- Apply the remover generously. Spread it over the entire stained area, ensuring full coverage. For liquid removers like glycerine, a few drops are enough.
- Let the solution sit. Allow it to work on the stain for at least 30 minutes. For tougher marks, leaving it overnight can improve results.
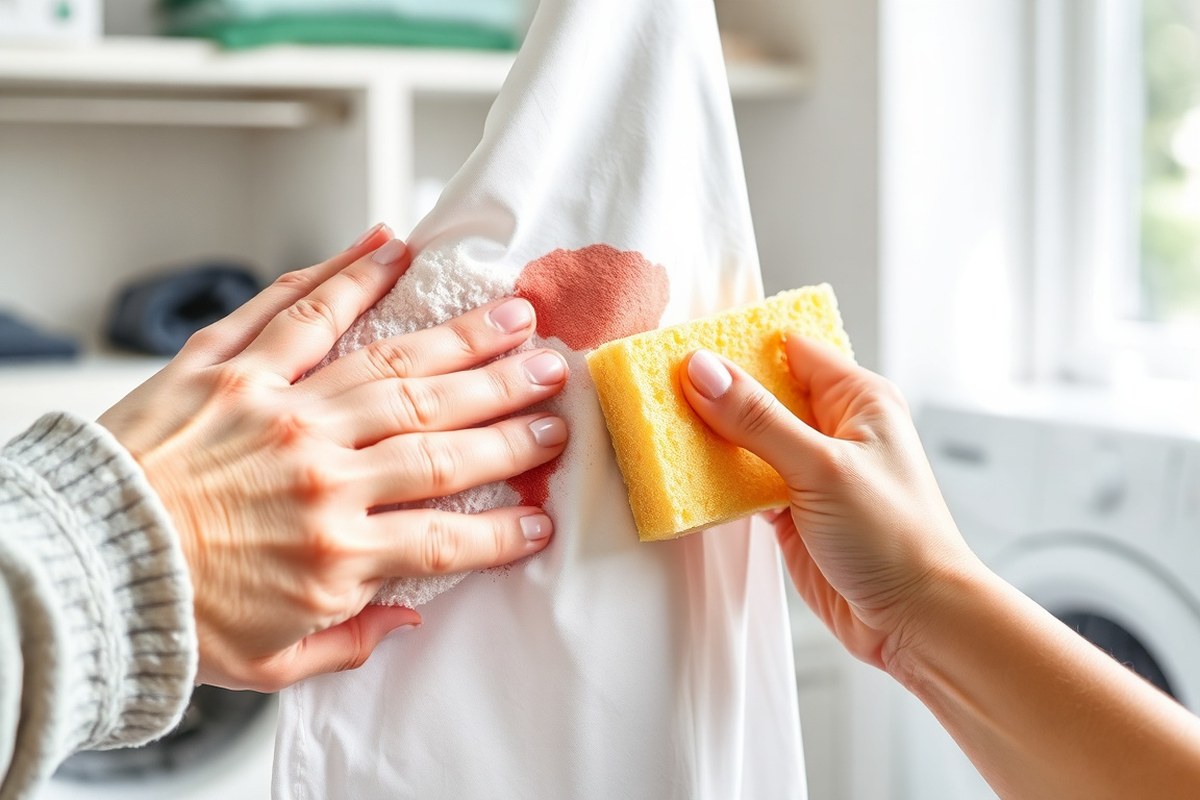
- Gently agitate or scrub the stain. Use a soft brush or cloth to work the remover into the fabric, lifting the stain from deep fibers without damaging the material.
- Wash the fabric in the warmest safe water. Follow the garment’s care instructions precisely regarding water temperature. Warmer water usually boosts stain removal but avoid heat if it risks setting the stain further.
- Check the stain before drying. Avoid placing stained garments into the dryer until the mark is fully gone. Heat can permanently set residual stains, making them nearly impossible to remove later.
- Repeat treatment if needed. Some set-in stains require multiple rounds of pre-treatment and washing to disappear. Trying the same or a different method can help clear persistent stains.
Most stain removers should sit on fabric for at least 30 minutes to break down the stain molecules. Allowing extra time, up to overnight, can greatly improve success with stubborn stains like coffee or grease. Avoid rushing to the wash cycle right after applying a remover as it can decrease effectiveness. Also, never rub harshly at the fabric initially; it can embed the stain deeper. Following a patient and gentle routine with careful timing gives you the best chance to lift set-in stains and restore your clothes.
2. Types of Set-In Stains and How They Differ

Set-in stains vary widely in their composition, which affects how you should treat them. Oil, protein, tannin, and dye stains each require different cleaning methods because of their chemical properties. Identifying the type of stain ensures you use the right technique, increasing the likelihood of removal.
Oil-Based Stains
Oil and grease stains come from substances like cooking oils, butter, or lotion. These stains tend to embed deep because oil molecules bond tightly with fabric fibers. Warm water combined with a grease-cutting dish soap works best by breaking down oil molecules effectively.
Pre-treating with dish soap and allowing the fabric to soak for about 60 minutes helps lift the grease before washing. Avoid cold water here since it doesn’t dissolve oils well. One trick is using WD-40 to freshen a dry oil stain; it doesn’t remove the stain itself but loosens it for easier cleaning afterward.
Protein-Based Stains
Protein stains include blood, sweat, dairy, eggs, and some food spills. Proteins can “cook” and harden when exposed to heat, making them tougher to remove once set. Using cold water prevents proteins from binding further into fibers, and enzymes in special cleaners break down the protein chains.
Soaking a protein stain in cold water with an enzyme cleaner for around 30 minutes softens the stain. Alternatively, for blood stains, hydrogen peroxide or meat tenderizer can be applied carefully to break down proteins further. Avoid hot water or dryers until the stain is fully gone to prevent permanent setting.
Tannin and Dye Stains
Tannin stains come from tea, coffee, wine, and some fruits, while dye stains include inks, grass, and mustard. These stains often cause brownish or reddish discolorations that penetrate fabric deeply. Acidic agents like white vinegar or oxygen-based bleaches attack these stains chemically to lift them.
Soaking tannin stains in a mixture of white vinegar and salt for about 15 minutes can be effective. For dye stains such as wine, soaking in oxygen bleach solutions works well without damaging colorfast fabrics. Mustard stains respond best to a baking soda paste applied until dry. Here is a summary table showing common stain types, recommended treatments, and suggested soak times to guide you:
| Stain Type | Primary Treatment | Soak Time |
|---|---|---|
| Protein-Based (brown) | Cold water + enzyme cleaner | 30 minutes |
| Oil/Grease (gray) | Dish soap | 60 minutes |
| Rust/Tannin (reddish) | White vinegar + salt | 15 minutes |
| Wine | Oxygen bleach soak | Varies (follow product directions) |
| Mustard | Baking soda paste | Until dry |
Applying the appropriate treatment depending on the stain type helps prevent damage and improves results. Different chemical reactions target stains in distinct ways, making it important to choose methods carefully.
Tip: Avoid using hot water on protein stains before they are fully treated; heat can permanently set the stain, making removal much harder later.
3. Best Household Ingredients That Remove Set-In Stains
Common household ingredients like oxygen bleach, hydrogen peroxide, vinegar, baking soda, salt, dish soap, and glycerine can effectively break down different types of set-in stains. Each ingredient targets specific stain compositions, and using them as directed ensures fabric safety while boosting removal effectiveness.
Oxygen Bleach and Hydrogen Peroxide
Oxygen bleach is a fabric-safe option that works well on organic stains such as coffee, wine, grass, and sweat. It releases oxygen to lift stains gently without damaging most cotton or polyester fabrics. Hydrogen peroxide, a key ingredient in oxygen bleach, excels at breaking down wine and other organic stains through oxidation.
To apply hydrogen peroxide for stain removal, mix 1 tablespoon with 1 tablespoon of salt and 1/2 cup baking soda to create a stain-treating paste. Spread this paste over the stain and let it sit for about 10 minutes before rinsing or laundering. Keep in mind that hydrogen peroxide can bleach colored fabrics, so test on an inconspicuous area first. Use oxygen bleach according to package instructions, typically soaking garments for 15 to 30 minutes at room temperature.
Vinegar, Baking Soda, and Salt
White vinegar is effective for tannin-based stains such as coffee and blood. Its acidic nature helps loosen the stain for easier removal, but it rarely removes stains alone. Baking soda adds mild abrasiveness and deodorizing power, making it ideal for older stains and grease spots. Salt combined with vinegar can address colored stains by drawing out pigment.
Create a paste by combining baking soda with a small amount of vinegar and spread it over the stain, allowing it to bubble for 5 to 10 minutes. For stains caused by tannins, soak your fabric in white vinegar for roughly 15 minutes prior to washing. For stains with color, cover the spot with salt, add vinegar on top, and let it sit for 30 minutes. Rinse thoroughly with cold water after to prevent the stain from embedding deeper.
- Apply vinegar for 15 minutes on coffee or blood stains
- Use baking soda paste for grease and old stains, waiting 30 minutes
- Combine vinegar and salt for colored stains, soak 30 minutes
- Rinse thoroughly with cold water after treatments
- Always test on a small fabric area first to prevent discoloration
These natural ingredients are usually gentle on fabrics and avoid the harsher chemicals found in commercial stain removers. They work best as pre-treatments to help detergents or oxygen bleach remove set-in stains more effectively.
Dish Soap and Glycerine Applications
Dish soap is especially effective at breaking down grease and oil-based stains thanks to its surfactants. Applying liquid dish soap directly to the stain and gently rubbing it in can help loosen oily residues. Allow the soap to sit for up to 60 minutes before laundering or rinsing. Avoid using dish soap on delicate fabrics like silk without a patch test.
Glycerine is a moisturizing agent that helps soften dried protein-based stains such as blood or perspiration. You can apply glycerine directly to a protein stain, let it soak for 15 to 30 minutes, then gently scrape or blot away the stain before washing. Because glycerine retains moisture, it may require multiple applications and thorough drying afterward.
- Apply dish soap directly on oil-based stains and let sit for 60 minutes
- Use glycerine on protein stains, wait 15, 30 minutes before blotting
- Rinse or wash with cold water after treatment
- Avoid dish soap on delicate fabrics without testing
- Multiple applications may improve results for stubborn stains
While natural ingredients such as vinegar and baking soda are often effective, some especially tough set-in stains may require the extra power of hydrogen peroxide or oxygen bleach. Careful application and fabric testing help ensure the best outcome without damage.
4. Removing Set-In Stains from Washable Versus Non-Washable Fabrics
Fabric type significantly influences how you should approach removing set-in stains to avoid damage and ensure effective cleaning. Washable fabrics like cotton and polyester generally tolerate soaking and stronger cleaners, while delicate or non-washable materials such as silk, wool, or acetate require gentler methods. Knowing fabric care labels and testing treatments beforehand helps protect your items and improves stain removal success.
Treating Washable Fabrics
Washable fabrics, including cotton, polyester, and blends, allow more aggressive stain treatments. You can soak these fabrics in a solution of oxygen bleach and cold water for up to six hours to lift set-in stains, especially if the stain is older. Treating stains within the first 12 hours after occurrence raises your chances of removal success to about 75 percent.
Before soaking, apply a pre-treatment stain remover or mild detergent directly on the affected area and gently scrub with a soft brush. After soaking, wash the garment on the warmest setting recommended by the care label. Avoid drying the fabric until you confirm the stain is fully gone, as heat will set it further. White washable fabrics offer more options since they tolerate oxygen bleach better, but avoid chlorine bleach unless the fabric explicitly allows it to prevent yellowing or fiber damage.
Handling Delicate and Non-Washable Materials
Delicate fabrics such as silk, wool, and acetate or non-washable items like upholstery require extra care to avoid shrinkage, distortion, or color loss. Instead of soaking, gently blot the stain to absorb any residue without rubbing. Use gentle cleaners like diluted white vinegar or mild detergent solutions, but test on a hidden spot first to check for discoloration or damage.
Professional dry cleaning is often the safest route when dealing with valuable or highly delicate fabrics. If you attempt home treatment, work with cool water, minimal moisture, and avoid agitation. Avoid soaking these materials entirely, as water exposure can worsen the condition. Spot cleaning with fabric-safe stain removers specifically labeled for delicate fabrics can sometimes remove set-in stains without risking harm.
When to Avoid Soaking or Bleaching
Soaking or using bleach should be avoided on fabrics labeled “dry clean only” or those made of delicate fibers like silk, wool, or acetate. These treatments can weaken fibers, cause color fading, or set the stain permanently. Vinegar-based solutions generally provide a gentler alternative but still need caution, especially on sensitive fabrics.
Heat, including hot water or drying machines, should be kept away from stubborn stains until completely removed. Heat can cause many stains to become permanent by chemically bonding them to the fabric fibers. Always check the care label and test any stain removal method on an inconspicuous area to avoid costly damage before proceeding with a full treatment.
5. How to Remove Set-In Stains from Upholstery and Carpet
Removing set-in stains from upholstery and carpet requires caution to avoid damage to the fibers while effectively lifting the stain. Using the right cleaning products is essential. Look for specialized carpet cleaning products or powdered stain removers designed specifically for upholstery and carpet. Products with enzyme-based pre-treaters, such as OxiClean® or Zout®, are effective for breaking down the proteins and oils that bond stains deeper into fibers. Always test any cleaner on an inconspicuous spot first to ensure it doesn’t discolor or weaken the fabric.
When treating carpet stains, avoid aggressive scrubbing, which can spread the stain or damage fibers. Instead, gently blot the area, working from the outside of the stain toward the center. This prevents the stain from spreading further. Letting the stain remover sit on the fabric for about 5 to 10 minutes usually gives it time to break down the stain, but check the product instructions for the recommended duration. Over-soaking can cause damage or discoloration, especially with delicate upholstery fabrics.
- Identify the stain type. Knowing whether the stain is protein-based (blood, sweat), oil-based (grease), or pigment-based (ink, dye) will help select the correct cleaner.
- Test a small area. Apply your chosen cleaner to a hidden portion of the fabric to check for adverse reactions.
- Blot excess stain gently. Use a clean white cloth to blot, never rub, to avoid pushing the stain deeper or spreading it.
- Apply the stain remover. Use a spray or apply powdered remover as directed. For upholstery, treat from the back of the fabric if accessible to push the stain out rather than deeper in.
- Let the product sit. Allow the cleaner to work for 5 to 10 minutes unless otherwise stated on the product label.
- Blot again with a damp cloth. Remove the loosened stain with a damp, clean cloth, working gently. Avoid soaking the area to prevent damage.
- Rinse and dry. Lightly rinse the spot with water if product instructions recommend it, then blot dry with a towel. Use fans or open windows to speed drying and prevent mildew.
- Repeat as necessary. Stubborn stains may require multiple treatments but do not exceed recommended product usage to prevent fiber damage.
Always avoid harsh scrubbing as this can damage fibers and make stains harder to remove; gentle blotting preserves fabric integrity.
6. Common Mistakes When Removing Set-In Stains and How to Fix Them
Common mistakes when removing set-in stains often cause failure or make the stain worse. One frequent error is applying heat too soon, such as drying or ironing the fabric before the stain is fully treated. Heat permanently sets the stain by bonding it deeper into the fibers, which can make removal nearly impossible. Always treat the stain before any heat exposure to keep your chances high.
Applying strong chemicals such as bleach to sunscreen stains may worsen the situation by interacting with the ingredients in the stain and intensifying the discoloration. To tackle grass or sweat stains, soak the item in white vinegar for around 30 minutes before laundering, which provides a gentler and often more successful removal method. Always try any stain remover on a small, concealed area first to prevent potential damage.
Ignoring the texture difference between stained and unstained fabric leads to ineffective cleaning. Set-in stains can feel rough or bumpy because they penetrate deeply. Gentle scrubbing combined with soaking allows the cleaner to work deeper without harming the fabric.
- Never apply heat from dryers or irons before fully treating the stain.
- Avoid bleach on delicate or sunscreen stains to prevent worsening damage.
- Use natural stains removers like white vinegar for grass or sweat stains.
- Test any stain remover on an inconspicuous fabric area first.
- Let soaking treatments work for 20 to 30 minutes before washing.
- Gently scrub rough-stained fibers to allow better penetration.
- Repeated gentle treatments often work better than one harsh attempt.
When a stain deepens, quickly treat the fabric by soaking it again in a gentle solution made from warm water, baking soda, and a small amount of dish soap designed to target stains. This can help lift the stain progressively without damaging the fibers. Avoid scrubbing aggressively, which may damage fabric threads and spread the stain further. The cost here is time and patience, as multiple applications over a day or two might be necessary.
When treatments cause fabric damage or color loss, immediately rinse the area with cold water to stop the chemical reaction. Applying a fabric-safe color restorer or using a dye pen designed for clothing can sometimes mask the damage on colored fabrics. For whites, soaking in a gentle oxygen-based bleach solution (not chlorine bleach) for a short, controlled time can help restore brightness. Delicate or costly fabrics benefit from professional cleaning to avoid the risk of permanent damage.
7. Preventing Set-In Stains: Tips to Stop Stains Setting Again
Act on stains as soon as possible to prevent them from setting permanently. The longer a stain sits, the more it bonds with fabric fibers, making removal difficult or sometimes impossible. Blot fresh spills gently with a clean cloth to absorb excess liquid without rubbing it deeper into the material. Avoid heat until the stain is fully removed, since hot water or a dryer can lock stains in place.
Maintaining good laundry habits reduces the risk of permanent stains. Pre-treat visible stains on clothing with liquid laundry detergent, rubbing it in to break down the stain before washing. Let the detergent sit for 10 to 15 minutes to work effectively. Sorting laundry by color and fabric type helps avoid spreading stains or fabric damage during the wash cycle. Use stain-fighting detergents designed for your fabrics to improve cleaning power without harsh chemicals.
- Blot spills immediately with a clean cloth.
- Pre-treat stains with liquid detergent and wait 10, 15 minutes before washing.
- Use cold water for initial stain removal to prevent setting.
- Air dry stained items until stains are fully removed; avoid dryers.
- Apply powdered oxygen bleach occasionally on whites or color-safe fabrics for tough residues.
- Use natural paste remedies like salt and water or meat tenderizer on colored fabrics if detergent isn’t effective.
- Consider gentle stain removers for frequent use, such as Puracy Natural Stain Remover, to target sweat and common marks.
For ongoing prevention, incorporating a powder-based oxygen bleach treatment into your wash routine helps brighten clothes and loosen soils, reducing future set-in stains. This gentle oxidizing agent whitens and refreshes fabrics without the harshness of chlorine bleach. For colors and delicate materials, milder methods like a salt-water paste or specialized stain removers can provide protection without damage.
Stay vigilant with stain treatments and laundry order to stop marks from settling in. Multiple treatments might be necessary for stubborn stains, especially those exposed to heat. Removing stains before putting clothes in the dryer is important because heat fixes stains permanently. By adopting these practical steps, you maintain fabric appearance and extend the life of your wardrobe.
8. When to Call a Professional for Set-In Stain Removal
Knowing when to call a professional for set-in stain removal can save your fabrics and upholstery from permanent damage. If you’ve tried multiple home treatments without success or the stain has been set for more than 24 hours, professional help is advisable. Professionals have access to stronger solvents and specialized equipment, which can handle stubborn stains that household products cannot fully remove.
Stains on delicate or non-washable fabrics, like silk or leather, and set-in carpet stains often require professional care. These materials can be easily damaged by improper cleaning attempts or harsh chemicals. Also, extensive or large stains, especially those that have been exposed to heat or have dried thoroughly, typically need expert intervention. The risk of discoloration or fabric weakening increases with aggressive DIY treatments past a certain point.
Choosing the right professional cleaner involves a few key steps. Start by checking for certifications or memberships with associations like the Institute of Inspection, Cleaning and Restoration Certification (IICRC), which sets industry standards. Ask about their experience with your specific fabric type and stain kind. It’s helpful to get a written estimate that includes methods, products used, and a clear price range. Expect professional stain removal to cost anywhere from $50 to over $150 depending on fabric type, size of the stain, and location.
Preparing items before professional cleaning is important. Remove any excess residue gently without rubbing the stain deeper. Avoid home-use stain removers before the appointment, unless directed, since some treatments can react poorly with professional chemicals. Keep the stained item dry and transport it carefully to prevent spreading or damaging the fabric further. Providing the cleaner with information on the stain’s age, origin, and previous attempts to remove it helps guide the treatment plan.
Clear communication and realistic expectations are part of the process. Professionals can improve or sometimes fully remove set-in stains, but no method guarantees perfection, especially if the stain has been set for a long time or if the fabric is fragile. Discussing these outcomes upfront can help prevent disappointment and ensure your cleaner uses the safest and most effective approach.
Do not apply multiple DIY treatments on the same spot before calling a professional; this can worsen the stain or damage the fabric beyond repair.
Step-by-Step Action Plan to Remove Set-In Stains
Follow these clear steps to tackle set-in stains confidently and effectively on different fabrics and surfaces.
- Before you start: Identify the fabric type and stain to choose the safest removal method. Confirm fabric labels for washing instructions.
- Within the first 24 hours: Pretreat the stain using a household ingredient suited to the stain type, like white vinegar for sweat or baking soda for grease. Check if the stain lightens after 30 minutes.
- Day 1: Wash washable fabrics in the warmest water safe for the material using an enzyme-based detergent. Inspect if the stain fades significantly after washing.
- Day 2: For stubborn stains, apply a stain remover formulated for the fabric or use oxygen bleach on whites and colorfast items. Assess stain removal before drying.
- Day 3: For upholstery or carpet, blot the stain with the appropriate cleaner and avoid rubbing. Consider a steam clean if the stain persists and fabric can handle moisture.
- Day 4: Air dry the fabric to prevent setting any residual stain with heat. Reinspect and repeat pretreatment if needed before next wash.
- After 1 week: If home methods do not work, consult a professional cleaner specializing in stain removal for advice tailored to your fabric and stain type.
Frequently Asked Questions
What Is the First Step in Treating a Set-In Stain Effectively?
The first step is to identify the stain type and fabric. Starting with the mildest safe cleaner helps avoid damage when working on set-in stains.
Can Heat Make a Stain Permanent on Fabric?
Yes, heat from dryers or irons can set stains permanently. Avoid heat until the stain is fully removed for best results.
How Long Should a Cleaning Solution Sit on a Set-In Stain?
Let the solution sit for at least 30 minutes, or overnight for tough stains. Reapplying every 12 hours helps break down stubborn stains further.
Are Homemade Cleaners as Effective as Store-Bought Products for Set-In Stains?
Some household ingredients can be effective, but specialized products often work better on tough set-in stains. Testing on a fabric patch first is key.
What Fabrics Require Special Care When Removing Set-In Stains?
Delicate fabrics like silk and wool need gentler cleaners and no harsh scrubbing. Using a mild cleaner and testing first protects these materials.
Can Set-In Rust Stains Be Removed from Clothing?
Fabric-safe rust removers have been proven to remove set-in rust stains successfully. Always follow product directions carefully for the best outcome.
Key Points to Remember
Effectively removing set-in stains depends on timely action tailored to your fabric and stain type. Start by identifying your stain and fabric care needs to choose the right treatment. Trying the right household remedies early can save your textiles and upholstery, extending their life. Your next step is to test a small, hidden area with your chosen method to avoid damage and achieve the best results.