How to Do Dry Cleaning at Home: A Complete Guide That Really Works
Doing dry cleaning at home is an affordable way to safely clean and refresh your delicate clothes without a trip to the dry cleaner. You can achieve this by using a home dry cleaning kit or gentle DIY methods that remove light stains, deodorize, and reduce wrinkles. This method suits wool, synthetic blends, and many delicate fabrics when you follow the proper steps to protect your clothes.
This guide helps homeowners and renters understand how to do dry cleaning at home effectively and safely. You’ll learn which clothes are best for home dry cleaning, the tools needed, stain pre-treatment tips, and when professional dry cleaning remains the better option for your most valuable garments.
Key Takeaways
- Select clothes labeled “dry clean only” but with light stains or that need refreshing for home dry cleaning.
- Use a home dry cleaning kit like Dryel to clean up to four loads for about $25, saving up to 90% compared to professional service.
- Pre-treat stains by applying the cleaning solution and waiting 15 minutes before running the full cycle or cleaning.
- Place garments with the cleaning sheet in the dryer on medium to high heat for 15, 30 minutes to create steam and clean clothes.
- Hang dry clothing after tumble drying to prevent wrinkles and damage from overheating.
- Avoid home dry cleaning on heavily soiled or luxury items that require perfect appearance for important events.
How to Dry Clean Clothes at Home Safely and Effectively

Dry cleaning clothes at home means gently cleaning delicate fabrics without water, using specialized solvents or low-moisture methods to avoid damage. Following the right steps ensures your garments stay in good shape and wrinkles and light stains are removed. Home dry cleaning suits freshening up “dry clean only” items between professional cleanings, saves money, and adds convenience. Avoid using high heat or traditional washing machines, as these can ruin delicate fibers or cause shrinkage.
Many people use home kits like those from Dryel, which employ safe solvents and a clothes bag that goes in your tumble dryer for about 15-20 minutes. The dryer’s low heat and moist environment activate the cleaning sheets without wetting the clothes. Without a commercial kit, try steaming and spot cleaning using a gentle solvent or detergent solution as alternative methods.
When dry cleaning at home, avoid overloading the dryer or using high heat. High temperatures can damage delicate fabrics, so keep dryer settings low or use air fluff. Steam can also help remove wrinkles and odors safely after cleaning.
- Pre-treat stains: Apply a specialized stain remover or gentle detergent directly to any spots before cleaning. Use a soft cloth or a toothbrush to work in the product without rubbing aggressively.
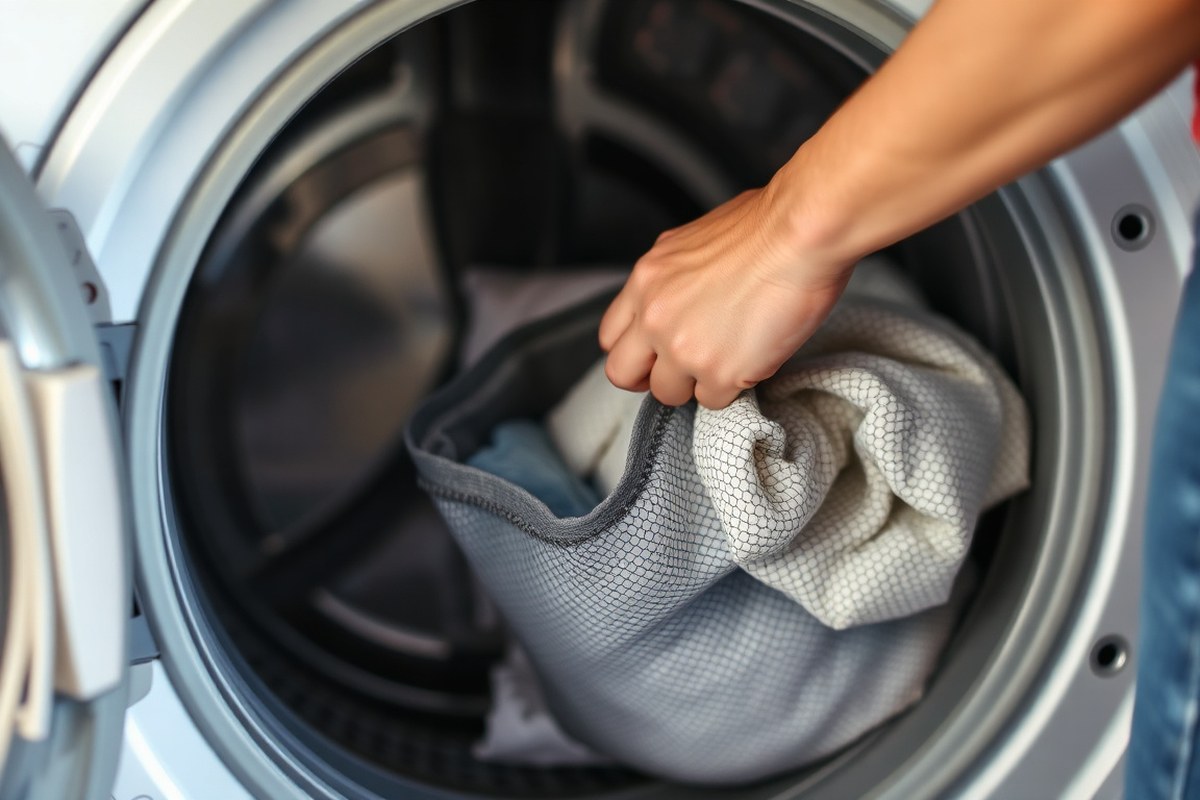
- Place clothes in a drying bag: If using a kit, put your garments inside the provided reusable bag with a cleaning cloth. This protects your clothes while allowing solvent vapour to circulate.
- Set your dryer to low heat or air fluff: Put the drying bag into the dryer and run it for 15-20 minutes to activate cleaning. Monitor closely to avoid over-drying or overheating.
- Remove clothes promptly: Take garments out immediately after the cycle to prevent wrinkles. Shake out items and lay them flat or hang them up to finish drying if needed.
- Steam or iron clothes: Use a clothes steamer or an iron with the appropriate setting for your fabric to smooth wrinkles and refresh garments.
- Handwash if necessary: For heavily soiled areas, gently handwash with cold water and mild detergent before the dry cleaning process, ensuring no fabric damage.
Allow total time of about 30-45 minutes for the full home dry cleaning process, including preparation and finishing. Results should be visibly fresher, less wrinkled clothes with light stain removal but not as intense as professional cleaning. When you notice fabric puckering, shrinking, or persistent stains, stop home cleaning and consult a professional to avoid damage.
Choosing the Right Clothes for Home Dry Cleaning

You can safely dry clean several fabrics at home, as long as you know which garments tolerate the process. Fabrics like wool, silk, velvet, denim, and some special care materials labeled “dry clean” or “dry clean recommended” often handle home dry cleaning well. Sweaters and mesh fabrics are also generally safe for gentle cleaning methods. These fabrics respond well because they aren’t as sensitive to the mild solvents or steam used in home kits.
Leather and suede, however, should never be dry cleaned at home using typical DIY methods. These materials require special care because home dry cleaning solvents can damage their texture and surface. Instead, hand-washing or specific leather cleaners work better for those items. For heavily stained clothes or extremely delicate fabrics, such as some silks or specialty garments, professional dry cleaning remains the safest choice.
Use this table to decide if your item is suitable for home dry cleaning or should be sent to a professional. Look at the fabric type, and the garment’s condition, then choose the cleaning method accordingly.
| Fabric/Item | Suitable for Home Dry Cleaning | Notes |
|---|---|---|
| Wool garments | Yes | Handles gentle solvents, can be dry cleaned monthly or every few months depending on wear |
| Silk | Yes (with caution) | Some silks tolerate home kits, but heavily stained or delicate silks are better professionally cleaned |
| Velvet | Yes | Sensitive but usually fine with gentle home dry cleaning methods |
| Denim | Yes | Typically durable enough for home dry cleaning |
| Sweaters and mesh fabrics | Yes | Can be cleaned at home regularly |
| Leather and suede | No | Requires special cleaning methods like hand washing, avoid solvents used at home |
| Heavily stained or extremely delicate fabrics | No | Best sent to professional cleaners for specialized care |
When choosing clothes to dry clean at home, focus first on their fabric and care label. Check if the garment is labeled “dry clean recommended” or “dry clean only.” For “dry clean recommended” items, you’re usually safe starting with a home dry cleaning kit. For “dry clean only” tags, assess the fabric type and stains carefully before deciding. Avoid home dry cleaning if the garment is heavily stained or extremely delicate to prevent damage.
Always test any home dry cleaning product on a hidden area before treating the entire garment to avoid unexpected damage.
Taking these steps saves money and time by reducing professional trips, but only for suitable fabrics. Regular home dry cleaning can be done about once a month for frequently worn items or every few months for garments you wear less often. This helps maintain your clothes’ appearance without risking damage that might come from DIY attempts on unsuitable materials.
Essential Tools and Products Needed for Home Dry Cleaning
To effectively dry clean clothes at home, you need certain tools and products designed to refresh fabrics without water damage. Home dry cleaning kits are the most convenient option, but additional stain removers and wrinkle treatments also improve results. Choosing the right equipment prevents fabric harm and keeps your garments looking their best.
Commercial Dry Cleaning Kits
At-home dry cleaning kits work well for clothes that only need freshening up, like removing odors, smoothing wrinkles, and mild cleaning. These kits often come with a stain remover, a special cleaning solution, and reusable cloths or pads. You place the cloths inside a drying bag along with the garment, then run it in your dryer for about 15 to 30 minutes as directed by the instructions.
Reusable cloths lower the long-term cost since you don’t have to buy replacements frequently. Expect to spend around $15 to $25 per kit, which can handle multiple uses if you follow the directions carefully. Using the provided bag in these kits helps contain moisture and cleaning agents safely during the process. A zip-top pillowcase can replace the kit’s drying bag if you don’t have one, though it may not clean as thoroughly.
Supplementary Stain Removers and Solutions
Home dry cleaning kits focus on refreshing fabrics, so they often don’t fully remove tough or set-in stains. It helps to have additional gentle stain removers that are safe for dry-clean-only fabrics. Look for products labeled as suitable for delicate or wool garments, and always test on a hidden section first to check for discoloration or fabric damage.
For light stains, a small dab of a solvent-based stain remover can be applied before using the dry cleaning kit. Avoid water or abrasive scrubbing, as this can cause fabric damage or shrinkage. Following garment labels precisely ensures you don’t risk harming delicate fibers during stain treatment.
- Dry cleaning kit with cleaning solution and reusable cloths
- Fabric-safe, solvent-based stain remover for spot treatment
- Replacement cleaning cloths for frequent use
- Dryer-safe garment bag or zip-top pillowcase as a substitute
- Soft-bristled brush or cotton swabs for gentle stain application
- Clean, dry towels for blotting stains carefully
- Protective gloves when handling solvents
Having these additional products on hand improves your ability to tackle more challenging stains while maintaining fabric integrity.
Tools for Wrinkle Removal and Freshening
Ironing is a key step in home dry cleaning to smooth wrinkles and restore garment shape. A steam iron with adjustable temperature control suits most dry-clean-only fabrics. Use the lowest heat setting recommended by the garment’s care label and apply steam gently.
Another helpful tool is a handheld steamer, which removes wrinkles without direct iron contact, minimizing the risk of fabric burns or shine marks. Portable steamers, like the Hilife Steamer, cost between $20 and $50 and are effective for delicate pieces such as blouses and sweaters made from synthetic blends or wool.
Maintaining garment freshness also involves proper airing after dry cleaning. Hanging clothes in a well-ventilated area for 15 to 30 minutes helps eliminate any residual odors and allows fabrics to air out before storage or wearing.
How to Pre-Treat Stains Before Dry Cleaning at Home
Stains are the toughest part of cleaning delicate garments at home, especially those labeled ‘dry clean only.’ Home dry cleaning kits and alternative methods can remove many stains, but some spots need proper pretreatment to improve results. Pretreating breaks down oils, dirt, or pigments so the dry cleaning solvent or kit can clean more effectively. Knowing the type of stain and treating it correctly before starting the dry cleaning process prevents permanent marks and saves you from sending items to a professional.
Stains like oils, makeup, sweat, or food can be treated at home with spot removers designed for delicate fabrics. Water-based stains like coffee or wine may need different care than oily stains such as salad dressing. Using a stain remover appropriate for your garment and stain type is essential. Always test the stain remover on a hidden area first to avoid fabric damage or color loss.
- Identify the stain type. Determine whether the stain is oil-based (grease, makeup), water-based (coffee, wine), protein-based (blood, sweat), or dye-based (grass, ink). This helps select the best treatment.
- Blot the stain gently. Use a clean white cloth or paper towel to blot the stain and remove excess residue. Avoid rubbing, which can push the stain deeper or damage fibers.
- Apply a suitable stain remover. Use a commercial stain remover made for delicate or dry clean only fabrics, or mix a small amount of a mild detergent with water for water-based stains. For oil stains, use a grease-fighting spot cleaner safe for fabric.
- Let the treatment sit. Allow the stain remover to work for about 5 to 10 minutes but not longer than 15 minutes to avoid fabric damage. This waiting time lets the product break down the stain before the main cleaning.
- Gently dab the treated area. After soaking, use a damp cloth to blot the spot remover and lifted stain. Avoid saturating the fabric, especially delicate fibers.
- Check the stain’s progress. If the spot persists, repeat the treatment once, but multiple attempts risk harming the garment. For stubborn or old stains, consider professional help.
- Start the dry cleaning process. Once pretreated and partially lifted, proceed with your home dry cleaning method for best results.
Pre-treating stains adds time but significantly improves how well home dry cleaning works. Spot removers typically cost around $5 to $10 per bottle and last through several uses. Applying them correctly helps lift stains without soaking your garments, which could ruin delicate fabrics or alter textures. Avoid using bleach or harsh chemicals unless the garment label explicitly allows it. Expect some stains to fade but not disappear completely at home; frequent, harsh treatments can weaken fibers or cause color changes. When stains don’t respond to home treatments, professional dry cleaners have solvents and equipment better suited for tough contamination.
Step-by-Step Home Dry Cleaning Process Using a Kit or DIY Method
Home dry cleaning kits and DIY methods follow a simple cycle: prepare your garments, run them safely through a dryer cycle inside a special bag with cleaning cloths, then carefully remove and hang the clothes to dry fully. Timing, temperature, and garment condition matter to protect fibers and ensure freshness.
Preparing the Garments and Bag
Start by inspecting the care labels on each garment to confirm they are suitable for home dry cleaning. Spot treat any stains using the included pre-treatment pen or a gentle stain remover designed for delicate fabrics. Avoid soaking or washing heavily soiled garments in water.
Place three to four garments into the reusable dryer bag supplied in your kit. Add one cleaning cloth that contains the cleaning solvent and fragrance. Do not overfill the bag; overcrowding can prevent proper circulation of the cleaning vapor.
Running the Dryer Cycle Correctly
Use a dryer set on low or air fluff to avoid heat damage. Insert the sealed bag with your garments and cleaning cloth inside. Run the dryer cycle for 20 to 30 minutes, which allows the cleaning solvent to vaporize and refresh your clothes.
For heavily soiled or very delicate items, consider shorter cycles of 15 to 20 minutes and allow a longer airing period afterward. Avoid frequent home dry cleaning on garments with embellishments or very fragile fibers, as these can degrade over time.
Post-Drying Care and Hanging
Remove the garments promptly from the dryer bag to prevent wrinkles and allow any remaining solvent to dissipate. Hang clothes on wide, padded hangers in a well-ventilated area away from direct sunlight. Let them air dry completely for one to two hours before wearing or storing, ensuring all moisture and odors have cleared.
If wrinkles occur, gently reshape the fabric while still damp or use a cool iron with a pressing cloth. Avoid spraying water directly on dry-cleaned clothes, as this can cause water spots or shrinkage.
- Check the garment care label to confirm suitability for home dry cleaning.
- Pre-treat any stains according to kit instructions or with a gentle stain remover.
- Place 3 to 4 garments loosely into the dry cleaning bag provided.
- Add one dry cleaning cloth containing the cleaning solvent into the bag.
- Seal the bag securely and place it in the dryer set on low or air fluff.
- Run the dryer cycle for 20 to 30 minutes depending on garment delicacy.
- Remove garments immediately and hang on padded hangers to air dry 1 to 2 hours.
- Use a cool iron with a pressing cloth to remove any remaining wrinkles as needed.
Do not overload the dryer bag or use high dryer heat, as this can damage delicate fabrics and reduce cleaning effectiveness.
Removing Wrinkles and Refreshing Clothes After Dry Cleaning
Removing wrinkles and refreshing your dry cleaned clothes helps maintain their crisp appearance and pleasant scent. Using a handheld steamer is one of the best ways to achieve this. Steam smooths out wrinkles gently without direct contact that can scorch delicate fabrics. Hold the steamer about 6 to 12 inches away from the garment and move it slowly along wrinkled areas. This method works particularly well for wool, silk, cashmere, and blends that can wrinkle easily after cleaning or storage.
Ironing dry cleaned clothes is possible but requires caution. Always check the garment’s care label for recommended iron settings. Use a low heat or “silk” setting and place a clean pressing cloth between the iron and the fabric to protect fibers. Avoid steam irons on delicate or synthetic materials unless the care instructions specifically allow it. The goal is to smooth wrinkles without applying too much heat, which can damage or shine the fabric’s surface.
Refreshing clothes to smell clean and stay fresh focuses on reducing light odors and preventing fabric from feeling worn out. Hanging the garment in a well-ventilated area for a few hours after dry cleaning or steaming helps dissipate any residual solvents or scents from the cleaning process. If your dryer has a refresh or steam cycle, use it for about 10 to 15 minutes with a damp cloth inside the drum to gently revitalize the fabric. This adds moisture and heat without harsh agitation, which keeps clothes looking newly cleaned.
For stubborn wrinkles that steaming and light ironing don’t fully remove, you can try a damp towel method. Place the garment on a flat surface, lay a slightly damp, clean towel over the wrinkled areas, and press down firmly with your hands or a cool iron on top of the towel. This adds moisture gradually and avoids direct steam or heat. However, avoid this for very delicate or water-sensitive fabrics like rayon or acetate, as water may leave marks or distort the weave.
Freshening fabrics with sprays designed for delicate materials can add a subtle scent and help maintain a clean feel between wears. Choose those labeled safe for dry clean-only garments and test a small hidden area first to check for any dye or fabric reaction. Avoid heavy perfumes or fabric softeners, which may leave residues or alter fabric texture.
Taking these steps, using carefully controlled steam, gentle ironing, proper airing, and optional refresh cycles, will help keep your dry cleaned clothes looking crisp and smelling fresh. Always work patiently, use low heat and moisture, and test your techniques on hidden fabric spots to ensure you protect the garment’s integrity while achieving the best appearance post-cleaning.
Common Mistakes and How to Avoid Them During Home Dry Cleaning
Common mistakes during home dry cleaning often cause damage or poor results. One major error is skipping the test for colorfastness before applying cleaning solutions. Always test on a hidden area, like an inside seam, using the product diluted as directed. Wait 10 to 15 minutes and check for color change or fabric distortion. This simple step prevents surprises like color bleeding or fading.
Using too much water or detergent can also harm delicate fabrics, especially wool, silk, and cashmere. These materials absorb water differently, and excess moisture can weaken fibers or lead to shrinking. Use only the recommended amount on the product label, usually a teaspoon or less for hand washing. Avoid wringing wet garments; instead, press gently and dry flat to maintain shape.
Ignoring fabric-specific care instructions found on garment labels causes common problems. For example, a wool sweater should be hand washed in cold water and reshaped while damp, never wrung. Silk blouses require an even gentler approach and sunlight should be avoided when drying, as it can fade colors. Understanding and following these specific care tips reduce the risk of damage or misshaping.
- Always do a colorfastness test on a small, hidden area before cleaning.
- Use only the recommended amount of water and detergent to avoid soaking.
- Press, don’t wring, to remove excess water from delicate fabrics.
- Dry wool and cashmere flat to retain their shape and size.
- Avoid direct sunlight when drying silk and other sensitive fabrics.
- Check garment symbols carefully and follow instructions exactly.
- Pre-treat stains only after spot testing the cleaner for fabric safety.
Another frequent mistake is rushing the drying process or using heat sources like dryers or irons directly on wet garments. Heat can shrink fibers or cause color changes. Instead, air dry clothes laid flat on a clean, dry towel in a well-ventilated area. This method takes longer, usually 12 to 24 hours, depending on fabric thickness, but preserves the item’s integrity.
Testing garments for safety prevents costly mistakes. For instance, a silk blouse that bleeds dye during a spot test should be cleaned using just steam refreshers or professional care. Wool sweaters showing fabric distortion when gently pressed with water mean hand washing should be avoided, opting for dry cleaning kits with caution. Spot testing reveals how your clothes might respond, helping you adjust techniques or decide if professional services are safer.
When to Choose Professional Dry Cleaning Instead of DIY
Professional dry cleaning is the better choice when your garment has delicate fabrics, hard-to-remove stains, or complex construction that at-home methods cannot address safely. Choosing expert care helps avoid damage and ensures thorough cleaning, especially for valuable or intricately designed items. Knowing when to hand the work over to a professional will save you time, money, and frustration.
Types of Garments Best Left to Professionals
Silk, lace, wool, and other delicate fabrics require special handling beyond the scope of typical home dry cleaning kits. Although some wool items can tolerate gentle hand washing and steaming, finer versions or those with linings and trims need the precise solvents and controlled processes used by professionals. High-end garments with embroidery, embellishments, or vintage textiles demand this expertise as well to prevent fabric distortion, color loss, or damage to delicate detailing.
Professional cleaners use chemical solvents rather than water, which avoids shrinking or warping. Clothes with stubborn oil-based stains, lining issues, or strong odors unresponsive to airing or steaming also require professional treatment. Garments that are expensive or hold sentimental value deserve this specialized service to keep them in pristine condition.
Limitations of Home Dry Cleaning Kits
Home dry cleaning methods typically work best for lightly soiled or mildly odor-affected clothes. These kits rely on gentle detergents and brief cycles that cannot fully remove oil-based stains or heavy soil without risk of incomplete cleaning or damage. They also cannot replicate the exact chemical solvents or equipment that professionals use, so delicate fibers or complex garments may not respond well.
DIY methods often involve brief machine tumbling with reusable cloths and a small packet of cleaning solution designed for light refreshment. This process lacks the thorough agitation, solvent saturation, and controlled drying conditions found in professional setups. Attempting home treatment on deeply stained or structured garments may result in partial stain removal or fabric weakening.
Do not use home dry cleaning kits on clothes with oil stains; these typically require solvent cleaning that only professionals can provide.
Cost vs Quality Considerations
Professional dry cleaning costs vary but often range from about $7 to $20 per item depending on fabric and complexity. While this is more expensive than at-home kits, it ensures expert stain removal and garment care that preserves the life of your clothes. Home methods cost less upfront and save time but carry risks of uneven cleaning or fabric damage that can lead to replacement expenses.
Investing in professional services makes sense for delicate materials, valuable garments, or when you need guaranteed results. Choosing DIY approaches is suitable for everyday wear in good condition that only needs a light refresh. Balancing cost with the potential consequences on your clothing’s appearance and longevity helps decide when professional dry cleaning is necessary.
Step-by-Step Action Plan for Dry Cleaning at Home
Follow these clear steps to start dry cleaning your delicate clothes effectively with DIY methods or kits.
- Before You Begin: Check care labels on your clothes for dry clean only instructions and fabric type to confirm they are safe for home cleaning.
- Pre-Treatment Phase: Treat any visible stains with a gentle stain remover and blot carefully; stained areas should look visibly lifted before proceeding.
- Dry Cleaning Setup: Gather your home dry cleaning supplies like cleaning cloths, stain removers, and a dryer bag or cleaning kit to organize your workspace.
- Cleaning Cycle: Place the garment and cleaning cloth or kit sheets in the dryer bag or follow your kit instructions; after drying, check that the clothes smell fresh and appear clean.
- Post-Clean Inspection: Remove garments promptly after drying and inspect for any remaining stains or odors to decide if a repeat treatment is needed.
- Remove Wrinkles: Use a warm iron or steamer on the recommended setting to smooth wrinkles; clothes should feel soft and look smooth with no damage.
- Storage: Hang your cleaned clothes on appropriate hangers in a well-ventilated closet to keep them fresh until wearing.
- Evaluate Next Steps: After a few home cleaning cycles, evaluate if your clothes maintain color, shape, and freshness; if not, consider professional dry cleaning for those items.
Frequently Asked Questions
Is Dry Cleaning Actually Worth It?
Dry cleaning is worth it for delicate or structured clothes that water can damage. It preserves fabric shape and color better than washing with water alone. Use home kits mainly for light stains and refreshing clothes to save money.
Can I Use My Dryer for Dry Cleaning?
Some home dry cleaning kits let you use your dryer, but avoid using it alone. The heat and tumbling help activate the cleaning sheets but do not replace solvents. Always follow the kit instructions closely.
How Many Hours Is Dry Cleaning?
Professional dry cleaning usually takes 24 to 48 hours for pickup and return. At home, the cleaning process can take around 1 to 2 hours, depending on stain treatment and drying method used.
Is Dry Cleaning Completely Dry?
Dry cleaning uses chemical solvents instead of water, but it is not totally dry. Clothes may still contain some moisture from solvents or steam. Proper drying after cleaning is essential to avoid odor or mildew.
Can I Dry Clean Delicate Sweaters at Home?
Yes, many sweaters made of wool or blends are good candidates for home dry cleaning. Use gentle solvents and avoid harsh heat to prevent shrinking or damage.
Are Home Dry Cleaning Solvents Safe for All Fabrics?
Home solvents suit light stains but may harm delicate or special-care fabrics. Always check the label and test a small area first to avoid ruining clothes.
Key Points to Remember
Dry cleaning clothes at home can save time and money while preserving your delicates if done carefully. Start by identifying the right clothes to clean yourself and follow the exact steps using recommended kits or methods. Monitor your results closely and don’t hesitate to seek professional cleaners for sensitive or heavily soiled garments. Your next step is to pick a home dry cleaning kit and try your first cleaning session on a less precious item.