How to Clean Leather Clothes at Home: Safe Steps and Expert Tips
To clean leather clothes at home safely, use gentle, leather-specific cleaners, avoid excess water, and always test products on a small hidden area first. Clean your leather regularly every few months and condition it to keep the material soft and prevent cracking. Proper drying and storage also help maintain the garment’s shape and finish.
This information is ideal for anyone owning leather jackets, pants, or skirts who wants to maintain their items confidently without causing damage. You’ll learn how to select the right products, identify the leather type, and follow step-by-step cleaning and conditioning methods that protect your clothes.
Key Takeaways
- Identify your leather type before cleaning to choose the safest products and methods.
- Remove surface dirt with a soft brush or dry cloth before applying any cleaner.
- Use leather-specific cleaners and avoid household soaps or detergents that can dry out leather.
- Apply conditioner every 3 to 6 months to keep leather supple and prevent brittleness.
- Dry leather clothes naturally away from heat and direct sunlight to avoid warping.
- Store leather in a cool, well-ventilated space, using breathable garment bags if possible.
How to Clean Leather Clothes Safely at Home

Cleaning leather clothes at home requires care to avoid damage like discoloration, drying, or wrinkling. Start by testing any cleaning method on an inconspicuous area to check for adverse reactions. Avoid soaking leather or using harsh chemicals, as these can cause permanent damage. Gentle cleaning combined with proper conditioning helps maintain the leather’s softness and appearance.
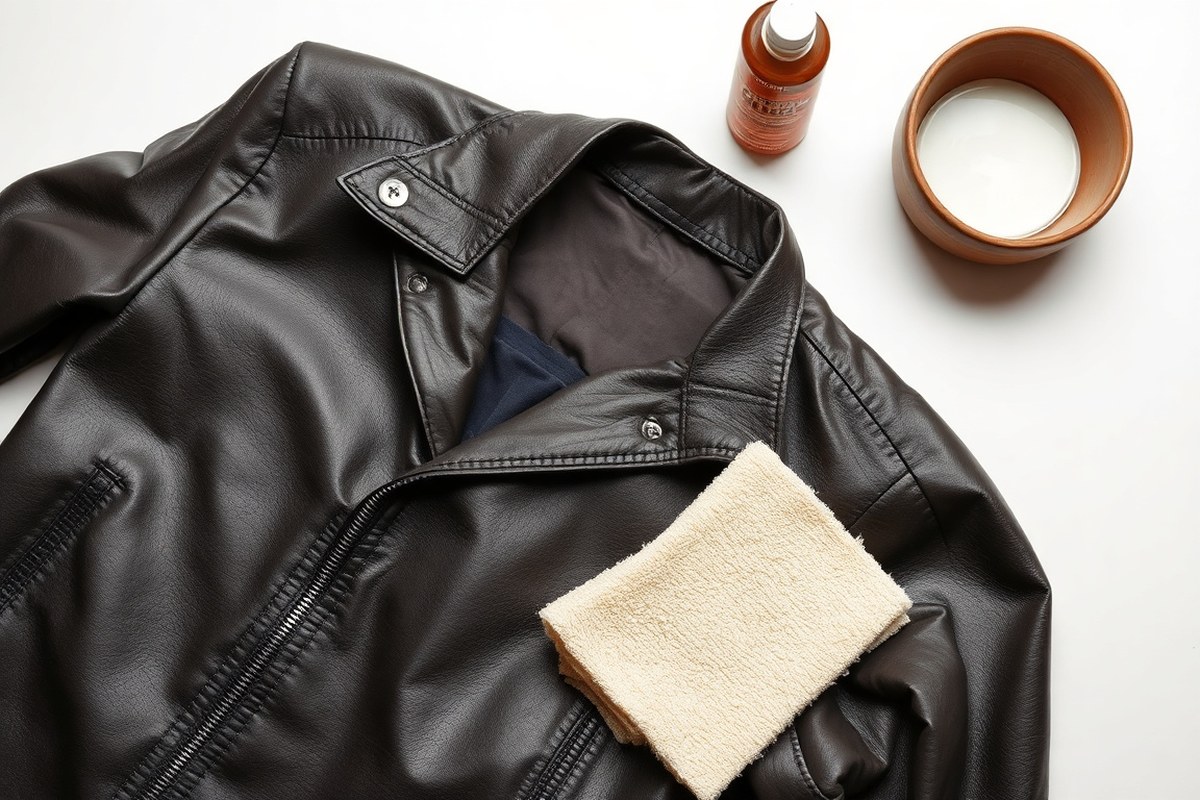
Before cleaning, gather soft microfiber cloths, a mild leather cleaner or a homemade solution (such as 2 parts olive or coconut oil to 1 part lemon juice for natural cleaning), and distilled water. Keep your work area well-ventilated and out of direct sunlight to prevent fading during drying. Follow these key steps to clean your leather clothes safely:
- Brush off surface dirt. Use a dry, soft brush or microfiber cloth to gently remove loose dust and dirt from the leather surface before applying any cleaner.
- Prepare your cleaning solution. Mix a small amount of a mild leather cleaner with distilled water or use the natural oil and lemon juice mixture. Avoid harsh soaps or detergents that strip natural oils.
- Dampen a cloth. Lightly moisten a clean microfiber cloth with your solution. It should be damp but not wet; excess moisture can damage leather.
- Wipe leather gently. Using circular motions, clean the leather one small section at a time. Do not scrub hard or saturate the material.
- Dry the leather. Immediately use a dry microfiber cloth to blot away moisture. Let the leather air dry naturally away from heaters or sunlight, roughly 4 to 6 hours or until fully dry.
- Check for damage or changes. After drying, inspect the leather for any discoloration, stiffness, or wrinkling. If you notice damage, stop cleaning and consult a professional cleaner.
- Apply conditioner if needed. After cleaning and drying, use an appropriate leather conditioner to replenish oils and keep leather soft and flexible.
Safety precautions include avoiding water saturation, testing any solution on a hidden spot, and never using abrasive tools. Cleaning too aggressively or using harsh chemicals can lead to permanent marks or cracks, increasing restoration costs that often run $40 to $100 or more. Gentle, routine cleaning combined with conditioning protects your investment while keeping leather looking fresh. Handle leather clothes with clean hands to prevent oil and dirt transfer during the process.
Choosing the Right Products for Leather Cleaning

Choosing the right cleaning product for your leather clothes is essential to protect their appearance and durability. Natural solutions like olive oil can both clean and condition leather, keeping it supple and maintaining its shine. However, not all household items are safe. Vinegar, for example, is acidic and can dry out or discolor leather, so it’s generally not recommended. Commercial leather cleaners or conditioning cleaners designed specifically for leather provide reliable results and usually cost between $10 and $25 per bottle. Below is a comparison table that summarizes common leather cleaning options, highlighting what they are, how to use them, and the types of leather best suited for each product.
| Cleaning Solution | Description | How to Use | Best For | Notes |
|---|---|---|---|---|
| Olive Oil | Natural oil that cleans and conditions | Apply a small amount on a soft cloth; gently rub in circular motions | Full-grain, top-grain leather | Use sparingly to avoid buildup; not for suede or nubuck |
| Commercial Leather Cleaner | Formulated products for cleaning leather safely | Damp cloth dipped in cleaner; wipe leather, then dry | All smooth leather types | Follow label instructions; $10, $25 per bottle |
| Leather Conditioning Cleaner | Two-in-one product that cleans and conditions | Apply with soft cloth; let absorb; wipe excess | Dry or aging leather | Helps maintain suppleness and color |
| Vinegar (Not Recommended) | Acidic household cleaner, harmful to leather | N/A | Not recommended for leather | Can cause drying and color loss |
| Leather Protectant Spray | Protects leather from water and stains after cleaning | Spray evenly over clean leather; dry completely | Outdoor-use items like jackets, shoes | Use regularly to maintain protection |
Applying any cleaner or conditioner starts with ensuring your hands are clean to avoid transferring oils and dirt. For daily maintenance, a simple wipe with a soft, damp cloth helps remove dust. Deep cleaning every 3 to 6 months keeps frequently worn leather clothes in the best shape.
Always test a small, hidden area first when using any product on leather to avoid unwanted damage or discoloration.
Natural oils like olive oil save time because they combine cleaning and conditioning but work best on certain leather types only. Commercial products provide targeted cleaning power with clear instructions but require purchasing dedicated cleaners. Avoid harsh household chemicals, which might save money initially but risk ruining your leather’s finish. Choosing the right product tailored to your leather type ensures your clothes look good and last longer.
Identifying Your Leather Type Before Cleaning
Different types of leather require different cleaning methods. Treating suede the same as smooth leather can damage its texture or leave stains. Knowing how to identify your leather type helps you choose proper care steps to keep your clothes in good condition.
Recognizing Smooth Leather
Smooth leather has a polished surface that’s shiny or matte with a consistent texture. It feels firm and smooth to the touch without any noticeable nap or fuzz. Common examples include cowhide or lambskin used in jackets and coats. You can gently rub a damp cloth on a small hidden area to test water resistance; smooth leather darkens slightly when wet but won’t absorb water quickly.
This leather is generally easier to clean with mild leather cleaner or saddle soap, followed by conditioning. Harsh scrubbing or soaking can damage the finish, but it won’t ruin as easily as suede. Avoid waterlogged conditions or cleaning products not meant for leather.
Identifying Suede and Nubuck Leather
Suede and nubuck have a soft, fuzzy texture created by buffing the inner layer or sanding the outer surface of the hide. Suede feels velvety, while nubuck is finer and smoother but still fuzzy. Both show a visible nap that changes when brushed in different directions. They absorb water quickly, turning dark or leaving spots when wet.
You should never clean suede with the same soap or liquid cleaners used for smooth leather. Instead, use a suede and nubuck care kit that includes a soft brush, eraser, and specialized cleaner. These kits maintain the nap and prevent water marking or staining.
Why Leather Type Affects Cleaning Methods
Using smooth leather cleaners on suede or nubuck mats down the fiber and permanently alters the texture. Instead of cleaning, this can cause damage that’s impossible to reverse. Suede and nubuck need gentle brushing and specific products to lift dirt without wetting the surface excessively.
Smooth leather can tolerate light liquid cleaners to remove grime or stains followed by conditioning to restore oils. Suede should be cleaned dry or with minimal moisture to avoid water stains. Proper identification of your leather type prevents costly mistakes and preserves your garment’s appearance.
How to Check Your Leather Before Cleaning
Start by reading the care tag on your leather clothing. Manufacturers often specify the leather type or recommended cleaning methods. When no label is present, examine the texture carefully under good light. Feel the material: smooth leather lacks fuzz, suede has a nap, and nubuck is somewhere in between with a subtle velvety feel.
To test, lightly dampen a cotton swab and touch an inconspicuous area. Smooth leather darkens but dries evenly. Suede or nubuck darkens significantly and may show watermarks if not dried quickly and brushed properly. This quick test helps decide if you need a suede-specific kit or a gentle leather cleaner.
Cleaning Decision Guide by Leather Type
When you identify smooth leather, choose mild leather cleaners or saddle soaps designed for polished surfaces. Use a soft cloth dampened with the solution and work gently. Always wipe off any residue with a clean, slightly wet cloth, then dry the item by air. Finish with a leather conditioner to keep the leather supple.
For suede or nubuck, avoid any liquid cleaners except those in a specialized suede care kit. Brush dirt off with a suede brush and use an eraser block for stains. Lightly spraying the suede cleaner from the kit and letting it air dry before brushing keeps the nap intact. These kits typically cost $15 to $30 and include tools designed to protect these delicate textures.
Step-by-Step Guide to Remove Dirt and Stains
Removing dirt and stains from leather clothes requires gentle care to avoid damage. You’ll need soft cloths, mild soap, and sometimes a vinegar solution or specialist leather cleaner to get the best results. Knowing how to treat different stain types lets you keep your leather looking its best without harming the finish.
Cleaning Light Surface Dirt and Dust
Regularly removing dust and light dirt prevents buildup that can dull leather’s surface. Start by using a soft lint-free cloth or a vacuum with a brush attachment to lift away loose particles. Avoid harsh scrubbing, which can scratch or dry out the leather’s surface.
Use a mild soap solution made with a few drops of dish soap mixed in warm water for gentle cleaning. Dampen the cloth slightly and wipe the leather evenly to remove grime. Always follow up with a dry cloth to absorb moisture quickly.
- Remove surface dust with a vacuum brush attachment or a soft cloth.
- Mix a mild soap solution: 1 teaspoon dish soap per cup of warm water.
- Lightly dampen a clean microfiber cloth with the solution.
- Wipe the leather surface gently without saturating it.
- Use a dry cloth to blot the surface and remove moisture.
- Allow your leather garment to air dry away from direct heat.
Removing Oil, Grease, and Food Stains
Act quickly on oil and grease stains to prevent lasting damage. Gently dab away extra oil with a dry cloth or paper towel, taking care not to push the stain further into the leather. Mix equal amounts of white vinegar and water to carefully remove the stain, being cautious not to saturate the leather.
Spray or apply a leather-approved stain remover if vinegar isn’t effective. Test any cleaning solution on a hidden area first to check for color changes. Repeat cleaning a few times if the stain persists, but never over-wet the leather.
- Blot excess oil or grease immediately with a dry, lint-free cloth.
- Mix equal parts white vinegar and water in a spray bottle.
- Lightly spray the stain or apply the solution with a soft cloth.
- Dab gently, avoid rubbing or scrubbing the stain.
- Wipe away residue with a clean, damp cloth.
- Dry with another soft cloth and allow air drying.
- Consider a commercial leather stain remover if needed, following label directions.
Dealing with Water Spots and Discoloration
Water spots can happen if your leather clothes get wet unevenly. These spots leave mineral residues that alter the leather’s color. Use a slightly damp cloth to spread the moisture evenly across the stained area, avoiding soaking. Let the piece dry naturally on a flat surface.
For discoloration caused by water or sun exposure, use a leather conditioner after cleaning to restore moisture and prevent cracking. Conditioning also helps even out the leather’s colour and shine.
- Dampen a clean cloth with plain water (not dripping wet).
- Gently wipe over the water spots to even out moisture.
- Blot excess moisture with a dry cloth.
- Lay the garment flat and let it air dry at room temperature.
- Apply a leather conditioner once dry to restore oils and color.
Handling Ink Stains and Tough Marks
Ink stains on leather are difficult to remove and often require professional help. For small spots, gently blot with a leather-safe cleaning product. Avoid using rubbing alcohol or acetone, which can remove dye and damage leather irreversibly.
Tough marks from dirt or scuffs sometimes need repeated cleaning with a commercial leather cleaner. Use a soft-bristled brush on textured leather surfaces to lift debris before applying cleaner. Always do a spot test first and follow product instructions carefully.
- Test any cleaner on a hidden patch of leather first.
- For ink spots, gently blot with a leather-safe stain remover or a damp cloth.
- Avoid harsh solvents like alcohol or acetone.
- Apply commercial leather cleaner to remove tough dirt or scuffs.
- Use a soft brush on textured leather for better cleaning access.
- Wipe off residue with a clean, dry cloth.
- Allow your leather garment to dry away from heat and sunlight.
How and When to Condition Leather Clothes
Conditioning leather clothing keeps it soft, flexible, and helps prevent cracking or drying out. Applying a good leather conditioner every few months restores moisture and maintains the leather’s natural look and feel.
Choosing the Right Leather Conditioner
Select a conditioner formulated specifically for leather clothing, not for furniture or car seats, as these may differ in consistency and additives. Leather conditioners with natural oils or creams work best because they absorb into the hide without leaving a greasy residue. Look for products labeled safe for your leather type, such as Leather Honey Leather Conditioner, which only needs application every six months. Avoid using oils or conditioners meant for faux leather, since they won’t absorb properly and can cause peeling.
Using distilled water during cleaning and conditioning helps prevent residue buildup, keeping your leather smooth and clean. Pick a conditioner that is easy to apply with a soft cloth and has clear instructions about absorption time to avoid over- or under-conditioning.
Application Techniques for Even Coverage
Applying conditioner correctly is important to avoid uneven patches or sticky spots. Start with clean, dry leather before conditioning. Use a clean, soft cloth, like an old cotton t-shirt, to apply the product sparingly and evenly. Focus on small sections at a time for thorough coverage without saturating the material. Follow this straightforward process to condition your leather clothes:
- Lay your leather item flat on a clean surface to work comfortably and avoid creases.
- Put a small amount of leather conditioner on a soft, lint-free cloth.
- Gently rub the conditioner into the leather using circular motions, covering all areas evenly.
- Pay extra attention to areas prone to dryness, such as elbows, cuffs, and seams.
- Allow the conditioner to soak into the leather for 15 to 30 minutes, as directed on the label.
- After absorption, buff the surface with a dry cloth to remove excess and restore shine.
- Let the leather air dry completely before wearing or storing to prevent moisture buildup.
Applying too much conditioner at once can leave the leather sticky or discoloured, so use small amounts and build up if needed.
Recommended Conditioning Schedule
Condition most leather clothing every 3 to 6 months to maintain softness and vibrant color. Items worn frequently or exposed to dry or cold environments may benefit from conditioning closer to every 3 months. Less-used pieces can be conditioned every 6 to 12 months to prevent brittleness and keep leather supple. Leather Honey Leather Conditioner is one option designed to last up to six months per application, reducing how often you need to treat your clothes.
After deep cleaning or if the leather feels dry or stiff, apply a conditioner immediately to restore moisture lost during washing. Regular conditioning can significantly extend leather’s lifespan, preventing cracks and preserving its appearance over time. Check your leather after each cleaning and adjust the schedule if it starts to feel stiff or faded.
Proper Drying and Storing Techniques for Leather
After cleaning leather clothes, allow them to air dry naturally at room temperature. Typically, leather takes between 12 to 24 hours to dry completely, depending on the thickness and the environment’s humidity. Avoid placing leather near heat sources like radiators, heaters, or using a hairdryer on high because heat can cause the leather to dry out, crack, or lose its shape. Keep the leather garment away from direct sunlight during drying, as sunlight promotes fading and stiffness.
To dry leather clothes safely, hang them on a wide padded hanger to support their shape and prevent stretching. Place the hanger in a well-ventilated area, ideally with moderate temperature and low humidity. Avoid folding leather when damp since creases can become permanent. Resist the temptation to speed up drying with heat, as it compromises leather’s flexibility and leads to long-term damage.
Once dry, maintain leather’s softness by applying a conditioner designed for your leather type. Conditioning replenishes oils lost during cleaning and drying, preventing the surface from becoming brittle. Apply conditioner sparingly, following product instructions, and allow it to soak in fully before storing.
Proper storage plays a major role in preserving the shape and quality of leather clothing. Store your leather in a cool, dry closet away from sunlight and heat sources to avoid color fading and material drying. Use a padded hanger to keep the garment’s natural shape intact. Avoid plastic garment bags, which trap moisture and promote mildew; instead, store leather in a breathable cloth bag or cover loosely with a cotton sheet.
Make sure the closet has good air circulation to prevent dampness, which can damage leather. Do not store leather clothes in tightly packed spaces, as this leads to wrinkles and creases. For seasonal storage, clean and condition the leather first, then place the clothing in a breathable cover. Check your leather garments periodically, reconditioning them if needed to maintain moisture balance and flexibility.
Common Leather Cleaning Mistakes and How to Fix Them
Cleaning leather clothes at home often leads to avoidable damage when common mistakes occur. One frequent error is skipping the conditioning step after cleaning. Leather loses its natural oils through washing, causing it to dry out, crack, and feel stiff or cardboard-like. To fix this, apply a quality leather conditioner immediately after the leather dries. This restores moisture and flexibility. Repeat conditioning every few months, especially in dry climates where leather dries faster.
Another mistake is using harsh cleaners or excessive water. Leather is porous and too much water can lead to stains or deformation. Avoid soaking leather or using household detergents. Instead, use a leather-specific cleaner applied sparingly with a soft cloth. Work gently to avoid pushing dirt deeper into the pores, which can create a gritty, rough texture. Clean only the dirty spots rather than washing the entire item unless necessary.
- Avoid using bleach, ammonia, or abrasive soaps on leather
- Never dry leather in direct sunlight or with a heat source
- Do not store leather clothes in plastic bags or airtight containers
- Wipe dust and dirt off regularly before it sets in
- Test any new cleaning product on a hidden area first
Never dry leather with a hairdryer or place it near heaters. Rapid drying causes the material to become brittle and crack. Instead, air dry leather at room temperature away from sunlight. Preventing problems often means protecting leather before cleaning. Regularly brushing off dust and dirt stops particles from embedding in the grain. Using a protective spray designed for leather creates a barrier against stains and moisture damages.
If you accidentally apply the wrong cleaner or dry leather incorrectly, you might notice stiff patches or surface cracking. To improve this, apply a rich conditioner multiple times, massaging it into the dry areas. For severe damage, professional treatment may be needed. Prevention through gentle cleaning, prompt conditioning, and proper storage (cool, ventilated places) saves money and effort over needing repairs or replacements.
When to Consult a Professional Leather Cleaner
Avoid cleaning your leather clothes yourself when the stains cover a large area, show no signs of fading after gentle attempts, or appear on valuable pieces. Significant damage like deep cracks, severe discoloration, persistent odors, or major discoloration often requires professional care. Professionals have tools and solutions that are safer for tough stains and can restore delicate finishes without risking further harm.
Assess your leather garment carefully before choosing home cleaning. If the leather shows signs of structural damage, such as brittleness or deep scratches, skip at-home methods to prevent irreversible damage. Also, if you can’t identify the leather type or the stain’s origin, a professional can advise the safest treatment. Cleaning on your own with an unsuitable method or product could cause discoloration, stiffness, or shrinkage.
Professional leather cleaning services generally charge based on the garment’s size, leather material, and the complexity of cleaning required. Small items like gloves or wallets may cost around $20 to $40, while jackets or coats can range from $50 to $150 or more. Exotic leathers or intricate detailing may push prices higher. Some services also offer conditioning and restoration for an additional fee. Comparing local providers and reading reviews can help you find a technician who suits your needs and budget.
Choosing a professional cleaner starts with verifying their experience in treating leather garments similar to yours. Look for cleaners who specify leather garment care in their services and who clearly explain their cleaning process. You can ask them how they handle stains, whether they use specialized solvents, and what types of leather they service. A good cleaner will recommend a patch test on a hidden spot before working on the whole garment, ensuring the process won’t damage your item.
The decision rule for professional cleaning is straightforward: if a stain or damage is beyond minor surface marks you can manage with a gentle leather cleaner, or you’re unsure about the cleaning method, opt for professional care. This prevents further damage and preserves the garment’s appearance. Well-done professional cleaning restores leather’s look and feel, removing impurities and odors while protecting its finish and flexibility.
Always test any treatment on a hidden patch of leather first; this step helps avoid surprises like discoloration, stiffness, or damage before committing to full cleaning.
Step-by-Step Action Plan for Cleaning and Maintaining Leather Clothes
Follow this plan to clean your leather clothes safely and keep them in good condition.
- Before you start: Identify the leather type of your garment to choose the right cleaning method and products. Check for any care labels or do a small patch test to avoid damage.
- Day 1: Remove surface dirt using a soft brush or dry cloth. You should see less dust or grime on the garment’s surface afterward.
- Day 1: Clean stains with a recommended leather cleaner applied gently with a damp cloth. The stain should lighten or disappear without discoloring the leather.
- After cleaning: Allow the leather to air dry naturally away from direct heat or sunlight to prevent stiffness or cracking. The leather should feel dry but still supple.
- Day 2: Apply a leather conditioner evenly to restore moisture and flexibility. After conditioning, the leather should feel softer and look less dull.
- Weekly: Store your leather clothes on padded hangers in a cool, dry place to maintain shape and prevent damage. You shouldn’t see any wrinkles or mold forming.
- Monthly: Inspect your leather clothes for any new stains or signs of wear and treat them promptly using the appropriate method.
- As needed: Consult a professional leather cleaner if you encounter tough stains, extensive damage, or have expensive items to preserve.
Frequently Asked Questions
Can I Clean All Types of Leather Clothes the Same Way at Home?
No, different types of leather need tailored care. Smooth leather can be gently wiped with a damp cloth, while suede or nubuck requires special brushes or products. Always identify your leather type before cleaning.
Is It Safe to Use Homemade Solutions Like Lemon Juice and Oil on Leather?
Yes, a natural mix of two parts coconut or olive oil and one part lemon juice can clean leather gently. Test it first on a small hidden area to avoid discoloration.
How Often Should I Clean My Leather Clothes to Keep Them in Good Condition?
Clean your leather clothes lightly after each wear and deep clean only when needed. Over-cleaning can dry out leather, so condition it regularly to maintain softness.
What Should I Do If My Leather Clothes Develop a Sticky Residue After Cleaning?
Sticky residue usually means too much product was used. Wipe the leather lightly with a damp cloth, then air dry. If stickiness persists, use a leather-specific cleaner or consult a professional.
Is It Advisable to Machine Wash or Dry Clean Leather Clothes at Home?
Avoid machine washing or home dry cleaning kits, as they can damage leather’s texture and finish. Use spot cleaning or professional services for thorough cleaning.
Can I Apply Leather Protectant Spray Right After Cleaning at Home?
Yes, applying a protectant spray after cleaning and conditioning helps shield leather from water and stains, especially for frequently worn items. Ensure leather is fully dry before spraying.
Before You Go
Cleaning and caring for leather clothes at home extends their life and keeps them looking good. Taking small, regular steps, like gentle cleaning and conditioning, makes a big difference over time. Start by checking your leather’s type today and choose a cleaner suited for it to protect your investment. Your leather clothes will thank you with lasting quality and style.