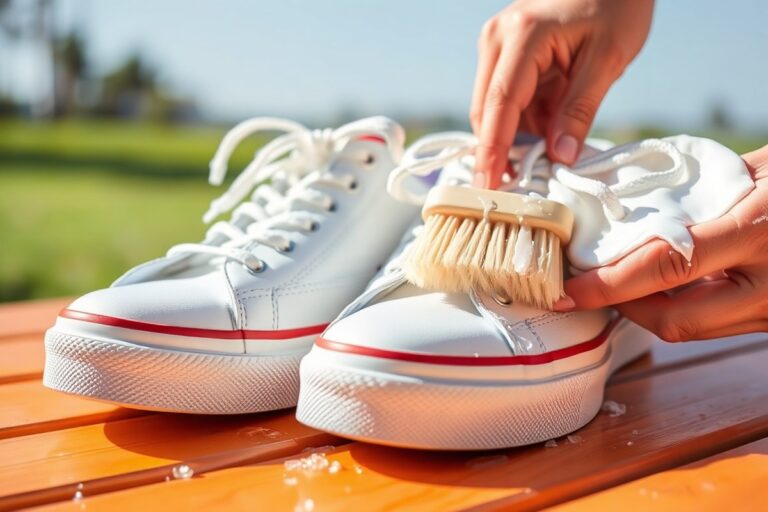
How to Clean Dirty Shoes: 8 Proven Ways for Every Material and Stain
To clean dirty shoes effectively, use gentle methods tailored to the shoe’s material, avoid harsh chemicals, and allow proper drying away from direct heat. Start by removing laces and loose dirt, then select a cleaning method that suits your specific shoe type for best results. This advice suits anyone who wants to restore their shoes without damage, whether dealing with fabric, leather, or suede.
You will learn safe, easy ways to treat different materials and stains at home, plus tips on handling insoles, laces, and soles. Following these steps helps you keep your shoes looking fresh and extend their life while avoiding common cleaning mistakes.
Key Takeaways
- Remove laces and brush off dirt before applying any cleaning solution to your shoes.
- Choose a cleaning method based on your shoe material to prevent damage and discoloration.
- Use mild detergents or specialized cleaners and avoid harsh chemicals that harm shoe surfaces.
- Soak laces separately for about 15 minutes to remove dirt effectively without damaging shoe fabric.
- Let shoes air dry for at least 30 minutes in a cool, shaded area away from direct sunlight or heat.
- Spot-treat stubborn stains by applying detergent directly and allowing it to sit for 10 to 15 minutes.
1. How to Clean Dirty Shoes Safely and Effectively
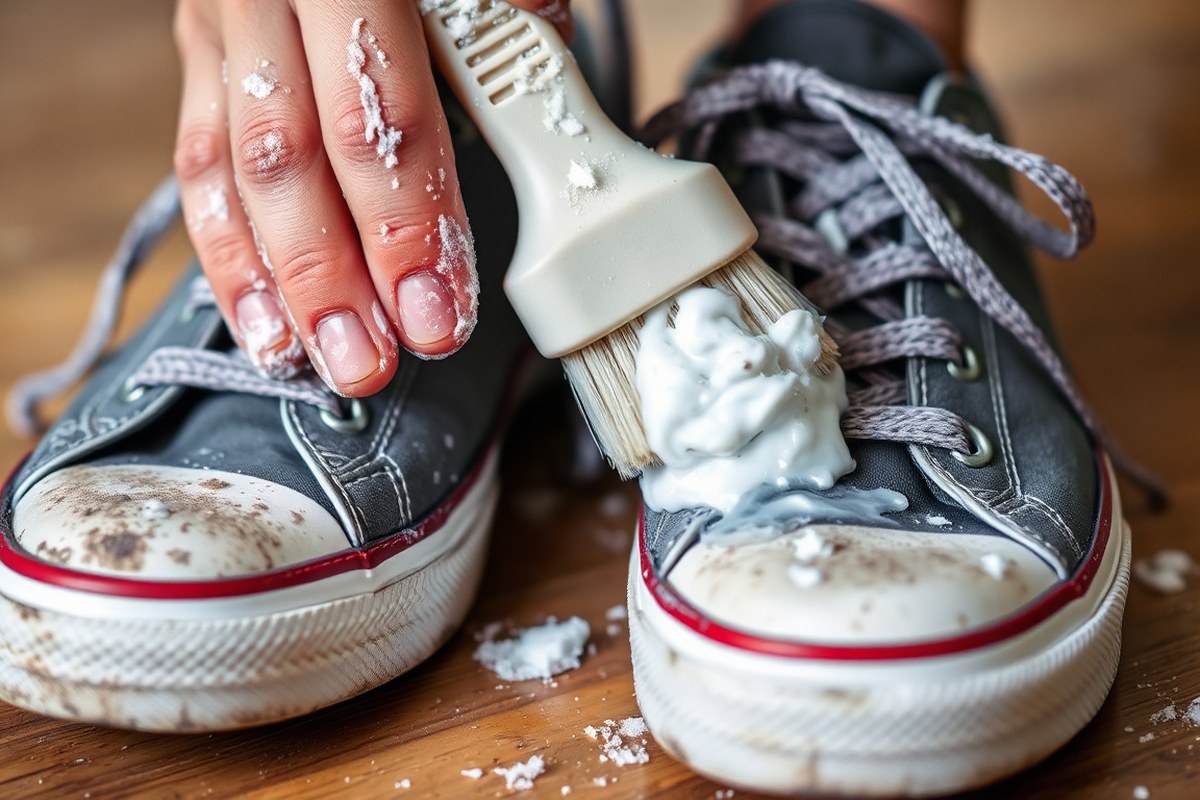
Cleaning your dirty shoes safely starts with preparing both your shoes and your workspace to avoid damage. Knowing your shoe’s material type influences how much water and cleaning solution you’ll use. General cleaning tools and materials like soft brushes and mild detergents are effective on many surfaces but using harsh chemicals or scrubbing too hard can ruin your shoes.
Before you begin, gather these essentials: a soft-bristled brush or an old toothbrush, a microfiber cloth or soft towel, mild liquid detergent or dish soap, warm water (around 90°F or 32°C), a bowl or bucket, and some old newspapers or shoe trees. Removing laces and insoles where possible helps you clean every part thoroughly and prevents moisture damage inside the shoe. Stuffing your shoes with newspaper or inserting shoe trees keeps their shape and stops them from warping during cleaning. Follow these steps to clean your shoes without causing damage:
- Remove laces and insoles. This allows better access to all surfaces. Insoles can be cleaned separately to avoid moisture buildup inside the shoe.
- Brush off loose dirt and debris. Use a dry soft brush or toothbrush to gently remove dirt from the surface and sole without scratching or abrading the material.
- Prepare a cleaning solution. Mix a few drops of mild detergent with warm water. Avoid hot water as it can deform glue or certain shoe materials.
- Spot test the solution. Apply the mix to a small hidden area to check for colorfastness or material reaction, especially important with sensitive fabrics like suede.
- Apply the solution gently. Dip the brush or cloth in the solution and gently scrub the shoe’s surface with circular motions. Avoid soaking the shoe.
- Wipe off excess moisture. Use a clean, damp cloth to blot away soap and dirt residues after scrubbing, then dry with a soft towel to remove surface moisture.
- Dry shoes naturally at room temperature. Stuff them with newspaper or use shoe trees to maintain shape while drying. Avoid direct sunlight or heat sources that can crack or fade materials.
This process usually takes 15 to 30 minutes per shoe depending on dirtiness and materials, and costs around $5 to $10 for basic household supplies if you don’t already have them. Good results look like shoes with lifted dirt stains, restored color, and no water damage or material distortion. Avoid leaving shoes wet for long, over-saturating them, or using harsh brushes or cleaners to prevent fading, warping, or texture loss. Repeating these steps every couple of weeks, or when your shoes look dirty, helps keep them fresh, clean, and longer-lasting.
2. Choosing the Right Cleaning Method for Different Shoe Materials

Not all shoe materials can be cleaned with the same method because each type of fabric or leather has unique properties that react differently to water, soap, and scrubbing. Selecting the right cleaning approach preserves the shoe’s look and durability while preventing damage such as discoloration, shrinking, or weakening of adhesives. For example, leather shoes should never be soaked in water, while canvas shoes often handle it fine. Understanding these differences helps you clean shoes safely and effectively.
Leather requires gentle cleaning and minimal moisture to avoid stains or warping. Use a damp cloth with a dedicated leather cleaner or mild soap solution and avoid soaking. Suede and nubuck must be kept as dry as possible; use special suede brushes and cleaners to remove dirt without water, which can cause marks. Fabric and canvas shoes are more forgiving and can often be cleaned with soap and warm water, sometimes even machine-washed carefully. Knit and mesh athletic shoes need a soft touch to avoid snagging or wear from harsh scrubbing.
| Shoe Material | Recommended Cleaning Method | Risks to Avoid |
|---|---|---|
| Leather (including white leather) | Damp cloth with leather cleaner or mild soap; no soaking | Avoid too much water; soaking can damage glue and cause stains |
| Suede and Nubuck | Use a suede brush and suede-specific cleaner; avoid water | Water causes stains and discoloration; no soaking |
| Canvas and Fabric | Machine wash or hand wash with mild detergent; water safe | Harsh scrubbing may damage fabric; avoid bleach |
| Knit and Mesh (e.g., athletic shoes) | Hand wash gently with mild soap; avoid machine unless label allows | Snagging and tearing from rough scrubbing |
| Plastic Shoes (e.g., jellies) | Soak in soapy water, then rinse and air dry | Avoid heat drying which can deform plastic |
Choosing the right cleaning method starts with identifying your shoe’s main material. Check the care label if available. Use mild dish soap diluted in water for many shoes but skip soaking and harsh chemicals on sensitive materials. Always start with a small test area, especially on colored or delicate shoes. Cleaning products designed for leather, suede, or canvas can help remove toughest stains safely. Dry shoes away from direct heat to avoid shrinking, cracking, or warping.
Sunlight and heat can permanently damage and discolor delicate materials like suede and leather, so always dry shoes at room temperature.
Special care is required for shoes made of mixed materials; treat each part based on its specific needs. When in doubt, use the gentlest method or consult a professional cleaner to avoid costly damage. Proper cleaning can extend the life of your shoes and keep them looking fresh without sacrificing their material integrity.
3. How to Clean Fabric, Canvas, and Knit Shoes
Cleaning fabric, canvas, and knit shoes starts with removing loose dirt and drying debris. This helps prevent dirt from embedding deeper during washing. Afterward, address any specific stains carefully with appropriate solutions. Let shoes air dry completely while maintaining their shape to avoid warping or shrinkage.
Removing Dirt and Dry Debris
Before using any liquid cleaning product, remove loose dirt, dust, and dry debris to avoid spreading dirt further. A soft brush or an old toothbrush with slightly trimmed bristles can help lift dirt gently from the fabric without damaging the delicate fibers. For shoes with removable insoles and laces, take those out first to clean everything thoroughly.
- Take off the shoe laces and set them aside for separate cleaning.
- Use a dry microfiber cloth or a soft-bristled brush to lightly brush off loose dirt and dust from the shoe surface.
- Focus on outsole edges and seams where dirt tends to collect.
- Remove insoles if possible and brush them to remove surface debris before washing separately.
Removing dry debris first reduces the risk of smearing stains or pushing dirt further into the fabric during the wet cleaning stage.
Spot Cleaning Stains and Scuffs
Target stains with careful spot cleaning to preserve the fabric’s look. Use a mild cleaning solution suited for fabric shoes. Homemade options include mixing warm water with a few drops of gentle liquid detergent or white vinegar. Baking soda combined with water can act as a mild stain remover for tough spots. Avoid harsh chemicals that may discolour or weaken fabric fibers.
- Mix a cleaning solution using warm water with a teaspoon of mild liquid detergent or white vinegar per cup of water.
- Dip a soft brush or clean cloth into the solution and gently scrub the stained area in circular motions.
- For stubborn stains like grass or coffee, apply a paste of baking soda and water, let it sit for 10 minutes, then brush away gently.
- Rinse the cleaned area with a damp cloth to wipe away any residue from cleaning agents.
- Use a clean, dry towel to blot away excess moisture from the treated spots.
Repeat the process if stains persist, but avoid soaking the fabric to prevent shrinking or damage. For rubber or plastic trim, a Magic Eraser can remove scuffs without harming fabric.
Proper Drying and Maintenance
Fabric shoes need to air dry naturally at room temperature to prevent distortion or cracking. Avoid direct sunlight and high heat from dryers or heaters, as these can cause colors to fade and materials to shrink. Stuffing shoes with paper towels or old white socks helps retain their original shape during drying.
- Place the cleaned shoes on a newspaper or towel in a well-ventilated area away from direct sunlight.
- Stuff the shoes with white tissue paper or clean socks to maintain shape and absorb moisture internally.
- Allow shoes to air dry for at least 12 to 24 hours, depending on humidity and thickness of the fabric.
- Remove the stuffing periodically if it becomes very damp to speed drying and prevent odors.
- Once dry, replace the insoles and laces, which should be washed and dried separately beforehand.
Following these steps preserves both the look and the structure of your fabric shoes. Drying times vary by fabric thickness and environmental conditions, so patience is key to avoid damage caused by rushing the process.
4. How to Clean Leather, Patent, and Faux Leather Shoes
Leather, patent, and faux leather shoes require careful cleaning to avoid damage while keeping the material supple and attractive. Avoid harsh scrubbing or soaking that can weaken the leather’s structure. Proper stain treatment, gentle cleaning, and conditioning after washing maintain the shoes’ appearance and longevity.
Gentle Cleaning and Removing Surface Dirt
Leather and faux leather shoes should be cleaned regularly to remove dirt and prevent staining. Start with a soft, damp cloth to gently wipe away surface dust and grime. Avoid using too much water which risks damaging the material. For tougher dirt, a mild soap solution can be used, but always rinse well and avoid soaking. Use this step-by-step process to clean your leather shoes safely:
- Remove loose dirt by brushing the shoes gently with a soft-bristled shoe brush or dry cloth.
- Moisten a clean cloth with water, then mix in one or two drops of liquid dish soap to form a gentle cleaning solution.
- Wipe the shoes carefully with the soapy cloth, focusing on dirty areas without saturating the leather.
- Use a second clean, damp cloth to wipe away soap residue thoroughly.
- Pat the shoes dry gently with a soft towel to absorb excess moisture.
- Allow the shoes to air dry at room temperature, away from direct heat sources, for several hours.
Tackling Scuffs and Stubborn Stains
Tough scuffs and stains need special attention to avoid permanent marks. For patent and faux leather, applying petroleum jelly directly onto scuffs and buffing with a soft cloth can help restore the shine. For white leather shoes with stubborn stains, gently rubbing a wet soft-bristle brush or your fingertip dipped in baking soda works well to lift discoloration.
Be cautious not to use harsh chemicals or excessive pressure which can damage the delicate surface. Avoid using water excessively or soaking the leather, as this causes warping or discoloration.
Conditioning and Protecting Leather
Conditioning leather after cleaning is key to maintaining its suppleness and preventing cracking. Use a dedicated leather conditioner or protector, such as Furniture Clinic Leather Protection Cream, to keep the material soft. Apply a small amount evenly over the entire shoe with a clean cloth and allow it to absorb fully before wearing.
Regular application after cleaning (about every 1 to 3 months depending on wear) helps extend the life of leather shoes. Avoid skipping this step after washing because cleaned leather loses oils and dries out. Faux leather can also benefit from a light conditioner or water-repellent spray but check product labels for suitability.
5. How to Clean Suede, Nubuck, and Sheepskin Shoes Without Damaging Them
Suede, nubuck, and sheepskin shoes must be cleaned without using water to avoid damaging their delicate texture and losing the soft nap. These materials absorb moisture easily, which can cause stains, shrinkage, or stiffening. Using the right tools like suede brushes, erasers, and specialized sprays ensures you safely remove dirt and stains while restoring the natural look of your shoes.
Dry Brushing and Dirt Removal
Cleaning suede starts with dry brushing to lift loose dirt and dust that build up on the surface. Avoid water because it can darken suede and damage its finish. A soft-bristled suede brush is the essential tool to gently brush away dirt without harming the fibers. Brush in one direction, following the nap of the material, to maintain its natural texture. For daily maintenance, light brushing after each wear keeps your shoes looking fresh and prevents buildup that becomes harder to remove later.
Removing Spots and Stains Safely
For stains, specialized suede erasers or cleaning blocks work well. Gently rub the stained area to lift spots without wetting the shoe. If dry methods don’t fully remove stains, use a small amount of white vinegar or rubbing alcohol on a soft cloth to blot the spot carefully. These liquids won’t soak into suede as water does, reducing the risk of damage.
- Dry brush the shoe gently to remove loose dirt.
- Use a suede eraser to target small stains or scuffs by rubbing lightly.
- Dampen a clean cloth with white vinegar or rubbing alcohol; do not soak.
- Blot the stained area gently, avoiding rubbing which can damage fibers.
- Let the shoe air dry away from direct sunlight or heat sources.
- After drying, brush the suede again to restore the texture.
- Apply a silicone-based protective spray to repel water and dirt.
Never use water directly on suede shoes; it will cause stains and may shrink the material.
Restoring the Suede Finish
After cleaning, the nap of suede shoes may look flat or stiff. Restoring the soft texture requires gentle brushing with a suede brush or a clean toothbrush. Work in the direction of the fibers to lift and fluff the nap back into place.
Dry your shoes naturally in a well-ventilated area, keeping them away from sunlight or heat that can cause fading or shrinking. Use shoe trees or stuff the shoes with paper to help maintain their shape as they dry.
Applying a silicone spray after cleaning helps protect against future water damage and stains. These sprays typically cost between $8 and $15 and last for several applications, depending on how often you wear your shoes.
6. Cleaning Special Parts: Insoles, Laces, and Soles Explained
Cleaning the removable parts of your shoes, insoles, laces, and soles, ensures complete shoe care and extends their life. Each part collects dirt and bacteria differently, so they need targeted care. Insoles absorb sweat and odor, laces get grimy from handling and exposure, and soles gather mud and other debris from regular use. Proper cleaning restores their look, freshness, and function without causing damage.
For insoles, removing them from the shoes lets you clean underneath and air them out. You can gently scrub insoles with a mild detergent and warm water to remove sweat and odors. Avoid soaking if the insoles are foam or memory foam, as excess water can cause damage or slow drying. After cleaning, leave them to air dry fully before putting them back in your shoes to prevent mold or odor buildup.
Laces benefit from soaking and a thorough rinse. Use a liquid laundry detergent mixed with warm water and let them soak for about 15 minutes. This loosens dirt and oils that build up from frequent use. After soaking, rinse under running water and gently rub if needed. Avoid harsh bleaches, unless the laces are white and you’re prepared to do a spot test. Air-drying laces flat prevents stretching or warping.
Soles often require scrubbing due to mud and grime. A simple mixture of equal parts baking soda and water works well to break down stubborn dirt on rubber soles. Use a stiff brush and work in a circular motion to clean thoroughly. This method cleans without harsh chemicals that might degrade the sole material. Rinse off the baking soda paste and dry the soles with a cloth or air dry before reassembling your shoes.
- Remove insoles and laces: Take these out before cleaning the shoes to clean each component fully and speed drying.
- Prepare cleaning solutions: Mix a mild detergent with warm water for insoles and laces, and a paste of equal parts baking soda and water for soles.
- Soak laces: Immerse the laces in the detergent solution and soak for about 15 minutes, then rinse thoroughly.
- Clean insoles: Use a soft cloth or sponge dipped in soapy water to scrub insoles gently without soaking. Blot excess moisture with a towel afterward.
- Scrub soles: Apply the baking soda paste and scrub the soles with a stiff brush using circular motions until dirt is removed, then rinse well.
- Dry components: Air dry insoles and laces on a flat surface. Avoid dryers, which can damage materials.
- Reassemble shoes: Put insoles and laces back in the shoes only after all parts are completely dry to prevent mold and odors.
7. How to Use Household Ingredients and Commercial Products Safely
Baking soda, white vinegar, mild dish soap, and water are common household ingredients that effectively clean many types of shoes. Baking soda works well as a gentle abrasive and deodorizer. Mix equal parts baking soda and water to form a paste, then apply it with a soft brush to stained areas. White vinegar is useful for removing odors and tough stains; dilute it with water in a 1:1 ratio before use to avoid damaging shoe materials.
Mild dish soap diluted in warm water can cut through dirt and grime without harsh chemicals. Use a soft toothbrush to scrub gently, then wipe away residue with a clean, damp cloth. Always test your cleaning solution on a small, hidden area first, especially on delicate materials like suede or knit, to check for colourfastness or damage.
Commercial shoe cleaners offer convenience and formulations designed for specific materials. They can be safer for sensitive fabrics if labeled appropriately. When choosing a commercial product, look for those made for your shoe type, leather, canvas, or mesh, and check for non-toxic, biodegradable ingredients if health and environmental impact matter.
Preparation is key. Insert a shoe tree or stuff the shoes with crumpled newspapers to keep their shape during cleaning. Avoid using hot water or machine dryers as they can deform shoes or damage adhesives.
- Never mix household cleaners like vinegar and bleach, as this creates harmful fumes.
- Apply cleaning solutions sparingly; over-saturating can weaken glue or cause stains.
- Use soft brushes or cloths to prevent scratching or weakening shoe fibers.
- Allow shoes to air dry at room temperature, away from direct sunlight or heat sources.
- Check product labels for any warnings or instructions specific to shoe materials.
Using household ingredients usually costs just a few cents per cleaning and requires mostly items you already have on hand. Commercial cleaners range from $5 to $15 and can save time if you clean frequently or need specialized formulas. Avoid mixing different cleaner types without expert guidance, as this can reduce effectiveness or cause damage. Following these precautions helps keep your shoes clean without compromising their material or structure.
8. Drying, Maintenance, and When to Call a Professional
Drying your shoes properly after cleaning is essential to avoid warping, fading, or mildew growth. For leather and faux leather shoes, air drying at room temperature away from direct sunlight or heat sources like radiators is best; this usually takes 24 to 48 hours. Fabric, canvas, and knit shoes dry faster but may need 12 to 24 hours depending on thickness and ventilation. Suede and nubuck should dry slowly in a shaded, well-ventilated spot, typically taking up to 48 hours, to prevent stiffening and discoloration. Avoid using household dryers or direct heat, which can shrink or crack materials.
Keep your shoes in good shape by cleaning them regularly, aiming for at least once a month with frequent use. Regular cleaning stops dirt and debris from damaging the materials, helping your shoes look better and last longer. After cleaning, use a conditioner or spray suited to your shoe’s material to protect it. This treatment helps resist stains, makes future cleaning easier, and maintains the material’s flexibility, especially for leather or suede. Take out insoles and laces to wash and air dry separately, which prevents odor and bacterial growth.
Preventing odors starts with keeping shoes dry and fresh. Use moisture-absorbing products such as activated charcoal bags or cedar shoe trees inside the shoes when not in use. These help wick away moisture and neutralize smells. Rotating shoes so the same pair isn’t worn daily also allows airflow and complete drying between uses, limiting bacterial growth.
Check your shoes for signs of damage after cleaning. Look for sole separation, holes, deep scuffs, structural weakening, or persistent odours despite your care. Shoes showing large cracks on the surface, soles coming apart, or materials feeling fragile should be taken to a professional for cleaning or repairs. A cobbler can re-glue soles, patch holes, or professionally clean stubborn stains, often extending the life of higher-end shoes. Professional cleaning might cost $30 to $80 depending on the shoe and service, but it is worthwhile if it prevents replacement.
Always follow specific care product instructions to avoid damage. For example, use only a suede brush on suede shoes, or specialized leather conditioner on leather shoes. Handling your shoes gently during cleaning and drying preserves their shape and appearance over time.
Never put wet shoes directly in the sun or near a heater to dry, as this can cause shrinkage, cracking, or color fading.
Step-by-Step Action Plan for Cleaning Your Dirty Shoes
Follow this plan to clean your shoes safely and keep them looking their best over time.
- Before you start: Check the shoe material tags or labels to choose the right cleaning method for fabric, leather, suede, or synthetic shoes.
- Day 1: Remove insoles and laces, and clean them separately by soaking in warm soapy water or washing in a mesh bag in the machine. You’ll know they’re ready when they smell fresh and look clean.
- Day 1: Gently brush off loose dirt with a soft brush or cloth before applying cleaning solutions. Shoes should look noticeably less dusty or grimy after brushing.
- Day 2: Apply the selected cleaning method, mild soap and water for fabric, saddle soap for leather, and a suede brush for suede, and rinse or wipe off according to instructions. Shoes should feel clean without residue or damage.
- Day 3: Air dry shoes naturally at room temperature, away from direct heat or sunlight. They’re ready when completely dry without stiffness or cracking.
- After 1 week: Apply appropriate protection spray (water and stain repellent tailored for the shoe type) to maintain cleanliness longer. Shoes should repel water and stains more effectively afterward.
- After 2 weeks: Inspect shoes for new dirt. Spot clean promptly using the earlier steps to avoid buildup.
Frequently Asked Questions
Can You Clean Dirty Shoes in a Washing Machine?
Machine washing can damage some materials; hand cleaning is safer and more precise. Check manufacturer guidelines before using a washer.
How Often Should I Clean My Dirty Shoes?
Clean your shoes every two weeks or when they start to look dirty to keep them in top shape. Frequent cleaning prevents buildup and extends shoe life.
Can I Use Bleach to Clean White Shoes?
Bleach can damage some fabrics and leather; use diluted solutions or specific whiteners designed for shoes instead. Test on a small area first.
Is It Safe to Use Toothpaste to Clean Shoes?
White toothpaste works as a mild cleaner for white canvas shoes and stains; avoid colored or gel toothpaste for best results.
How Do I Remove Odor from Shoe Insoles?
Remove insoles and clean separately with mild detergent or baking soda to neutralize smells and bacteria effectively.
Should I Waterproof My Shoes After Cleaning?
Waterproofing after cleaning protects shoes from future stains and water damage; use a spray suited for your shoe material.
Wrapping Up
Consistent care with the right cleaning methods can extend your shoes’ life and keep them looking fresh. Start with gentle cleaning based on material, and maintain your shoes regularly to prevent heavy dirt buildup. Treat stains and dirt early to avoid damage and consider professional help for stubborn issues or expensive shoes.