How to Use Laundry Dryer for Best Results: Complete Step-by-Step Guide
Using a laundry dryer correctly starts with sorting your clothes by fabric type and choosing the appropriate cycle and temperature for each load. Avoid over-drying to prevent shrinkage and fabric damage, especially with 100 percent cotton items. This guide is for home users who want to improve their laundry care skills by learning how to use a laundry dryer safely and effectively.
You will find clear steps on sorting laundry, selecting dryer settings, and using dryer sheets or balls. The advice also covers drying times, preventing static, keeping your machine efficient, and troubleshooting common problems for better results with every load.
Key Takeaways
- Sort laundry by fabric type and weight to ensure even drying and prevent damage.
- Use lower temperatures and shorter cycles for delicate or 100 percent cotton clothes to avoid shrinkage.
- Most small to medium damp loads dry within 20 to 30 minutes; larger loads may take 40 to 60 minutes.
- Place your dryer in a well-ventilated area with temperatures between 50 and 80 degrees for optimal performance.
- Use dryer sheets or wool dryer balls to reduce static and soften fabrics without chemicals.
- Clean the lint filter after every load to maintain dryer efficiency and reduce fire risk.
How to Start Your Laundry Dryer Safely and Correctly

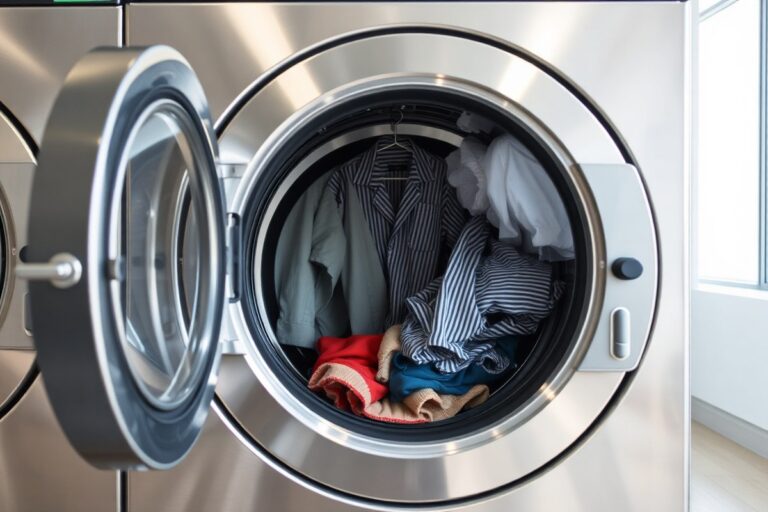
Starting your laundry dryer correctly ensures your clothes dry efficiently without damage or safety risks. Before pressing start, it’s important to prepare the load, check your dryer, and set the right options carefully. This helps avoid issues like uneven drying, fabric shrinking, or lint fires. Following a simple pre-start checklist equips you for a smooth drying cycle.
Begin by sorting and loading your laundry loosely to prevent tangling. Check that your dryer’s lint filter is clean to maintain airflow and reduce fire risk. Make sure the dryer vent is unobstructed, especially if it’s a gas dryer, to prevent dangerous exhaust buildup. Confirm your laundry items are suitable for drying, particularly cottons which may shrink if overdried. Finally, choose the correct heat and timer settings based on your load size and fabric type to optimize drying time and energy use.
- Load clothes loosely and evenly: Avoid packing items tightly. This allows hot air to circulate and dry fabrics uniformly. Tangled clothes dry unevenly and take longer.
- Clean the lint filter: Remove and wipe the lint screen before each load. A clean filter improves drying efficiency and reduces fire hazards.
- Check dryer ventilation: Inspect your vent hose and outside vent for blockages. Clear any lint or debris to maintain proper airflow, essential for both electric and gas dryers.
- Select appropriate heat level and drying time: Match the setting to fabric type and load size. For example, use medium or low heat for delicate items and high heat for heavy cottons. Set a timer if your dryer requires manual control.
- Close the dryer door securely: Ensure the door is fully shut to start the cycle. Some dryers won’t operate if the door latch is not engaged.
- Press the start button or turn the cycle knob: Initiate the drying process. Some models have a specific start button, while others begin when the timer knob is turned.
- Activate wrinkle prevention features if available: Use the wrinkle guard or cool down option to keep clothes from creasing if you won’t remove them promptly after drying.
Following these steps helps your dryer work safely and efficiently. Taking time for basic prep adds only a minute or two but improves drying results and extends your dryer’s life. Avoid overloading or using high heat excessively, which can cause shrinking or damage. Make sure your drying area stays well-ventilated and between 50 and 80 degrees Fahrenheit to keep your appliance running safely. Checking these conditions regularly supports effective drying and user safety.
Sorting Laundry for Your Dryer: What Fabrics and Items to Separate

Sorting laundry before drying prevents damage, improves drying efficiency, and ensures clothes retain their shape and color. Separate items based on fabric type, weight, and drying needs to avoid shrinking, fading, or uneven drying.
Separate by Fabric Type and Care Labels
Check each garment’s care label for drying instructions and fabric type. Heavy fabrics like denim, towels, and canvas can withstand higher heat settings, while delicate fabrics such as silk, lace, or polyester blends require low heat or air-drying. Sorting by fabric prevents damage, like shrinking or fabric degradation caused by tumbling against rougher materials.
Using a mesh laundry bag allows you to dry delicate items separately while protecting them from friction. Always follow the laundry symbols carefully, especially those indicating temperature limits or drying methods, to extend the life of your clothes.
Avoid Drying Certain Items in Dryer
Some items should never go in the dryer because heat and tumbling can cause permanent damage or safety hazards. Avoid drying:
- Rubber-backed rugs or mats, which can melt or stick to the drum
- Waterproof or water-resistant outerwear, since heat can damage coatings
- Items with foam, plastic, or delicate embellishments that may warp or melt
- Swimsuits and lingerie that recommend air drying to maintain elasticity
- Flammable or oily fabrics that pose a fire risk
Carefully reading labels and manufacturer warnings lets you decide if an item should air dry, dry flat, or be placed on a gentle dryer cycle. When in doubt, air-drying helps avoid unexpected damage.
Never put items labeled “Do Not Tumble Dry” in your dryer, as ignoring this can ruin the item and may void return policies.
Sort by Weight and Thickness
Group heavier items like towels and jeans separately from lighter fabrics such as T-shirts and synthetics. Drying similar-weight items together promotes even airflow and consistent drying, reducing drying time and wear. Mixing heavy and light fabrics can cause lighter clothes to overdry and shrink or develop static.
For example, one load could contain bath towels and sweatshirts, while another includes cotton blouses and thin knitwear. This practice also helps when choosing the right dryer cycle and heat setting for each load, ensuring efficient energy use and proper garment care. A simple sorting checklist looks like this:
- Heavy fabrics (towels, jeans, sweatshirts)
- Lightweight cottons and synthetics (T-shirts, underwear)
- Delicates (lace, silk, lingerie – preferably air dry or mesh bag)
- Bulky items (comforters, blankets, use separate cycles if your dryer supports)
Sorting your laundry by these categories usually takes just a few minutes but can save time and money by avoiding repeated drying cycles and replacing damaged clothes.
Choosing the Right Dryer Cycle and Temperature for Each Load
Choosing the right dryer cycle and temperature is key to protecting your clothes and getting them dry efficiently. Dryer cycles vary by fabric type and moisture level, often including options like Regular, Delicate, Permanent Press, and Air Fluff. Most modern dryers also have temperature settings such as High, Medium, Low, or No Heat. The correct combination prevents shrinkage, color fading, and damage to fabrics while optimizing drying time.
Automatic cycles use moisture sensors to stop drying as soon as your load reaches the right dryness, saving energy and reducing wear on fabrics. For delicate items, using a low heat or no heat setting can help keep them from stretching or becoming misshapen. Cotton items handle medium to high heat well, but always check labels to avoid shrinkage, especially with 100% cotton. Synthetic fabrics like polyester dry best on low to medium heat to avoid melting fibers or static buildup. The table below compares common dryer cycles and temperature settings, with guidelines to help you decide based on your laundry load:
| Dryer Cycle | Temperature | Best For | Why Use It |
|---|---|---|---|
| Regular/Heavy Duty | High | Cotton, towels, durable fabrics | Removes moisture quickly, tough on heavy fabrics but may shrink delicate cottons |
| Permanent Press | Medium | Synthetics, blends, wrinkle-prone items | Prevents wrinkles, gentler heat protects synthetic fibers |
| Delicates | Low or No Heat | Lingerie, silk, wool, delicate garments | Prevents shrinkage and fabric damage |
| Air Fluff (No Heat) | None | Fluffing, refreshing clothes | Circulates air without heat to avoid damage |
| Automatic Moisture Sensor | Varies (Medium to High) | Most fabrics | Stops drying when optimal moisture is reached, saves energy |
Knowing the fabric type in your load is the starting point. For cotton clothes you don’t want to shrink, choose medium or low heat and consider air drying instead if you’re worried about size changes. For delicate or mixed loads, use the delicate cycle with low heat or no heat, and consider mesh bags to protect softer items from rubbing against rougher fabrics like denim. Synthetic materials should be dried on medium heat to avoid melting or static issues.
Some dryers come with special features like the 16-Hr Fresh Hold option that circulates air to keep clothes fresh if you’re not folding immediately after drying. Expensive models may offer pet hair removal cycles or connect to apps allowing cycle customization, but basic cycle and temperature selection covers most needs. Using the right cycle and temperature reduces drying time and wear on clothes, ultimately saving on electricity and replacement costs.
How Long Does It Take to Dry Laundry and What Affects Time?
Drying laundry typically takes between 20 and 60 minutes, depending on the size of the load and the type of fabric. Small or medium loads with lighter fabrics generally dry within 20 to 30 minutes, while larger or heavier loads like towels, blankets, or coats can require 40 to 60 minutes to become completely dry. Choosing the correct drying time and cycle helps avoid under-drying or over-drying, which can leave clothes damp or damage fabrics.
Several factors affect how long your dryer takes to finish a cycle. Load size is a primary consideration; a fuller drum holds more moisture, so it takes longer to dry. Similarly, fabric type influences drying time. Thick or dense fabrics such as denim, towels, or bulky blankets absorb more water and need longer drying periods compared to lighter fabrics like cotton shirts or synthetic blends. The heat setting also impacts drying time, high heat dries faster but can harm delicate items, while low heat takes longer but protects fabric.
To estimate drying time accurately, start by gauging your load size and fabric. For example, a small load of lightweight clothes may dry in 20 to 25 minutes on a medium heat setting. Medium loads of mixed fabrics usually require 30 to 40 minutes. Heavy or bulky items need closer to 50 to 60 minutes on high heat or use a heavy-duty cycle specifically designed for those fabrics. Some modern dryers offer moisture sensors that automatically adjust drying time and stop the cycle once clothes are dry, which can prevent over-drying.
Reducing drying time safely can save energy and protect your laundry. Start by properly loading the dryer, not too full, so air can circulate, and not too empty, which wastes energy. Using dryer balls or wool balls helps separate clothes, allowing hot air to reach more fabric surface and speed drying. Dryer sheets reduce static but don’t significantly impact drying time. Regularly cleaning the lint trap improves airflow, which can shorten cycles and reduce electricity use. Avoid using high heat on delicate fabrics and instead choose a slower drying time or air dry those items.
How to Use Dryer Sheets and Dryer Balls for Better Laundry
Dryer sheets and dryer balls can both improve your laundry by softening fabrics, reducing static cling, and speeding drying times. Use dryer sheets when you want added scent and static control, especially in winter. Dryer balls offer a reusable, chemical-free way to soften clothes and cut drying time.
Benefits of Dryer Sheets
Dryer sheets reduce static electricity, helping clothes come out of the dryer without sticking together. They also add softness and a fresh scent to your laundry. Use them especially during cold months when static tends to increase.
Using a dryer sheet is simple: toss one sheet into the dryer drum along with your wet clothes before starting a cycle. Avoid using multiple sheets at once because excess sheets can leave a greasy residue on fabrics and clog the dryer’s lint filter.
Dryer sheets are not necessary if you already use liquid fabric softener in the wash, since both products serve similar functions in reducing static and softening fabrics. Also, avoid using dryer sheets with moisture-wicking or athletic clothes, as the coating they leave may reduce fabric performance.
Benefits of Dryer Balls
Dryer balls, often made of wool or plastic, work by separating clothes as they tumble, allowing hot air to circulate more efficiently. This can reduce drying time by up to 25%, saving energy and reducing wear on fabrics. Wool balls absorb moisture, while plastic balls often have small spikes to improve fabric separation.
Reusable dryer balls are an eco-friendly alternative to dryer sheets and do not leave any residue or artificial scents on clothes. They naturally soften fabrics by agitating them during the drying process, which reduces wrinkles and static electricity without chemicals.
Wool dryer balls typically cost around $20 for a pack of six and last for hundreds of loads, making them a cost-efficient choice over time. You only need 3 to 6 balls per load, depending on your dryer size and load volume.
Using Them Together or Alone
Both dryer sheets and dryer balls offer benefits, but consider your priorities when choosing. Dryer sheets add fragrance and reduce static effectively, useful in winter. Dryer balls are better if you want no added chemicals or scents and want to improve drying efficiency.
You can use one product exclusive of the other depending on the situation. For example, use dryer balls on everyday cotton loads or large items like towels, and add a dryer sheet when you want extra softness or scent on delicate or mixed fabrics.
- Toss one dryer sheet into the drum with wet clothes per load.
- Use 3 to 6 dryer balls per drying cycle.
- Do not use both products simultaneously to avoid residue buildup.
- Skip dryer sheets if you apply fabric softener during washing.
- Do not use dryer sheets on athletic wear or moisture-wicking fabrics.
- Remove dryer balls before cleaning the dryer’s lint filter if needed.
- Replace dryer balls after about 1,000 loads or when they show wear.
Overusing dryer sheets in one load can cause a greasy film on clothes and clog your dryer’s lint trap, so stick to one sheet per load.
To prevent clothes tangling and ensure effective drying, spread out large items like sheets or towels inside the dryer along with dryer balls or sheets. Check clothes for dampness before finishing the cycle; if damp, run the dryer for another 10 to 20 minutes. Using dryer sheets or dryer balls properly can improve fabric softness, reduce wrinkles, and help your clothes dry faster without damage.
How to Prevent Fabric Damage, Shrinkage, and Static in the Dryer
Preventing fabric damage and shrinkage in the dryer starts with controlling heat and drying time. Overdrying clothes causes fibers to weaken and shrink, especially in natural fabrics like cotton and wool. Dry clothes just until they’re dry enough to wear or store; using moisture sensor cycles can help. For sensitive or delicate garments, drying them inside a heavy-duty mesh laundry bag reduces friction and wear. Using lower heat settings or even air-dry modes further protects these fabrics from damage and shrinking.
Static cling develops when dryer heat removes moisture, causing clothes to build electrical charges through friction. Static mostly affects synthetic fabrics such as polyester and nylon but can happen with blends and other materials too. To reduce static, add dryer balls during the cycle; they minimize friction by keeping clothes separated and help soften fabrics by loosening fibers. Dryer sheets provide chemicals that reduce static and make clothes feel softer, but they should be avoided on moisture-wicking gym wear since they can impact stretch and breathability.
Certain fabrics require extra attention. Wool, silk, and lace need low or no heat to avoid damage, and drying outside the dryer, like air drying flat, is often safest. Cotton can shrink if dried on high heat or too long, so medium heat and careful timing matter. Athletic wear should not be dried with fabric softeners or dryer sheets that coat fibers and inhibit the clothing’s performance features. Using specific dryer cycles designed for delicate, heavy, or synthetic fabrics reduces wear and fading. Promptly removing clothes once dry limits wrinkling and overexposure to heat.
Careful drying saves money and extends the life of your wardrobe. Drying on lower temperatures uses less electricity and protects fabrics better but may take longer. Knowing which fabrics to treat with gentle care and which can handle regular heat helps you decide. Invest in dryer balls, which typically cost around $10 to $15 and last hundreds of loads, to reduce static and soften clothes naturally without chemicals. For delicate or pricey items, adding mesh bags (about $10 to $20 for a set) and air drying is a small upfront cost compared to replacing or repairing damaged clothes.
Following these specific steps will prevent shrinking, unwanted static, and fabric wear. This approach maintains the look and feel of your clothes, helping them last longer and saving you time and money. Monitoring your dryer’s heat level, sorting laundry appropriately, and using helpful tools like dryer balls or mesh bags are key to keeping fabrics safe during the drying process.
Maintaining Your Dryer: Cleaning, Safety, and Efficiency Tips
Cleaning your dryer’s lint filter before every load and routinely inspecting the drum and vent are essential steps to keep your dryer safe and efficient. Neglecting these tasks can lead to longer drying times, higher energy bills, and even fire hazards. Proper maintenance also extends the life of your dryer, ensuring it runs well for years.
Cleaning the Lint Filter Correctly
Remove and clean the lint filter before each dryer load to ensure unrestricted airflow and prevent lint buildup inside the machine. Locate the lint filter, typically on the top edge of the dryer door, inside the door frame, or beneath the door. Pull the filter straight out and use your fingers or a soft brush to roll off lint.
Wash the lint filter with warm water and mild detergent once a month to remove residue from dryer sheets or fabric softeners, which can clog the screen. Make sure the filter is completely dry before reinserting it to avoid moisture issues.
Checking and Cleaning the Dryer Vent
The dryer vent carries hot, moist air outside, making it important to keep this pathway clear. A clogged vent forces your dryer to work harder, increases drying time, uses more electricity, and can cause the dryer to overheat, creating a fire risk. Inspect and clean the vent hose and exterior vent cap every 3 to 6 months.
To clean, disconnect the vent hose from the dryer and wall. Use a vent brush or vacuum with a hose attachment to remove lint. Check that the exterior vent flap opens freely and is not blocked by debris or nests. Proper ventilation helps maintain drying efficiency and safety.
Regular Maintenance for Efficiency
Maintaining your dryer goes beyond cleaning lint. Regularly inspect the drum for dents, scratches, or loose parts, which can damage clothes or signal a mechanical problem. Check hoses for cracks or disconnections, and ensure the dryer sits level on the floor. These simple checks prevent unnecessary strain on the machine and clothing. Adopting a maintenance routine will keep your dryer operating smoothly:
- Clean lint filter before every load
- Wash lint filter monthly with soap and water
- Inspect and clean the vent hose and vent outlet every 3 to 6 months
- Examine dryer drum and door seals quarterly
- Verify the dryer is level and secure regularly
- Replace damaged or worn vent hoses promptly
- Avoid overloading to reduce strain and improve drying
Following these steps helps reduce energy consumption by preventing your dryer from overheating or running longer than necessary. It also lowers the risk of fire caused by lint accumulation, possibly saving repair costs or replacement expenses, which can range from $100 to over $500 depending on the damage. Staying on top of maintenance improves drying performance, saves money, and protects your home.
Troubleshooting Common Dryer Issues and Knowing When to Call a Professional
Uneven drying often results from overloading your dryer or placing heavy and lightweight items together. To fix this, try removing some clothes to allow better airflow and separate bulky items like towels from lighter fabrics. Using the dryer’s advanced moisture sensor settings can also help by adjusting drying time according to the load’s dampness. Avoid stuffing the drum too full; this restricts air circulation and prolongs drying time.
Your dryer overheating or suddenly stopping means you should first check the lint trap. A clogged lint trap restricts airflow, causing the dryer to run hotter and potentially shut down as a safety measure. Clean the lint screen before every load. Also, inspect the vent hose for blockages or kinks that could cause poor ventilation. Overheating might also be due to a malfunctioning thermostat or heating element, which can pose a fire risk and should be handled by a professional.
Unusual noises like rattling, squeaking, or thumping can signal problems such as loose drum parts, worn belts, or foreign objects caught inside. To troubleshoot, unplug the dryer and carefully inspect the drum for items like coins or buttons. Tighten any obvious loose screws or bolts. Persistent noise could mean worn parts need professional repair. Continuing to use a noisy dryer risks further damage and safety hazards.
Call a repair professional if your dryer frequently overheats, fails to start, or stops mid-cycle despite basic maintenance like lint trap cleaning. Ignoring these signs can lead to costly damage or fire. Also, when you notice persistent uneven drying after reducing load size or strange noises you can’t resolve, professional service can diagnose internal issues such as faulty sensors, motors, or thermostats. Repair costs typically range from $100 to $300, depending on the problem and appliance model.
Regular maintenance like cleaning the lint trap and vents and avoiding overloading helps prevent common problems. Use mesh laundry bags for smaller or delicate items to keep them from getting caught or tangled, which can also cause uneven drying. Always refer to your dryer’s manual for recommended load sizes and cycle settings to minimize issues.
Never ignore persistent overheating or strange noises; these may signal safety hazards that need expert attention.
Step-by-Step Action Plan for Using Your Laundry Dryer
Follow these steps to get your laundry dried safely and efficiently while protecting your clothes and dryer.
- Before you start: Sort your laundry into appropriate fabric types and weights to prevent damage and uneven drying; check that the dryer lint screen is clean to ensure airflow.
- Every load: Select the right drying cycle and temperature based on the fabric care labels; use dryer sheets or balls as needed to reduce static and soften clothes.
- Start drying: Load the dryer without overstuffing to let air circulate properly; begin the cycle and monitor the first load to confirm drying time fits usual expectations.
- After drying: Check the clothes for dryness and remove them promptly to reduce wrinkles; inspect the lint screen again and clean if necessary.
- Weekly: Clean the dryer vent and exhaust duct to prevent fire hazards and maintain efficiency; watch for unusual noises or odors during cycles.
- Monthly: Deep clean the dryer drum and seals to prevent residue buildup that may affect performance and garment condition.
- When problems arise: Consult the user manual and try basic troubleshooting like resetting the dryer; call a licensed professional for repairs if issues persist or safety concerns emerge.
Frequently Asked Questions
How to Start a Dryer?
Load your sorted laundry, select the correct cycle and temperature, then press start. Ensure the lint trap is clean before starting to avoid fire hazards and improve efficiency.
How Does a Washer Dryer in One Work?
It washes and dries clothes in a single drum using separate cycles. These combos save space but usually take longer for drying than separate machines.
How Do You Wash a Dryer?
Clean the lint trap after every load and vacuum out the vent annually. Wipe the drum with a damp cloth to remove residue and prevent odors.
How Long to Dry Laundry in a Dryer?
Larger loads take 40 to 60 minutes, but drying time varies by load size, fabric type, and dryer settings. Check dryness to avoid over-drying.
Can I Dry Clothes Without a Lint Trap?
No, removing or bypassing the lint trap can cause lint buildup and fire risk. Always use a clean lint trap for safety.
Is It Safe to Leave a Dryer Running Unattended?
Running a dryer unattended is risky due to fire hazards; never leave it running when no one is home.
Key Points to Remember
Using your laundry dryer effectively comes down to proper sorting, choosing the right settings, and keeping the machine clean. Starting with small regular maintenance habits will save time and protect your clothes in the long run. Begin by checking your dryer’s lint screen before the next load, you’ll notice better airflow and faster drying right away.