

How to Shrink Clothes in the Dryer: 8 Easy Steps for Perfect Fit
Shrinking clothes in the dryer is simple: use high heat and check frequently until you reach the desired fit. It usually takes 20 to 30 minutes on high heat to shrink cotton and similar fabrics effectively. This method works best for people looking to adjust the size of garments at home without sewing or professional help. You’ll find clear steps for shrinking various fabrics safely and tips to avoid damaging your clothes in the process.
Knowing which fabrics shrink most and how to identify them will help you decide when the dryer method is appropriate. This information also keeps you from over-shrinking or ruining delicate items. Achieving the perfect fit with your clothes starts with understanding both the drying process and the fabric types involved.
Key Takeaways
- Use a high heat setting on your dryer to shrink cotton clothes in 20 to 30 minutes.
- Check clothes every 10 to 15 minutes to prevent over-shrinking and damage.
- 100% cotton garments shrink about 20% when dried on high heat for the first time.
- For gentle shrinking, use a low agitation cycle and check the garment halfway through.
- Jeans with spandex may shrink significantly during drying due to elastic fibers.
- Avoid drying clothes with leather parts above 40 degrees Fahrenheit to prevent damage.
1. How to Shrink Clothes Using Your Dryer Effectively
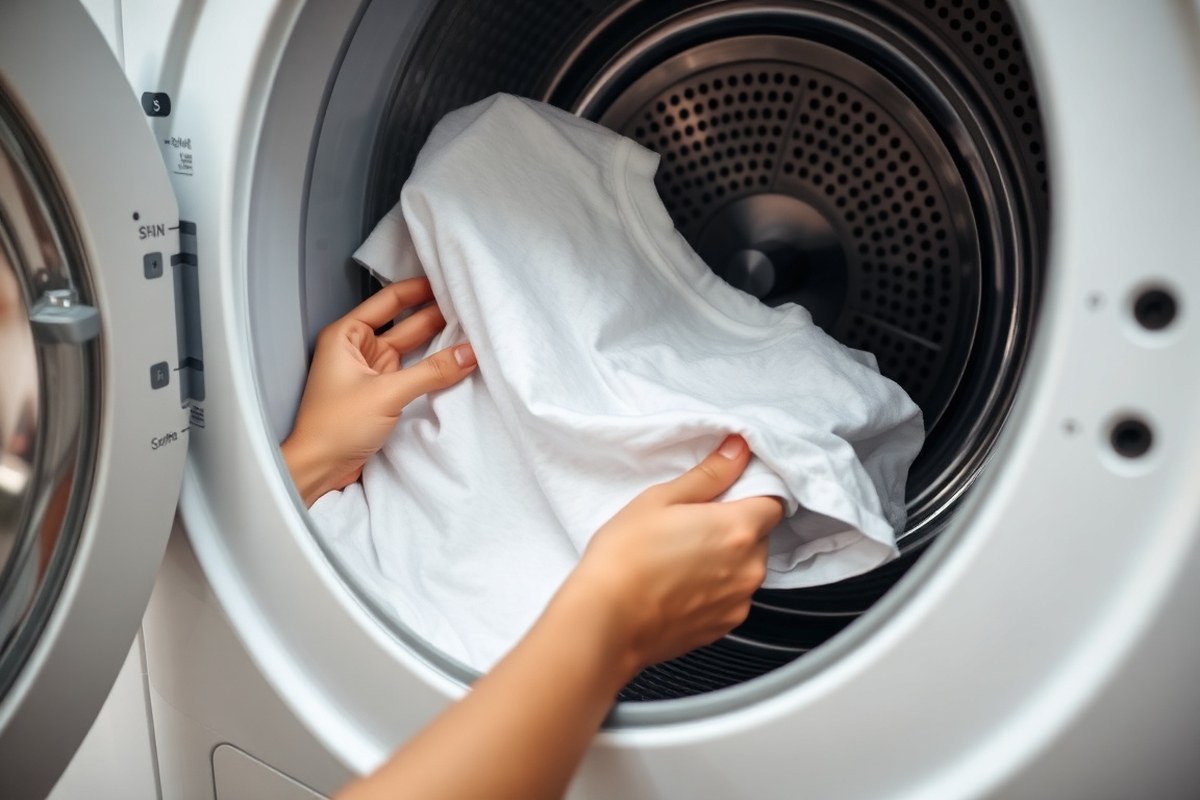
Shrinking clothes in the dryer works best when you use the correct heat settings and timing while checking the garment regularly. High heat over 20 to 30 minutes is usually effective for cotton and wool, but you need to monitor the process to avoid over-shrinking or damaging the fabric.
Preparing Clothes Before Drying
Start by reading the care label to confirm the fabric can handle heat without damage. Clean the clothes with a hot wash cycle if shrinking a natural fiber like cotton or wool is your goal. This helps loosen fibers and makes dryer shrinkage more effective. Avoid drying blended fabrics right away, as they may require multiple cycles to reach the desired size.
Make sure the garment is wet or damp before putting it into the dryer, since dry clothes won’t shrink effectively. If it’s dry, run it through a quick rinse or soak to add moisture.
Choosing the Right Dryer Settings
Use the highest heat setting your garment’s label allows. For pure cotton or wool, that means high heat is usually safe and effective. Set your dryer to a cycle that lasts between 20 and 30 minutes. This duration typically shrinks clothes one size or less while reducing the risk of damage.
Consider using a “timed dry” mode instead of “auto dry” to control exactly how long the high heat runs. Avoid mixed fiber or delicate fabrics’ high heat as it can cause damage or uneven shrinking. In those cases, use medium heat and extend drying time, repeating the process if needed.
Monitoring Shrinkage During Drying
Check your clothes halfway through the drying cycle. Stop the dryer and feel the garment to assess how much it has shrunk. Put it back if more shrinkage is needed or remove it if it’s reached the desired size. This prevents over-shrinking or fabric stress.
Different dryers heat differently, so frequent checks every 10 to 15 minutes can help fine-tune the process. Be aware that blended fabrics often shrink gradually and need several drying cycles for full effect.
- Check the care label for heat tolerance.
- Wash the garment in hot water if safe, or dampen it with water.
- Set the dryer to the highest heat setting permitted.
- Use a timed dry cycle between 20 and 30 minutes.
- Pause the cycle halfway to check shrinkage progress.
- Return the garment to the dryer if more shrinking is needed.
- Repeat monitoring every 10 to 15 minutes for best control.
- Remove the garment once it fits the desired size.
2. Which Fabrics Shrink Most and How to Identify Them

Natural fibers like cotton and wool shrink most easily in the dryer because heat and moisture cause their fibers to contract. Cotton, in particular, is prone to significant shrinkage, especially if it’s untreated or not pre-shrunk. Wool also shrinks well but requires careful handling to avoid felting or damaging the garment. Rayon, a semi-synthetic fiber derived from natural cellulose, will shrink when exposed to dryer heat. These fabrics respond to the heat and tumbling action by tightening their fibers, reducing the garment’s overall size.
Synthetic fibers such as polyester, nylon, and acrylic generally resist shrinking. Their heat-sensitive properties mean the high dryer temperatures can damage them without causing significant size reduction. Because synthetics don’t shrink much, trying to shrink these fabrics in the dryer might result in color fading or material weakening. When you attempt it, turn the garment inside out and use the dryer on high heat to limit surface damage while trying to achieve slight shrinkage.
Blended fabrics that combine natural and synthetic fibers vary in shrink response depending on their ratio. For example, a cotton-rayon blend usually shrinks more readily in the dryer than a polyester-cotton blend. It’s important to check the garment’s label for the fiber content. Pre-shrunk fabrics, identified on the label, have been treated during manufacturing to reduce shrinkage and typically won’t respond much to dryer shrinking while risking damage if exposed to excessive heat.
| Fabric Type | Shrinkage in Dryer | Notes |
|---|---|---|
| Unshrunk Cotton | High | Shrinks significantly; avoid high heat if delicate weave |
| Wool | Moderate to High | Requires caution to prevent felting; shrinks with heat and moisture |
| Rayon | Moderate | Shrinks due to cellulose content; handle gently |
| Pre-shrunk Fabrics | Low | Minimal shrinkage; heat may damage |
| Polyester & Acrylic | Low | Heat may damage; little to no shrinkage |
| Cotton-Synthetic Blends | Varies | Shrink depends on cotton ratio; dryer heat affects cotton fibers mostly |
To identify the fabric before shrinking, start with the care label inside the garment which lists fiber content and any pre-shrunk information. When the label is missing, feel the fabric’s texture: cotton is soft and breathable, wool is thick and fuzzy, synthetics feel smooth and sometimes slippery. When in doubt, test a small hidden area by applying heat briefly to see if it changes. Considering fabric weight also helps; thicker fabrics usually shrink more, while lightweight ones have less change.
Always check the care label to avoid shrinking pre-shrunk or synthetic fabrics that can be damaged by heat from the dryer.
3. How Long Does It Take to Shrink Clothes in the Dryer?
Shrinking clothes in the dryer usually takes between 10 and 30 minutes, depending on the fabric type and the heat setting you use. For cotton and linen, expect about 10 to 15 minutes on medium to high heat to achieve noticeable shrinkage, typically around 3 to 7 percent per drying cycle. Wool needs a gentler approach with low to medium heat for about 15 to 20 minutes to avoid damaging the fibers while still shrinking 5 to 10 percent. Synthetic fabrics like polyester shrink very little, less than 1 percent, even on high heat, so drying time has a smaller impact on shrinking these materials.
Different fabrics react differently to heat and time, which means the duration you leave clothes in the dryer matters quite a bit. Using too long a cycle or too high a heat setting on delicate fabrics such as silk or rayon can cause damage or unwanted misshaping instead of controlled shrinking. For these, low heat and a shorter cycle of around 10 minutes work best to prevent harm while allowing minor shrinkage.
To gauge when your clothes have shrunk enough, check them periodically during the drying cycle. Pause the dryer every 10 to 15 minutes and feel the garment for tightness or smaller dimensions compared to before drying. Lay the item flat and measure key points like width and length if you want precise results. Shrinkage often stops after one or two cycles, so avoid over-drying, which can lead to hard or misshapen fabric.
Start with a safe heat setting and short drying time, then increase as needed while monitoring the garment. For cotton, begin with 10 minutes on medium heat, then check fit and texture. If more shrinkage is needed, add 5-minute increments on higher heat while checking regularly. Wool should be dried about 15 minutes on low to medium heat at first, watching carefully for felting, which feels like stiffening or matting of the fibers. Stop immediately if these signs appear.
Keep in mind that fabric softener used in washing can relax fibers, making them shrink faster in the dryer. Avoid fabric softener if you want to reduce shrinkage or use it deliberately to speed up the process. Also, some dryers and their heat output vary, so drying times might differ slightly across models. Using a well-calibrated dryer with temperature control ensures better results.
4. Tips to Avoid Damage When Shrinking Clothes in Dryer
Drying clothes on high heat is the fastest way to shrink them, but it’s easy to overdo it and ruin your garments. Over-shrinking can make clothes too tight or misshapen, while excessive heat can cause color fading and fabric warping. Using the proper temperature, timing, and handling is important to keep your clothes looking their best while achieving the shrinkage you want.
To avoid damage, check the care label before shrinking. Clothes labeled for air drying or low heat should not be placed on high heat in the dryer, as this can weaken fibers and alter texture, especially in wool and delicate fabrics. Heat can cause wool to felt, making it stiff and less wearable. Similarly, avoiding synthetic fabrics like polyester for shrinking is best since they tend to melt or warp rather than shrink properly.
Color fading happens mostly due to hot water washing combined with high dryer heat. To reduce fading, wash clothes inside out in cold water before drying and consider using a gentle detergent designed to preserve colors. Adding fabric softener or dryer sheets can help reduce static cling and prevent wrinkles or creases, which also protect fabric fibers during tumbling.
- Do not dry synthetic fabrics on high heat; they can melt or lose shape.
- Set the dryer to medium or low heat for delicate or wool items to reduce felting and stiffening.
- Remove clothes promptly when shrinking looks adequate to avoid over-shrinking.
- Use garment bags for delicate clothes to minimize friction and tangling.
- Avoid tightly packing the dryer as overcrowding can increase wrinkles and uneven shrinking.
- Air dry or use a drying rack to maintain clothes’ shape if you want to avoid shrinkage entirely.
- Turn garments inside out when drying to protect color and fabric surface.
Stretching can also be an issue, especially with lightweight or stretchy fabrics hung too tightly after shrinking. Clothes may regain size or lose their new fit if dried hanging under tension. Instead, lay them flat or gently shape them when air drying to keep the right proportions. Taking small steps with heat and timing gives you control over shrinkage and helps prevent irreversible damage.
5. How to Shrink Specific Fabrics: Cotton, Wool, and Synthetics
Different fabrics respond uniquely to heat and moisture in the dryer, so shrinking clothes effectively requires knowing each fabric’s traits. Cotton shrinks readily with heat and moisture, wool demands gentle handling to avoid felting or damage, and synthetic fabrics typically resist shrinking but can reduce slightly with careful treatment. Following tailored steps for cotton, wool, and synthetics helps you shrink them to the right size without ruining the garment.
Shrinking Cotton Clothes
Cotton is one of the easiest fabrics to shrink since it naturally contracts when exposed to heat and water. New 100% cotton garments can shrink up to 20% in the dryer, making it ideal for adjusting slightly oversized shirts, t-shirts, or jeans. Avoid overheating if you want to prevent excessive shrinkage that could turn your clothes too small.
To shrink cotton safely, use a high heat setting on your dryer combined with a wet or damp wash load. This encourages the natural fiber to tighten without irreversible damage.
- Check the care label to confirm the garment is 100% cotton and machine washable.
- Wash the cotton clothes in warm or hot water to start the shrinking process.
- Put the clothes directly into the dryer while still damp.
- Select the highest heat setting available on your dryer.
- Dry the clothes completely, typically for 30 to 40 minutes depending on dryer power.
- Check the size periodically to avoid over-shrinking; remove clothes early if the fit is right.
- Repeat the drying step if additional shrinkage is needed.
Caution: Excessive heat can cause cotton to shrink too much or become stiff, so monitor the process carefully.
Shrinking Wool Garments
Wool reacts differently than cotton since it can easily felt and shrink permanently if mishandled. Wool fibers contract when exposed to heat and agitation, but this can ruin the fabric’s softness and shape. Use lower heat settings and short drying times to shrink wool garments gently.
Many wool items will shrink about 10-15% under controlled dryer conditions. Always start with the gentlest approach and increase heat cautiously if more shrinkage is needed.
- Confirm the garment label states it contains wool and allows tumble drying.
- Wash with cold or lukewarm water using a gentle or wool-specific detergent.
- Place the damp wool garment in the dryer.
- Set the dryer to low or medium heat to reduce risk of felting.
- Dry in short intervals of 10 to 15 minutes, checking size and texture between cycles.
- Remove the garment as soon as it fits well to avoid over-shrinking or matting.
Tip: Using dryer balls can help reduce fabric clumping and protect wool’s texture while shrinking.
Managing Synthetics and Blends
Synthetic fabrics such as polyester, nylon, and their blends resist shrinking because their fibers are designed for stability. You generally cannot shrink these fabrics much without risking permanent damage like melting or warping. However, slight shrinkage may occur using heat carefully if the garment has a significant natural fiber content.
To attempt shrinking, use the lowest heat dryer settings and keep timing short. For blends with cotton or wool, focus on the natural fiber to achieve modest size reduction without hurting synthetic parts.
- Check the care label to identify the fiber composition.
- Wash the garment using warm or hot water if safe per label instructions.
- Dry the item on a low or medium heat setting for 10 to 20 minutes.
- Inspect the fit and texture; avoid additional dryer time if the fabric appears damaged or does not shrink.
- Repeat drying in short bursts if slight further shrinkage is necessary and safe.
Warning: High heat on synthetics may cause irreversible melting or fabric distortion; always start with low heat.
6. Pre-Shrunk and Blended Fabrics: What You Need to Know
Pre-shrunk clothes have already been treated during manufacturing to minimize further shrinkage, so they generally won’t shrink much more in your dryer. However, you might achieve a slight size reduction, especially if the fabric is natural like cotton or wool, but it will be subtle compared to untreated garments. For example, pushing a pre-shrunk cotton shirt through a high heat drying cycle might shrink it less than half an inch in overall dimensions, not a full size smaller.
Blended fabrics, which combine fibers such as cotton with polyester or rayon, respond differently when you try to shrink them in the dryer. The natural fiber portion can shrink, but synthetic fibers resist heat shrinkage. This leads to uneven results that might leave the fabric feeling tighter without a proportional size change or cause puckering or distortion. A shirt that’s 60% cotton and 40% polyester will shrink less than one that is 100% cotton because the polyester limits how much the fabric contracts.
Deciding whether to attempt shrinking on pre-shrunk or blended items starts with reading the care label thoroughly. Look for instructions specifying whether the garment can be safely tumble dried at high heat. Labels indicating “tumble dry low” or “do not tumble dry” typically mean shrinking attempts risk damage like weakening fiber strength, fading, or warping. If the care label permits tumble drying, check the fabric composition listed to understand its shrink potential. Avoid high heat with pre-shrunk or blends that include delicate synthetics to reduce the chance of damaging the garment.
To safely try shrinking a pre-shrunk or blended fabric piece, start by washing it in warm water rather than hot to loosen fibers carefully. Then dry on medium heat for about 20 to 30 minutes to control the shrinkage rate. Monitor the garment’s size after drying. This approach allows subtle shrinkage without the harsh effects caused by extended exposure to high temperature. Pulling the item slightly when damp and reshaping it before drying can also help avoid distortion.
There are risks to aggressive shrinking in pre-shrunk and blended fabrics. Overheating can degrade elastic fibers, damage decorative elements like prints, or cause permanent creasing. For blends with synthetic fibers, excessive heat may melt or distort the fabric surface. That results in uneven textures or fabric stiffness. Pre-shrunk clothes may lose their fit balance or softness if dried too hot.
In short, pre-shrunk clothes can offer minor size changes in the dryer but expect modest results. Blends behave unpredictably because their synthetic fibers limit shrinkage and risk texture changes. Care label reading guides you by highlighting drying limits. Try warm washes plus medium heat drying in short cycles for the best balance between shrinking and fabric care. Avoid high heat and long drying times when working with these fabrics to prevent damage or uneven results.
7. Signs of Successful Shrinking and When to Stop
You can tell your clothes have shrunk enough by measuring key areas of the garment and feeling the fabric’s tightness compared to the original fit. Stop the dryer when the size meets your target or the fabric feels firm but not tight enough to damage. When the clothes remain too big, repeat the drying process in short intervals until you get the size you want.
Using a Measuring Tape During Shrinking
Use a flexible measuring tape to track the garment’s shrinkage at the chest, waist, sleeves, or inseam, depending on the item. Measure the same points before starting drying, then again after every 10 to 15 minutes. This allows precise control over how much the garment has shrunk and lets you stop as soon as it fits better.
For example, if a cotton shirt had a chest width of 22 inches before drying, expect some shrinkage to around 20 inches after 15 minutes on high heat. Stop when the measurement is close to your target size to avoid over-shrinking.
Checking Fabric Feel and Tension
Besides tape measurements, feel the fabric’s tension to judge shrinkage. The material should feel snugger and less relaxed but not stretched or overly stiff. Slight dampness when removing clothes can help limit excess shrinkage and reduce wrinkles.
Wool fabrics require extra care: They may feel tighter quickly and can become misshapen if dried too long. Stop checking more frequently, every 4 to 5 minutes, and remove when slightly damp to prevent excessive shrinkage or damage.
Indicators to Stop or Continue Drying
Monitor the following signs to decide when to stop or continue drying:
- The garment fits better or matches your measurements.
- The fabric feels firmer and less loose than before.
- Wrinkles decrease with dampness, not fully dry stiffness.
- No visible fabric damage or puckering from overshrinking.
- The garment still feels larger than preferred upon inspection.
- For wool, damp but not soaked fabric with slight texture change.
- You’ve checked at regular intervals (every 10, 15 minutes for cotton or 4, 5 minutes for wool).
When your measurements and fabric feel show the garment is too large, go over the drying steps again. Pausing the cycle to check lets you gradually reach the desired size without risking over-shrinkage. Be cautious not to keep drying beyond the point you want, as undoing excessive shrinkage is difficult.
8. When to Seek Professional Alterations Instead of Dry Shrinking
Shrinking clothes in your dryer can sometimes give you a better fit, but it isn’t the best solution for every garment or situation. When precise alterations are needed, shrinking at home may not deliver the exact fit, shape, or finish you want. Professional tailoring is a better choice if you are aiming for a specific fit, need adjustments in areas other than overall length or width, or have expensive or delicate clothing.
Consider hiring a tailor when the garment is complex, such as suits, dress shirts, or items with structured elements like shoulder pads or lining. These pieces require skillful adjustments that shrinking won’t provide. Delicate fabrics prone to damage from heat or agitation, like silk or fine wool, also call for professional care rather than home shrinking. Tailors can reshape shoulders, taper sleeves, take in sides, or alter hems to precise measurements, whereas shrinking only reduces general dimensions without controlling specific areas.
Use this decision checklist before attempting to shrink clothes yourself: If the item is casual, made of cotton or denim, and you only need minor size reductions, shrinking in the dryer is reasonable. When the garment is expensive, has special finishes, intricate designs, or you want to adjust fits like waist or arm length exactly, professional alterations are usually best. Tailors also help when you need permanent results or when previous shrink attempts have altered the fabric unevenly or caused damage.
Costs for basic alterations vary based on the type of adjustment and your location. Simple two-inch hemming typically runs between $10 and $20, while more complex tailoring, such as taking in the waist of pants or slimming a jacket, can cost from $30 up to $100 or more. On average, expect to pay $25 to $50 for common size adjustments. Calling local tailors for quotes is advisable, as prices can differ widely. Remember that paying a reasonable amount for professional work often preserves your garment’s lifespan and appearance better than risky home shrink attempts.
Successful alterations result in clothes that fit comfortably and look balanced, without puckering fabric or strained seams. Poor shrinking attempts may distort shape, cause uneven sizing, or damage fabric texture. Tailors use specialized tools and techniques to ensure the garment maintains its shape while fitting you correctly. If you want a perfect fit that your dryer cannot provide, visiting a professional is a more reliable investment for your wardrobe.
Do not use dryer shrinking on expensive or complex garments; minor size changes on simple fabrics are safer to handle at home, but otherwise consult a tailor for best results.
Step-by-Step Action Plan for Shrinking Clothes in the Dryer
Follow these steps to shrink your clothes using the dryer safely and effectively.
- Before you begin: Check the care label on your garment to confirm it’s safe to shrink and identify the fabric type.
- Prepare the garment: Wash the item in hot water, which loosens fibers and starts the shrinking process.
- First dryer session: Place the damp garment in the dryer on the highest heat setting suitable for the fabric. Run for 30 minutes and check size.
- Assess fit: Immediately measure or try on the garment when it comes out. If it’s still too large, proceed to the next step.
- Repeat drying: Run additional 15 to 30-minute drying cycles on high heat, checking after each cycle to avoid over-shrinking.
- Final check: Once the garment fits as desired, air dry or use low heat to maintain size and prevent damage.
- Prevent damage: Avoid overdrying or high heat on delicate fabrics; stop shrinking attempts if fabric shows distress like thinning or pilling.
Frequently Asked Questions
Can I Shrink Clothes in the Dryer Without Washing Them First?
Yes, you can shrink clothes by placing them directly in the dryer on high heat, but washing them first helps the fibers relax, resulting in better shrinkage. Drying alone may not shrink as effectively.
Is It Safe to Shrink Clothes in the Dryer Multiple Times?
Repeatedly shrinking clothes in the dryer can weaken fibers and cause damage. Limit shrinkage attempts to avoid wear and keep your clothes in good condition.
Does Drying Clothes on High Heat Always Shrink Them?
High heat often shrinks clothes, but results depend on fabric type. Some fabrics like polyester resist shrinkage even on high heat, while cotton shrinks more readily.
Can Drying Clothes on Low Heat Prevent Shrinkage?
Low heat reduces the chance of shrinking by causing less fiber contraction, which helps preserve clothing size and shape. Use low heat to avoid unwanted shrinkage.
Will Shrinking Clothes in the Dryer Affect Their Color or Texture?
Shrinking in high heat may fade colors or change texture, especially with delicate fabrics. Always check care labels to minimize damage during heat drying.
How Can I Control How Much My Clothes Shrink in the Dryer?
Control shrinkage by adjusting heat settings and drying time; shorter high-heat cycles cause less shrinkage than long, intense drying. Monitor clothes closely to stop at the right size.
Key Points to Remember
Shrinking clothes in the dryer gives you a practical way to achieve a better fit when done carefully. Focus on understanding your fabric type and using heat in controlled intervals to avoid damage. Take your first step by selecting one garment and trying one drying cycle to see how it responds. This hands-on approach helps you gain confidence and control over the process.


