How to Make Shirts Shrink: 8 Proven Methods for Perfect Fit Every Time
To make shirts shrink effectively, use heat and water: wash them in warm or hot water, then dry on high heat for 15 minutes. Natural fibers like cotton shrink more easily, so focus on these materials for the best results. You can control the shrinking by adjusting time and temperature, but delicate fabrics require gentler methods.
This advice suits individuals altering shirt sizes at home, DIY clothing modifiers, and casual sewists seeking a better fit without buying new clothes. You’ll learn practical, safe ways to shrink different fabrics, understand how fabric types react, and handle prints or blends without damage.
Key Takeaways
- Use hot water and a high-heat dryer cycle to shrink 100% cotton shirts by up to 20%.
- Pre-shrunk cotton shirts only shrink about 1-2%, so expect minor size changes.
- Blended fabrics shrink less than pure cotton and may require repeated treatments for noticeable shrinkage.
- Soaking wool in boiling water for 30 minutes can reduce its size effectively.
- Use vinegar and warm water to shrink delicate fabrics like silk without damaging prints.
- Shirts should be damp-wrung before drying to maximize shrinkage without overstressing the fabric.
1. How to Make a Shirt Shrink: Proven Practical Methods

Shrinking a shirt effectively depends mostly on heat and moisture exposure. Cotton and other natural fabrics tighten their fibers when heated in water and then dried with high heat. Using hot water and a high-temperature dryer cycle produces quicker and more noticeable shrinkage. However, for shirts with graphics or blended fibers, avoid hot water to prevent fading or damage.
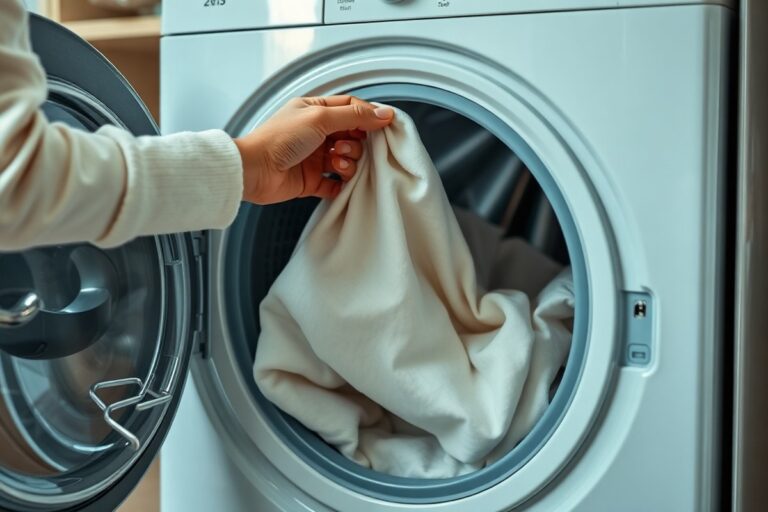
The most reliable method to shrink a plain cotton shirt involves a hot wash followed immediately by thorough drying at the hottest dryer setting available. The heat relaxes and then tightens the fibers as the shirt dries, where significant shrinkage occurs. Repeating the drying cycle without rewashing can increase shrinkage if needed. Cold water washing followed by a long, hot dry cycle also works but shrinks less overall compared to washing in hot water first.
- Prepare your shirt: Check the fabric type and avoid this method on graphics and delicate blends. Turn the shirt inside out to reduce fading on plain cotton shirts.
- Set your washing machine: Use the hottest water setting available for cotton or linen shirts. Choose a long, fast wash cycle with heavy agitation to begin relaxing the fibers.
- Load and start the wash: Place your shirt in the washer alone or with similar fabrics. The hot water and agitation start the shrinking process.
- Transfer immediately to the dryer: Once the wash finishes, do not let the shirt air dry. Move it straight into the dryer set to high heat with the longest drying cycle (around 45 minutes to an hour).
- Dry thoroughly: Dry until the shirt is completely bone dry. The heat further contracts the fibers, maximizing shrinkage. Check size after this first cycle.
- Repeat drying if necessary: If the shirt still feels too large, run another high-heat dry cycle without rewashing. Each dry cycle shrinks a little more but may eventually damage fiber strength.
- Adjust for sensitive fabrics: For blends or prints, skip the hot wash and only dry on high heat, or start with warm water washing to minimize fabric stress while inducing some shrinkage.
- Cool-down and shape: After drying, shape the shirt by gently stretching it back to size if it shrinks too tight or pulling at sleeves and body to maintain desired fit.
2. How Different Fabrics Respond to Shrinking

Different fabrics respond uniquely to shrinking attempts based on their fiber content and construction. Natural fibers like cotton and wool shrink more easily, while synthetics resist shrinkage or require special care. Understanding these differences helps you choose the right shrinking method for each shirt material.
Cotton and Cotton Blends Shrinking Characteristics
Cotton fabrics are among the easiest to shrink, especially if untreated or non-pre-shrunk. Typical shrinkage for new cotton shirts is around 3% to 5% after the first wash, but untreated cotton can shrink up to 20% if exposed to heat during washing or drying. Cotton blends with over 50% cotton also shrink, though less dramatically than 100% cotton because synthetic fibers in the blend limit contraction.
Preshrunk cotton shirts shrink only about 1% to 2%, which is why they’re popular. For best shrinking results, use warm water around 140°F (60°C) and a hot dryer setting. Turning the shirt inside out during washing helps protect the fabric and color. Cotton denim behaves similarly but may shrink less depending on finish and weave.
Wool, Silk, and Delicate Fiber Shrinking Tips
Wool and silk are natural fibers that can shrink, but they require gentler treatment. Wool shrinks by felting, which usually causes permanent size reduction and fabric thickening. To encourage shrinkage without damage, hand wash wool shirts in cool water or use the wool cycle on your machine if allowed. Avoid tumble drying; instead, press out excess water and dry flat to prevent distortion.
Silk is very sensitive to heat and water. Exposing silk to high temperatures or aggressive washing can damage its texture and cause shrinking that leads to tight, uncomfortable fit. Use a garment steamer on high heat to shrink silk gently without soaking or tumble drying.
Synthetic Fabrics: What Shrinking Works or Fails
Synthetic fibers like polyester, nylon, and spandex generally resist shrinking due to their molecular structure. Applying heat during washing or drying may cause slight shrinkage, but results are often minimal and uneven. Some synthetic blends with high cotton content will shrink slightly, combining the behaviors of both fibers.
Delicate synthetic shirts require careful handling to avoid melting or distortion. Use gentle wash cycles with cold water and skip the dryer, opting for air drying. Attempting to shrink pure synthetics using heat typically won’t work well and risks damage. Below is a table summarizing common fabric types, their shrinking tendencies, and recommended care techniques to achieve shrinkage safely and effectively.
| Fabric | Shrinks? | How to Wash | How to Dry |
|---|---|---|---|
| Cotton (tees, shirts, sweats) | Yes, most in first few washes | Cold or warm; gentle; inside out | Remove while damp; finish on rack or hanger |
| Wool and cashmere | Yes, by felting; mostly permanent | Hand wash cool or wool cycle if machine washable | Press water out; dry flat; never tumble |
| Denim | Some; raw denim more | Cold; inside out | Hang to dry |
| Linen | Some; mainly after first wash | Cold or warm; gentle | Hang or dry flat |
Following these fabric-specific approaches balances effective shrinking with garment care. Using high heat for cotton and wool helps, but steam or gentle handling suits delicate fibers better. Synthetics require low heat and caution to avoid damage and often will not shrink much.
Keep in mind that tumble drying wool or silk shirts can permanently ruin the garment’s texture and fit, so stick to flat drying for these fibers.
3. How Heat, Water, and Time Affect Shirt Shrinkage
Heat intensity, water temperature, and exposure time each play distinct roles in how much a shirt will shrink. Dry heat from the dryer usually causes more significant shrinkage than hot water alone. The dryer’s tumbling action combined with heated air causes fibers, especially in cotton shirts, to contract permanently. Using high dryer settings like “high heat” and longer cycles maximizes shrinkage, but overdrying can damage fabric and lead to unwanted stiffness or wear. Running a shorter drying cycle or using a “less dry” setting helps you control how much shrinkage occurs while protecting the shirt’s fabric.
Water temperature affects shrinkage mainly during washing. Hot water between 112°F and 145°F (45, 63°C) encourages cotton fibers to tighten, causing noticeable size reduction. Warm water, from 87°F to 111°F (31, 44°C), offers moderate shrinkage but is gentler on older or already shrunk shirts. Cold water (up to 86°F or 30°C) causes minimal shrinking by itself but won’t prevent shrinkage from tumbling in the dryer. Washing in cold water is safest for maintaining size and colour, especially when shrinking is not desired.
Exposure time to heat and water also matters. The longer a shirt sits in hot water or in the dryer at high heat, the more it can shrink. A brief wash cycle with high heat and a short, warm tumble dry may reduce the shirt by about 1 to 3 percent in size. Extending drying times increases the risk of over-shrinking and fabric damage. For targeted shrinking, like tightening just the waistband, soaking that specific area in hot water and then applying a blow dryer can be effective without shrinking the whole garment.
Dryer temperature around 130°F to 140°F supports good shrinking for cotton shirts without causing too much damage. Running the dryer on a normal or permanent press cycle for 20 to 30 minutes often achieves moderate shrinkage. Check progress frequently by removing the shirt while still slightly damp and letting it finish drying on a hanger. This approach helps avoid overdrying and preserves fabric quality.
Cold water does not cause shrinkage, but it does not stop shrinkage from drying either. To avoid shrinking shirts unintentionally, wash in cold water and use a low heat tumble dry or air dry. For intentional shrinking, combine hot water washing with a warm or hot dryer cycle, adjusting the time to balance desired size reduction against fabric wear.
4. Ways to Shrink Shirts Without Washing Machines or Dryers
You can shrink shirts without using a washing machine or dryer by soaking them in hot water or boiling, followed by air drying. Soaking allows the fabric fibers, especially cotton, to absorb heat and water, causing them to contract. Boiling is a more intense method suited for stubborn shrinkage. Air drying after soaking controls how much the shirt tightens without damage.
Hot Water Soak Method Step-by-Step
Soaking your shirt in hot water activates shrinkage by relaxing and contracting the knit fibers, particularly in cotton shirts. This method is gentle and effective when you soak long enough, around 15 to 20 minutes. Adding half a glass of white vinegar can help improve shrinkage slightly by affecting the cotton fibers.
- Fill a clean basin or large bowl with hot tap water, aiming for 120°F to 140°F (49°C to 60°C). Use water this hot but not boiling to protect the fabric.
- Add half a glass (about 4 ounces) of white vinegar if you want to improve shrinkage, especially for cotton.
- Submerge the shirt fully, ensuring it is soaked evenly.
- Let it soak for 15 to 20 minutes without disturbance to maximize fiber contraction.
- After soaking, remove the shirt and gently wring out excess water without stretching.
- Proceed to drying methods focused on shrinkage control.
Boiling Method Precautions and Procedure
Boiling a shirt is a more aggressive way to shrink it, useful for raw cotton or particularly large sizes. Use caution as high heat and prolonged exposure can weaken or damage delicate fibers and prints. Wool sweaters also shrink well with boiling but require only about 30 minutes.
- Bring a large pot of water to a rolling boil on the stove.
- Fully submerge the shirt into the boiling water using tongs to avoid burns.
- Let it boil gently for about 5 to 10 minutes for cotton shirts. For wool sweaters, soak for up to 30 minutes.
- Remove the shirt carefully and avoid sudden stretching while hot.
- Let the shirt cool down slightly before handling further.
- Dry the shirt with shrinkage-focused techniques to lock in size reduction.
Air Drying and Towel Drying Techniques
After soaking or boiling, how you dry your shirt affects final shrinkage. Air drying while minimizing stretching helps retain smaller size. Avoid hanging shirts if you want to prevent length stretching. Instead, towel drying is an effective way to remove excess moisture while encouraging shrinkage.
Lay the shirt flat on a dry towel, roll the towel around it, and press gently to absorb water without twisting. Unroll and lay the shirt flat on a dry surface in a warm area away from direct sunlight. Flip occasionally for even drying. This method keeps the shirt from expanding and promotes a gradual shrinkage that protects fabric integrity.
5. How to Shrink Shirts with Prints and Blended Fabrics Safely
Shrinking shirts printed with designs or made from blended fabrics requires a careful approach to avoid damaging the graphics or altering the fabric’s appearance unevenly. Shirts with prints, especially screen-printed or heat-transfer graphics, can fade, crack, or peel if exposed to high temperatures and harsh agitation. Because cotton blends, such as those mixed with polyester, are less likely to shrink and can react differently to heat, using moderate heat and gentler methods is essential. For a 60% cotton, 40% polyester shirt, significant shrinkage is unlikely since polyester resists shrinking and can distort under extreme heat.
Start by turning the shirt inside out to protect the print during washing and drying. Use warm water instead of hot, setting your machine to a gentle or delicate cycle. This reduces agitation, preventing uneven shrinkage and preserving printed designs. After washing, avoid tumble drying at high heat. Instead, dry the shirt on a low heat setting or hang it to air dry partially, then use a brief warm dryer cycle if needed. This approach minimizes fading and fabric stress while still encouraging some shrinkage in the cotton fibers.
For shirts with a high cotton content but blended with polyester or other synthetics, expect only minimal shrinkage, usually around 2% to 5% at best. Since polyester fibers do not shrink well and can be harmed by high heat, avoid attempting extreme heat treatments that might burn or distort the synthetic fibres. Sweating, hot water, and agitation can shrink pure cotton up to 20%, but blended fabrics do not respond the same way and require gentler handling.
When dealing with prints, another strategy is spot-shrinking: concentrate heat and dampness on areas without graphics, or limit drying time to avoid overheating printed sections. Pressing the shirt with a steam iron on a low setting can also help shrink cotton without affecting the design if handled carefully. Always test on a small, inconspicuous area first. The cost here is mostly time and attention to temperature settings rather than materials or special equipment.
Set your washer to cold or warm water and always dry printed shirts on low heat to prevent damage and fading of the designs.
In summary, shrinking shirts with prints and blended fabrics safely means balancing heat, moisture, and agitation. Overusing heat risks ruining the prints and weakening synthetic fibers, while too little warmth results in no shrinkage. The best results usually come from warm, gentle washing, inside-out care, and controlled low-heat drying. This method limits shrinkage for blended fabrics while keeping your shirts looking their best.
6. Troubleshooting and Fixes for Shirt Shrinking Mistakes
Shrinking a shirt too much or unevenly is a common problem, but in many cases, you can partially reverse the shrinkage. The key is to carefully stretch the fabric while it’s still damp, which relaxes the fibers and expands the shirt size. This fix works best on natural fibers like cotton or wool and is less effective on synthetic blends or shirts with heavy prints.
To stretch a shirt back to size safely, soak it in lukewarm water mixed with a small amount of hair conditioner or baby shampoo (about 1 tablespoon per quart of water). Let it sit for 20 to 30 minutes so the fibers soften. Gently squeeze out excess water, avoid wringing, and lay the shirt flat on a clean towel. Use your hands to pull and stretch the shirt evenly, focusing on areas that are too tight or small.
- Use a clean, flat surface for laying out the damp shirt
- Stretch evenly across width and length to avoid distortion
- Pin shirt edges to the towel if you want to hold the new size
- Leave the shirt to air dry completely while pinned/stretching
- Repeat soaking and stretching if needed but avoid excessive pulling
If the shirt shrank unevenly, try targeted stretches rather than a full-size restore. Concentrate on one small section, soak just that area briefly, then gently pull it. This helps maintain the shirt’s general shape instead of stretching parts that didn’t shrink. For shirts that shrank too small to wear comfortably, repeated soak and stretch cycles over a couple of days may bring back more size. Avoid machine drying here to prevent further shrinking.
Taking precautions can reduce the chance of overshrinking in the first place. Always test shrinking methods incrementally and check the shirt’s size after each step. Smaller, gradual changes give you better control and reduce the risk of irreversible damage or misshaping. Note that some shirts, especially 100% cotton ones, can shrink one to two sizes maximum, so adjustments beyond that are limited.
When these DIY fixes aren’t enough, professional alteration by a tailor might be a better option than trying to reverse heavy shrinkage. Adjustments like adding fabric panels or resewing seams can restore fit without compromising the shirt’s look. Consider donating or swapping shirts that have shrunk beyond repair to avoid waste and give them a new life with someone else.
7. Selective Shrinking: How to Control Shirt Size and Shape
You can shrink specific parts of a shirt, such as the length or width, by using targeted heat and moisture techniques instead of treating the whole garment. This selective shrinking lets you adjust the fit without risking unwanted changes elsewhere. Using tools like garment steamers, controlled drying, and strategic shaping during drying helps control which parts of the shirt shrink and by how much.
Using Heat to Target Specific Areas
Applying heat directly to a specific part of the shirt encourages shrinkage only in that area. A garment steamer or even a handheld iron set to the appropriate temperature can deliver focused heat. This method works best on cotton or cotton-blend shirts, where fibers respond predictably to heat. Avoid overheating to prevent damage or discoloration, especially near trims or prints.
Select the portion you want to shrink, such as the collar, hem, or sleeves. Keep the rest of the shirt cool and dry by isolating it with towels or folding it away from the heat source. Steam or press the targeted area evenly, monitoring the fabric’s reaction. Short bursts of heat followed by cool-down periods help prevent over-shrinking.
Wet and Stretch Technique for Partial Shrinking
This method involves wetting only the area you want to shrink, then allowing it to dry naturally or with heat while restricting stretching. Moisture relaxes the fabric fibers, and controlled drying causes shrinkage focused on the dampened section. Doing this reduces the risk of the whole shirt shrinking and lets you adjust the size more precisely.
- Dampen the specific part of the shirt carefully, using a spray bottle or wet cloth, avoiding saturation of the rest of the garment.
- Lay the shirt flat on a clean surface, smoothing wrinkles away from the wet area.
- Lightly stretch or shape the dry areas to prevent accidental shrinking in those parts.
- Let the dampened area air dry or use a hair dryer on medium heat, keeping it about 6 to 8 inches away.
- Check progress periodically and repeat the process if more shrinkage in that area is needed.
Using Towels and Weights to Shape Shirt During Drying
During drying, placing towels or weights strategically on your shirt can help shape the drying fabric and control shrinkage. This approach works well after applying heat or moisture. Towels absorb excess moisture and prevent over-stretching, while weights can hold fabric in place to encourage shrinkage in designated areas.
For example, if you want to reduce length, fold the shirt so the bottom half is under a damp towel, then place light weights on top to keep it flat and restricted. This limits stretching and encourages fibers in that area to contract more. For width adjustments, use weights along the sides or sleeves.
- Lay the shirt flat with the target area exposed and the rest protected by dry towels.
- Place a damp towel over the area you want to shrink or keep dry towels around parts you don’t want to shrink.
- Add small weights (like clean cans or fabric weights) on top of the towels above the target area.
- Allow the shirt to dry completely this way, preferably indoors away from direct sunlight or excessive heat.
- Remove weights and towels once dry, and check the fit; repeat if necessary.
8. Safety Tips and Best Practices for Shrinking Shirts at Home
Shrinking shirts at home requires careful attention to safety and fabric care. Excessive heat or agitation can quickly damage fabrics or cause unwanted shrinking. Always check the garment’s care label first and use the lowest heat setting needed to gradually shrink the shirt. Avoid plunging directly into high temperatures, as this can warp fibers or cause irreversible shrinkage, especially with delicate materials like wool or blends.
Protecting colors is another important step. Before applying heat or water treatments, test the shirt’s colorfastness on a hidden seam or hem with a damp cloth to make sure colors won’t fade or bleed. Avoid prolonged soaking or boiling, which can strip dyes or weaken fabric integrity. Using gentle agitation helps preserve both color and fiber strength.
Common mistakes include rushing the process by using high heat immediately, skipping label instructions, and neglecting the total amount a shirt can shrink. Shirts pre-shrunk by manufacturers may not shrink much further and trying to force more shrinkage often leads to shrinking unevenly or damaging the fabric texture. To protect your shirts while achieving the right fit, follow this safety and care checklist:
- Always read and follow the care label’s temperature and washing instructions.
- Start with low heat settings on washers and dryers, then increase gradually if needed.
- Perform a colorfastness test on a hidden area before applying heat or water.
- Limit agitation to gentle cycles to reduce fabric stress.
- Avoid boiling delicate or blended fabrics; reserve high heat for sturdy 100% cotton items.
- Monitor the shirt carefully during drying to prevent over-shrinking.
- Allow the fabric to rest between shrinkage attempts to avoid cumulative damage.
Different fabrics respond differently under heat. Wool especially requires extra care to avoid felting, which compresses fibers into a dense mat rather than shrinking evenly. Felting damages the shirt’s softness and flexibility. For cotton, durable fabrics can usually handle brief exposure to temperatures around 140°F to 160°F in dryers, but synthetic blends often need lower heat.
Do not leave shrinking shirts unattended in the dryer; check frequently to prevent overshrinking or fabric damage.
Taking a gradual approach reduces the risk of irreversible damage and helps maintain your shirt’s quality through repeated wear. The goal is controlled shrinking, not fabric distress. Avoiding high heat spikes and excessive mechanical stress protects your shirts’ look, feel, and longevity while helping you reach the perfect fit safely.
Step-by-Step Action Plan for Shrinking Your Shirt
Follow these steps carefully to shrink your shirt effectively while keeping its shape and print intact.
- Before you start: Check the fabric label for shrink tolerance and print care instructions to avoid damage.
- Day 1: Soak the shirt in hot water for 30 minutes, then remove and gently wring out excess water.
- Day 1 continued: Lay the shirt flat on a clean towel and roll it up to absorb moisture without stretching.
- Day 1 evening: Place the shirt in a dryer on a high-heat setting for 15 to 20 minutes, then check the size.
- Day 2: Repeat the drying step if needed, stopping once the desired shrinkage is reached.
- After a week: Wear the shirt and observe if the fit has settled; consider minor spot treatments for selective shrinking.
- Ongoing: Use cold water washes after shrinking to maintain fit and prevent further unintended shrinkage.
Frequently Asked Questions
How Can I Shrink a Shirt That’s Too Big?
You can shrink a shirt that’s too big by soaking it in hot water and drying it on high heat. Hot water relaxes the fibers, and heat from the dryer tightens them, reducing the size. Avoid repeated attempts, as too much heat can damage the fabric.
Can I Shrink an XL to a Large?
Shrinking an XL shirt to a large is possible if the shirt is made of cotton or a high cotton blend. Use hot water soaking and high-heat drying to shrink, but expect only about a 3%, 5% size reduction from one shrink cycle.
Can I Shrink a Shirt That Is 60% Cotton and 40% Polyester?
Shirts with 60% cotton and 40% polyester shrink only slightly, if at all. Polyester resists shrinking, so expect minimal change in size. Shrinking attempts with heat might stress the fabric but won’t significantly reduce the shirt’s dimensions.
Can I Shrink a 100% Cotton T-Shirt?
Yes, 100% cotton t-shirts can shrink significantly, especially if not pre-shrunk. Hot water and high dryer heat make cotton fibers contract, typically shrinking the shirt by 3%, 5%. Be careful to avoid damage or distortion.
How Long Should I Soak a Shirt to Shrink It?
Soak a shirt in hot water for about 15 to 30 minutes to allow fibers to relax and start shrinking effectively. Prolonged soaking beyond 30 minutes usually doesn’t increase shrinkage much and may affect fabric quality.
Does Ironing Shrink Shirts?
Ironing can shrink shirts slightly by applying heat and pressure to cotton fibers, but it’s less effective than hot water and dryer heat. Use the highest safe heat setting for cotton only, and iron evenly to avoid fabric damage.
Wrapping Up
Shrinking shirts can be done safely by controlling heat, water, and time while respecting fabric types. Taking careful steps reduces the chance of over-shrinking or damaging your shirt. Start with a small test on an inconspicuous part of the shirt to build confidence before altering the whole garment. This approach lets you adjust size without regrets.