

How to Wash Sneakers in Washer Safely: 8 Proven Steps for Best Results
To wash sneakers in washer safely, first ensure your shoes are machine-washable materials like canvas or synthetic fabrics, then remove laces and insoles before cleaning. Use a mild detergent, select a gentle cycle with cold or warm water, and protect your sneakers by placing them in a mesh bag. Proper drying and stain treatment after washing help maintain their condition and appearance.
This advice fits sneaker owners who want an effective, safe washing method without damaging their shoes or machine. You’ll get clear steps on checking sneaker materials, prepping them for washing, and tips to keep your shoes and washer in good shape.
Key Takeaways
- Only machine wash sneakers made of canvas, nylon, or synthetic materials to avoid damage.
- Remove laces and insoles before washing, soaking laces separately for about 15 minutes.
- Use mild laundry detergent mixed with warm water to treat stains before washing sneakers.
- Select a gentle or delicate washing cycle with cold or warm water for best results.
- Put your sneakers inside a mesh laundry bag to shield them throughout the washing cycle.
- Dry sneakers naturally by air-drying away from direct heat to prevent warping.
1. Which Sneakers Are Safe to Wash in a Machine?
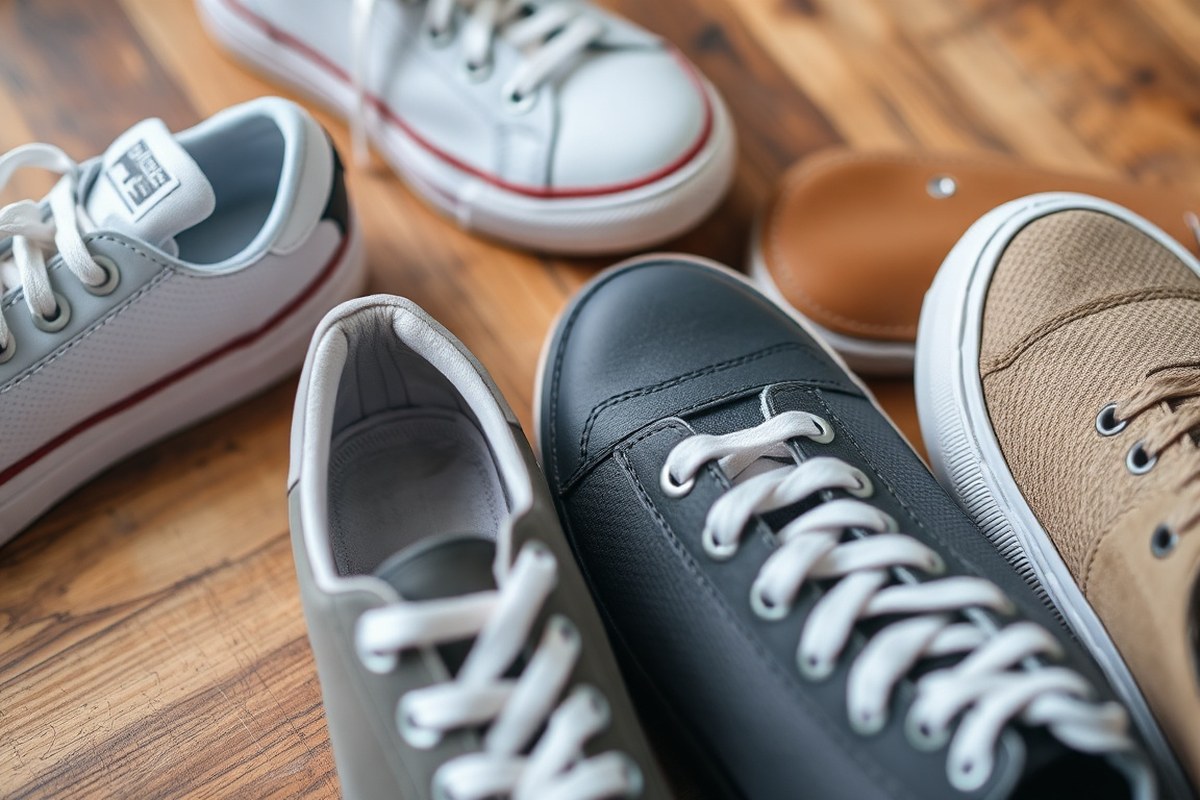
Not all sneakers are safe to wash in a washing machine. Sneakers made from canvas, nylon, polyester, or mesh fabrics generally handle machine washing well because these materials can tolerate water and agitation without losing shape or color. Regular athletic sneakers or casual fabric shoes often fall into this category and can be cleaned effectively using a gentle cycle and cold or warm water.
You should avoid machine washing sneakers that include leather, suede, vinyl, or rubber components. These materials react poorly to water and aggressive washing motions. Leather and suede, in particular, can warp, crack, discolor, or become stiff after machine washing. Washing machines can also cause rubber parts like soles or trim to degrade or detach. Manufacturers and shoe experts advise hand washing any shoes that use these materials to prevent damage to both the sneaker and your washer.
Checking your sneaker’s care label is the most reliable way to confirm if they are machine washable. This label shows what cleaning methods and products are safe to use, helping avoid costly mistakes. In absence of a care label, visually identify materials: smooth, natural grain or synthetic leather and soft, fuzzy suede mean you should avoid the washing machine. Stiffer rubber trims or vinyl accents also require hand cleaning.
When you decide to machine wash fabric-based sneakers, support them properly inside the washer. Washing them alongside towels cushions the shoes, reducing harsh impacts that could deform them or damage your machine. Do not wash sneakers with delicate clothes or mix in heavy items not recommended for your machine’s settings. The next checklist shows how to determine if your sneakers are machine washable:
1. Identify materials: Fabric (canvas, nylon, mesh) is machine safe. Leather, suede, vinyl, and rubber parts mean hand wash only.
2. Check manufacturer’s care label: Follow any instructions or warnings about machine washing.
3. Assess construction: Sneakers with glued or glued-and-stitched soles may come apart in a washer.
4. Consider shoe age and condition: Older or delicate sneakers risk damage.
5. Avoid washing mixed-material sneakers: Shoes combining fabric with leather or suede should be hand cleaned.
Being cautious saves your shoes from distortion and discoloration, and prevents washers from damage. This approach prevents common issues like shrinking, peeling, or staining. When handled correctly, machine washing fabric sneakers refreshes their look safely and keeps them wearable longer without added expense.
2. How to Prepare Sneakers, Laces, and Insoles for Washing
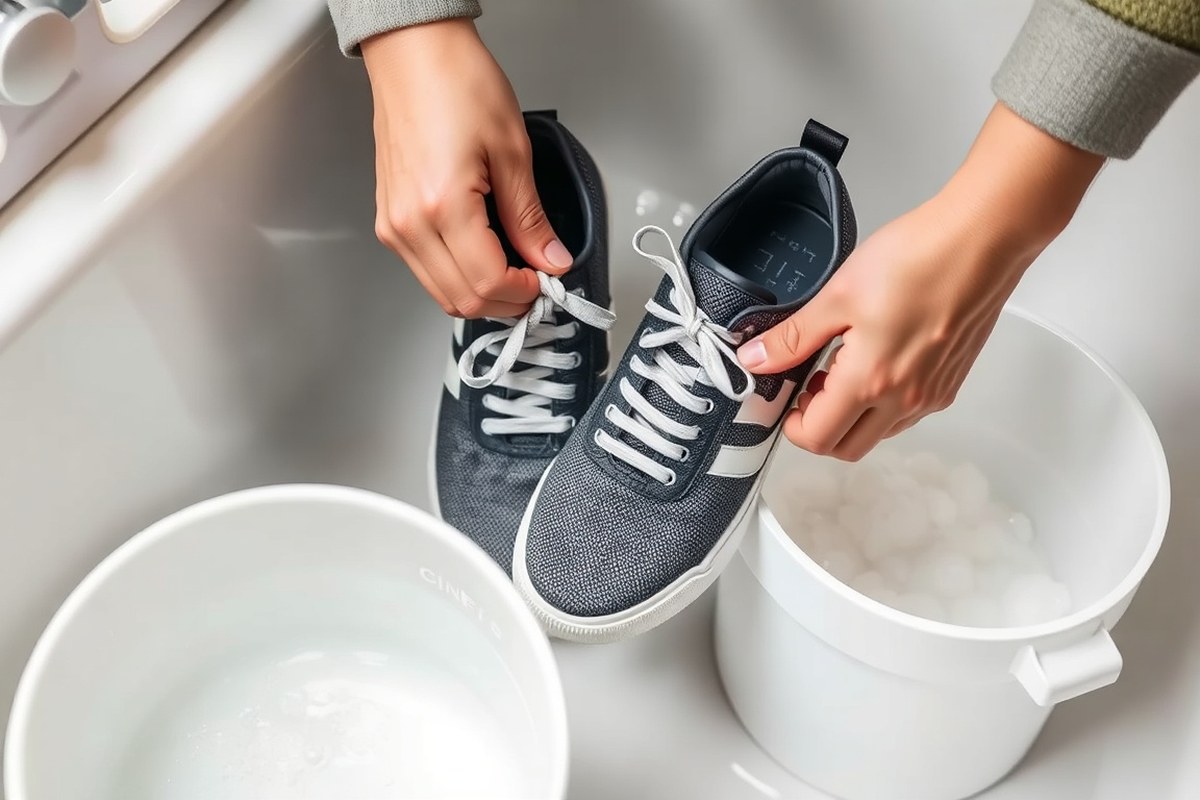
Prepare your sneakers by removing laces and insoles before washing. Brush away loose dirt from the surface and treat any noticeable stains to help the machine clean better. Proper preparation prevents damage and achieves a deeper clean.
Removing Laces and Soaking Them
Take the laces out before washing. Laces often collect dirt and grime, especially near the eyelets, and cleaning them separately ensures they get enough water and detergent. You can either hand wash them or put them in the machine with the shoes. Tying the lace ends together and placing them inside a pillowcase or mesh laundry bag prevents tangling and protects them during the wash.
For tough dirt on laces, soak them in warm soapy water for 15 to 30 minutes before scrubbing with a soft brush to loosen stains. This step helps restore whiteness or brightness to shoelaces.
- Unlace each sneaker carefully without forcing.
- Check the laces for any damage; replace if severely worn.
- Fill a basin with warm water and a small amount of mild detergent.
- Soak the laces for 15 to 30 minutes.
- Gently scrub laces with a soft brush to remove stains.
- Rinse thoroughly with cold water and squeeze out excess water.
- Let laces air dry completely before re-lacing sneakers.
Always avoid washing laces without removing them first to get a thorough clean and avoid tangles inside the machine.
Taking Out Insoles and Cleaning Separately
Remove the insoles because machine washing can leave them soaked and slow to dry, risking damage or odor. Cleaning insoles separately allows you to target odor and dirt without soaking the entire shoe structure. Most insoles pause better when hand washed with mild soap and air-dried thoroughly. Use a soft cloth or brush with mild detergent to clean insoles, then rinse and air dry in a well-ventilated area away from direct sunlight to prevent warping or shrinking.
- Pull out the insoles carefully from inside each sneaker.
- Inspect for damage or wear and consider replacing if needed.
- Prepare warm water with a small amount of liquid detergent in a basin.
- Take a soft brush or a cloth and carefully clean both sides of the insoles.
- Rinse lightly with clean water, avoiding saturation.
- Press with a towel to remove excess water without wringing.
- Let insoles air dry completely in a shaded area.
Do not put insoles in the washing machine, that can cause them to retain water for days and develop odor or damage.
Pre-Treating Stains with Appropriate Cleaners
Spot-treat stains before washing to improve cleaning results. Use stain removers that match the sneaker’s fabric and the stain type, for example, Clorox™ Disinfecting Bleach for white canvas shoes or Clorox 2™ for colored fabrics. Avoid harsh chemicals on delicate or synthetic mesh materials to prevent discoloration.
Apply a small amount of cleaner directly on the stain, gently rub with a soft brush, and allow it to sit for 5 to 10 minutes before placing the sneakers in the machine. This helps loosen dirt and grime stuck in the fibers.
- Identify stains that need pre-treatment, such as mud, grease, or ink.
- Select a cleaner suitable for your sneaker material and stain type.
- Apply a small amount of cleaner on a clean cloth or brush.
- Gently rub the stained area without excessive force.
- Let the cleaner work for 5 to 10 minutes but do not let it dry out completely.
- Blot excess cleaner before putting sneakers in the machine.
Test stain removers on a hidden part of the shoe first to check for colorfastness or damage.
Brushing Off Excess Dirt and Debris
Remove loose dirt, mud, and debris with a soft brush before washing. This reduces grime that can get trapped during the wash cycle and protects your machine from damage or clogging. Use a soft-bristled brush or an old toothbrush to gently sweep dirt away from seams, soles, and fabric surfaces.
After brushing, wipe sneakers with a damp cloth to remove remaining dust or particles. Ensure you remove mud from the soles and any sticky residue that might interfere with washing.
- Select a soft-bristled brush suitable for your sneaker material.
- Brush all exterior parts of the sneakers, focusing on crevices.
- Tap the shoes lightly to dislodge loosened dirt.
- Use a damp cloth to gently wipe down the surface.
- Inspect the soles and remove trapped debris manually if needed.
- Allow sneakers to dry partially before starting the wash cycle.
Do not skip brushing off excess dirt, it ensures better washing results and limits wear on the washing machine.
3. Choosing the Right Detergent and Stain Removers for Sneakers
Choose a liquid detergent designed for delicate fabrics when washing sneakers in a machine. Powder detergents can leave residue inside shoes, causing stiffness or discoloration. Cold water helps maintain colors and prevents shrinking, so avoid hot cycles unless the shoe manufacturer states otherwise.
Adding a stain remover like Clorox 2™ for Colors Laundry & Fabric Stain Remover can improve cleaning on colored fabrics without fading. Use it alongside your regular detergent during the wash cycle. For disinfecting, a product with at least 80 percent pine oil is necessary, but it only works effectively on a warm water cycle, which many sneakers cannot tolerate due to material sensitivity.
Pre-treat stains by applying stain remover directly to affected areas before loading the shoes into the washer. Avoid mixing heavy stain removers or bleach with sneakers made of delicate or colored fabrics, since these can cause damage or fading.
| Product Type | Use Case | Water Temperature | Why It Matters |
|---|---|---|---|
| Liquid Laundry Detergent (Mild) | Everyday sneaker wash | Cold | Prevents powder residue, protects colors, and maintains fabric integrity |
| Clorox 2™ for Colors | Color-safe stain removal | Cold | Improves stain removal without fading colored fabrics |
| Disinfectant (≥80% pine oil) | Disinfecting sneakers | Warm | Effective only on warm cycles, but warm water may damage some sneaker materials |
| Powder Detergent | Not recommended for machine wash | N/A | Might leave stubborn residue inside shoes |
For most sneakers, start with liquid detergent in cold water on a delicate cycle. Apply stain remover before washing if necessary. Skip disinfectants unless you can safely use warm water without risking damage. Using old towels in the wash helps cushion your sneakers and prevents machine damage.
4. Best Washing Machine Settings for Cleaning Sneakers
Set your washing machine to the gentlest cycle with cold water when cleaning sneakers. Cold water prevents shrinking and damage to shoe materials. Gentle or delicate cycles reduce tumbling speed, which helps protect the shoe shape and fabric from excessive wear during the wash. Slow spin or no spin cycles are best to avoid aggressive spinning, which might deform your sneakers or strain the washer.
The entire wash cycle typically takes about 30 to 45 minutes on a gentle setting. Choosing shorter cycles not only minimizes wear on your shoes but also reduces energy use. Avoiding high temperatures and heavy agitation is important because intense heat or harsh washing can degrade adhesives, fabrics, and cushioning.
Wash sneakers separately without clothes. Mixing clothes with shoes increases the risk of knocks and scratches inside the drum and can cause damage to both. Placing shoes alone in a mesh laundry bag or a pillowcase cushions them, limiting contact and tumbling friction with the machine’s interior. This simple step helps protect your washing machine from scrapes or clanks from the shoes’ hard parts like soles or eyelets.
Add 1 to 2 teaspoons (5 to 10 mL) of mild laundry detergent designed for delicate fabrics. Avoid heavy-duty or bleach soaps that may degrade shoe materials. Do not use fabric softener because it can leave residues affecting shoe breathability.
To protect your washer further, always check that the drum and door seals are free from grit or shoe parts before and after washing. Ensure shoes have no large debris like stones attached. Using only one pair per wash avoids unbalancing the machine and reduces noise. Running a quick maintenance clean cycle after shoe washing helps remove any leftover grime inside the machine.
Following these settings and precautions helps keep your sneakers clean without damage and prevents harm to your washing machine. The goal is slow, gentle cleaning with cold water, minimal agitation, and protective barriers between the shoes and the washer. This approach balances effective cleaning with care for both your footwear and appliance over time.
5. How to Protect Sneakers and Your Washer During the Cycle
Use a mesh laundry bag and add towels to protect your sneakers and your washing machine during the cycle. The mesh bag keeps shoes together and reduces wear on both your sneakers and the machine drum. Towels act as cushions, preventing the shoes from banging around loudly or causing damage.
Placing Sneakers in a Mesh Laundry Bag
A mesh laundry bag is a breathable pouch designed to hold sneakers during the wash. It prevents the shoes from hitting the inside of the washing machine too hard, which can cause damage to both the machine and the sneakers’ stitching or structure. This is especially important for tougher machines or bulky shoes. Here are the steps to prepare sneakers for the wash using a mesh bag:
- Choose a sturdy mesh laundry bag sized to fit both sneakers comfortably without squeezing.
- Place your clean, prepared sneakers inside the mesh bag, ensuring they are fully enclosed.
- Close the bag securely, using the zipper, Velcro, or drawstring that comes with it.
- Place the mesh bag with shoes into the washing machine drum.
Not using a mesh bag can lead to scratches or dents inside the washing machine drum and cause excessive wear on sneaker materials during the wash.
Adding Towels to Cushion the Shoes
Adding towels helps cushion your sneakers during the cycle, reducing banging noises and protecting the drum and shoes from impact. Towels absorb shock and limit movement in the drum, which is especially helpful with heavier shoes or front-loading machines. Use about one or two medium-sized old towels to fill the rest of the space around the mesh bag in the machine.
- Choose 1, 2 old bath towels that you don’t mind getting slightly dirty.
- Fold or bunch the towels to fill empty space around the mesh bag inside the drum.
- Make sure the towels evenly surround the mesh bag to prevent excessive shifting during the cycle.
- Run your chosen wash cycle as planned.
Don’t overload the machine; the drum needs sufficient room to spin and rinse properly even with towels added for cushioning.
Securing or Bagging Shoelaces with Shoes
Shoes and shoelaces should stay together during washing to prevent laces from tangling or damaging other items in the load. The mesh bag often holds both, but if you remove laces before washing, keep them in a separate mesh bag or securely tied. To keep laces safely with your sneakers:
- Remove shoelaces from your sneakers, unless the mesh bag is large enough to hold both shoes and laces without crowding.
- Place the laces inside a small mesh pouch or an old pillowcase tied shut.
- Put the pouch with the laces inside the main mesh bag with your sneakers or wash it separately with towels.
- Close all bags securely before adding them to the washing machine.
Loose laces can tangle inside the machine or catch on the agitator, potentially causing damage to both the washer and other clothing items.
6. Drying Sneakers Safely After Machine Washing
Drying sneakers after washing affects their shape, size, and overall durability. Avoid using a tumble dryer because heat can warp the shoe’s structure, break down adhesives, and shrink synthetic materials. Letting sneakers air dry preserves their form and prevents damage that can shorten their lifespan. Proper drying also reduces odor buildup by allowing moisture to dissipate evenly.
To maintain the shape of your sneakers, it’s important to support them during drying. Placing crumpled paper or a shoe tree inside helps retain their form as they dry. Air drying patterns vary depending on the material; mesh and knit sneakers dry fastest, while leather or canvas shoes take longer and need gentler care to avoid stiffness or cracking.
- Remove excess water gently: After the wash cycle, use a clean towel to blot and absorb as much moisture as possible on the outside and inside without squeezing or twisting, which can distort the shape.
- Stuff the sneakers: Fill the shoes with crumpled newspaper, paper towels, or a shoe tree to maintain structure. Replace the stuffing every few hours as it absorbs moisture.
- Place in a well-ventilated area: Set the sneakers in a covered, shaded spot with good air circulation. Avoid direct sunlight or heating vents, as these can cause material degradation and color fading.
- Dry laces separately: Remove laces and hang or lay them flat to air dry; never put laces in the dryer to prevent melting or shrinking.
- Allow sufficient drying time: Let sneakers dry for 24 to 48 hours, depending on humidity and material thickness. Expect canvas or mesh to dry faster than leather or synthetic materials.
- Check for odor or dampness: If the sneakers still feel damp or smell musty after drying, repeat the stuffing and air drying steps to fully remove moisture and prevent bacterial growth.
7. Dealing with Odors and Stains After Washing Sneakers
Sometimes washing your sneakers in the machine doesn’t fully eliminate all the smells or stains. For lingering odors, sprinkle a generous amount of baking soda inside the shoes and let them sit overnight. Baking soda works as a natural deodorizer because it has a mild alkaline pH that neutralizes acidic odors. After resting, shake out the excess powder to prevent buildup. When the smell lingers, try a specialized sneaker deodorizer, such as one from Rocket Pure, which contains stronger odor-fighting ingredients made for sports shoes.
To clean the inside of sneakers thoroughly, you can remove the insoles and treat them separately. Place the insoles in a sealed plastic bag with baking soda, shake well to coat them evenly, and then leave them out overnight to absorb moisture and odors. This method helps reach deep inside where sweat and bacteria build up. Adding a small amount of white vinegar to the washing machine during the cycle can also assist in removing mold or mildew smells by killing odor-causing bacteria. Vinegar is a mild acid that breaks down residues without damaging fabric.
Stubborn stains often need targeted treatment after your wash cycle. Gently scrub spots with a paste made from baking soda and water, letting it sit for 10 to 15 minutes before wiping clean with a damp cloth. Avoid using baking soda on any parts of the shoe where surface damage may occur, such as delicate leathers or bright fabrics. It’s wise to spot test a small area first. For extra protection, consider applying a sneaker-specific stain repellent after the shoe dries to keep future dirt and stains from setting deeply.
Deodorizing other household items inside the shoes, like coffee grounds or kitty litter, can work as a temporary fix. Just sprinkle these materials inside your sneakers and leave them overnight. These alternatives absorb moisture and odors but don’t clean stains. Use them only when you want to freshen sneakers between washes.
After baking soda treatments, fully air dry your sneakers in a well-ventilated spot to avoid trapping moisture, which could cause more odor issues or damage. This step also helps all deodorizing agents dissipate fully. Your sneakers smelling musty shortly after drying usually means there’s still moisture trapped inside. Repeating the baking soda or deodorizer process along with proper drying usually solves this.
8. Common Mistakes and When to Hand Wash Instead
Common mistakes when washing sneakers include putting leather or suede shoes in the washer, using high heat, or selecting harsh detergents. These errors can damage the materials, shrink the shoes, or ruin their look and fit. Hand washing is often better for delicate or sensitive sneaker types to keep them safe and maintain their appearance.
Why Not to Wash Leather or Suede Sneakers in Machines
Leather and suede sneakers should never go in the washing machine. The agitation, water, and detergents can remove natural oils and destroy the texture of these materials. This leads to cracking, warping, and color fading. Machines also use higher water volumes and force which leather and suede cannot handle well, causing permanent damage that’s difficult to repair.
Wet leather is prone to becoming stiff and losing its flexibility, while suede can develop water stains and lose its soft finish. Protecting these shoes requires gentle cleaning methods to prevent ruining expensive or sentimental pairs.
Avoiding High Heat and Harsh Detergents
High heat settings in the washer or dryer can shrink fabric sneakers or make their shape warp. That affects comfort and performance, sometimes permanently. For machine-safe sneakers, cold or warm water cycles are best, along with gentle spin settings to limit stress on materials and seams.
Using mild, sneaker-friendly detergent is important. Strong detergents or bleach strip color and fabric integrity. Avoid fabric softeners as well since they can leave residues affecting the shoe’s breathability. Rinse thoroughly to remove all soap, preventing stiffness after drying.
When Hand Washing Is the Safer Choice
Hand washing is recommended for leather, suede, vinyl, and rubber sneakers. Also choose hand washing for shoes with glued joints or intricate designs that could come undone in a washer. It grants better control over cleaning and prevents mechanical damage.
Use a soft brush or cloth with mild soap and cool water. Gently scrub the dirty areas, rinse carefully, and air dry away from direct heat or sunlight. It takes more time and effort but avoids the risks of shrinking, cracking, or faded colors.
Fixing Damage Caused by Improper Washing
If sneakers shrink after washing, stretching them gently while damp can sometimes restore size. Stuffing the shoes with newspaper and wearing them in short intervals helps reshape fabric models. For leather cracked by machine wash, applying a leather conditioner can soften and restore some flexibility.
Water stains on suede require brushing with a suede brush or eraser tool once fully dry. Avoid using water or cleaning products that can worsen discoloration. Severe damage may only be fixed by a professional shoe repair service.
Do not put leather or suede sneakers in the washer; instead, clean them with a damp cloth and mild soap to avoid permanent damage.
Step-by-Step Action Plan for Washing Sneakers in a Washer
Follow these steps to get your sneakers clean without damage or lingering odors.
- Before washing: Check your sneakers’ material tag to ensure they’re machine washable. Confirm that leather or delicate fabrics are avoided.
- 30 minutes before washing: Remove laces and insoles; pre-treat visible stains with a sneaker-safe stain remover to boost cleaning results.
- Right before loading: Place sneakers in a mesh laundry bag or pillowcase to protect both shoes and washer drum during the cycle.
- During washing: Use cold water with a gentle cycle and a small amount of liquid detergent designed for athletic gear or delicate fabrics.
- After washing: Air dry sneakers at room temperature, stuffing them with paper towels to maintain shape and speed up drying.
- 1 day after drying: Inspect for lingering odor or stains; apply an odor-eliminating spray or repeat spot cleaning only as needed.
- After complete drying: Reinsert dry insoles and lace up sneakers, ready for wear or storage.
Frequently Asked Questions
Can I Wash Leather Sneakers in the Washing Machine?
No, leather sneakers can get damaged, so hand wash them instead to protect their material and shape.
Is It Okay to Wash Sneakers with Other Laundry Items?
Yes, washing sneakers with towels helps cushion them and prevents banging inside the machine.
How Do I Prevent Color Fading During Machine Washing?
Use cold water and gentle detergent to avoid fading the colors and damaging fabrics.
Can I Put Sneakers in a Dryer After Washing?
Avoid dryers; air drying sneakers prevents shrinking and shape loss.
Should I Remove Insoles Before Machine Washing Sneakers?
Yes, removing insoles helps them dry faster and prevents damage in the washer.
Is It Safe to Wash Sneakers Every Week?
Frequent washing may wear out sneakers faster; spot clean when possible.
Key Points to Remember
Washing sneakers in a machine can freshen them effectively while avoiding damage if you follow protective steps. Start by checking materials and preparing your shoes properly, then choose gentle settings and drying methods. Taking these specific actions today ensures your sneakers stay clean and last longer.


