How to Remove Old Stains: 8 Expert Methods for Best Results
Removing old stains effectively depends on identifying the right treatment and acting with suitable household ingredients or commercial products. Pre-soaking, using hydrogen peroxide on color-safe fabrics, and oxygen bleach for white clothes can significantly improve results. Understanding your fabric type and stain nature helps you apply the best method quickly and avoid damage.
This article is for homeowners and renters dealing with stubborn stains on clothes, upholstery, carpets, and hard surfaces. You’ll learn practical techniques to treat set-in stains, including tips for grease, ink, blood, and slime, plus how to decide when to call in professionals.
Key Takeaways
- Pre-treat color-safe fabrics by blotting old stains with 3% hydrogen peroxide for better removal.
- Soak stained white clothes in water for 15 to 30 minutes before rinsing to help break down the stain.
- Use a 50/50 vinegar and water solution to tackle grease stains on clothing effectively.
- Oxygen bleach stays active for 5-6 hours, soak stains this long for the best whitening effect.
- Apply rubbing alcohol to permanent ink stains and let sit 15 minutes before cold water rinse.
- For non-color-safe fabrics, soak items 30 minutes with warm water, detergent, and borax before washing.
1. How to Remove Old Stains from Clothes Effectively

Removing old stains from clothes requires careful treatment to avoid damaging the fabric while improving the chances of full removal. Start by checking the fabric care label to confirm water temperature limits and whether bleach or certain chemicals are safe to use. Pre-treating the stain before soaking helps break down the residue, making washing more effective. Soaking time varies by fabric type and stain, and using the right water temperature ensures better stain release without setting the stain further. Follow these steps to pre-treat, soak, and wash old stains effectively:
- Check the fabric care label. Identify the fabric type and read any washing instructions. Use cold water for delicate fabrics like silk or wool, and warm to hot water for durable fabrics like cotton or polyester to maximize stain removal.
- Pre-treat the stain. For color-safe fabrics, apply a few drops of 3% hydrogen peroxide directly on the stain and gently blot with a clean cloth. For greasy stains, dab with lemon essential oil to rehydrate the oil before treating. Avoid rubbing, which can damage fibers. For enzyme-based stains like grass, use a stain remover with enzymes or a heavy-duty detergent such as Tide or Persil, working it into the fabric with your fingers or a soft brush.
- Allow the pre-treatment to sit. Let the hydrogen peroxide or stain remover work for 5 to 15 minutes but avoid letting it dry out on the fabric to prevent damage.
- Place the garment in a bath of cool or lukewarm water. Let it sit submerged for anywhere from 30 minutes to a few hours based on the fabric type and how tough the stain is. Hot water risks fixing stains on delicate or colored fabrics. For white garments stained with color, a soak of 15 to 30 minutes works best before rinsing. Extended soaking helps remove stains but might damage fragile fibers if overdone.
- Rinse out the soak water. Use cold water to flush out loosened stain particles and residue from the pre-treatment.
- Wash according to label instructions. Use the warmest water temperature safe for the fabric, combined with a good quality laundry detergent. Washing in hotter water generally helps remove old stains better but only if the fabric can tolerate it.
- Inspect the garment before drying. Air dry the item and check if the stain is fully removed. Heat from a dryer can set any remaining stain permanently. Repeat the pre-treatment and soaking if necessary.
Pre-treatments break down the stain chemicals and loosen particles, so they wash away instead of embedding further into fibers. Soaking gives the pre-treatment time to work deeply without harsh scrubbing. Using water at the right temperature complements this process; cold water prevents stains from setting, while warm water helps detergents dissolve oils and residues. Delicate fabrics should never soak longer than an hour, and always avoid hot water to preserve fabric integrity.
2. Identifying Old Stains and Choosing the Right Treatment
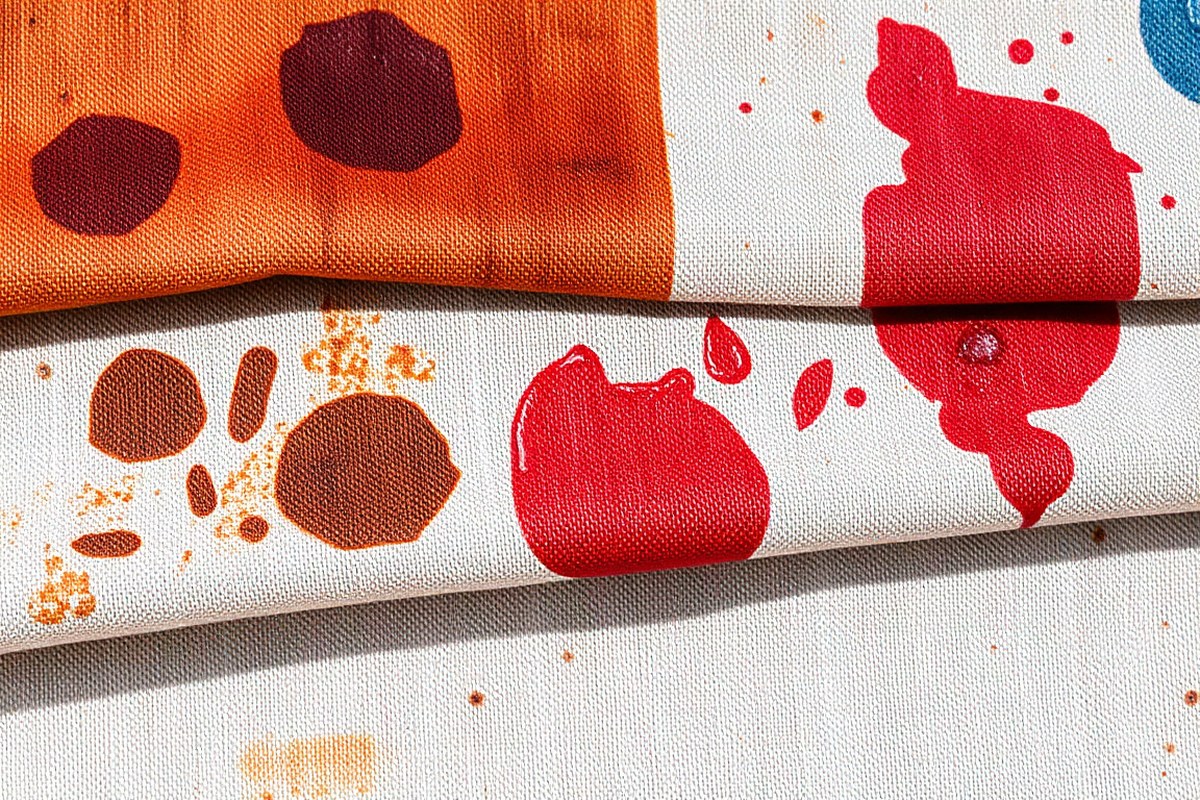
Knowing the type of old stain you’re dealing with helps you pick the best way to treat it. Protein-based stains like blood or eggs differ from grease or dye stains in their makeup, so they respond differently to cleaners. Matching stain type to treatment prevents damage to your fabric and improves removal success.
Common Types of Old Stains Explained
Old stains usually fall into one of four groups: protein, tannin, dye, and oil-based. Protein stains come from substances like blood, eggs, or sweat. These need enzymes or hydrogen peroxide to break down the proteins effectively. Tannin stains come from coffee, tea, or tomato sauce, and often require an acid-based treatment like vinegar to remove them.
Dye stains, including mustard, berries, or fruit jams, colour the fabric itself and need careful treatment often involving boiling water or specialized stain removers. Oil-based stains like cooking grease or makeup are challenging because oils don’t dissolve in water, so solvent-based or soap treatments work best here.
- Protein: blood, eggs, sweat
- Tannin: coffee, tea, tomato sauce
- Dye: mustard, berries, fruit jam
- Oil-based: cooking oil, makeup, grease
Identifying the stain type requires looking at the source and texture. Protein stains often have a crusty or dried feel, dye stains are bright or discoloured, oil-based stains feel greasy or sticky, and tannin stains sometimes darken fabric without affecting its texture.
Matching Stain Types to Treatments
Choosing the right treatment depends on the type of stain. Protein stains respond well to hydrogen peroxide mixed with dish soap, combining one part soap to two parts peroxide works well for armpit or blood stains. For tannin stains, a solution of 50% white vinegar and 50% water helps lighten stains like coffee or tomato.
Dye stains often need hot water applied carefully. For berry or jam stains, pouring boiling water over the back of the fabric or using a sieve and rubber band to focus the water flow can lift the colour out gently. Oil-based stains require liquid dish soap or degreasing solutions; scrubbing with dish soap before laundering is often effective.
| Stain Type | Effective Treatment |
|---|---|
| Protein | Hydrogen peroxide and dish soap mix |
| Tannin | 50/50 vinegar and water solution |
| Dye | Boiling water rinse or specialized stain remover |
| Oil-based | Dish soap or solvent-based cleaner |
Using the wrong treatment can make a stain worse. For example, applying bleach to an oil stain may set it permanently, and hot water on a protein stain can cook the protein into fabric fibres. That’s why testing on a small area first is critical.
Performing a Safe Patch Test
Before treating a whole stain, test the method on an inconspicuous spot such as a seam or inside hem. Apply a small amount of your chosen cleaner and wait 10 minutes or longer depending on instructions, then rinse or blot to check for colour loss or fabric damage. If you notice fading or fabric weakening, do not proceed with that treatment.
Testing helps save your garment or item from worsening damage. This practice is especially important with delicate upholstery or vintage fabrics where certain chemicals can strip dyes or weaken fibres over time.
Always rinse the patch test spot thoroughly before checking results to avoid false readings caused by lingering cleaner.
3. Using Household Ingredients to Remove Old Stains
Common household ingredients like hydrogen peroxide, white vinegar, baking soda, and dish soap can effectively treat old stains on clothes and fabrics. Each works differently, so choosing the right one depends on the stain type and fabric. Using these ingredients safely involves testing on a hidden area, following specific mixture ratios, and allowing enough time for the solution to work without damaging the material.
Hydrogen Peroxide for Protein and Dye Stains
Hydrogen peroxide works as a mild bleach that breaks down protein-based stains such as blood and dye stains like wine or juice. Use it cautiously on colored fabrics because it may cause fading, especially on delicate materials like wool or silk. Testing a small, hidden spot first helps avoid damage.
For tough sweat or blood stains, create a paste using 1 tablespoon of hydrogen peroxide, 1 tablespoon of salt, and ½ cup of baking soda. Apply it directly to the stain and let it sit for 30 minutes to an hour. This mixture breaks down the stain molecules while absorbing residues. Here is how to apply hydrogen peroxide safely:
- Test the fabric by dabbing a drop of hydrogen peroxide on an inconspicuous area and wait 5 minutes for any color change.
- Saturate the stain lightly with hydrogen peroxide using a clean cloth or dropper.
- For blood stains, let it bubble and fizz for about 5 minutes.
- Optionally combine with 1-2 drops of dish soap and a sprinkle of baking soda to boost cleaning power.
- Allow the mixture to sit on the stain for 30 to 60 minutes.
- Blot or gently scrub the stain with a soft brush.
- Rinse thoroughly with cold water before laundering as usual.
White Vinegar and Baking Soda Combinations
White vinegar’s acidity breaks down pigments and mineral deposits, making it effective for removing set-in stains like coffee, juice, or rings around collars. Baking soda acts as a mild abrasive and deodorizer that helps lift stains from fabric fibres.
A well-known stain remover consists of equal parts white vinegar and water. For a paste that sticks better on stains on vertical surfaces, add a bit of dish soap to the vinegar. Tough sweat stains on white clothes respond well to a paste made by mixing baking soda, hydrogen peroxide, and water in equal amounts. Spread this paste on the stain, let it dry fully, then rinse it off. Apply these mixtures safely as follows:
- Mix a solution of equal parts distilled white vinegar and water in a spray bottle or bowl.
- Spray or dab the solution onto the stain and let it soak for 10 to 15 minutes.
- Alternatively, mix equal parts baking soda and water for a paste and apply to the stain.
- For stubborn stains, apply the baking soda paste first, then spray with vinegar solution; fizzing indicates stain breakdown.
- Allow the paste or fizzing mixture to sit for 20 to 30 minutes.
- Rinse the fabric thoroughly with cold water.
- Launder or blot dry depending on fabric type.
Dish Soap and Alcohol-Based Solutions
Dish soap cuts through grease and oily stains, making it valuable for pigment stains or residue from food spills. Combining dish soap with alcohol-based liquids, like rubbing alcohol or diluted hydrogen peroxide, increases lift for ink and marker stains, especially on upholstery and carpets.
Combine 1 tablespoon of Dawn dish soap and 1 tablespoon of white vinegar with 2 cups of cool water to get a cleaning solution for upholstery marker stains. Use a sponge dipped in this mixture to gently blot the affected area, repeating until the stain lightens. For durable clothing materials, create a paste using dish soap, hydrogen peroxide, and baking soda as a powerful option to remove tough stains. Steps to use dish soap mixtures safely include:
- Prepare a mix of 1 tablespoon dish soap, 1 tablespoon white vinegar, and 2 cups cool water for upholstery or carpets.
- Use a clean sponge or cloth to apply the solution on the stained area by dabbing gently.
- Let it work for about 15 minutes, avoiding oversaturation.
- Rinse by blotting with a damp cloth to remove soap residue.
- For fabric stains, mix dish soap, hydrogen peroxide, and baking soda into a paste.
- Apply the paste to the fabric stain and allow it to sit for 30 to 60 minutes.
- Scrub gently with a soft brush if needed, then rinse or wash as appropriate.
4. Removing Old Stains from Upholstery and Carpets
Upholstery and carpets need gentler stain removal methods than clothing, due to their fixed nature and delicate fibers. Using harsh chemicals or excessive scrubbing can cause discoloration, fabric damage, or water stains. Choosing a safe cleaner depends on the material type: water-based cleaners work well on most synthetic fabrics and carpets, while solvent-based or enzyme cleaners may be better for natural fibers like wool or silk. Blotting is the preferred technique because it lifts stains without pushing them deeper or shredding fibers, unlike scrubbing, which can worsen the stain and harm fabric.
Applying too much water risks staining rings and mildew formation, especially if the area does not dry quickly. Use only enough liquid to dampen the stain and always test cleaners on a hidden spot first. DIY cleaning is usually effective for small or moderate stains on durable upholstery or carpet, but stained areas larger than 10 square inches, persistent discoloration, or delicate fabrics should prompt a professional cleaning service. Professionals offer advanced stain removal tools and can minimize damage to valuable or sensitive items. Follow these steps for effective and safe removal of old stains from upholstery and carpets:
- Test the cleaner. Select a water-based upholstery cleaner or a mild carpet detergent and apply it to a hidden area to check for colorfastness and fabric reaction. Wait 10 to 15 minutes.
- Vacuum the stained area. Remove loose dirt and debris to prevent rubbing dirt further into the fabric during cleaning.
- Blot the stain gently. Dampen a white cloth or sponge with your cleaner solution. Press gently on the old stain to lift it, changing cloth sections frequently. Avoid rubbing or scrubbing.
- Use minimal moisture. Apply small amounts of cleaner repeatedly if needed, rather than soaking the fabric. Excess water can cause water rings or backing damage.
- Rinse with a damp cloth. Press a clean, damp cloth on the treated area to remove cleaner residues that may attract dirt later.
- Blot dry with a towel. Absorb moisture by pressing dry white towels on the spot, replacing them until no dampness transfers.
- Air dry completely. Use a fan or open windows to speed drying and prevent mold or mildew.
- Evaluate the results. If the stain remains visible after drying, consider repeating treatment once more. For difficult stains or delicate materials, consult a professional cleaner to avoid permanent damage.
5. Safe Techniques for Removing Stains on Hard Surfaces
Choosing the right cleaner for hard surfaces depends on the material to avoid damage and ensure effective stain removal. Natural stone, such as granite or marble, reacts badly to acidic cleaners like vinegar or lemon juice because these acids can etch and dull the stone. Instead, use a solution of 1/2 cup hydrogen peroxide mixed with two cups of cool water. Apply it directly to the stained area, let it sit for about 30 minutes, then gently scrub with a soft brush before rinsing thoroughly.
Tile and ceramic surfaces tolerate vinegar well, making it a good option for removing hard water stains, mineral deposits, and soap scum, especially around faucets or shower heads. Let vinegar sit for about 30 minutes before scrubbing and rinsing. Rust stains on these surfaces can be treated with oxalic acid-based products designed for rust removal, following the label instructions carefully to avoid damage. Wood surfaces require a gentler approach. Use rubbing alcohol or regular toothpaste applied to tough stains like permanent marker, letting it sit a few minutes before wiping clean.
| Surface | Recommended Cleaner | Application & Dwell Time | Rinse & Dry |
|---|---|---|---|
| Natural Stone (granite, marble) | Hydrogen peroxide solution (½ cup H₂O₂ + 2 cups cool water) | Apply, sit 30 minutes, scrub gently | Rinse with cool water thoroughly, dry with soft cloth |
| Tile and Ceramic | White vinegar or oxalic acid-based rust remover | Vinegar: sit 30 minutes; rust remover per label | Rinse well with water, dry surface to avoid spotting |
| Wood (furniture, floors) | Rubbing alcohol or regular toothpaste | Apply directly, sit a few minutes, then gently rub | Wipe clean, dry immediately with soft cloth |
Letting the cleaning solution sit is key. Most stains need 10 to 30 minutes for loosened buildup, mineral deposits, or pigments to break free. Avoid leaving acidic cleaners on natural stone longer than recommended to prevent etching. After treatment, rinse surfaces thoroughly with water to remove any cleaner residue that can attract dirt or damage finishes. Drying hard surfaces with a clean, soft cloth prevents water spots and streaks.
Never use acidic cleaners like vinegar on natural stone; they can permanently damage the surface’s shine and texture.
- Do test a small, hidden area first to check for adverse reactions.
- Do use soft-bristled brushes or nonabrasive cloths to avoid scratching.
- Do rinse thoroughly to remove all residue after cleaning.
- Don’t leave acidic cleaners on natural stone longer than recommended.
- Don’t use harsh scrubbing pads on wood or sensitive surfaces.
- Don’t apply harsher rust removers to incompatible surfaces without guidance.
6. Avoiding Common Mistakes and Myths in Old Stain Removal
Scrubbing stains roughly, whether fresh or old, can push the stain deeper into fabric fibers or upholstery, making removal harder and sometimes causing permanent damage. Instead, dab gently with a clean cloth or sponge to lift the stain without spreading it. Hot water does not always help; for protein-based stains like blood and egg, hot water can actually set the stain permanently. Use cool or lukewarm water for these types of stains to keep them removable.
Bleach can weaken or discolor colored fabrics if used improperly. Oxygen-based bleach needs hot water to activate but works best on whites or colorfast items. Always check the fabric care label before applying any bleach, and test on an inconspicuous area first. Commercial stain removers vary widely in chemical makeup; some can cause color fading, fabric damage, or allergic reactions. Look for removers labelled safe for your fabric type, follow instructions exactly, and consider DIY options like diluted vinegar for delicate materials.
Preventing permanent stain setting requires quick and correct action. Soak stains in cold water promptly rather than rubbing or using heat. For example, soaking a tea stain in cold water with oxygen bleach for up to six hours can help lift it before washing. Avoid pouring boiling water on stains unless sure of the fabric’s heat tolerance, as it can cause set-in stains or shrinkage.
- Avoid scrubbing stains; dab gently instead.
- Use cold or lukewarm water on protein stains; hot water can set them.
- Test bleach on a hidden area before use and avoid on non-colorfast fabrics.
- Choose commercial removers suited for your fabric and follow directions carefully.
- Soak stains quickly in cold water to prevent setting, especially for blood or tea.
- Do not pour boiling water on delicate fabrics; test fabric heat resistance first.
- Use homemade vinegar solutions as a mild, safer alternative when unsure.
Many believe hot water is always better, but it depends on the stain’s nature and fabric type. Oils often respond well to warm water, whereas dairy and blood stains require cooler temps. Misapplying heat risks locking in stains or shrinking garments. Similarly, bleach myths include universal safety and effectiveness; some stains require specific treatments, and bleach can degrade fabrics or change colors.
Using the correct approach, with awareness of these common errors, will increase your success in removing even old and stubborn stains. Patience in soaking, avoiding harsh mechanical actions, and choosing appropriate cleaning agents tailored to the stain and fabric type makes a significant difference. This careful approach costs little but reduces frustration and preserves your items longer.
7. Dealing with Stubborn Stains: Ink, Grease, and Blood
Old ink, grease, and blood stains often resist standard cleaning efforts, but targeted methods can improve your chances of removing them without damaging fabric or upholstery. Using the right products and timing is key. Avoid harsh scrubbing on delicate fabrics, and always test treatments on a hidden area first.
Removing Ink with Alcohol-Based Products
Permanent ink stains, especially those made with alcohol-based inks like permanent markers, are tough because they dry quickly and bond tightly to fibers. Alcohol-containing products such as hand sanitizer or hairspray weaken the ink’s hold without excessive fabric damage if used properly. Test on a small, inconspicuous area first to check for colourfastness, especially on delicate materials like silk or wool. Follow these steps to tackle ink stains:
- Place a clean white cloth under the stained fabric to prevent ink transfer.
- Apply a small amount of hand sanitizer or hairspray directly to the ink stain.
- Let it sit for about 5 to 10 minutes to break down the ink.
- Blot gently with a clean white cloth, avoiding rubbing, which can spread the stain.
- Repeat applying and blotting until no more ink transfers.
- Rinse the area under cold water to remove residue.
- Wash the garment as usual according to care labels, using the warmest water safe for the fabric.
- Air dry rather than using a machine dryer to avoid setting any lingering stain.
Reactivating and Removing Grease Stains
Old grease stains solidify, making them hard to remove. Heat can spread grease, so cold treatment is preferred initially. Grease responds well to degreasing agents like dish soap or specialized stain removers that break down oils. On fabrics prone to damage, gentle pre-treatment is best. Try this method for loosening grease:
- Gently scrape off any hardened grease using a dull knife or spoon without pushing grease deeper.
- Apply a small amount of liquid dish soap or a grease-targeted stain remover directly onto the stain.
- Work the soap into the stain with your fingers or a soft brush for 3 to 5 minutes.
- Let the soap sit for 15 minutes to dissolve oils.
- Rinse with cold water and inspect. Repeat if grease remains.
- Wash the item following care instructions using the warmest water the fabric can tolerate.
- Air dry to check if the stain is gone; avoid machine drying until confident it’s removed.
Treating Dried Blood Stains Safely
Dried blood contains proteins that bind to fibers, so enzymatic cleaners or hydrogen peroxide are effective options. Hydrogen peroxide bubbles to lift and break down the stain safely on many fabrics but test first on delicates. Avoid hot water, which sets blood stains permanently. Use this step-by-step approach:
- Use a soft-bristled brush to loosen dried blood particles and remove them gently.
- Place a clean white cloth under the spot to catch drips.
- Apply a small amount of 3% hydrogen peroxide directly to the stain.
- Allow it to sit for 5 to 10 minutes until bubbling slows.
- Blot with a clean cloth, lifting loosened blood.
- Rinse with cold water thoroughly to remove peroxide and stain residue.
- If the stain remains, treat with an enzymatic stain remover and soak up to 30 minutes.
- Wash according to fabric care instructions, using cold water.
- Air dry to avoid setting the stain if not completely removed.
8. When to Call a Professional for Old Stain Removal
Some old stains are too risky or permanent to treat on your own, especially on delicate fabrics, vintage upholstery, or expensive carpets. Protein-based spots like blood or sweat, ink marks, and dye stains often resist home treatments and can worsen if you use the wrong cleaners or scrub too hard. Professionals have access to specialized solvents and industrial equipment that target these stains safely, which helps avoid damage like color fading, fabric weakening, or spreading the stain further. They can also perform thorough cleaning, drying, and conditioning that home methods usually can’t match.
DIY cleaning is more likely to cause harm when you’re dealing with antique textiles, leather, or when the stained area is large or heavily soiled. If the fabric care label says “dry clean only” or warns against water-based products, it’s a good sign to leave the job to experts. Trying to remove very old, set-in stains with household chemicals can actually lock the stain deeper.
Professional stain removal services usually start with a fabric or material test to choose a safe treatment. They use multiple steps: pre-treating, extracting, neutralizing chemicals, and carefully drying. The process can take a few hours to a few days depending on the item and stain severity, with prices ranging from $30 to $150 or more per item or area, depending on complexity and fabric type. Checklist for professional cleaning needs:
- Stain older than 48 hours with obvious fabric damage or discoloration
- Delicate or dry-clean-only fabrics and materials
- Large stains or stains on valuable or sentimental items
- Stains from chemicals, ink, or dye that home methods failed to remove
- Any sign of mildew, mold, or odor linked to stains
Choosing a reputable cleaner starts by asking for recommendations from friends or local consumer protection sites. Look for cleaners certified by industry groups like the Institute of Inspection, Cleaning and Restoration Certification (IICRC). Communicate clearly about the type of fabric, the stain origin, how old the stain is, and any previous treatments you tried. Request a written estimate that covers possible costs and timelines. Some cleaners offer guarantees or follow-up services, which is a reliable sign of professionalism.
Test a small, hidden area with any cleaning solution before treating the whole stain to avoid unexpected damage.
Clear communication prevents surprises and helps the cleaner tailor their approach to your item. Make sure to understand their methods and aftercare advice, which often includes avoiding heat or immediate use until fully dried. This approach helps you get the best possible results without risking further damage or hidden residue that can attract dirt.
Step-by-Step Action Plan for Removing Old Stains
Use this plan to tackle old stains on different surfaces confidently and see clear results. Follow each step carefully and check the stain after treatment.
- Before you start: Identify the type of stain and fabric or surface to choose the right cleaner. Correct identification improves your chances of removal.
- Day 1: Apply a household stain remover like baking soda paste or hydrogen peroxide to the stain. After 30 minutes, blot the area and check if the stain has lightened.
- Day 2: For upholstery and carpets, use a mild detergent solution with a soft brush. Rinse lightly with water and blot dry to test effectiveness.
- Day 3: Treat stubborn stains such as ink or grease with specialized spot removers or rubbing alcohol on a test area. Wait 10 minutes and reevaluate the stain.
- Day 4: For hard surfaces, clean with an all-purpose cleaner or vinegar solution. Scrub gently and check if the stain is gone or fading.
- After 1 week: If the stain remains, repeat the appropriate treatment once more. Persistent stains may need professional evaluation.
- After 2 weeks: Monitor treated areas for any discoloration or damage. Avoid harsh chemicals if surfaces show wear or fading.
Frequently Asked Questions
Can Old Stains on Dark Clothes Be Removed Without Fading the Color?
Yes, use color-safe stain removers and test on a hidden spot first to avoid fading. This helps protect the fabric while still targeting the old stain effectively.
Are Enzymatic Cleaners Effective on Old Protein-Based Stains?
Enzymatic cleaners can break down old protein stains like blood or sweat well. Using them on set-in stains often improves results compared to regular detergents.
Can Dry Cleaning Remove Old Stains Better Than Home Methods?
Dry cleaning often removes old stains that home treatments can’t, especially on delicate fabrics. Consider this option when stains persist after at-home efforts.
Is It Okay to Use Bleach on Old Carpet Stains?
Bleach can damage carpet fibers or colors, so it’s best avoided on old stains. Instead, try vinegar or enzyme-based cleaners safe for carpets.
Do Time and Heat Affect the Success of Removing Old Stains?
Heat can sometimes set stains further, making removal harder. It’s best to treat old stains with cold water and avoid drying until the stain fades.
What Household Items Are Safest for Removing Old Stains on Upholstery?
Mild dish soap mixed with water or white vinegar solutions usually work safely on upholstery. Always test in an inconspicuous area first to prevent damage.
Final Thoughts
Removing old stains takes patience and the right approach tailored to each material. By carefully applying the correct treatments and checking results step by step, you increase your chances of success without damaging your belongings. Try a test treatment on a hidden spot today and see how much old stains can fade with simple, safe methods.