How to Get Out Old Stains from Clothes: 8 Proven Methods That Work
Old stains can often be removed effectively by using specific methods tailored to the type and age of the stain. You can lift set-in stains from clothes by choosing the right household ingredients and allowing ample time for treatments to work. Understanding how fabric type and stain characteristics affect removal helps improve your success. Patience and the correct procedure increase your chances without damaging your clothing.
This information is for homeowners and renters who want practical, affordable ways to get out old stains from clothes. It offers simple steps and tips for treating various stains at home, including what to avoid, how long to soak, and when to get professional help.
Key Takeaways
- Identify the stain type before treatment to select the most effective removal method.
- Use oxygenated bleach powder for deep soaking of tannin-based stains, allowing 4 to 6 hours.
- For oil stains, absorb excess oil with baking soda or cornstarch for at least 30 minutes before cleaning.
- Mix liquid dish soap with hydrogen peroxide and let it sit 30 minutes for tough old stains.
- Wait 5 to 10 minutes after applying stain remover before washing for mild stains.
- Give severe or stubborn stains longer treatment time, up to a week, to increase removal chances.
1. How to Remove Old Stains from Clothes Effectively
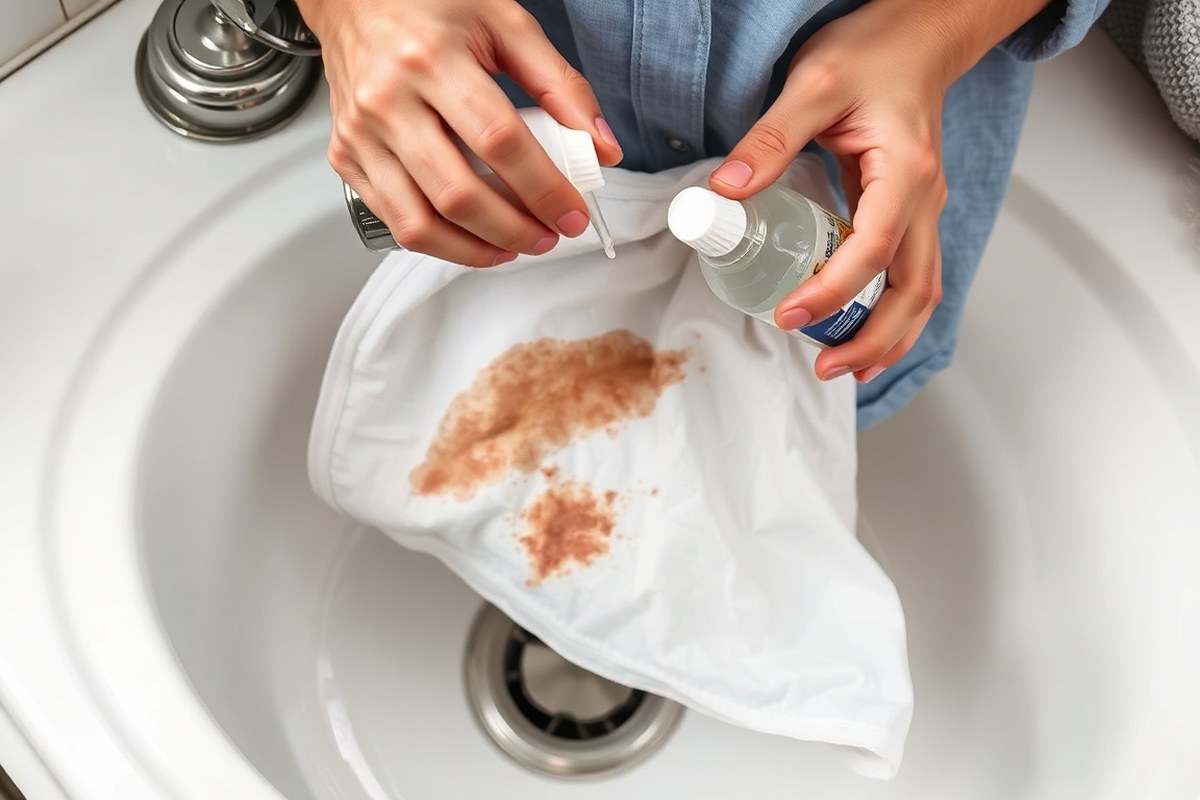
Removing old stains from clothes requires a focused approach that includes pre-treatment, soaking, and proper washing. Stains that have set over time chemically bond with fabric fibers, so just tossing the item in the wash usually won’t get rid of them. The goal is to break down these bonds with the right products and methods before washing to increase the chance of full removal.
Start with pre-treatment to loosen the stain, then soak the garment to allow the chemicals to work deeply within the fabric. Pay close attention to the type of stain and fabric to select the correct temperatures and soaking time. Generally, soaking time ranges from 30 minutes for oily stains to several hours for tannin-based stains like wine or coffee.
- Apply a liquid dishwashing detergent or dedicated stain remover. Work a small amount of the product into the stained area using your fingers or a soft brush. This step helps rehydrate and begin breaking down the stain’s chemical bonds.
- Soak the garment based on the stain type. For oily stains, soak in lukewarm water (between 95°F and 105°F) for 30 to 45 minutes. For protein stains such as blood or sweat, soak in cold water below 85°F for 1 to 2 hours. Tannin stains require an oxygen bleach powder solution and a soaking time of 4 to 6 hours in hot water (around 130°F) to fully break down the stain.
- Gently rub the fabric after soaking. This can help release loosened stain particles but avoid aggressive scrubbing, especially on delicate fabrics to prevent damage.
- Wash the garment following care instructions. Use the warmest water safe for the fabric as indicated on the label. Hot water works well for some stains but can set others permanently. For instance, avoid heat on protein stains like blood.
- Inspect the garment before drying. Check to see if any stain remnants remain. Drying with heat can set stains, so repeat pre-treatment and soaking if needed before using a dryer.
This method costs the price of common household items like dish soap and oxygen bleach powder, usually under $10, and takes from 30 minutes up to 6 hours depending on the stain. Success looks like the stain fading significantly or disappearing after washing and before drying. Poor results often come from using wrong water temperature, skipping soaking, or drying too soon. Following these steps carefully preserves your clothes and improves stain removal results.
2. Identifying Stain Types to Choose the Right Treatment

Recognizing the type of stain you’re dealing with is essential to removing old marks on clothes effectively. Different stains respond best to specific treatments, so identifying whether a stain is protein-based, oil-based, tannin, or ink will guide you in choosing the right remover and method. This can save time and prevent fabric damage.
Common Protein-Based Stains
Protein-based stains come from substances like blood, sweat, dairy, and egg whites. These stains often appear dark and can set deeply into fibers, especially on natural fabrics like cotton and wool. Since protein stains are sensitive to heat, using cold water during treatment is important to avoid setting the stain further. Pretreat these stains with enzyme-based detergents or soak them in cold water before washing.
For old blood stains on cotton, soak the garment in cold water with a bit of dish soap or a specialized enzyme cleaner for 30 minutes. Avoid hot water during this process. Treating protein stains carefully helps break down the stain without causing it to bond tighter to the fabric.
Typical Oil and Grease Marks
Oil and grease stains come from cooking oils, car grease, or body oils and are among the most challenging to remove, especially when old or set-in. These lipid stains sit on the fabric if not treated systematically. The first step is to absorb excess oil by sprinkling baking soda or cornstarch onto the stain and letting it sit for at least 30 minutes. This draws out the grease for easier removal.
Dish soap is a highly effective pretreatment for oil and grease stains. Apply a small amount directly to the stain and gently rub it in. Washing in the hottest water safe for the fabric helps break down the grease further. Commercial stain removers designed for grease can boost cleaning power on tough stains.
- Identify grease stains by their dark, shiny appearance on fabric.
- Sprinkle baking soda or cornstarch and leave for 30 minutes to absorb oils.
- Pretreat with dish soap before washing.
- Use the hottest water temperature recommended for the fabric to wash.
- Avoid mixing with protein stain methods which require cold water.
Hot water helps break down oil stains but can shrink delicate fabrics; check care labels before applying.
Tannin and Dye Stains Explained
Tannin stains come from tea, coffee, red wine, and some fruit juices. These are water-soluble but can become stubborn once dried. Vinegar works well to neutralize tannin stains by breaking down the pigment, but you’ll need to test on an inconspicuous area first to avoid fabric damage. Cold to warm water can be used depending on the fabric’s tolerance.
These stains usually benefit from soaking in vinegar diluted with water, followed by washing with a normal detergent. Avoid oil or grease treatments because they won’t affect tannin-based marks. Recognizing tannin stains by their source can save you from using ineffective methods.
Ink and Dye-Based Stains
Ink stains rank among the toughest to remove from clothes. They often appear as permanent spots that resist normal washing. Alcohol-based solutions, such as rubbing alcohol, can dissolve ink marks by breaking down the pigment particles. Dab the stain gently rather than rubbing to avoid spreading it.
Mildew stains, which have a musty green or gray color, require different treatment involving fungicidal cleaners or soaking in vinegar solutions. Ink and mildew have distinct appearances and origins, so applying the wrong treatment might make the stain worse.
- Ink stains often have sharp, defined edges and rich dark colors.
- Use rubbing alcohol to dab, not rub, ink stains.
- Mildew stains are fuzzy or blotchy with a musty smell.
- For mildew, use vinegar or a fungicidal cleaner, not alcohol.
- Test any chemical treatment on a hidden fabric area first.
3. Best Household Ingredients for Treating Set-In Stains
Household ingredients like vinegar, baking soda, hydrogen peroxide, dish soap, and lemon juice can be effective for treating old stains when used properly. Each has specific strengths depending on the stain type and fabric. Knowing how to prepare and apply these remedies safely helps you target set-in stains without damaging your clothes.
Vinegar and Baking Soda Uses
White vinegar works well on alkaline and tannin stains, such as coffee or grass, because its acetic acid helps break down these compounds. Baking soda is slightly abrasive and acts as a mild deodorizer, plus it helps lift stains by creating a gentle scrubbing effect when combined with water. For set-in stains, you can soak the fabric in a solution of one part white vinegar to two parts cold water for 30 minutes before laundering. Avoid using vinegar on delicate fabrics like silk or wool, as the acid may weaken fibers or cause color loss.
Baking soda is best applied as a paste mixed with water. Spread the paste over the stain, let it dry, then brush off the residue before washing. This method can help with odor and lift mild discolorations but may be less effective on very old or protein-based stains. Combining vinegar and baking soda for old stains by pouring vinegar over a baking soda paste can cause fizzing but often doesn’t improve cleaning power beyond using each separately. For overnight treatment, soaking in vinegar solution is preferable.
Hydrogen Peroxide and Dish Soap
Hydrogen peroxide works well on protein stains such as blood. Combine two parts hydrogen peroxide with one part dish soap for stubborn, set-in stains. Apply this solution on the stain and softly scrub using a cloth or soft brush. Let it rest for 30 minutes, then rinse using cold water. The dish soap helps tackle greasy or blended stains by breaking down oils.
Handling hydrogen peroxide requires care since it can bleach colored fabrics; always test on a hidden area first. Avoid using peroxide on wool and silk due to fiber sensitivity. Refrain from using this mixture on heat-sensitive materials as prolonged exposure may weaken them. For tough stains, applying the mixture and letting it sit overnight can improve results, but monitor the fabric to avoid damage. Costs are low since a bottle of 3% hydrogen peroxide and basic dish soap together usually costs under $5.
Lemon Juice and Natural Bleaching
Lemon juice serves as a natural, mild bleaching agent particularly useful on whites or light colors. It softens stains through its citric acid content without harsh chemicals. For set-in stains, soak the affected area in about half a cup of lemon juice, optionally mixed with a little water, for up to 30 minutes before washing. Exposure to direct sunlight while the lemon juice is on the fabric can boost whitening effects.
Avoid lemon juice on dark or delicate fabrics since it can cause discoloration or fiber damage. Lemon juice is best for stains that have less oil and more pigmentation like rust or tea. It’s an inexpensive option, with typical household lemons costing less than $1 each. Do not use lemon as the sole treatment for greasy or protein stains; it works best in combination with other methods or as a final whitening step.
Using Enzyme Detergents at Home
Enzyme detergents contain biological agents that break down protein, starches, and fats in stains, making them effective for many old stains like food, sweat, and blood. Applying them usually involves soaking the garment in water mixed with the enzyme detergent according to package instructions, often at warm temperatures around 104°F (40°C). This lets enzymes work effectively without damaging fabrics.
Enzyme detergents are especially useful for cotton and synthetic blends but should be avoided on wool and silk because enzymes may degrade the fibers. For overnight stain removal, soaking clothes in enzyme detergent diluted in water can increase stain breakdown without harsh chemicals. These products cost more than basic household ingredients but offer a middle ground before seeking professional cleaning. Always rinse thoroughly after use to remove enzyme residues.
4. How Fabric Type Affects Stain Removal Success
You need to match stain removal methods with the fabric type to avoid damage and get the best results. Delicate fabrics such as silk, wool, and cashmere react differently than sturdy cotton or polyester. These delicate materials often require gentle treatments or professional dry cleaning to preserve their texture and color.
Deciding whether to treat a stained garment at home or send it to a dry cleaner hinges on this fabric consideration. For delicate fabrics, taking them directly to a dry cleaner is usually safest since they have solvents that won’t harm fibers. Until you can get to the cleaner, you can use mild, fabric-safe stain pretreatments, but avoid harsh chemicals or scrubbing that can fray or discolor the fabric.
Water temperature also plays a key role and varies by fabric type. Warm to hot water helps remove many stains on cotton and durable blends, generally around 110 to 130 degrees Fahrenheit (43 to 54 degrees Celsius). However, for delicate fabrics or those prone to running colors, such as wool or silk, lukewarm or cold water under 85 degrees Fahrenheit (29 degrees Celsius) prevents shrinking, distortion, and color bleed.
Bleach is another factor requiring caution. Never use chlorine bleach on delicate fabrics. It can rapidly weaken fibers and remove dyes, causing irreversible damage. Even on whites, silk and wool should avoid any bleach, including oxygen-based options, unless the product explicitly states it’s safe for that fabric. For durable stained whites like cotton, diluted bleach can be effective; typically 1/4 cup chlorine bleach per gallon of water applied carefully and rinsed promptly, but test a hidden area first.
A helpful decision rule is this: first identify the fabric content on the care label. If it says silk, wool, cashmere, or “dry clean only,” do not attempt strong home treatments or bleach. Instead, apply gentle stain removers formulated for delicate fabrics and opt for cold or lukewarm water. For cotton, polyester, or blends labeled as machine washable, you can use warmer water and mild bleach solutions for tough stains. Always air dry after treatment to check stain removal success before machine drying because heat can set stains permanently.
Incorrect fabric and chemical combinations can lead to visible damage such as shrinking, color fading, or texture changes that are much harder to fix than the stain itself. Costs for professional dry cleaning vary, but gentle home treatments often only require minor expense for specialized stain removers priced between $5 and $15 per bottle. Choosing the right approach based on fabric type avoids wasting money and effort on treatments that might worsen the garment condition.
5. Timing and Patience: When to Let Stain Removers Work
Setting the right timing for stain removers is critical for tackling old stains effectively. Generally, letting treatments sit between 10 and 30 minutes achieves good results without damaging fabrics. Different stain types and fabrics respond best to specific soaking times, so matching these with your situation is key.
Short soaks of 5-10 minutes often work well for fresh or light stains. Old stains usually require longer times, from 15 up to 30 minutes. For example, enzyme-based detergents should sit for 15 to 30 minutes to break down protein stains in clothing properly. Vinegar and water sprays are most effective after 10-15 minutes of contact.
| Stain Type | Recommended Soaking Time | Treatment Tip |
|---|---|---|
| Protein stains (e.g. Blood, sweat) | 15-30 minutes | Use enzyme detergents directly on the stain |
| Oily stains | 5-10 minutes | Opt for solvent-based stain removers |
| Foundation makeup | Few minutes | Apply shaving cream, work material, then rinse with cold water |
| General set-in stains | 30 minutes | Let treatment sit before rinsing and washing normally |
| Vinegar solution (equal parts vinegar and water) | 10-15 minutes | Spray on stain and rinse afterward |
Longer soaking doesn’t always mean better. Over-soaking, especially beyond 30 minutes, may weaken some fabrics or set certain stains further. Instead of relying on extended soaks, repeating treatments after washing can be more effective. If a stain persists following a wash cycle, applying fresh stain remover and letting it sit again for the recommended time before rewashing is a better approach. This prevents fabric damage and boosts stain removal success.
Patience matters when treating tough, old stains. Treat, wait, wash, then reassess. Several cycles might be necessary for stubborn marks. Each treatment cycle should have a break time to avoid excessive exposure to chemicals.
Practical tip: Don’t let treated clothes air-dry before the stain is fully removed, as heat can set the stain permanently. Always wash immediately after the treatment time ends.
6. Common Mistakes with Old Stain Removal and How to Fix Them
Rubbing a stain aggressively often pushes it deeper into fabric fibers instead of lifting it out. Use gentle blotting or dabbing motions with a clean cloth or sponge. Harsh scrubbing can damage delicate fabrics and worsen the stain’s appearance, especially on natural fibers like cotton or wool.
A common error is applying bleach incorrectly. Bleach can set stains permanently, particularly protein-based stains like blood, because of the chemical reaction with iron in the stain. Always dilute bleach according to label instructions and test it on a hidden spot first. For colored garments, use only color-safe bleaches, and avoid mixing bleach with other cleaners, as it may create harmful fumes.
Drying stained clothes too soon can lock in the stain, especially with heat from a dryer. Check stained clothes immediately after washing. When stains remain, air-dry or skip drying until retreatment. The heat from dryers sets protein and oil-based stains by causing chemical bonds with fabric fibers.
After a failed attempt, don’t put the stained item in the dryer. Soak the garment in cool water with a stain remover or mild detergent. You can try enzymatic cleaners that target proteins or oxygen-based bleach for color-safe stain removal. Repeat pre-treatment and washing. Avoid heat and drying until stains show significant improvement.
- Always check fabric care labels before any treatment.
- Test stain removers on an inconspicuous fabric spot first.
- Blot stains gently; never rub hard or scrub aggressively.
- Use diluted bleach only when recommended and never on wool or silk.
- Air-dry clothes with residual stains to prevent setting.
- When a stain persists after 2-3 treatments, avoid further home attempts.
- Consider professional cleaning for delicate fabrics or old, set-in stains.
Recognize when to stop home stain removal efforts. Repeated harsh treatments can weaken fabric or cause color loss. Professional services have specialized solvents and equipment that improve extraction rates for stubborn, old stains, often demonstrating over 90% success in removing set-in sweat or protein stains compared to less than 40% typical home success.
Handling an expensive, sentimental, or delicate garment, or a stain that won’t budge after a few tries, calls for a professional cleaner to reduce the risk of permanent damage. Professional laundry and stain removal services usually cost more upfront but can prevent costly replacement or ruin of your clothing in the long run.
7. Step-By-Step Protocol for Rehydrating and Extracting Very Old Stains
To remove very old stains, start by carefully rehydrating the stained fabric with a specific solution, followed by applying surfactants to loosen the set-in contaminants. This step-by-step method helps restore the stain’s moisture and breaks down residues before washing. Proper rinsing and drying prevent any remaining stains from becoming permanent.
Preparing the Rehydration Solution
Old stains usually have oxidized substances and dried residues that aren’t removed by regular washing. Using a mix of equal parts vegetable glycerin and distilled water adds moisture back to these stubborn compounds. Vegetable glycerin works as a humectant, softening the stain without using harsh chemicals that could make it worse.
Use distilled water to avoid minerals from tap water, which can interfere with stain removal. Mix the solution at room temperature to ensure proper solubility without damaging delicate fabrics.
Applying Surfactant Rehydration
Once the rehydration solution is prepared, apply it evenly to the stained area without rubbing or scrubbing, as friction can damage fibers or embed stains deeper. Surfactants in the solution help break down lipid-based residues by lowering surface tension, allowing better penetration of cleaning agents.
Let the fabric soak in this contaminant-free fluid for exactly 45 minutes. This timing is important to allow complete molecular rehydration of the oxidized stain matrix, setting the stage for the next enzyme cleaning phase. For lighter or less stubborn stains, reducing soaking time to 10 minutes may suffice.
Soaking and Agitation Tips
After the surface lipids are rehydrated, soak the fabric in cold water mixed with an enzyme detergent designed for proteins and organic stains. Avoid warm or hot water at this stage, as heat can permanently set some protein-based stains such as blood.
Use gentle tapping motions rather than vigorous scrubbing to avoid fiber abrasion. Stationary tapping helps the enzymes work effectively without damaging the fabric. Depending on the stain severity, leave the fabric in this enzymatic soak for up to one week, checking periodically for bleaching or color fading.
Careful Rinsing and Drying
Rinse the fabric using a steady stream of cold water to remove chemical residues without forcing stains deeper into fibers. Use an outward flow configuration where water flows from the inside out to push out soils. Avoid high water pressure or agitation during rinsing to protect the fabric.
Air drying is essential after rinsing since heat from dryers or irons can fix any leftover stains permanently. Hang or lay the fabric flat to dry in a well-ventilated, shaded area. Check your clothes closely once dry to confirm stain removal before considering additional treatments.
- Mix equal parts vegetable glycerin and distilled water to create the rehydration solution.
- Apply the solution to the stained area, ensuring full coverage without rubbing.
- Allow the fabric to soak in this solution for 45 minutes at room temperature.
- Prepare a cold water soak with enzyme detergent formulated for organic stains.
- Gently tap the soaked fabric intermittently for better enzyme action, leaving it submerged up to one week if needed.
- Rinse thoroughly with cold water, maintaining a gentle outward flow and low pressure.
- Air dry the fabric in a shaded, well-ventilated space to avoid heat setting any remaining stains.
- Inspect the garment once dry; repeat the cycle if the stain persists.
8. When to Seek Professional Help for Stubborn Old Stains
Some old stains are too tough for home remedies, especially when repeated treatments have failed or the stain has deeply set into delicate or valuable fabric. You should consider professional cleaning if the stain persists after several attempts with household products or specific stain removers. Stubborn oil-based stains, wine, ink, and dyes often require expert attention to avoid damage during removal. Fabrics like silk, wool, leather, or garments with intricate embroidery or vintage value are at higher risk of harm from DIY methods because aggressive scrubbing or improper chemicals can weaken fibers, cause color loss, or set the stain permanently.
Knowing when to turn to a professional can save you time and protect your clothing investments. Spending more than 3 to 6 hours trying different treatments without any clear improvement signals it’s time to get professional help. Professionals use advanced dry cleaning techniques that handle tough stains more safely and efficiently. These methods minimize the chance of fabric damage and generally require you to spend less than five minutes coordinating pickup or drop-off, making it a more convenient option for complicated cases.
Cost is often a deciding factor. Professional stain removal or dry cleaning prices vary widely, typically ranging from $10 to $350 per item. The price depends on the garment’s material, stain severity, specialty cleaning methods needed, and overall value of the piece. Expensive or delicate items justify the higher cost because improper DIY attempts might ruin the item completely, which could be costlier in the long run. For everyday clothes, professional cleaning may not be worth the expense unless the stain is particularly stubborn or from oils and dyes that home methods usually cannot fully remove.
To decide practically, start with a thorough assessment: if the stain remains visible after three dedicated home treatment sessions spaced over days, and the fabric is delicate or valuable, schedule a professional cleaning. Home treatments are still worth trying when the fabric is common cotton or polyester and the stain is old but can be treated. However, if the stain is from oil-based substances on any fabric or involves complex materials, leaning toward professional services can prevent permanent damage.
Avoid aggressive scrubbing on silk, wool, or leather yourself; such fabrics often require professional dry cleaning to prevent irreversible damage.
Step-by-Step Action Plan for Removing Old Stains
Follow these steps to tackle old stains on your clothes carefully and effectively. Each phase helps you see progress before moving on.
- Before you start: Identify the stain type and fabric to choose the best treatment method and cleaner. Use a small hidden area to test the cleaner’s safety.
- Day 1: Rehydrate the stain by applying cold water or a gentle soak with mild detergent. Check if the stain softens or begins to lift after 30 minutes.
- Day 2: Apply a targeted household stain remover like white vinegar or baking soda paste. Let it work for at least 30 minutes before rinsing.
- Day 3: Gently blot the stain with a clean cloth to draw out residues. Avoid rubbing; the stain should fade visibly or at least loosen.
- Day 4: Launder according to the fabric’s care instructions using the hottest water safe for the fabric. Confirm the stain has diminished before drying.
- Day 5: Air dry the garment; heat from drying can set any remaining stain. If the stain remains, repeat the treatment steps once.
- After 1 week: If stains persist despite repeated home treatments, prepare the garment for professional cleaning and avoid further home attempts.
Frequently Asked Questions
How to Get Out Laundry Stains?
Treat laundry stains by pre-treating with water and dish soap or a dedicated stain remover, then wash as usual. Target the stain type correctly for best results and avoid general washing alone, which often can’t break down old, set-in stains.
Is There a Stain That Cannot Be Removed?
Some very old or chemically fixed stains can be nearly impossible to remove because they bond deeply with fabric fibers. Professional cleaning may help, but total removal isn’t guaranteed.
Does Rubbing Alcohol Stain Clothes?
Rubbing alcohol usually doesn’t stain clothes and can help remove ink or some dye-based stains. Test on a hidden area first to avoid fabric damage or color fading.
Is Vinegar or Baking Soda Better for Stains?
Vinegar effectively removes many food and drink stains, while baking soda is best for absorbing oils and freshening fabrics. Choose based on stain type and fabric to avoid damage.
Can I Use Baking Soda on Silk Stains?
Baking soda can be too abrasive for delicate silks and may cause damage. Use gentle stain removal methods specifically designed for delicate fabrics instead.
How Do You Get Old Oil Stains Out of Clothes After Washing?
Sprinkle baking soda or cornstarch on the stain to absorb leftover oil, let it sit 30 minutes, then scrub gently and rewash. This helps lift oil that survived the initial wash.
Final Thoughts
Removing old stains takes patience and the right approach tailored to the fabric and stain type. Start today by identifying your stain carefully and testing treatments on a hidden spot. Taking these practical steps increases your chances of restoring your clothes without damage or unnecessary expense.