How to Clean Athletic Shoes: Expert Tips for Every Material and Quick Results
To clean athletic shoes effectively, start with a light brushing to remove dirt, then use appropriate cleaning solutions based on the shoe material. Regular maintenance can keep your shoes looking fresher and extend their life. This advice helps you clean your athletic shoes promptly and properly without professional tools or damage.
This guidance targets anyone using athletic shoes for running, training, or daily wear. You’ll learn practical cleaning steps for different materials, when to use machine washing safely, and how to tackle tough stains and odors for quick, lasting results.
Key Takeaways
- Brush off loose dirt with a dry brush before applying any cleaner to your shoes.
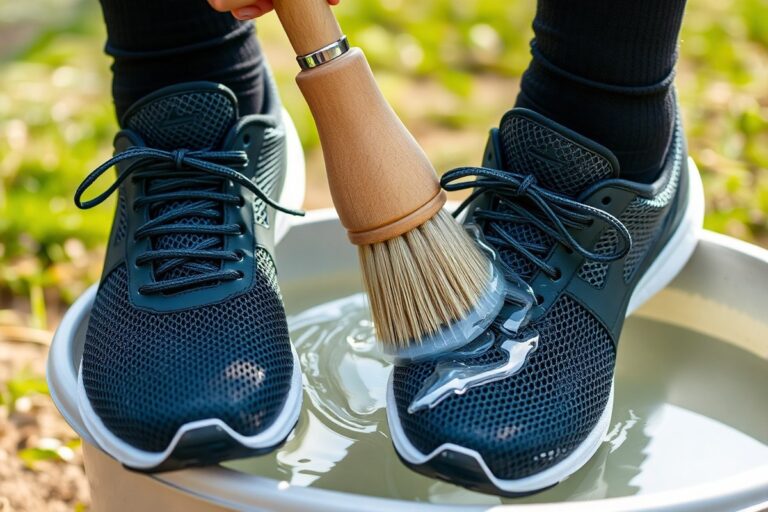
- Use mild soap and water for mesh and synthetic shoes, avoiding harsh chemicals.
- Clean midsoles every 1 to 2 weeks to maintain a fresh appearance on frequently worn shoes.
- Place shoes in a protective shoe washing bag before using a gentle machine wash cycle.
- Mix equal parts baking soda and vinegar to treat stubborn stains; let sit 15 minutes before rinsing.
- Air dry shoes away from direct sunlight to prevent material damage and odor buildup.
How to Clean Athletic Shoes Effectively at Home
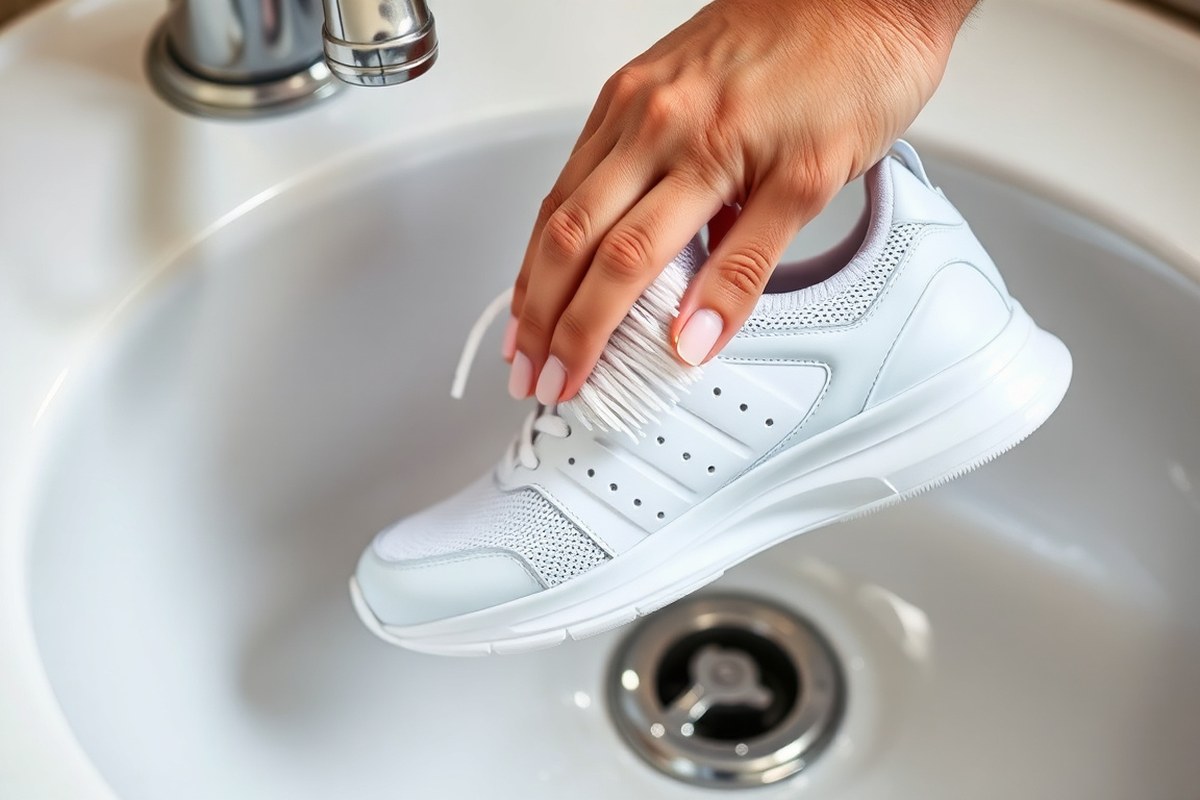
Cleaning athletic shoes effectively at home means balancing thoroughness with care to avoid damage. Regular light cleaning keeps shoes fresh, reduces odor, and prevents deep dirt buildup. For most shoes, a multi-purpose brush combined with a foam cleaner is the best approach. This setup cleans fabric uppers and rubber soles without harsh scrubbing.
The process usually takes about 10 to 15 minutes and brightens the shoe significantly, often making it look 60 to 90% fresher. Focus on areas that get the most wear and dirt, such as the toe box, midsole edges, and laces. Removing dirt before it settles deeply allows you to keep shoes looking newer longer. Thorough drying after cleaning helps prevent odor and material breakdown. Follow these steps for a practical home cleaning routine:
- Remove laces and insoles. Taking out laces and insoles allows you to clean these separately. You can wash laces by hand with mild soap or use foam cleaner on them. Insoles should air out and can be wiped lightly if needed.
- Brush off loose dirt. Use a balanced multi-purpose brush to gently remove surface dust and dirt from mesh uppers, soles, and edges. This prevents grinding dirt when applying cleaner.
- Apply foam cleaner. Spray or apply foam cleaner evenly on the shoe’s upper fabric, midsole, and outsole. Foam lifts dirt and oils without soaking the shoe, helping avoid water damage.
- Scrub gently with the brush. After letting foam sit for about 2 minutes, lightly scrub problem areas, such as gray midsole edges or dirty toe boxes. Use circular motions but avoid excessive pressure on delicate mesh.
- Wipe off foam and dirt. Use a clean microfiber towel to remove remaining foam and loosened dirt. This reduces streaks and lint while revealing the refreshed surface underneath.
- Clean the tongue, collar, and insole separately. Use foam and a small brush or cloth to clean sweat zones, then wipe clean. These parts often hold odor and require attention for comfort.
- Air dry completely. Place shoes in a well-ventilated area at room temperature, avoiding direct sunlight or heat. Drying fully can take several hours but prevents odor and material loss.
- Re-lace and reassemble. Once dry, put back clean laces and insoles. Fresh shoes feel more comfortable and look notably better after this care.
For light daily dust, a quick wipe with foam and a towel can refresh shoes in under 8 minutes. More stubborn mud or sweat buildup requires up to 25 minutes with added scrubbing. Investing about 15 minutes regularly keeps shoes ready for workouts, daily wear, and storage with less odor and wear. Avoid soaking shoes or using harsh detergents to protect materials and shape.
How Shoe Material Affects the Cleaning Method

Athletic shoes come in a variety of materials such as mesh, suede, leather, canvas, and synthetic blends, each requiring specific cleaning methods. Using the wrong technique or product can damage these materials, causing discoloration, texture loss, or structural issues. Carefully tailoring your cleaning method to the shoe’s material helps maintain its appearance and prolongs its lifespan.
Cleaning Mesh and Knit Shoes
Mesh and knit uppers are common in athletic shoes for breathability and flexibility. These materials are porous and can trap dirt deep inside small holes. Use a small amount of foam cleaner and a light brush to gently lift dust and dirt without pushing grime deeper.
Be cautious to avoid soaking the material with water or cleaning solution, since excess moisture can damage the shoe’s structure and slow drying. Focus on small circular motions and wipe excess foam off with a clean towel.
Handling Suede and Nubuck Shoes
Suede and nubuck trims or panels add texture and style but are sensitive to water and scrubbing. Apply only very small amounts of foam cleaner and avoid soaking or heavy brushing. Always test the cleaner on an inconspicuous area first to prevent darkening or nap damage.
Use a soft brush or suede-specific tool to lightly lift dirt, then blot with a dry cloth. Aggressive cleaning can lead to permanent stains or a worn look.
Care for Synthetic and Genuine Leather
Leather and PU (polyurethane) are durable but prone to dulling or streaks from over-wetting or rough cleaning. Use a small foam amount applied lightly and wipe quickly with a microfiber cloth to avoid streaks. Avoid hard scrubbing, which can scratch or remove finishes.
Leather requires quick drying after cleaning to maintain its finish. For PU, gentle brushing combined with microfiber wiping works best to avoid brush marks or surface streaks.
Best Practices for Canvas and Fabric Shoes
Canvas shoes absorb water and can develop rings or residue if not properly cleaned. Use a small to medium amount of foam cleaner and a soft brush in circular motions to lift dirt from the weave. After brushing, wipe the surface fully with a towel to remove trapped residue and moisture.
Canvas takes longer to dry, so avoid soaking and ensure thorough drying to prevent mold or odors. Clean stitching areas carefully with light, short strokes to avoid damaging thread.
| Shoe Area | Foam Amount | Best Use |
|---|---|---|
| Mesh upper | Small | Lift dust without soaking fabric |
| Canvas upper | Small to medium | Clean dirt inside fabric texture |
| Leather / PU | Small | Wipe quickly to avoid streaks |
| Rubber midsole | Medium | Remove gray grime and black scuffs |
| Tongue / collar | Small | Clean sweat and hand oil |
| Outsole grooves | Medium | Loosen mud and grit after dry brushing |
Following the right foam amount and brushing pressure ensures effective cleaning without damage. Using too much foam or heavy pressure risks pushing dirt deeper, causing stains, or harming delicate materials.
Test cleaning products on a hidden spot of the shoe first to check for colorfastness or texture changes before cleaning the entire pair.
When and How to Use Machine Washing Safely
You can clean some athletic shoes in the washing machine, but this method works only for certain materials and styles. Machine washing can save time but may damage delicate shoes or loosen glue if not done carefully. Following proper preparation, cycle selection, and drying methods reduces risks and improves results.
Assess Shoe Material and Manufacturer Guidelines
Before machine washing, check the materials and any care instructions from the manufacturer. Canvas and sturdy synthetics often tolerate machine washing well. Shoes with leather, suede, mesh, or glued components risk damage and are better cleaned by hand. Removing laces and insoles helps protect parts and allows separate cleaning.
Look for tags inside the shoe or packaging for washing details. If uncertain, spot test a small hidden section with water and mild cleaner first. Avoid machine washing shoes with extensive padding or complex cushioning systems, since agitation or water exposure can deform or degrade these parts.
Use a Shoe Washing Bag and Gentle Cycle
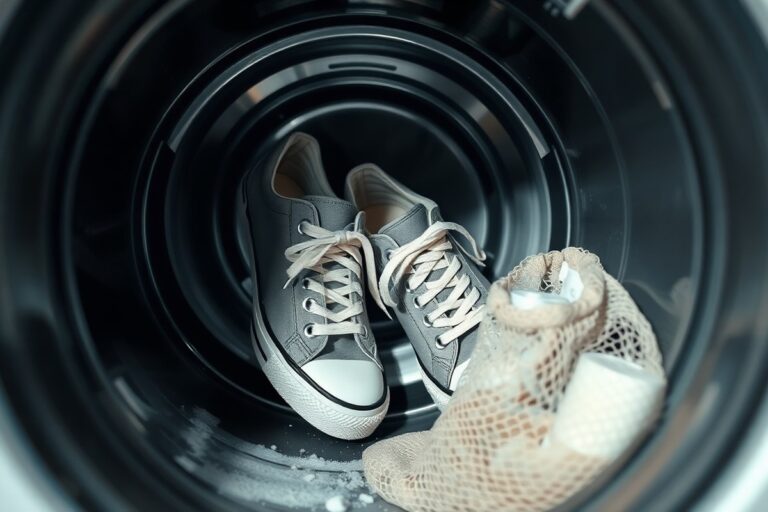
Protecting your shoes and the washing machine starts with placing shoes inside a dedicated shoe washing bag or a pillowcase tied shut. This keeps the shoes from banging against the drum or other items, preventing damage to both shoe and machine.
Select a gentle or delicate cycle with cold water (below 86°F or 30°C). A slower spin speed below 800 RPM also reduces stress on the shoe structure. Avoid warm or hot water, which can loosen glue and warp materials.
- Remove shoelaces and insoles for separate cleaning or air drying.
- Brush away loose dirt and debris to avoid clogging the machine or rubbing in grime.
- Place shoes and laces inside the shoe washing bag or secure pillowcase.
- Load the bagged shoes into the washing machine, ideally with towels or soft clothing to balance the load.
- Choose a gentle cycle with cold water and low spin speed.
- Use a short cycle, generally 30 to 40 minutes, to reduce wear and drying time.
- Remove shoes promptly after the cycle finishes to prevent odor and mildew buildup.
Select Appropriate Detergents and Settings
A mild, liquid detergent free of bleach or harsh chemicals is best for machine washing athletic shoes. Avoid powdered detergents, fabric softeners, or stain removers that can damage dyes or shoe materials.
Use only the recommended amount of detergent to prevent residue buildup inside and outside the shoes. Skip bleach completely to avoid weakening fabric or causing discoloration. Adding a cup of white vinegar to the rinse cycle can help reduce odors without damaging the shoe.
Proper Air Drying After Machine Wash
Never use a clothes dryer, heater, or direct sunlight to dry washed athletic shoes. High heat can warp soles, weaken adhesives, and shrink materials. Instead, dry shoes naturally in a shaded, well-ventilated area with good airflow.
Stuff shoes with dry paper towels or unscented newspaper to absorb moisture and help maintain shape. Change the paper every few hours until shoes feel dry to the touch, typically within 24 hours. Remove insoles to air dry separately and prevent trapped moisture and odor.
Removing Tough Stains and Yellowing on Athletic Shoes
Mud and grass stains on athletic shoes should be cleaned quickly to keep them from becoming permanent. Start by brushing off loose dirt or dried mud with a dry brush or an old toothbrush, working gently on the surface and inside the grooves. Avoid aggressive scrubbing at first to protect the shoe’s seams and mesh materials. Next, apply a foam cleaner or a mild soap mix to the stained spots and softly brush in small circles. Use a clean cloth to remove extra moisture. Cleaning two to three times within 15 to 20 minutes often reduces the grass stains noticeably, although very stubborn green marks may need more treatments. A homemade paste of equal parts baking soda and warm water can also help if you don’t have commercial cleaners, but always test it on a hidden area to avoid fabric damage.
Yellowing on white rubber soles, commonly caused by oxidation, heat exposure, or grime buildup, doesn’t always respond to surface cleaning alone. Start by removing all surface dirt and scrubbing with foam and a medium brush. Yellowing can sometimes be treated by making a mild paste using baking soda combined with a little warm water. Apply the paste evenly to the rubber areas, letting it sit for about 15 minutes before brushing lightly and rinsing with warm water. This treatment can brighten soles noticeably without harsh chemicals. Avoid bleach or intense scrubbing that can weaken rubber and cause permanent damage. Regular cleaning after exposure to dirt and heat prevents yellow buildup and keeps the soles looking fresh longer.
Using household products like baking soda and vinegar is generally safe for athletic shoe materials if applied carefully. Vinegar diluted with water can be sprayed on tough stains, then blotted with a cloth. Vinegar’s acidity helps break down organic stains such as sweat or grass but should never be applied full strength or left on too long, especially on colored or delicate fabrics, to avoid fading. Baking soda acts as a mild abrasive and deodorizer, ideal for scrubbing rubber soles or removing odor. Avoid soaking the shoe or using harsh concentrations, which risk weakening adhesives or causing color loss. After these treatments, thoroughly wipe or rinse the shoes to remove residues and air dry away from direct heat sources.
Cleaning and Refreshing Shoe Interiors and Accessories
Remove the insoles and laces before cleaning to reach all the areas that trap sweat, dirt, and bacteria. Cleaning and deodorizing them separately reduces odor and prevents damage inside your shoes.
Removing and Soaking Insoles and Laces
Take out the insoles and unlace the shoes completely. This allows you to clean sweat and grime trapped under the insoles and on the laces, which often hold the most moisture and odor.
Prepare a soak using warm water (about 90°F) mixed with mild soap or laundry detergent. Avoid hot water, which can damage foam insoles or synthetic laces. Soaking loosens sweat residue and dirt before hand washing.
- Fill a basin with warm water and add a small amount of mild detergent (about one teaspoon per quart).
- Place the insoles and laces in the water separately to avoid tangling.
- Let them soak for 15 to 30 minutes depending on odor severity.
- Remove the insoles and laces from the water and gently wring excess moisture without twisting.
- Discard the soak water and prepare for hand scrubbing.
Tip: Avoid using bleach or harsh chemicals on insoles and laces, as they can weaken materials and cause discoloration.
Cleaning Insoles and Laces by Hand
Hand washing preserves the shape and function of insoles and prevents laces from fraying. Use a soft brush or cloth to scrub away stains and odors gently.
Focus on the top and underside of insoles where sweat collects. Laces benefit from thorough scrubbing to remove dust and grime from gym and outdoor surfaces.
- Wet a soft brush or cloth with soapy water from the soak or fresh mild detergent mix.
- Brush both sides of the insoles with light but firm strokes, paying attention to areas with visible sweat marks.
- Gently scrub each lace to remove embedded dirt and oils.
- Rinse insoles and laces with cool, clean water to remove all soap.
- Press out excess water without wringing insoles excessively to avoid deforming them.
- Use a dry towel to blot both insoles and laces.
Warning: Avoid scrubbing too hard on mesh or delicate insole fabrics to prevent fraying or thinning that shortens their lifespan.
Deodorizing Shoe Interiors Safely
Wipe the shoe interior, including the collar and tongue, with a damp cloth to remove sweat and oils that cause odors. Use a mild foam cleaner designed for delicate sports fabrics if needed. This prevents bacteria buildup that leads to stale smells.
To reduce lingering odors, sprinkle baking soda inside shoes after each wear or use specialized shoe deodorizing sprays approved for athletic footwear. Let shoes air out in a dry, ventilated area to discourage moisture buildup, a leading cause of odor.
- Damp a cloth lightly with water or gentle foam cleaner and wipe the tongue, collar, and inner opening.
- Remove any loose lint or sweat dust with the cloth.
- Apply baking soda liberally inside shoes, shaking out excess after at least 12 hours.
- Use a shoe deodorizing spray if desired, making sure it’s safe for the shoe materials.
- Allow shoes to air in a well-ventilated spot until completely dry.
Tip: Avoid using strong chemical sprays inside shoes, which might damage liners or cause irritation during wear.
Drying and Reassembling Shoes
Dry insoles and laces separately by laying them flat on a clean towel in a well-ventilated area. Avoid heat sources like direct sunlight or heaters that can warp insoles or fade colors.
Make sure the inside of your shoes is fully dry before reinserting insoles and threading laces. Moisture left inside promotes bacteria growth and odor formation.
- Place insoles and laces on a dry towel, turning them occasionally for even drying.
- Let shoes air dry naturally until interior and insoles feel completely dry to the touch.
- Insert the insoles back into the shoes once dry and lace them up.
- Store shoes in a cool, dry place between uses to maintain freshness.
Warning: Never put insoles or laces in a dryer or near direct heat to speed drying, as this can cause permanent damage.
Drying Athletic Shoes Without Damage or Odor
Drying athletic shoes correctly helps prevent shrinkage, material damage, and trapped odors that come from lingering moisture. Shoes often take longer to dry inside than they do on the surface, so targeting the interior moisture is essential. Using high heat or direct sunlight can warp or weaken synthetic materials and adhesives, so avoid those methods. Instead, aim for air circulation at room temperature to protect the shoe’s shape and integrity.
You can speed drying by removing the insoles and loosening the laces right after cleaning. These steps allow more airflow inside the shoe. Stuffing the shoes lightly with dry paper towels or unprinted newspaper helps absorb moisture from the lining and tongue. Replace the stuffing several times during the drying process to keep it effective. Keep the shoes in a well-ventilated area, ideally with a fan nearby to increase airflow. Avoid placing shoes near radiators, heaters, or using a clothes dryer. These sources of heat dry the outside quickly but leave the interior damp, which causes lingering odor and accelerates material breakdown.
- Remove insoles and laces before drying
- Lightly stuff shoes with dry paper towels, changing every few hours
- Place shoes in a room with good air circulation, preferably near a fan
- Keep temperatures between 65°F and 75°F to avoid material damage
- Avoid direct sunlight and high heat sources
- Allow 24 to 48 hours depending on humidity and shoe thickness
- Store shoes in a cool, dry place after fully drying
Using an electric shoe dryer designed for athletic footwear can reduce drying time without risking damage. These devices control the airflow and temperature to keep the shoe safe while removing moisture from multiple layers. For quick drying after exercise when shoes are only slightly damp, remove the insoles and stuff only if needed to prevent over-drying new shoes.
Never use harsh heat like hair dryers on high settings or ovens to speed drying. This often causes permanent warping of midsoles and soles or loosens glue that holds the shoe components together. Also, avoid airtight plastic bags or containers immediately after cleaning. Trapped moisture increases bacteria growth and odors. Proper drying includes handling both visible and hidden moisture and using gentle techniques to keep your shoes lasting longer and smelling fresh.
Mistakes to Avoid When Cleaning Athletic Shoes
Using harsh household products like baking soda or bleach can cause damage to athletic shoes. These substances may break down adhesives, discolor fabrics, or roughen surfaces, especially on shoes made of mesh, foam, or synthetic leather. Avoid them by sticking to cleaners designed for shoes, such as foam cleaning kits that come with gentle brushes and microfiber towels. These products clean effectively without soaking the shoe or weakening glued parts.
An easy mistake is using too much water during cleaning. Athletic shoes contain layers of foam, adhesives, and textile linings that can absorb water, causing the shoe to deform, lose cushioning, or develop odors. Instead of soaking your shoes, dampen the brush or cloth lightly and focus on spot-cleaning. After cleaning, always let shoes air dry fully at room temperature, away from direct heat or sunlight to keep their shape intact.
Many think thorough scrubbing is best, but overly aggressive cleaning can damage the shoe’s upper finish and soles. Light, regular cleaning helps maintain appearance longer and prevents buildup of dirt and grime. For white shoes, clean the soles before stains get heavy and avoid the urge to deep clean after every wear. Mild stains on uppers often respond to gentle wiping rather than harsh treatment.
- Do not use baking soda or bleach to clean shoes.
- Avoid soaking shoes or submerging them in water.
- Use cleaning kits made for athletic shoes with foam cleaner and soft brushes.
- Spot-clean small stains promptly instead of waiting for heavy dirt buildup.
- Air dry shoes at room temperature without direct sunlight or heat.
- Don’t scrub aggressively to prevent material damage.
- Limit deep cleaning frequency; light, frequent care works best.
Signs that cleaning has harmed your shoes include peeling or bubbling of glued areas, discoloration or rough texture of fabric, warping of soles, and a persistent bad odor from moisture retention. If you notice any of these, avoid DIY methods involving water-soaking or harsh chemicals, and consider professional cleaning to prevent further damage. You can protect your shoes by adopting a light, consistent cleaning routine and selecting the right cleaning products based on shoe material and condition.
Protecting and Maintaining Athletic Shoes After Cleaning
Protecting your athletic shoes from dirt and stains after cleaning is key to keeping them looking fresh and lasting longer. Regularly applying a protective spray designed for athletic shoes can help. These sprays often contain water- and stain-repellent ingredients, creating a barrier that slows down dirt and moisture absorption. Applying such a product according to the label’s instructions usually costs between $10 and $25, depending on the brand and shoe type.
Good maintenance begins with small habits. Wiping off visible dirt as soon as you notice it prevents stains from setting deep in the fabric or sole. Avoid using harsh tools like rigid brushes or household cleaners not made for your shoe material, as they can cause damage. Instead, use a mild cleaning solution made for sneakers, such as SHOEGR Clean. For example, mix 3 small squirts of the cleaner in 200 to 250 ml of water and gently clean the shoe to remove surface dirt without rough scrubbing.
Proper storage also matters greatly. Avoid leaving your athletic shoes in damp or hot places since moisture and heat can warp materials or promote mold growth. Instead, store shoes in a cool, airy spot away from direct sunlight. To help retain their shape, use shoe trees or stuff the shoes with clean, dry paper. Rotating between two or more pairs of athletic shoes gives each pair time to dry out fully between uses, which helps prevent odor and material breakdown.
- Apply a water- and stain-repellent spray every 3 to 4 weeks or after deep cleaning
- Wipe off light dirt immediately with a soft, damp cloth
- Store shoes in a well-ventilated area, not in sealed plastic bags
- Use shoe trees or paper stuffing to maintain shape during storage
- Rotate shoes regularly to allow air drying and reduce wear
- Clean small stains early rather than letting them set
- Avoid exposing shoes to extreme heat or direct sunlight
Always follow the product instructions carefully when applying protective sprays to avoid altering the shoe material’s color or texture.
Protective cleaning and careful storage add little time but can extend your shoes’ lifespan by months or more. Regular upkeep means your athletic shoes maintain their look and performance longer. Pay attention to how the shoes react to different products and environments; some materials may require specific care adjustments to avoid discoloration or wear.
Step-by-Step Action Plan for Cleaning Your Athletic Shoes
Follow these steps to clean your athletic shoes effectively and protect your investment.
- Before You Begin: Identify your shoe material to pick the right cleaning method. Check the label or manufacturer’s website for material details.
- Day 1: Remove laces and insoles. Hand wash laces separately and deodorize insoles with baking soda. Your shoes should smell fresher and feel cleaner inside.
- Day 2: Brush off loose dirt and dry debris with a soft brush or cloth. This step prevents scratching and makes deep cleaning easier.
- Day 3: Spot clean stains using a mild detergent solution or a sneaker cleaner suitable for your shoe type. Stains should visibly lighten or disappear.
- Day 4: For durable materials, place shoes in a laundry bag and machine wash on a gentle cycle with cold water. Avoid machine washing delicate shoes to prevent damage.
- After Washing: Air dry your shoes in a ventilated area away from direct sunlight or heat sources. They should feel dry to the touch within 24 to 48 hours.
- Weekly Maintenance: Wipe your shoes with a damp cloth and reapply a protective spray tailored to your shoe’s material. This helps maintain appearance and water resistance.
- Monthly Check: Examine soles and seams for wear and consider timely repairs or replacements to extend the shoe’s lifespan.
Frequently Asked Questions
What Removes Dirt from Shoes?
Dirt on athletic shoes comes off best by first brushing loose debris, then applying a gentle cleaner made for sneakers, and scrubbing carefully to avoid damage. Using too much water can soak the shoe and harm materials.
What Is the 3 Shoe Rule?
The 3 shoe rule means rotating at least three pairs of shoes to extend each pair’s life by allowing proper drying and reducing wear. This habit lowers moisture build-up and odor in athletic shoes.
How to Clean White Mesh on Athletic Shoes?
Clean white mesh by using a soft brush with mild soap and water, scrubbing gently to avoid fraying the fabric. Avoid harsh chemicals which can yellow the mesh or damage fibers.
Can I Use Dawn Dish Soap to Clean My Sneakers?
Dawn dish soap can work for cleaning sneakers gently because it removes grease and dirt but use it diluted with water to avoid damaging delicate materials. Test on a small spot first.
How Do I Remove Odor from Athletic Shoes?
Deodorize shoes by airing them out after use and using baking soda inside overnight to absorb smells. Avoid airtight storage to prevent moisture and odor build-up.
Is It Safe to Machine Wash All Athletic Shoes?
Machine washing is safe only for some shoes, mainly fabric-based, but always check the label. Avoid washing leather and suede shoes this way to prevent damage.
Wrapping Up
Cleaning your athletic shoes with the right approach keeps them looking and performing their best. Start by choosing care methods suited to your shoe’s material to avoid damage. Your next step is to pick up a soft brush and regular sneaker cleaner to handle dirt and stains promptly, so your shoes stay fresh and ready for every workout.