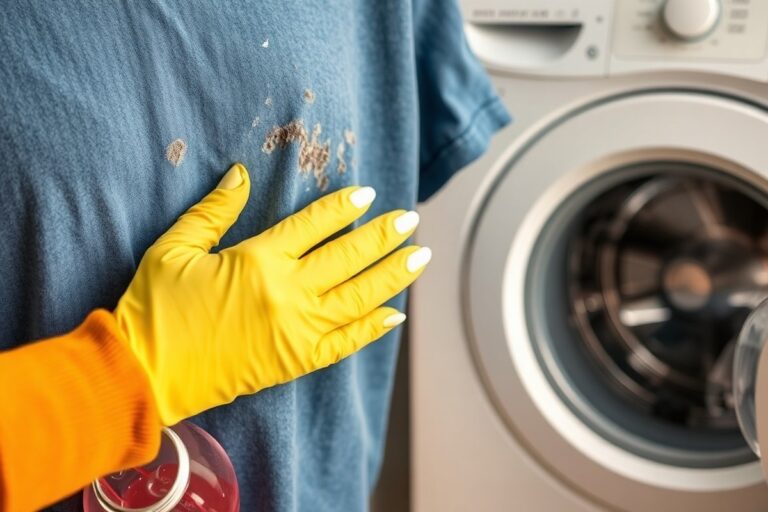
How to Get Rid of Armpit Stains on Shirts: 8 Proven Methods That Work
Armpit stains on shirts can be removed effectively by soaking the fabric in vinegar or hydrogen peroxide solutions, followed by gentle scrubbing and laundering. Using the right treatment based on your shirt’s fabric and the stain’s severity will get your clothes looking fresh again. This information is especially useful for anyone struggling with stubborn sweat marks on everyday shirts, whether cotton or blends.
You’ll find practical methods that work at home with common ingredients like white vinegar, hydrogen peroxide, and aspirin. These solutions fit different shirt materials and stain colors, helping you choose the best approach to restore your shirts without damage.
Key Takeaways
- Soak sweat-stained areas in a cold water and white vinegar mix for 20 to 30 minutes before washing colored shirts.
- Use a paste of aspirin and water applied with a toothbrush to break down armpit stains, then let it sit for 20 minutes.
- For tough stains, dilute 3% hydrogen peroxide with equal parts water and apply carefully to whites or colorfast fabrics only.
- Immerse shirts inside-out in warm water with detergent for 30 to 60 minutes to loosen armpit stains before laundering.
- Scrub gently after soaking for about 30 minutes to help lift the stain without damaging fabric fibers.
- If stains persist after two attempts, repeat treatment or try hydrogen peroxide to increase stain removal power.
1. Effective Ways to Remove Armpit Stains from Shirts

Removing armpit stains effectively depends on how fresh the stain is and the type of shirt fabric. Fresh stains mainly consist of sweat and deodorant buildup that can often be treated at home with common household products. Older stains might be yellowed and set-in, sometimes requiring stronger treatments or commercial stain removers for better results. The key is to loosen the buildup before washing and allow enough contact time for the treatment to work.
For fresh stains, simple dry cleaning methods like applying dish soap directly and rinsing can work well. Home remedies like a baking soda paste also break down sweat and deodorant buildup without damaging fabric. Commercial stain removers can be more reliable on tough or older stains, especially products made specifically for underarm stains. When using these, pretreat the area before washing, then wash as usual. Letting the treatment sit for at least 15 to 20 minutes is important. Avoid hot drying until the stain is fully lifted because heat can permanently set the discoloration.
- Identify the shirt fabric and stain age. Use gentler methods for delicate or colored fabrics. Older, yellow stains on whites may handle more aggressive treatments like baking soda and hydrogen peroxide pastes.
- Apply a stain remover or home remedy. For fresh stains, work dish soap into the armpit area with fingers or a toothbrush, then let sit 15 minutes. For white shirts with yellow stains, mix 4 tablespoons baking soda with a quarter cup hydrogen peroxide and a teaspoon of dish soap into a paste; apply with a spoon or toothbrush and leave for at least 20 minutes.
- Pre-treat with a commercial stain spray if needed. Spray the stained area thoroughly before washing. These sprays target deodorant buildup and sweat residue and are especially helpful for old or tough stains.
- Wait before washing. Let any treatment sit 15 to 20 minutes. Some commercial stain removers require washing within 15 minutes to prevent fabric damage, so check the product instructions. Longer soak times improve stain breakdown, but do not exceed what the label allows.
- Wash the shirt in the warmest safe water temperature for the fabric. Use a quality laundry detergent to clean the entire garment. Products intended for stain and odor removal work best in this wash cycle.
- Check the stain before drying. If the stain remains, repeat treatment. Avoid using the dryer as heat can set the stain permanently. Air dry instead, then reassess.
- Treat leftovers or extremely stubborn stains cautiously. For old yellow stains or buildup unresponsive to home methods, commercial products or professional cleaning may be necessary. Some pit stains embed too deeply for home removal methods.
2. Why Do Armpit Stains Form on Shirts?

Armpit stains on shirts form due to a chemical reaction between your sweat, deodorant ingredients, and the fabric itself. Sweat is made of water, salts, fats, and proteins, which break down with skin bacteria and interact with the aluminum compounds often found in antiperspirants. This reaction creates yellowish discoloration on fabric, especially in white and light-colored shirts. The aluminum salts block sweat ducts but leave residue that, combined with sweat components, causes more visible staining over time.
The amount of deodorant you use plays a key role in staining. Applying too much increases the chance that aluminum compounds mix with sweat and build up in the fabric. Body oils also stick to the shirt fibers, trapping those compounds and making the stains harder to remove. Because these chemical reactions happen mostly where fabric touches skin, armpit areas get stained more readily.
Fabric choice significantly affects how easily stains form and how visible they become. Natural fibers like cotton absorb sweat and oils more than synthetic ones, often making stains more stubborn and yellow with repeated wear. Performance fabrics with moisture-wicking properties tend to keep sweat away from the surface and reduce staining, while tighter fitting shirts press fabric closer to skin and deodorant, encouraging quicker buildup of residue and stains.
Washing frequency influences how much sweat and deodorant residue remains in the fabric. Delaying wash after wearing lets stains set and chemical reactions continue, making them tougher to remove later. Washing white shirts every time you wear them helps prevent yellowing and keeps fabric looking fresh. Turning shirts inside out during washing allows detergent to reach trapped deodorant and sweat particles more effectively, particularly under the arms.
Use aluminum-free deodorants to reduce the risk of yellow stains, especially if you wear light-colored shirts often.
Persistent armpit stains result from sweat and antiperspirant buildup combined with fabric type and wash habits. Choosing breathable, looser garments alongside regular washing reduces stain formation. Recognizing how sweat chemistry and fabric interactions cause these stains helps you tackle the problem more effectively when treating or preventing them at home.
3. Choosing the Right Stain Remover by Fabric and Stain Type
Choosing the right stain remover depends on the fabric type, stain severity, and how safely you can treat the shirt without damaging it. White and durable fabrics tolerate stronger agents like hydrogen peroxide, while colored and delicate items need gentler solutions like vinegar or certain commercial products labeled safe for colors. Knowing when to use each and how to test for safety helps prevent damage and improves your chances of lifting the stains.
Safe Treatments for White and Durable Fabrics
White shirts and sturdy fabrics can handle more aggressive stain removers because they are less prone to fading or weakening. A common effective approach starts by soaking the shirt in a solution of equal parts distilled white vinegar and water for 20 to 30 minutes, which helps dissolve sweat salts and odors. After soaking, apply a paste made from baking soda, salt, and diluted 3% hydrogen peroxide directly on the stain to break down proteins and yellowing. Let it sit for up to 30 minutes before washing as usual.
Hydrogen peroxide acts as a mild bleach, making it suitable for white or colorfast fabrics only. Avoid using it on anything that might bleed or fade. Proper use includes diluting it 1:1 with water and applying carefully to avoid excess exposure. These treatments not only brighten white fabrics but also tackle stubborn and older stains that other methods might miss.
Best Options for Colored and Delicate Materials
Colored and delicate fabrics require gentler stain removers to prevent color loss or fabric damage. Distilled white vinegar combined with cold water serves as an excellent soak for up to 30 minutes to safely lift sweat stains without fading colors. Avoid using hydrogen peroxide on these items as it may bleach or discolor the fabric.
Plant-based commercial stain removers that specify safety for colors and delicate fabrics can be a good alternative. They are formulated to break down sweat and body oils without harsh bleaching agents. Always follow the product instructions for contact time, and avoid scrubbing vigorously on delicate materials to prevent fiber wear.
Commercial Stain Remover Pros and Cons
Commercial stain removers offer convenience and formulas targeting specific stains like sweat and body oils. They come as sprays, powders, or liquids designed for pretreatment or direct application. However, not all products are safe for every fabric, so reading labels carefully is critical to avoid unintended damage.
Some commercial products work well on older, stubborn armpit stains, especially on durable clothing. Products like Shout Active Enzyme Spray or OxiClean Max Force are suited for heavy sweat and oil stains but may not be suitable for delicate or colored fabrics. Plant-based options like Puracy Natural Laundry Stain Remover provide a safer choice for everyday pretreatment on more fabric types but may require longer soaking or repeated application for tough stains.
| Product | Type | Good Fit For |
|---|---|---|
| Shout Active Enzyme Laundry Stain Remover Spray | Pretreatment spray | Sweat, body-oil, everyday underarm stains on sturdy fabrics |
| OxiClean Max Force Laundry Stain Remover Spray | Stain-removal spray | Stubborn and older underarm stains on compatible washable fabrics |
| Puracy Natural Laundry Stain Remover Spray | Plant-based stain remover | Everyday pretreatment when preferring a plant-based product |
| Sweat X Extreme Stain Remover Spray | Sports-oriented stain remover | Active wear and tough body oil stains on durable fabrics |
This table highlights how different products target specific stain severities and fabric types. Choosing the right one depends on the fabric’s durability and the nature of the stain.
Spot Testing and Fabric Care Precautions
Always perform a colorfastness test before applying any stain remover. To do this, apply a small amount of the stain treatment solution to an inconspicuous area such as the inside seam or hem. Wait 10 to 15 minutes, then blot with a clean white cloth and check for color transfer or fading. If the fabric shows no change, the product is likely safe to use on the stained area.
Follow the garment’s care label instructions strictly. Avoid hot water or vigorous scrubbing on delicate fabrics, as this can cause shrinkage or distortion. Contact time is critical, longer exposure doesn’t always mean better results and may harm the fabric if left too long. Rinse thoroughly before drying to prevent residue buildup, which can attract more dirt or irritate skin.
4. How Long to Soak and Treat Shirts for Best Results
Soaking your shirts for 20 to 30 minutes in natural solutions like vinegar or baking soda mixtures generally provides effective stain removal without harming the fabric. Longer soaking does not always improve results and can risk fabric wear if done excessively. For fresh stains, shorter soaks combined with gentle scrubbing work well, while set-in stains benefit from extended soaks and paste treatments. Carefully monitoring the soaking time and choosing the right sequence ensures the best balance of stain removal and fabric care.
Short Soaks for Fresh Stains
Fresh armpit stains usually require only a brief soak of 20 to 30 minutes. Use a solution made of equal parts water and white vinegar or a mild detergent mixture. This duration is enough to loosen fresh sweat residue without risking damage to the shirt fabric.
After soaking, rinse with cool water and machine wash as usual. Fresh stains respond quickly because they have not fully set into the fibers yet, so a short soak helps prevent the stain from embedding deeper.
Extended Soaks for Set-In Stains
Stains that have been on shirts for several days or weeks often need longer soaking times to break down the yellow pigment and odors. Soak the shirt for up to 30 minutes in warm water with a tablespoon of vinegar or baking soda added to improve stain lifting. For stubborn stains, a baking soda paste (baking soda combined with a small amount of water or hydrogen peroxide) applied directly onto the stain and left for 20 to 30 minutes before soaking can draw out embedded sweat residues more effectively. Repeating the soak-and-scrub cycle once or twice may be necessary for deeply set stains, but avoid soaking beyond 30 minutes to protect the fabric integrity.
Combining Soaking with Gentle Scrubbing
Soaking alone often won’t fully remove armpit stains, especially on thicker or textured fabrics. Applying a baking soda paste and scrubbing gently with an old toothbrush helps physically break down the stain without harsh abrasion.
After soaking, lightly brush the stained area to loosen residue, then soak again briefly. This method is especially helpful for white shirts where a baking soda and peroxide paste can both deodorize and lift stains safely.
- Apply baking soda paste directly on the stain
- Scrub gently with a soft-bristled toothbrush for 2 to 3 minutes
- Let the paste dry for 20 to 30 minutes
- Soak the garment again in cool water and vinegar or detergent solution
- Rinse thoroughly and machine wash per fabric care instructions
This combination offers a balance between chemical action and mechanical stain removal without causing excessive fabric wear.
Fabric Care During Soaking Times
Over-soaking, especially in hot water or acidic solutions, can weaken fibers and fade colors. Stick to room temperature or lukewarm water and avoid soaking more than 30 minutes. Colored shirts benefit from vinegar soaks rather than peroxide to prevent discoloration.
Check shirts periodically during soaking for any signs of fabric distress such as thinning, stretching, or unusual colour changes. If you notice any damage, shorten the soaking time or switch to a gentler method.
To protect shirts, always follow the fabric care label and use the gentlest effective treatment. This approach prevents wear and prolongs the life of your wardrobe while tackling armpit stains effectively.
5. Preventing Armpit Stains Before They Appear
Choosing the right deodorant affects how easily your shirts develop armpit stains. Deodorants and antiperspirants containing aluminum compounds often leave chalky white or yellowish marks. Switching to a natural deodorant without aluminum may reduce residue buildup and help prevent stains. The key is balancing sweat control with fabric care.
Application technique also matters. Apply deodorant to clean, dry skin and wait at least two minutes for it to dry before getting dressed. This practice reduces the chance of the product rubbing off onto your shirt, which often causes crusty or powdery stains. Avoid over-applying since a thick layer increases residue that could cling to fabric fibers.
Washing shirts promptly after wearing helps prevent yellow sweat stains from setting. Sweat, bacteria, and deodorant mix to create stains that become harder to remove the longer they stay in fabric. For best results, rinse shirts with cool water and treat stains within 24 hours. Using an enzymatic laundry detergent designed to break down protein-based stains improves stain removal during washing.
Wearing an undershirt adds a barrier between your skin and dress shirts. It absorbs sweat and deodorant, keeping outer layers cleaner and decreasing the chance of stains. Choose breathable cotton undershirts and change them daily for maximum effectiveness. This extra layer is a simple way to protect shirts without changing your deodorant routine.
- Choose natural deodorants without aluminum to reduce residue.
- Apply deodorant to dry skin and wait 2 minutes before dressing.
- Avoid heavy deodorant layers to prevent excess buildup.
- Wash shirts within 24 hours of wear to stop stains from setting.
- Use enzymatic detergents to break down sweat and deodorant.
- Wear clean cotton undershirts to protect outer shirts.
- Trim or shave armpit hair to reduce moisture and bacteria buildup.
Don’t put on clothes immediately after applying deodorant; letting it dry first prevents fabric stains and buildup.
Personal hygiene also impacts staining. Regularly washing your underarms and trimming hair helps reduce bacteria that mix with sweat and deodorant, leading to those stubborn yellow marks. Fabric softeners should be avoided because they can trap deodorant residue in fibers, making stains harder to remove. Focus on consistent care both in how you use deodorant and how you treat your clothes to keep shirts looking cleaner longer.
6. Common Mistakes When Removing Armpit Stains and How to Fix Them
Mixing chemicals like bleach and ammonia or vinegar can cause harmful fumes and damage your shirt’s fabric. Stick to one stain remover at a time, and check product labels for compatibility. Over-scrubbing the stained area can weaken fibers, causing thinning or holes. Use gentle motions with a soft brush or cloth instead.
Hot water may set protein-based sweat stains, making them permanent. Use cold or lukewarm water under 110°F (43°C) to prevent this. Stop any further treatment on your shirt if you notice damage like discoloration, stiffness, or holes to prevent making it worse. Discoloration from bleach or harsh chemicals can sometimes be fixed by rinsing the fabric thoroughly, then soaking it in a solution of 1 part white vinegar to 4 parts cold water for 15 to 30 minutes.
Some common mistakes that reduce stain removal effectiveness include delaying washing, using fabric softeners, or drying shirts with stains still present. Fabric softeners leave residues that trap stain molecules, making them harder to remove. Drying a stained shirt can set the stain, so always treat and rinse stains before drying.
- Do not mix different stain removers or cleaning agents
- Use cold or lukewarm water, never hot, for treating sweat stains
- Gently scrub stains to prevent fabric damage
- Avoid fabric softeners on stained laundry
- Wash shirts promptly after staining
- Soak the shirt in a diluted vinegar solution when you see discoloration.
- Do not dry shirts until stains are fully treated and removed
For silk or delicate fabrics, avoid home treatments that risk damage. In such cases, consider professional cleaning. The right approach and patience can restore shirts without costly replacements or damage to your favorite garments.
7. When to Consider Professional Cleaning for Armpit Stains
Professional dry cleaning can successfully remove armpit stains, especially when they are light, recent, or have set in stubbornly over time. Unlike typical home washing, the dry cleaning process uses solvents like perchloroethylene (perc), which effectively dissolve sweat and deodorant residues without water. This method works best when your shirts receive a pre-treatment specifically targeting the stains before the actual dry cleaning begins. Inform your dry cleaner clearly that your shirts have armpit sweat stains requiring special attention, so they can apply the right stain remover in advance.
Delicate or expensive fabrics, such as silk, linen, or designer shirts, greatly benefit from professional cleaning. These materials can be damaged or discoloured by harsh home stain removers or repeated washing. Dry cleaners have expertise in handling such fabrics, helping preserve the garment’s colour and texture while removing stains. For example, most silk shirts should only be cleaned by professionals to avoid shrinkage or fabric weakening that often occurs with water-based washing.
Set-in armpit stains that have turned yellow or brown can be difficult to remove at home, especially after several washes. Taking these shirts to a dry cleaner promptly improves stain removal chances. Sweat stains become harder to eliminate the longer they sit on fabric, so regular professional cleaning helps prevent permanent discoloration. Typical costs for dry cleaning a shirt range from $5 to $15 depending on location and fabric type, which is a reasonable investment to extend your shirts’ lifespan safely.
The risks of professional cleaning include potential damage if the dry cleaner uses incorrect solvents or procedures, but this is rare with reputable services. Always choose trusted dry cleaners experienced with stain removal and delicate garments. You might also find services offering specialized stain treatment before dry cleaning, increasing the likelihood of clear armpits without fabric damage. Some cleaners accept advance notice to prepare for tough stains, ensuring they use the most effective methods.
Communicate to your dry cleaner that your shirt has armpit stains caused by sweat or deodorant buildup and request a pre-treatment of the stains. You can say something like: “These shirts have tough yellow armpit stains from sweat and deodorant. Please pre-treat the stains before dry cleaning.” This helps the technician select appropriate solvents and avoid default cleaning that might not address the stains adequately. Sometimes professional stain removers used before dry cleaning guarantee the best results.
In summary, professional dry cleaning is worth considering when stains are set-in, your shirts are made of delicate fabrics, or you want to avoid damaging expensive clothing. Promptly taking stained items to the cleaner, clearly describing the issue, and choosing quality services minimize the chance of permanent armpit marks. This approach often results in fresher shirts and less wear than repeated home stain treatments and washings can provide.
8. Safe Use of Bleach, Hydrogen Peroxide, and Vinegar on Shirts
Use household chemicals like bleach, hydrogen peroxide, and vinegar carefully when treating armpit stains to protect your shirts and your health. Proper dilution, avoiding dangerous mixtures, and doing a spot test prevent fabric damage and harmful reactions. Follow specific ratios and timing guidelines depending on the chemical and fabric type.
Proper Dilution of Hydrogen Peroxide
Hydrogen peroxide is effective on light-colored fabrics but can weaken fibers if used full strength. Dilute 3% hydrogen peroxide with water in a 1:1 ratio for treating armpit stains safely. Applying it as a paste mixed with baking soda and salt increases stain removal power without soaking the fabric too long.
To apply, mix ½ cup baking soda, 1 tablespoon salt, and 1 tablespoon of 3% hydrogen peroxide to form a paste. Spread the paste on the stain and let it sit for 30 minutes before rinsing. Avoid soaking fabrics in undiluted hydrogen peroxide for more than 30 minutes, as prolonged exposure can cause fading or fabric weakening.
Safe Vinegar Use and Timing
Use diluted vinegar to cut through sweat and deodorant buildup, which can cause armpit stains. Mix one part white vinegar with two parts water and apply it to the stained fabric. Let it soak for 15 to 30 minutes before laundering to avoid damage or odor issues. Presoaking multiple times with this diluted vinegar solution may lighten yellow stains, but set-in stains, especially those darkened by heat from drying, may not fully disappear.
Dangers of Mixing Chemicals
Never combine bleach, hydrogen peroxide, or vinegar when treating your shirts. Mixing bleach with vinegar or hydrogen peroxide creates toxic gases that can irritate your respiratory system and eyes. Keep these tips in mind when working with these chemicals:
- Use oxygen bleach or hydrogen peroxide separately from vinegar treatments
- Do not add bleach to a washing machine preloaded with vinegar or peroxide
- Always rinse clothing thoroughly between chemical treatments
- Store chemicals separately and label their containers clearly
- Ensure proper ventilation when using these products
- Wear gloves to protect your skin from irritation
Never mix bleach and vinegar or hydrogen peroxide; the resulting gases can be hazardous to your health.
Alternatives for Delicate Fabrics
For sensitive fabrics like silk, wool, or spandex, avoid harsh chemicals such as chlorine bleach or undiluted hydrogen peroxide. Instead, use an oxygen-based bleach like Truly Free Home OxyBoost, which is non-toxic, gentle on fabrics, and free from harsh additives like phosphates or sulfates.
Test any stain remover on a hidden area first by applying a small amount, waiting 10 minutes, and checking for color change or damage. For delicate fabrics, shorter treatment times and cooler water temperatures help preserve fabric integrity while improving stain removal.
Step-by-Step Action Plan to Remove Armpit Stains from Shirts
Follow these clear steps to tackle armpit stains effectively and keep your shirts looking fresh.
- Before washing: Pretreat stains by applying a liquid stain remover or a paste made from baking soda and water directly to the affected area. Let it sit for at least 30 minutes to break down the stain.
- During soaking: Soak the shirt in cold water mixed with a gentle detergent for 1 to 2 hours. Check if the stain starts fading, this indicates the treatment is working.
- Before laundering: Double-check the stain and reapply stain remover if it remains visible. Use caution on delicate fabrics by spot testing first.
- During washing: Wash shirts in warm water with an enzyme-based detergent unless care labels advise otherwise. Ensure you follow temperature guidelines for your fabric.
- After washing: Inspect the shirt before drying. Avoid drying if the stain is still there, as heat can set it permanently. Repeat the pretreatment and wash if needed.
- Once dry: Observe the area for any remaining discoloration. If stains persist on white or colorfast shirts, consider a gentle bleach solution or take it to a professional cleaner.
- Ongoing care: Use deodorants that don’t contain aluminum to reduce future stains and wash shirts soon after wearing to prevent buildup.
Frequently Asked Questions
How Can I Remove Hard Armpit Stains from Clothes?
Use a strong stain remover like Vanish or a baking soda paste, then soak and wash according to the fabric care instructions. Hard stains often need repeated treatment and careful soaking to break down deodorant and sweat buildup.
Why Do My Armpits Leave Stains on My Shirt?
Armpit stains result from sweat mixing with deodorant ingredients and body oils, which react with fabric fibers and cause discoloration. This combination creates yellow or dark stains that set especially on light-colored shirts.
Can Yellow Underarm Stains Be Removed?
Yes, yellow stains can be removed with the right supplies and methods, like vinegar pretreatments and oxygen-based stain removers, though they sometimes require multiple treatments. Older, deep-set stains might not come out completely.
How to Remove Dark Armpit Stains?
Dark armpit stains respond well to pre-soaking with baking soda or hydrogen peroxide pastes, followed by normal washing. Dark stains often need targeted treatments and avoiding heat drying to prevent setting.
Are Deodorant Stains Different from Sweat Stains?
Yes, deodorant stains usually leave white or chalky marks, while sweat stains cause yellowing or dark discoloration, requiring different removal methods.
Can Fabric Softener Cause Armpit Stains?
Fabric softener can build up and trap oils, making armpit stains worse or harder to remove.
Final Thoughts
Addressing armpit stains promptly and using the right methods can restore your shirts without damage. Start by pretreating stains as soon as you notice them and follow with careful washing steps. Your next move should be to gather the proper stain removers and test methods on a hidden spot to ensure safety before tackling the whole shirt.