Do It Yourself Dry Cleaning a Complete Guide with 8 Easy Steps & Tips
Do it yourself dry cleaning lets you refresh and clean delicate garments at home using special kits or machines without water, preserving fabric quality. It’s a good option to save money, maintain clothes between professional visits, and avoid frequent trips to the dry cleaner.
This method suits budget-conscious individuals and DIY laundry enthusiasts who want to care for dry-clean-only clothes like blazers, wool suits, and fabrics prone to damage from water. You’ll learn which clothes to clean at home, necessary supplies, step-by-step instructions, and when to choose professional services instead.
Key Takeaways
- Check garment labels carefully to confirm dry-clean-only status before attempting home cleaning.
- Use home dry cleaning kits or machines designed to refresh fabrics without water damage.
- Reserve home dry cleaning for lower-value or lightly soiled garments to reduce risk.
- Pretreat stains gently with suitable spot cleaners before running the dry cleaning cycle.
- Clean 3, 5 items at a time in dryer bags to avoid overcrowding and ensure even cleaning.
- Freshen clothes between cleans by steaming or spritzing lightly with vodka to kill odors.
1. What Is Do It Yourself Dry Cleaning and How Does It Work?
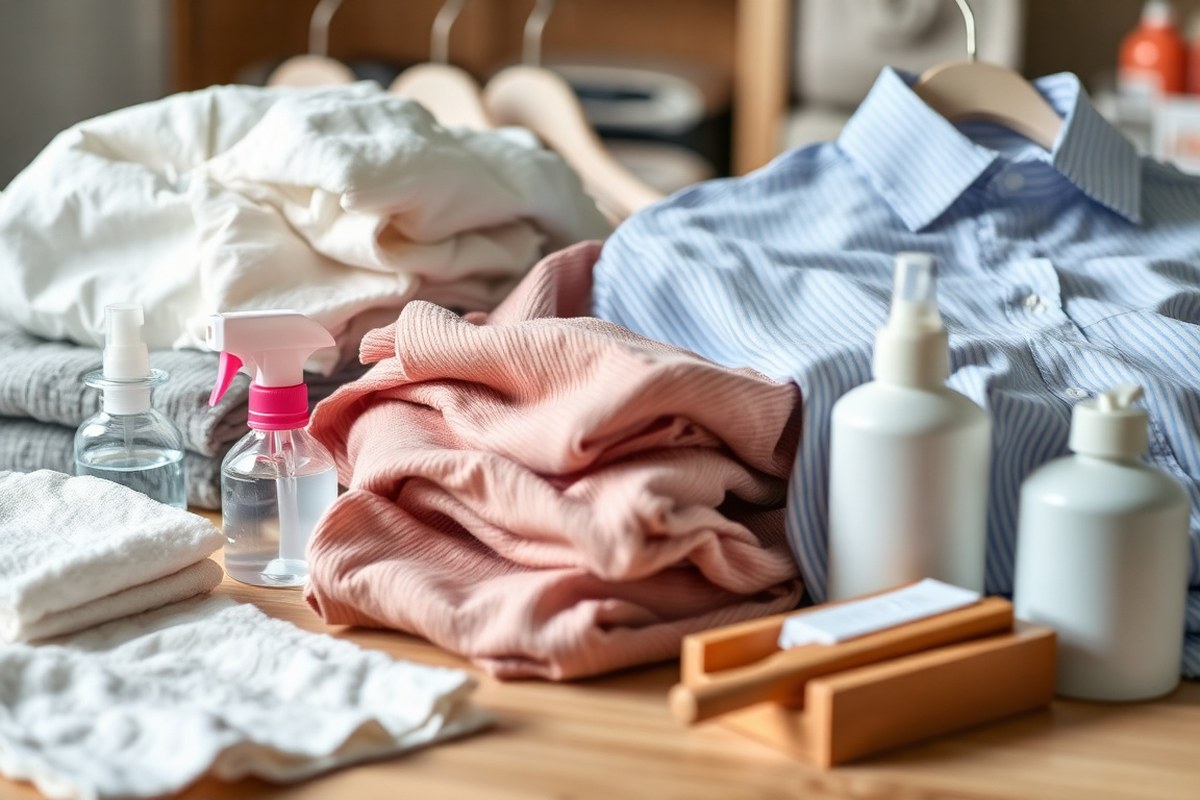
At-home dry cleaning uses special chemical solvents rather than water to clean clothes marked “dry clean only.” Traditional washing involves water and detergent, which can lead to shrinking, fading, or misshaping some fabrics. This method prevents that damage by using solvents that don’t soak or swell fabric fibers, preserving their quality. Wool, silk, and cashmere often get harmed by water or machine agitation, so this cleaning method avoids those risks.
The core of dry cleaning is using a solvent that dissolves oils and dirt without the use of water. Professional cleaners typically use perchloroethylene (perc) or other specialized solvents, but at home, you can use commercial dry cleaning kits containing safe, low-risk solvents or alcohol-based sprays. These solvents lift away oil-based stains and odors gently. Some DIY methods use common household supplies, such as vapor steamers or spray bottles with diluted vodka, which kills odors without wetting or harsh chemicals.
The actual cleaning process at home usually involves applying the solvent to a fabric bag containing your garment and a cleaning cloth from the kit or using spot treatments with solvent-soaked pads. You then tumble the garments in a dryer at low heat, letting the solvent vapor work to loosen soils and odors. This method saves money compared to professional dry cleaning, which can cost $10 to $30 per garment or more, depending on the item and location. DIY dry cleaning is hands-on and takes about 30 to 60 minutes per load, including the drying time.
Compared to washing with water, dry cleaning does not cause fibers to swell, which reduces the risk of shrinking or misshaping. This makes it ideal for structured clothing like suits or delicate fabrics prone to damage from water. Dry cleaning also targets oil-based stains better than water-based washing because the solvents dissolve oils more effectively. However, it may not fully remove heavy or set-in stains the way professional equipment and stronger solvents can.
At-home dry cleaning lets you refresh and clean many of your dry clean-only garments between professional cleanings, extending their life and maintaining their appearance without frequent trips to the cleaner. Results typically include reduced odors, fewer wrinkles, and some stain removal. Clothes emerge smelling fresh and looking cleaner, though very soiled or complex stains may still require professional attention. Using these solvent-based methods carefully can help you care for delicate fabrics safely while lowering your laundry costs and maintaining your wardrobe quality.
2. How to Decide Which Clothes and Fabrics You Can Dry Clean at Home

Choosing which clothes you can dry clean at home depends on the fabric type, the garment’s care label, and any special features like embellishments. Checking these carefully helps prevent damage and ensures your clothes stay in good condition. You should also run a colorfastness test to avoid color bleeding or fading.
Understanding Fabric Labels
Clothing care labels give essential instructions about how to clean a garment safely. The phrase “Dry Clean Only” often advises professional cleaning, but it doesn’t always mean you can’t try home dry cleaning methods. Fabrics like cotton, linen, polyester, and sturdy wool blends marked as “Dry Clean Only” are usually safe for home cleaning if you use the right products. Delicate fabrics or clothes with special finishes need more caution.
Look for symbols such as a circle (the dry clean symbol) or specific washing instructions. Avoid ignoring these labels, as they indicate the manufacturer’s tested best cleaning method to prevent shrinkage, distortion, or color loss.
Fabrics Safe for Home Cleaning
Many common fabrics can be cleaned at home using dry cleaning kits or gentle methods. Materials like cotton, linen, polyester, sturdy wool blends, silk, cashmere, and rayon fall into this group. These fabrics handle low-moisture, gentle cleaning cycles and the mild detergents in home kits well.
For dark fabrics such as denim or deep-colored cottons, using a home dry cleaning kit prevents fading and color bleeding that can happen in machine washing. Home dry cleaning is also a cost-effective alternative to professional services for these materials.
| Fabric Type | Home Dry Cleaning Suitability | Special Notes |
|---|---|---|
| Cotton | Safe | Usually strong enough for home cleaning |
| Linen | Safe | Use gentle methods to avoid wrinkles |
| Polyester | Safe | Resists shrinking and color loss |
| Wool blends (sturdy) | Safe | Careful with agitation |
| Silk | Safe with caution | Air dry to avoid damage |
| Cashmere | Safe with caution | Handle delicately, avoid heat |
| Rayon | Safe with caution | Use gentle cycles and mild detergents |
Cleaning multiple items together can save time and effort. Use a garment bag and dry clean 3, 5 similar-weight items at once for best results, keeping garments from rubbing excessively or overcrowding the dryer.
Fabrics and Garments to Avoid
Some materials and garment types should not be cleaned at home due to high risk of damage. Leather, suede, fur, and heavily embellished items need professional care. Their unique textures and finishes often require specialized solvents and equipment that home kits cannot replicate.
Clothes with metallic threads, heavy beads, sequins, or intricate decorations may melt or lose their finish with home dry cleaning kits. Structured garments like tailored suits or corseted dresses also benefit from professional handling to maintain their shape.
Warning: Avoid home dry cleaning for leather, suede, fur, and heavily embellished items to prevent irreversible damage.
How to Perform a Colorfastness Test
Testing a garment for colorfastness before home cleaning keeps your clothes safe from fading or bleeding. Pick a hidden area, such as an inside hem or seam, and dampen a cotton swab with the cleaning solution or water you will use. Press the swab firmly against the fabric for a few seconds, then check for color transfer on the swab.
Wait until the spot dries and inspect the fabric for fading or discoloration. No color transfer and unchanged fabric usually mean the garment is safe for home cleaning. Color bleeding or fading means professional dry cleaning is the best choice to prevent more damage.
3. What Supplies and Tools Do You Need for Home Dry Cleaning?
To dry clean clothes at home effectively and safely, you need specific supplies and tools tailored to the garments you’re cleaning and the methods you choose. At-home dry cleaning kits, such as Dryel or Woolite, are popular options that combine convenience with home appliance use. These kits typically include a reusable garment bag and specially treated moist cloths or sheets designed to refresh clothes and remove light odors and stains. They rely on your dryer’s heat and steam to activate their cleaning agents without soaking fabrics.
Beyond commercial kits, you can substitute certain household supplies for dry cleaning solvents, especially for spot cleaning or freshening. White vinegar diluted with water (about 1 cup vinegar per gallon of water) can safely deodorize or remove mild stains. Rubbing alcohol is another option for treating oil-based spots, but test it first on hidden areas because it can affect dye or fabric texture. Avoid harsh household chemicals like bleach or ammonia, which can damage delicate fibers.
Home dry cleaning kits require a dryer for activation; they do not need a special machine. The included garment bag holds the clothes with a moist cleaning cloth during a typical 20-30 minute dryer cycle at medium heat. For those interested in investing more, home dry cleaning machines range from $350 to $1600 and offer steam cleaning technology similar to professional services. These devices apply controlled steam and sometimes vaporized cleaning solvents but are often less effective on deep stains than commercial cleaners.
- At-home dry cleaning kit (incudes garment bag and cleaning cloth)
- Access to a standard clothes dryer (medium heat setting)
- Spot cleaning supplies such as white vinegar, rubbing alcohol, and gentle stain removers
- Soft-bristled brush or lint roller for delicate fabric care
- Optional home dry cleaning machine for improve steaming ($350, $1600)
- Clean, dry towels or cloths for blotting spots
- Fabric steamer for wrinkle removal and freshening between cleanings
Using a soft-bristled brush can help gently lift dirt and dust from wool or cashmere before dry cleaning. A lint roller removes surface debris without damaging fabric. A fabric steamer is a useful optional tool to reduce wrinkles and odors between cleanings and avoids repeated exposure to any solvents. Keep in mind that home kits work best on light soils and fresh smells rather than heavy staining or deep cleaning needs. Always follow the included instructions carefully, and check care labels to avoid damage.
4. How to Pretreat and Remove Stains on Dry-Clean-Only Clothes at Home
Pretreating stains on dry-clean-only clothes at home requires care and attention to fabric type and stain nature. Light water-based stains and fresh spots respond best to gentle home treatments. Carefully applying stain removers and using natural products in controlled ways help protect delicate fabrics before using a home dry cleaning kit.
Identifying Stain Type
Understanding the stain type helps select the right treatment. Water-based stains like coffee, wine, or juice often respond well to mild spot cleaning, while oil-based stains like grease or makeup usually need professional solvents. Fresh stains are easier to treat at home compared to set-in or dried stains, which can become permanent or require special handling. Consider the fabric’s delicacy; silks and wools need softer methods than cotton blends, and always check the garment label for cleaning instructions.
Applying Safe Stain Removers
Using safe stain removers properly prevents damage to delicate garments. Start by placing a clean, dry cloth underneath the stained area to avoid spreading. Lightly dab a small amount of mild detergent or a commercially available stain remover suited for delicate fabrics on the stain. Avoid scrubbing, which can damage fibers or cause color loss. Let the remover sit for about 5 to 10 minutes to break down the stain before gently blotting with a damp cloth to lift residues. Follow these steps for pretreating stains on dry-clean-only clothes:
- Test the stain remover on an unseen part of the garment for 1 to 2 minutes to check for colourfastness.
- Lay the garment flat on a clean towel to avoid stretching or distorting the fabric.
- Place a dry cloth or paper towel under the stained area to absorb moisture.
- Dab a small amount of mild liquid detergent or stain remover onto the stain.
- Let it sit for 5 to 10 minutes depending on stain severity.
- Blot gently with a clean, damp cloth to lift the stain outward.
- Avoid rubbing or wringing the fabric to prevent damage.
- Allow the treated area to air dry before proceeding with home dry cleaning.
Using Natural Solutions
Natural products like white vinegar, baking soda, and lemon juice can be effective for light stains and odors on delicate fabrics. For example, mix one part white vinegar with two parts water and apply with a soft cloth to water-based stains. Baking soda sprinkled on damp fabric absorbs moisture and neutralizes odors. Lemon juice diluted with water can help remove sweat stains but test carefully because it may lighten some fabrics.
Natural solutions are gentle, affordable, and generally safe but require spot testing. Avoid soaking or saturating garments with liquids, as excess moisture can alter fabric texture or cause shrinking. Use these treatments sparingly and let the garment dry completely before the home dry cleaning cycle.
Common Pretreatment Mistakes
Dabbling on stains without testing can cause color loss or fabric damage. Too much liquid, scrubbing, or rubbing can push stains deeper or cause fabric distortion. Waiting too long to treat fresh stains decreases the chance of successful removal. Applying harsh chemicals like bleach or strong detergents risks discoloration and weakening delicate fibers.
Another mistake is ignoring stain location; treating enlarged stains on linings or seams requires extra caution as they can bleed through or weaken stitching. Using dry cleaning kits on heavily stained or soiled areas without pretreatment often results in incomplete stain removal and frustration.
5. Step-By-Step Guide to Do It Yourself Dry Cleaning at Home
To dry clean your clothes at home successfully, start by preparing the garments and stains carefully, then use either a home dry cleaning kit or a gentle homemade cleaning method. Finish by drying and removing wrinkles properly to preserve the fabric’s quality. Following these steps in order ensures the best results without damage.
Preparing Clothes and Stains
Begin by inspecting your clothes to check for stains or spots that need pretreatment. Cleaning only lightly soiled garments at home is safest, as heavy stains may require professional attention. Use a stain remover designed for delicate fabrics or follow tips for gentle stain treatment before cleaning.
Turn garments inside out and close zippers, buttons, or hooks to prevent damage during cleaning. Avoid overloading your cleaning bag or dryer, too many items can stop proper cleaning and cause wrinkles or uneven drying.
Using a Home Dry Cleaning Kit
Dry cleaning kits typically include moist towelettes and a reusable dryer bag. The towelettes contain cleaning fluid that helps lift dirt while the bag creates a controlled steam environment in your dryer. Always read the packaging for specific detergent amounts and drying times since products vary.
Generally, place one to two garments inside the cleaning bag with one moist towelette. Seal the bag properly and tumble in your dryer on medium heat for about 20 to 30 minutes. Overfilling the bag can allow clothes to rub harshly or fail to clean evenly, so limit it to two garments or less according to the kit’s recommendations.
Cleaning Without a Kit
When skipping kits, use gentle detergent amounts, about one teaspoon of mild liquid detergent diluted in water. Lightly dampen a clean cloth or sponge with the diluted detergent and gently dab the garment, focusing on problem areas. Avoid soaking the fabric, as excess moisture can lead to shrinkage or damage.
After spot cleaning, place the garment in a mesh laundry bag and tumble dry on a low heat or air fluff setting for 15 to 20 minutes with a damp cloth to add humidity. This method won’t remove heavy stains but can freshen clothes and lightly clean.
Drying and Removing Wrinkles
After cleaning, remove clothes promptly to prevent wrinkles. Allow garments to air dry fully if they remain damp after the dryer cycle. For stubborn wrinkles, use a low heat iron or a garment steamer on the appropriate fabric setting, keep the iron moving to avoid scorching.
Never overload your dryer, which can cause uneven drying and creasing. If you’re using a cleaning bag, avoid opening it immediately after the dryer cycle; wait a minute for the steam to settle to reduce wrinkles and ease garment removal.
- Inspect clothes for stains and pretreat spots gently.
- Turn garments inside out and secure fasteners.
- Place one or two garments into the dry cleaning bag with the moist towelette, or spot clean with diluted detergent and a cloth if not using a kit.
- Seal the bag and tumble dry on medium heat for 20 to 30 minutes or air fluff for 15 to 20 minutes if cleaning without a kit.
- Remove garments promptly after drying and hang or lay flat to air dry if needed.
- Remove wrinkles using a low heat iron or steamer appropriate for the fabric.
Overfilling your cleaning bag or dryer can reduce cleaning effectiveness and cause fabric damage, so always follow capacity guidelines closely.
6. How to Freshen and Maintain Dry-Clean-Only Clothes Between Cleanings
Steaming is an effective and gentle way to freshen your dry-clean-only clothes between full cleanings. A handheld clothes steamer can quickly reduce wrinkles and remove common odors like smoke, body scent, or food smells without submerging the garment in water. Aim to hold the steamer about 6 to 12 inches away from the fabric, moving it slowly over the surface for 2 to 5 minutes depending on the size of the item. This avoids heat damage while refreshing the fabric evenly.
To remove odors without washing, airing your clothes outside can be a simple and cost-effective method. Hang your garments in direct sunlight for at least an hour, as fresh air and sunlight help break down odor-causing bacteria. When outside airing isn’t an option, put the item near an open window or turn on a fan indoors to move air around the clothes.
Using sprays like diluted vodka can also help neutralize odors. For this, mix equal parts of 70-proof or higher vodka with water in a spray bottle. Lightly mist the garment without soaking it and allow it to air dry. Vodka evaporates quickly and breaks down scent molecules, leaving your clothes smelling fresher. Avoid over-saturating delicate fabrics to prevent water spots or damage.
For dry-clean-only clothes that are a bit damp after steaming or misting, tumble dry them at low or no heat for up to 10 minutes to help dry and reduce wrinkles. Make sure the dryer has a clean lint filter to avoid transferring debris. Over-drying, especially at high heat, risks shrinking or damaging sensitive fibers, so keep the cycles short and cool.
Storing freshly steamed or aired clothes properly helps maintain their freshness longer. Use breathable garment bags made of cotton or linen to protect against dust while allowing airflow. Avoid plastic covers, which can trap moisture and cause mildew. Hanging suits, blouses, and dresses on padded or shaped hangers also preserves their form and prevents creases from settling during storage.
For expensive or heavily used items like tailored wool suits, spot-clean stains promptly and refresh regularly with steaming rather than frequent full dry cleanings. This approach saves time and money while preserving fabric quality. However, for garments with persistent odors or visible stains, professional care remains the safest option.
7. Safety Tips and Precautions for At-Home Dry Cleaning
Home dry cleaning solvents are both toxic and highly flammable, so handling them with care is essential to protect yourself and your garments. These solvents should never be used in your home washer or dryer, as heat and tumbling can cause fires or damage the fabric. Because of their flammability, always use home dry cleaning products in a well-ventilated area to prevent inhaling harmful fumes, which can cause headaches, dizziness, or respiratory irritation over time.
Ensure proper ventilation by opening windows or running a fan as you work. Avoid using these solvents near open flames, sparks, or heat sources. After treating your garment, air dry it naturally on a flat surface or hang it to dry. Never put dry-clean-only clothes treated with solvent in your dryer, since heat can cause shrinkage or permanent fabric damage.
Safe storage of your dry cleaning solvents is also important. Keep all chemicals in tightly sealed containers, away from children and pets, and store them in a cool, dry place out of direct sunlight. Because these products are flammable, do not store them near stoves, heaters, or electrical outlets. Label your containers clearly to avoid accidental misuse or mixing with other household products. Here is a safety checklist to follow when doing dry cleaning at home:
- Use solvents in a well-ventilated area with windows open or a fan running
- Keep solvents away from heat, sparks, flames, and electrical appliances
- Do not use solvents in washers or dryers
- Air dry garments after solvent treatment, never use a dryer
- Store solvents in sealed, clearly labeled containers in cool, dry places
- Keep solvents out of reach of children and pets
- Dispose of used solvent cloths or pads according to local hazardous waste guidelines
Following these safety steps helps reduce risks to your health and preserves your clothes’ quality. Using home dry cleaning kits is practical for low-risk garments like budget blazers or everyday items marked “dry clean,” but always respect the limits of your clothing and the chemicals. When handling solvents, expect some chemical smell, which should dissipate if you air dry clothes properly. Ignoring ventilation or solvent flammability can lead to health problems or fire hazards. Always read and follow the product instructions carefully.
8. When Should You Choose Professional Dry Cleaning Instead?
Some garments and stains require professional dry cleaning to avoid damage or insufficient results. Expensive suits, especially those with structured or padded shoulders, should be professionally cleaned to preserve their shape and fabric integrity. Moisture from home dry cleaning can distort tailoring, resulting in a poor fit and wear over time. Delicate materials like leather, suede, and intricately embroidered or beaded fabrics also benefit from expert handling.
Stains that penetrate deeply or have chemical bases, such as ink, oil, or wax, are difficult to remove at home and are best left to pros. Home treatments may spread these stains or damage delicate fibers, making matters worse. While mild and fresh stains, like light food spills, can often be pretreated and cleaned gently at home, older or set-in stains call for professional methods that use specialized solvents and equipment.
Professional cleaning frequency varies by garment quality and use. High-end suits worn regularly generally need professional cleaning every 3 to 6 months. For casual items labeled dry clean only, you might extend the interval by freshening and spot treating at home in between.
Deciding between home dry cleaning and professional service should weigh risks and costs. Pro cleaning costs average between $8 to $20 per garment but offers guaranteed preservation for delicate, expensive pieces. Home kits are cheaper upfront, about $5 to $10, but aren’t foolproof for tough stains or structured items.
| Garment or Stain Type | Home Dry Cleaning Suitability | Risk of Home Treatment |
|---|---|---|
| Structured suits with shoulder pads | Not recommended | Loss of shape, fabric distortion |
| Leather and suede garments | Not recommended | Damage, discoloration |
| Delicate fabrics with embroidery or beading | Not recommended | Fabric damage, bead loss |
| Fresh light food stains | Recommended with pretreatment | Minimal |
| Old or oily stains (ink, wax, oil) | Not recommended | Stain spreading, fiber damage |
| Casual dry-clean-only items | Suitable with caution | Possible incomplete cleaning |
You should carefully assess the garment’s structure, fabric type, and the kind of stain before attempting do it yourself dry cleaning. Expensive or complex pieces usually benefit more from professional care despite the higher price. Avoid risk by reserving home methods for simpler fabrics and newer, mild stains.
Home dry cleaning should never be used on leather, suede, or garments with heavy embellishments to prevent irreversible damage.
Step-by-Step Action Plan for DIY Dry Cleaning at Home
Follow this plan to start cleaning your dry-clean-only clothes safely at home and assess each step’s success before moving on.
- Before you start: Gather all necessary supplies like a dry cleaning kit, stain remover, and a clean cloth. Check fabric labels for suitability. Success means no missing items and clear fabric instructions.
- Day 1: Pretreat any visible stains using the recommended stain remover and a gentle touch. You’ll know it worked when stains visibly lighten without damaging the fabric.
- Day 2: Use your dry cleaning kit according to the package instructions, typically involving placing clothes in a special bag with a cleaning cloth and tumble drying. Success means clothes come out fresh and wrinkle-free.
- Day 3: Air out clothes fully before wearing, checking for lingering odors or spots. Clothes should smell fresh and look clean at this stage.
- Weekly maintenance: Freshen dry-clean-only items between cleanings by hanging them in a well-ventilated area and spot-cleaning as needed. You’ll maintain their appearance and reduce the frequency of full cleaning.
- Monthly review: Inspect clothes for any new stains or wear and decide if the next cleaning at home is suitable or if professional help is needed. Knowing when to switch prevents damage.
Frequently Asked Questions
Can I Use Regular Detergent to Dry Clean Clothes at Home?
Regular detergent isn’t suitable for dry cleaning because it involves water, which can damage some fabrics. Use specially designed home dry cleaning kits or solvents made for dry cleaning to protect your clothes.
How Often Should I Dry Clean Delicate Clothes at Home?
Limit dry cleaning delicate items to only when visibly dirty or smelly to preserve fabric quality. Overcleaning can wear fibers out faster even with home methods.
What Makes Home Dry Cleaning Kits Different from Professional Services?
Home kits use mild solvents and steam to refresh clothes but lack industrial chemicals and equipment. They’re good for light cleaning, not heavy stains or deep fabric care.
Can I Dry Clean Wool Sweaters at Home Using DIY Methods?
Yes, many wool sweaters can be dry cleaned at home with a gentle dry cleaning kit. Avoid water-based washing which may shrink or distort wool fibers.
Are There Any Garments You Should Never Dry Clean at Home?
Avoid at-home dry cleaning for heavily stained, structured, or very delicate garments like embellished gowns or leather. These need professional care to avoid damage.
Does Home Dry Cleaning Remove All Types of Stains Effectively?
Home dry cleaning can handle light stains but won’t fully remove oil-based or set-in stains. Pretreating spots helps, but serious stains may require professional cleaning.
The Bottom Line
Dry cleaning your clothes at home can save money and keep your wardrobe looking its best when done carefully and with the right materials. Start by testing your process on less delicate items to build confidence. Taking this cautious approach helps you protect your clothes while enjoying the convenience of home cleaning.