How to Shrink a Shirt: Effective Methods and Fabric Tips for Best Fit
Shrinking a shirt usually works best with cotton fabrics by using heat through washing, drying, or ironing. You can expect most cotton shirts to shrink between 3% and 20%, depending on fabric type and heat applied. Synthetic fabrics like polyester and nylon rarely shrink, so your efforts might not change these materials much.
This advice suits anyone with shirts that feel too large or loose and want a better fit without buying new clothes. You’ll learn which fabrics respond to shrinking, simple heat-based methods, and how to avoid common mistakes to safely adjust your shirts at home.
Key Takeaways
- 100% cotton shirts shrink most effectively using hot water wash and high dryer heat.
- Polyester and nylon shirts resist shrinking, so tailoring is a better option.
- Untreated cotton can shrink 3% to 5% quickly, mainly during the first hot wash.
- Dry shirts thoroughly on high heat to maximize shrinkage but monitor carefully to avoid damage.
- Boiling water can accelerate shrinking but risks fabric damage on delicate shirts.
- Target specific areas by wetting and heat-treating only those parts of the shirt.
What Fabrics Shrink and How Heat Affects Them

Shirt fabrics differ widely in how much they shrink, mainly because of their fiber types and how they react to heat and water. Natural fibers such as cotton, wool, and linen tend to shrink quite easily. Cotton shirts, for example, can shrink between 5% and 20% depending on cotton quality and the amount of heat applied. These fabrics change size because heat causes their fibers to contract and tighten after they relax during manufacturing. High heat in washing and drying speeds this process by forcing fibers to compress, which reduces the overall shirt size.
In contrast, synthetic fabrics like polyester, nylon, and spandex resist shrinking. Polyester shirts usually will not shrink much with normal washing and drying, and shrinking them significantly often requires boiling water or very high heat. Even then, shrinking polyester is tricky because excessive heat can damage the fibers, causing warping or loss of shape. Nylon acts similarly, showing little to no shrinkage. Because of these risks, attempting to shrink synthetic or blended shirts carries a higher chance of unwanted damage compared to natural fibers.
Linen falls somewhere in the middle. It can shrink slightly, although intentional shrinking can harm linen’s crisp texture and weaken the fibers. Wool needs warm, not hot, water and low dryer heat to shrink properly; too much heat will ruin its texture and cause felting.
| Fabric | Shrinkability | Typical Heat Needed | Notes |
|---|---|---|---|
| 100% Cotton | High (5%-20%) | Hot water (140°F/60°C+) and high dryer heat | Easy to shrink; can over-shrink if exposed too long |
| Wool | Moderate | Warm water and low dryer heat | Requires gentle heat to avoid felting |
| Linen | Low to moderate | Warm water, low heat | Shrinking can damage texture |
| Polyester | Very low | Boiling water or very high heat | High risk of damage; shrinking usually insufficient |
| Nylon | Very low | High heat, if any | Rarely shrinks, prone to damage |
| Blends (Cotton/Polyester) | Low to moderate | Hot water and high heat | Shrinks less than 100% cotton; polyester limits shrinking |
Heat shrinks natural fibers by relaxing and contracting their cellulose or protein structures. For cotton, applying hot water above 140°F followed by high heat in the dryer acts to tighten these fibers, gradually reducing size with each wash and dry cycle. This works well when you’re shrinking 100% cotton shirts. Synthetic fibers like polyester have thermoplastic properties, so they resist shrinking at typical washing temperatures and require very high heat that can melt or distort fibers. Therefore, shrinking polyester shirts may need boiling water followed immediately by a dryer cycle to try to shrink them somewhat, though results vary and damage risk increases.
Gradual shrinking is often best. Repeat heat and wet cycles cautiously for fabrics that shrink less readily to avoid damaging shirts. Overheating synthetics or delicate natural fibers can cause permanent damage or misshaping, so follow care labels and test small areas first when possible. Understanding fabric type and heat tolerance helps you choose safe and effective shrinking methods tailored for each shirt.
How to Shrink a Shirt Using Hot Water and Dryer Heat
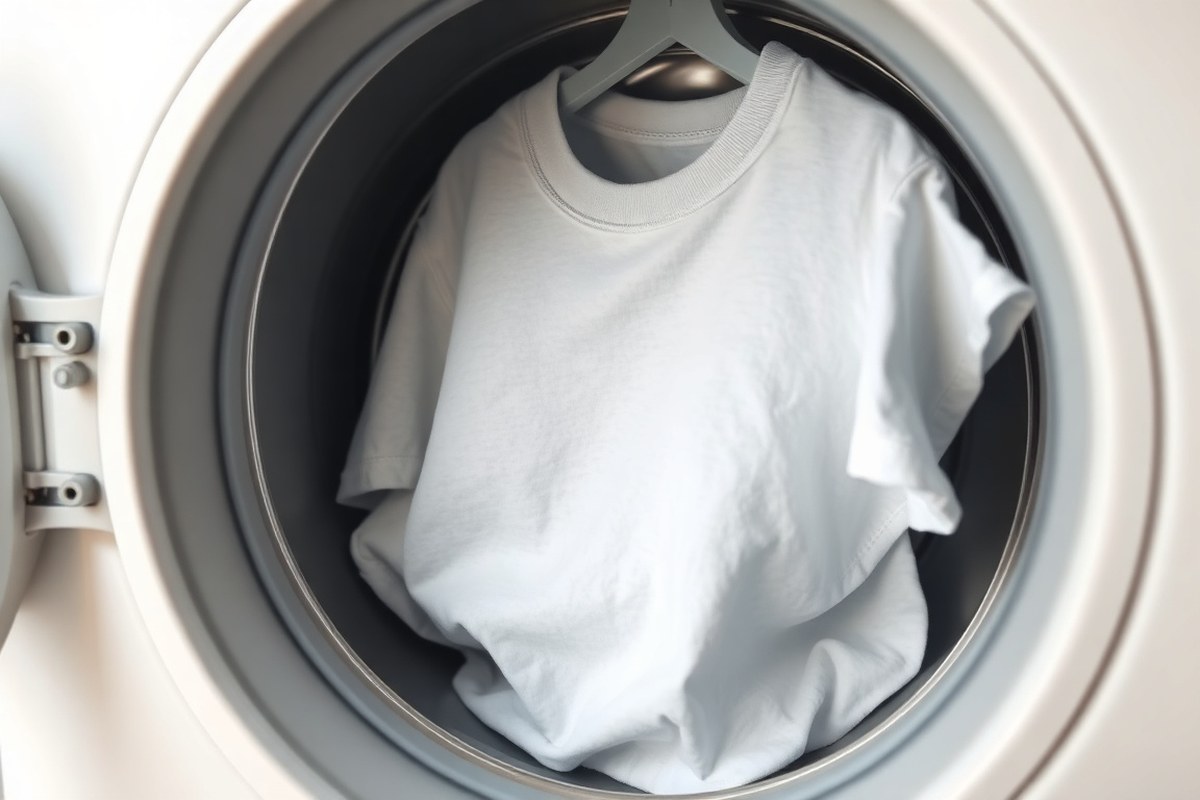
Use hot water in your washing machine and the highest heat setting on your dryer to shrink cotton and similar shirts effectively. Set the washer to run for at least 30 minutes at 140°F (60°C) and dry the shirt on high heat until completely dry. Monitor the fit between cycles and repeat if more shrinkage is needed.
Preparing the Shirt for Washing
Check the shirt’s fabric composition first; pure cotton shrinks more than blends. Turn the shirt inside out to protect colors and print. Make sure to clear lint traps and check for stains, as hot water can set them permanently.
Use detergent suitable for hot water washing to keep the fabric clean. Do not overload the washer to allow proper agitation, which helps with shrinking. Avoid fabric softeners, as they can reduce shrinkage effectiveness.
Setting the Washer and Dryer Correctly
Choose the hottest washing cycle available, typically labeled “hot” or set around 140°F (60°C). Run the wash cycle for 30 to 45 minutes to let heat and movement shrink the cotton fibers effectively. For polycotton blends, hot water still helps but expect less shrinkage than pure cotton.
After washing, transfer the shirt immediately to the dryer. Use the highest heat setting and dry the shirt fully in one cycle. High dryer heat can shrink some cotton shirts by up to 20%, while washing alone usually causes 3% to 5% shrinkage. Dry times vary but generally fall between 30 and 60 minutes depending on your dryer and shirt thickness.
Warning: Avoid leaving the shirt damp after washing, or shrinkage will be incomplete. Always run a full drying cycle on high heat for best results.
Monitoring the Shrinking Progress
Check the fit of the shirt as soon as it’s cool enough to try on. Pay close attention to length, which often shrinks more noticeably than width. If the shirt is still too large, repeat the hot wash and high heat dry cycle.
Expect gradual shrinkage: each machine wash and dry combined can reduce size by 3% to 20%. Track the shirt’s dimensions after each cycle using a tape measure to ensure you don’t overshrink. Stop once the desired fit is reached to avoid distortion or damage.
- Turn the shirt inside out and check for stains.
- Load the washer without overfilling to allow movement.
- Select the hottest water setting (around 140°F/60°C) and run the cycle for 30, 45 minutes.
- Remove the shirt promptly at cycle end and transfer it to the dryer.
- Set the dryer to the highest heat setting and dry the shirt completely (30, 60 minutes).
- Let the shirt cool and check the fit.
- Repeat washing and drying if you want more shrinkage but measure carefully after each cycle.
Using the Boiling Water Method to Shrink Shirts
Boiling water shrinks cotton shirts by tightening and shortening the individual cotton fibers that were stretched during manufacturing. The typical soaking time ranges from 5 to 20 minutes, with shorter times causing minor shrinkage (about 3%, 5%) and longer times producing more significant shrinkage (up to 10% or more). This method mainly suits 100% cotton shirts and can be repeated if needed, but it requires careful handling to avoid damage.
Preparing the Shirt Before Boiling
Begin by checking the fabric content and care labels to confirm the shirt is 100% cotton or mostly cotton, as blends and treated fabrics might not respond as well or could be damaged. Avoid boiling shirts with delicate prints or embellishments because boiling can cause fading or distortion.
Make sure the shirt is clean. Dirt and oils can interfere with even heat exposure, so a freshly washed shirt improves results. Avoid using fabric softeners or conditioners that may prevent shrinkage.
Boiling Duration and Impact
The exact time you leave the shirt in boiling water dictates how much it will shrink. A 5 to 10-minute soak generally results in a small size reduction of 3% to 5%, barely noticeable but helpful for minor fit adjustments. To shrink the shirt by about 10% or more, soak for about 20 minutes. Keep in mind that prolonged boiling beyond 20 minutes offers diminishing returns and increases the risk of fabric damage.
You can repeat the process if the desired shrinkage isn’t achieved after the first try. Wait until the shirt has dried before testing the fit and deciding on additional boiling sessions, as shrinkage occurs during drying too.
Post-Boiling Handling and Drying
Remove the shirt from boiling water using tongs or a long spoon to protect your hands from burns. Avoid wringing the fabric, which can distort the shape.
Lay the shirt flat on a clean towel and roll the towel to gently press out excess water, or blot with a dry towel. Then, dry the shirt on a low heat setting in a dryer or air dry on a flat surface to minimize stretching while the fabric sets into its new size. Repeated heat exposure during drying may contribute to further shrinkage, so monitor the shirt’s size during this stage. Follow these steps to shrink a cotton shirt using boiling water:
- Read the shirt’s care label to confirm it is safe to boil and made of cotton.
- Wash the shirt to remove dirt and fabric softener residues.
- Bring a large pot of water to a rolling boil on the stove.
- Use tongs or a long spoon to fully submerge the shirt in the boiling water carefully.
- Let the shirt soak for 5 to 20 minutes depending on your desired shrinkage level.
- Remove the shirt carefully and avoid twisting or wringing it.
- Gently press out excess water using towels.
- Dry the shirt on low heat in a dryer or lay it flat to air dry, checking the fit as it dries.
Precautions for using the boiling method include never leaving the shirt unattended in boiling water, using protective tools to avoid burns, and being cautious with shirts containing prints or special finishes. This method is best reserved for 100% cotton shirts that need significant size reduction and have no delicate features you want to preserve.
Targeted Shrinking Techniques for Specific Shirt Areas
To shrink specific areas of a shirt such as sleeves or shoulders, targeted heat application works best. Tools like a spray bottle combined with a heat source, an iron, or a hair dryer allow precise control over shrinkage. Applying heat carefully avoids over-shrinking and preserves the rest of the garment’s fit.
Spray Bottle and Heat Pressing Method
This method involves dampening only the areas you want to shrink, then applying heat to activate fiber contraction. It’s useful for shrinking sleeves, shoulders, or waist areas without affecting the whole shirt. The moisture softens the fibers while the heat shrinks them, giving you control over the process.
- Fill a spray bottle with warm water (around 100°F or 38°C) and lightly mist the target area until just damp, not soaking.
- Lay the shirt flat on an ironing board or heat-resistant surface, smoothing wrinkles gently.
- Place a clean, thin cloth (like a cotton dish towel) over the damp spots to protect the shirt.
- Use a hot iron set to the fabric’s highest safe temperature and press down firmly on the damp area for 15 to 20 seconds at a time.
- Lift and reposition the cloth and iron to cover the entire area evenly, repeating the pressing several times.
- Check fit after cooling; repeat if further shrinkage is needed, but avoid overheating which can damage the fabric.
- Let the shirt air dry completely before trying it on or storing it to lock in the shrinkage.
Limit the spray to just the part you want to shrink to avoid unwanted changes elsewhere. This technique works well on cotton and cotton blends but is tricky with delicate fabrics like wool or silk.
Using an Iron Safely for Shrinking
Ironing adds concentrated heat and steam to targeted areas, shrinking fibers without submerging the shirt in water. Steam speed-ups fiber contraction, improving results on specific spots like sleeves or shoulders.
- Set the iron to the appropriate heat level for your shirt’s fabric (cotton uses high heat, synthetics require lower heat).
- Spritz the desired area lightly with water to create steam during ironing.
- Iron the damp section slowly, pressing firmly and moving the iron evenly to avoid scorching.
- Use the iron’s steam function if available, but do not hold the iron too long in one spot to prevent damage.
- Repeat the process if the area hasn’t shrunk enough after the shirt cools.
This method is effective for small targeted shrinkage but can easily cause uneven results or heat damage if done carelessly. Use a pressing cloth for sensitive fabrics and always test on a hidden spot first.
Applying a Hair Dryer for Quick Shrink Fixes
The hair dryer method lets you apply dry heat to specific shirt areas while controlling intensity and direction. It’s good for quick fixes on sleeves or shoulders but less effective on large or heavily shrunk areas.
- Dampen the target area slightly using a spray bottle with warm water.
- Set the hair dryer to a high heat setting and hold it 3 to 5 inches away from the fabric.
- Move the dryer continuously back and forth over the damp section for 3 to 5 minutes until dry.
- Check the fit and repeat if more shrinkage is needed, allowing the garment to cool fully between sessions.
Hair dryers are convenient for quick targeted shrinking with minimal risk of overall garment damage. Avoid prolonged, close heat exposure to prevent burning or discoloration. This method works best on natural fabrics like cotton and is less effective on blends or synthetics.
How Long Does Shrinking Take and How to Control It
Shrinking a shirt usually takes about 30 to 60 minutes depending on the method you choose. Using the dryer alone can start shrinking within 15 to 30 minutes on a high heat setting, but checking the shirt every 5 to 10 minutes is key to stopping it at the right size. For hot water wash cycles, shrinkage typically happens during a single wash and dry cycle, which can last 45 minutes to an hour. Boiling water methods cause immediate shrinking once the shirt is submerged, which usually takes about 10 to 15 minutes. Removing the shirt right after this time helps control the amount of shrinkage.
Controlling the shrinking process requires monitoring and timely actions. When using the dryer method, stop the cycle every 5 to 10 minutes to check the fit by putting the shirt on or measuring it. Once the shirt reaches the desired fit, air-dry it instead of continuing machine drying to prevent over-shrinking or damaging the fabric texture. For wet heat methods like washing or boiling, let the shirt soak only until you see enough size reduction and then remove it promptly and air-dry or tumble dry on low.
Over-shrinking can cause your shirt to become too tight, distort its shape, or harm prints and delicate parts. To avoid this, use a timer or alarm on your phone or oven clock to remind you to check the shirt at regular intervals. With boiling water, don’t leave the shirt in longer than 15 minutes as fabrics can felt or become stiff, which is irreversible. Notice any harsh changes in texture or smell and stop immediately, then rinse with cool water. Avoid resting an iron too long on one spot while shrinking to prevent uneven shrinking or burn marks.
For precise control, take measurements of the shirt’s key areas, like chest width, shoulder seams, and length, before starting. After each shrinking step, measure again so you know how much it has shrunk and when to stop. This way, you can fine-tune the fit without guessing. Depending on fabric type and shirt construction, some areas may shrink faster, so checking multiple points matters most.
Set a timer and check your shirt every 5 to 10 minutes during heat shrinking to prevent accidental over-shrinking or damage.
Common Mistakes to Avoid When Shrinking Shirts
One common mistake when shrinking shirts is rushing the process and applying heat too long or too often. High heat can cause fabrics to shrink unevenly or overly, which might leave parts of the shirt too tight or misshapen. To avoid this, check the shirt frequently during the drying cycle and remove it once it fits better to prevent over-shrinking.
Ignoring the fabric type and label instructions can also lead to damage. Shirts made of polyester, nylon, or pre-shrunk cotton often resist further shrinking and may suffer damage if exposed to high heat repeatedly. Always read the care label inside your shirt before attempting to shrink it. For cotton shirts, washing in hot water and tumble drying on high heat usually works well without excessive harm, but synthetic blends require a gentler approach or professional help.
Another frequent error is neglecting shirts with prints or graphics. Exposing such shirts to direct heat can cause the artwork to crack or fade. Turning the shirt inside out before washing and drying helps protect these details while shrinking the fabric around it.
- Do not wash the shirt longer than 30 minutes in hot water; prolonged soaking does not increase shrinkage.
- Turn printed shirts inside out before shrinking to protect designs.
- Check the shirt every 10 minutes during drying to avoid over-shrinking.
- Avoid shrinking synthetic fabrics; they rarely respond well and can get damaged.
- Stop shrinking once the shirt fits better; repeated heat exposure weakens fibers.
- Allow the shirt to cool completely before measuring the fit to ensure accurate sizing.
If the shirt shrinks too much, stretching the fabric while it is still damp may help recover some size. Gently pulling the fabric in all directions and reshaping it by hand can loosen tight areas without damaging the material. Avoid using heat again immediately, as over-shrunk shirts become fragile and prone to tearing. Letting the shirt air dry after stretching maintains the adjusted size better.
Fabric damage mainly results from excessive heat and washing cycles breaking down fibers. Fibers lose strength, feel rough, or develop holes if shrinking attempts continue past the fabric’s limit. Limiting heat exposure and checking the garment often are essential steps to preserve the shirt’s lifespan during shrinking attempts.
When Shrinking Won’t Work and Professional Alternatives
Certain fabrics and blends don’t respond well to home shrinking efforts. Polyester blends and fragile materials typically require gentle care and show minimal shrinkage when exposed to heat or hot water. Shirts made completely from nylon rarely shrink after washing or drying. Fabrics such as cashmere, silk, pre-shrunk cotton, leather, suede, spandex blends, rayon, and linen often suffer damage or distortion if you try to shrink them, so you should avoid attempting to shrink these at home.
When shrinking fails or you worry about damaging your clothes, getting them adjusted by a professional tailor is a safer choice that gives you better control. Tailors can take in or alter shirts precisely to fit your body, often at reasonable costs that range from $10 to $40 depending on the complexity and location. Unlike shrinking, which may irreversibly change the fabric and texture, tailoring maintains the shirt’s original look and material integrity.
Deciding whether to attempt shrinking or seek a tailor starts with your fabric type and comfort level with shrinkage risks. For example, if you own a cotton shirt that has grown too big, applying hot water and dryer heat is the usual approach. However, if the shirt contains polyester blends that resist shrinking or delicate fibers that could be ruined, take it to a tailor instead. Minimal size changes after multiple shrinking tries often mean it’s cheaper and easier to have a tailor take care of the alterations instead.
To plan your next step, check the care label first. A cotton or cotton-rich label suggests shrinking can work, but the presence of synthetic fibers signals caution. When you decide on tailoring, bring your shirt to a specialist with clear instructions on how much you want it taken in. A typical alteration task might involve shortening sleeves, taking in the sides, or adjusting shoulder seams depending on your fit goals.
Shrinking can permanently alter a shirt’s texture and finish, which is a tradeoff versus the tailored fit that preserves fabric condition. Liege out professional help if you want to avoid uneven or excessive shrinkage and keep the shirt wearing comfortably for longer. In all cases, slow and gentle shrinking using sunlight or low heat can be tried first for delicate fabrics, but be ready to rely on tailoring when that doesn’t produce the fit you want.
How Fabric Care Labels Guide Safe Shrinking Practices
Reading fabric care labels is the first and most important step in safely shrinking a shirt. These labels provide essential instructions designed by the manufacturer to preserve your garment’s integrity. Start by locating the label, usually sewn into an inside seam or the neck area. Check for fabric content, washing, drying, and ironing symbols. Understanding what each symbol means helps you choose a shrinking method that won’t damage the shirt.
Look for key label instructions that warn against shrinking, such as “Do not tumble dry,” “Dry flat,” or specific temperature limits on washing and drying. A common symbol is a square with a circle inside (the dryer symbol) with an “X” through it, indicating the garment should never go in the dryer. Other symbols include a hand in the wash basin, meaning hand wash only, or temperatures marked in degrees Celsius or Fahrenheit. These signs suggest avoiding heat-based shrink methods like hot water washes or dryer heat, which are primary shrinking techniques.
To adapt your shrinking approach based on label advice, use a checklist of main symbols and follow the corresponding guidance. For example, if the care label permits machine washing but only at cold or warm temperatures (usually below 40°C or 104°F), avoid hot water washes as they can damage the fibres. If tumble drying is allowed but only on low heat, setting your dryer to high heat to shrink the shirt could cause shrinking beyond your target size or fabric deterioration.
Fabric content also affects how you proceed. Natural fibers like cotton usually handle heat-driven shrinking well unless the label advises otherwise. Synthetic fibers like polyester blend fabrics may shrink less and need gentler heat, often limited by the care label’s maximum drying temperature. Wool and delicate fabrics tend to have strict instructions to avoid any high heat or rough tumbling, so shrinking attempts should be minimal or avoided.
When the label offers vague instructions like “Machine wash gentle cycle” or “Dry flat,” it’s safer to test shrinking on a small, hidden area first. Run a short hot water wash cycle or apply heat briefly in the dryer to see how the fabric reacts before treating the entire shirt. This “patch test” helps prevent irreversible damage or uneven shrinkage. After testing, proceed gradually, checking size changes after each attempt.
Always follow the manufacturer’s care symbols; ignoring warnings can cause irreversible fabric damage or excessive shrinking.
Good care label reading also includes understanding drying advice in relation to shrinking. Air drying or drying at low heat shrinks fabric much less, so if your goal is controlled shrinkage, selecting the highest safe heat setting indicated by the label is important. Avoid repeated high-heat exposure, because extended heat can wear down fibers or distort texture. Shrinking a shirt is a balance between pushing the heat enough to shrink and staying within safe fabric limits to preserve the shirt’s appearance and comfort.
Step-by-Step Action Plan for Shrinking Your Shirt
Follow these clear steps to shrink your shirt safely at home and check your progress along the way.
- Before you start: Check the fabric care label to confirm that heat shrinking won’t damage your shirt.
- Step 1: Wash the shirt in hot water for at least 10 minutes to encourage fabric contraction.
- Step 2: Dryer time, put the shirt in the dryer on the highest heat setting your shirt can handle according to the label. Stop and check every 10, 15 minutes to avoid over-shrinking.
- Step 3: Try the shirt on while slightly damp to evaluate fit before it fully dries.
- Step 4: Apply targeted shrinkage by wetting specific areas and using a hairdryer on high heat if one part needs more adjustment.
- Step 5: If the shirt still isn’t the right size, repeat washing and drying in small increments rather than one long session.
- Step 6: Avoid ironing or steaming between shrink attempts, which can relax the fabric and undo progress.
Frequently Asked Questions
How Can I Make a Shirt Shrink Fast?
The fastest way is using the ironing or boiling water methods. Both apply direct heat quickly, which causes the fibers to contract faster compared to regular washing and drying.
Can You Shrink 70% Cotton?
Yes, 70% cotton shirts will shrink but less than 100% cotton. The polyester blend limits how much heat affects the fibers, resulting in smaller size reductions.
What to Do If a Shirt Is Too Oversized?
Try targeted shrinking on specific areas using heat to reduce the shirt where needed, especially length or width. Oversized shirts often respond better to shrinkage in length than width.
Does Ironing Shrink a Shirt?
Ironing can shrink a shirt by applying focused heat and pressure, especially on cotton fabric. Use a pressing cloth to avoid damage to the material.
Can Washing a Shirt in Cold Water Prevent Shrinking?
Yes, cold water washing minimizes heat exposure and helps keep the shirt’s original size longer.
Will Drying a Shirt on Low Heat Stop It from Shrinking?
Low heat drying reduces shrinkage risks compared to high heat but may not fully prevent natural fiber contraction over time.
Key Points to Remember
Shrinking your shirt at home requires attention to fabric type and controlled heat application. Start with small, monitored steps to reach the fit you want without damaging the shirt. Your next step is to check the care label on your shirt and plan your first hot wash and drying session accordingly.