How to Clean Cloth Chairs: 8 Proven Steps for Lasting Freshness
To clean cloth chairs effectively, start by vacuuming to remove loose dirt, then treat stains with appropriate cleaners before gently scrubbing and drying the fabric. Avoid overwetting the backing and padding to prevent damage. This approach fits homeowners or renters who want to maintain their cloth chairs’ appearance and durability through proper cleaning methods. You’ll learn how to identify your chair’s fabric and cleaning codes, tackle common stains safely, select the right products, and maintain your chairs in busy or pet-friendly environments for lasting freshness.
Key Takeaways
- Vacuum cloth chairs thoroughly every 2 to 4 weeks for light use to remove dust and debris.
- Identify fabric type and cleaning codes before applying any cleaner to avoid damage.
- Dab spills immediately with a clean cloth using 3% hydrogen peroxide or white vinegar for stain removal.
- Use a pH-appropriate cleaner and avoid soaking the fabric to protect backing and padding.
- Deep clean cloth chairs professionally every 12 to 18 months, or every 6 months if pets shed heavily.
- Dry chairs quickly after cleaning by air-drying or using fans to prevent moisture damage.
1. How to Clean Cloth Chairs Step-by-Step
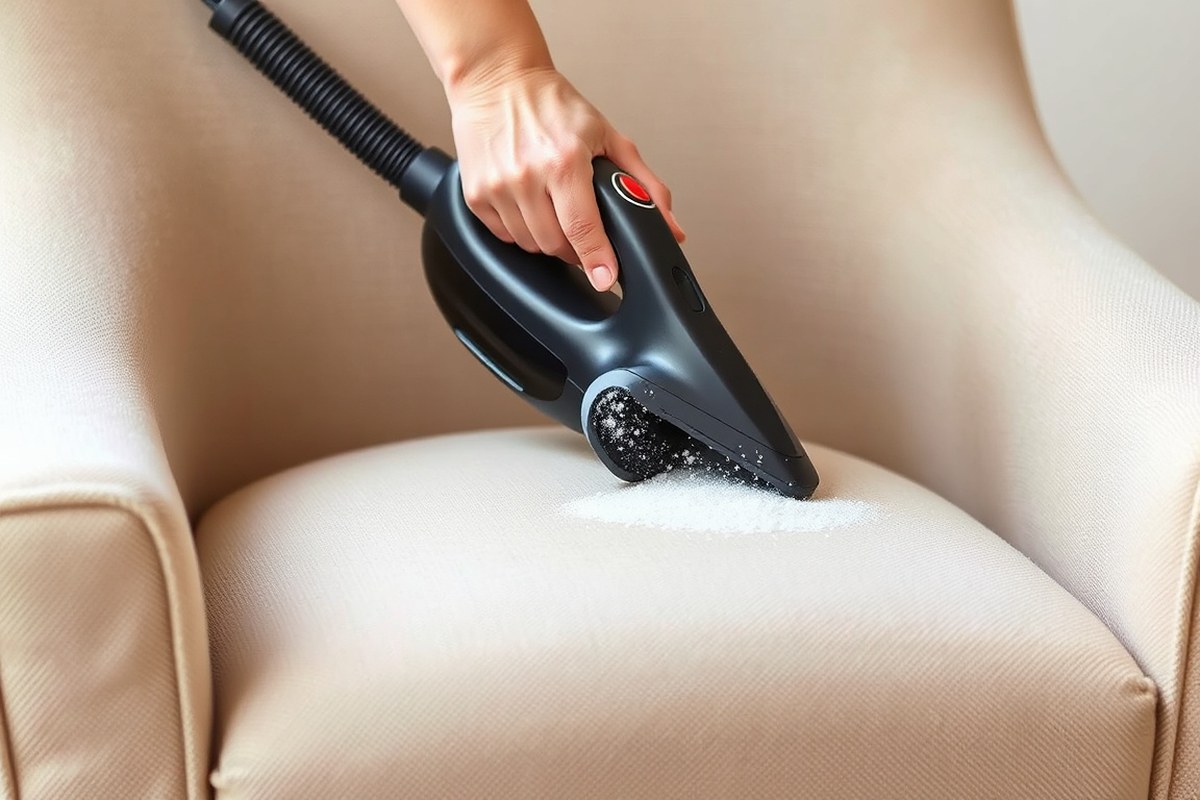
Cleaning cloth chairs involves careful preparation and a step-by-step approach to avoid overwetting and damage. Start with the right tools: a vacuum cleaner with an upholstery attachment, a soft brush, microfiber cloths, a spray bottle, and cleaning solutions appropriate for your fabric type. Proper preparation ensures efficient cleaning and protects the chair’s backing and padding from excess moisture, which can cause mold or weaken the fabric.
Begin by vacuuming the chair thoroughly. This removes surface dirt and prevents debris from embedding further during cleaning. Spot cleaning follows, targeting any stains with mild solutions using controlled moisture. Avoid soaking the fabric; instead, spray lightly and blot with a microfiber cloth. After each section, rinse gently by blotting with a clean, damp cloth to remove residue. Dry the fabric completely before use to prevent mildew. Vacuum once more when dry to lift any remaining particles or residue from the cleaning process.
- Get your cleaning supplies ready. Use a vacuum with an upholstery attachment, a gentle brush, microfiber cloths, and a spray bottle. Combine about 1/3 teaspoon of mild detergent with 750 mL (around 3 cups) of warm water. Apply a small amount on an unseen area first to ensure the fabric’s color and texture won’t be affected.
- Vacuum the entire chair carefully. Use the upholstery attachment to remove dust, dirt, and loose debris. Vacuuming first ensures grime doesn’t settle deeper during cleaning and protects the fabric’s structure.
- Spot clean stains with controlled moisture. Lightly spray your cleaning solution onto a small stained area, avoid soaking. Using a microfiber cloth, blot the stain gently from the outside toward the center. Repeat as needed, allowing the fabric to absorb minimal moisture to prevent overwetting.
- Deep clean the fabric if needed. For more thorough cleaning, apply the cleaning solution sparingly over each section, using a soft brush to loosen dirt gently. Immediately follow with a clean, damp microfiber cloth to blot and rinse the area, removing excess cleaning agents.
- Dry the chair thoroughly. Open windows or use fans to speed drying. Avoid direct heat, which can warp fabric fibers. Fully dried fabric prevents mold growth; this can take several hours depending on room conditions.
- Vacuum once more after drying. Use the upholstery tool again to lift any loosened dirt or residue left behind and to restore the chair’s texture and appearance.
2. How to Identify Fabric Type and Cleaning Codes

Start by locating the fabric care label on your cloth chair to find the cleaning code. These codes, W, S, WS, and X, show you which cleaning methods and products are safe to use. Knowing the code helps avoid damage and ensures effective cleaning.
Locating Fabric Care Tags
Most fabric chairs have a care label sewn onto the underside or the bottom edge of the seat. Check beneath any cushions or under the chair’s frame if the label is not visible. Some removable covers also contain care tags with the cleaning code clearly printed.
The label typically includes other important information such as fabric content and specific manufacturer instructions. Taking a few minutes to find this label can save you from costly mistakes or fabric damage during cleaning.
Meaning of Cleaning Codes
Each letter code on your chair’s fabric care label represents the best cleaning method to use. Here’s what each code means:
| Code | Description | Cleaning Products Allowed | Cleaning Products to Avoid |
|---|---|---|---|
| W | Water-based cleaners are safe. | Mild detergent, water-based upholstery cleaner. | Solvent-based cleaners, dry cleaning solvents. |
| S | Only solvent-based cleaners. | Dry cleaning solvents, solvent-based upholstery cleaner. | Water, water-based cleaners. |
| WS | Both water and solvent cleaners are safe. | Water-based and solvent-based cleaners. | Harsh chemicals beyond standard upholstery cleaners. |
| X | Vacuum only, no water or solvent cleaners. | Vacuuming, professional cleaning only. | All DIY cleaning solutions including water and solvents. |
Understanding these codes guides you in choosing safe cleaning products and prevents fabric shrinking, discoloration, or texture damage.
Recommended Cleaning Methods per Code
For fabrics labeled with a W code, use a mild detergent solution applied with a damp cloth. Blot the fabric gently to avoid soaking it. WS-coded fabrics give flexibility and can be cleaned with either method depending on the stain and soil level.
S-coded fabrics require solvent-based cleaners applied with a clean cloth; avoid water as it may cause damage or leave marks. For X-coded fabrics, vacuum thoroughly and consider hiring a professional for deep cleaning to avoid fabric harm.
Always test your cleaning method on an inconspicuous spot of the fabric before applying it broadly to check for any adverse reactions.
3. Best Methods for Removing Common Stains
Removing common stains from cloth chairs requires identifying the type of stain and using specific methods that match its source, like wine, coffee, grease, pet stains, or ink. Acting quickly is key, blot the stain first to prevent spreading, then apply an appropriate cleaner, letting it sit for a few minutes to break down the stain before wiping it away. Each stain needs a targeted approach involving careful steps and suitable products, which ensures effective cleaning without damaging the fabric.
Treating Food and Drink Spills
Food and drink stains, such as wine or coffee, are among the most frequent spills on cloth chairs. They can set quickly, so prompt attention can make a big difference. Begin by gently blotting the spill with a clean, white cloth to absorb as much liquid as possible without rubbing it further into the fibers. Mild detergent mixed with water works well for fresh stains, breaking down sticky residues without harsh chemicals.
- Blot the spill immediately with a clean, white cloth to soak up excess liquid without rubbing.
- Mix a small amount of mild detergent with cool water and dampen a cloth with the solution.
- Starting from the stain’s outside edge, gently dab inward to avoid spreading.
- Let the solution sit on the stain for 5 to 10 minutes to help break down particles.
- Blot the area again with a clean, damp cloth to remove soap residue.
- Allow the chair to air dry or use a fan to speed drying.
- For stubborn stains, apply an upholstery cleaner designed for fabric chairs, following product instructions.
Removing Grease and Oil Stains
Grease or oil stains come from food, lotions, or oily substances and can be stubborn since oil resists water-based cleaning. Allowing a drying agent to absorb the grease before applying a solvent helps avoid spreading. Cornstarch acts as an inexpensive and effective absorbent. After letting it work for 30 minutes, vacuum it up and use a solvent suitable for upholstery to target the remaining oil residue.
- Sprinkle cornstarch generously over the grease or oil stain to absorb excess oil.
- Let it sit for about 30 minutes without disturbing.
- Vacuum the cornstarch thoroughly using an upholstery attachment.
- Apply a solvent-based upholstery stain remover to the affected area, following label directions.
- Blot gently with a clean cloth, working from the outside toward the stain center.
- Allow the solvent to sit for 5 minutes before wiping off any residue.
- Let the chair air dry completely before use.
Handling Pet-Related Stains and Odors
Pet stains contain both visible marks and odors that need attention. Immediate blotting reduces staining, but the smell might linger without special treatment. Use an enzymatic cleaner designed for pet stains, which breaks down proteins that cause odor and stain. Before applying cleaners, test a hidden spot to confirm fabric safety and follow instructions carefully to avoid fabric damage.
- Blot the pet stain immediately with a clean white cloth to absorb moisture.
- Apply an enzymatic pet stain cleaner according to product directions.
- Allow the cleaner to sit for 10 to 15 minutes to break down the stain and odor-causing compounds.
- Blot or gently rub the area with a clean cloth to lift loosened stain material.
- Rinse with a cloth dampened in plain water to remove cleaner residue.
- Dry the area thoroughly, using a fan if necessary.
- Repeat if odor or stain persists, avoiding saturation that can damage padding beneath fabric.
Ink and Dye Spot Cleaning Tips
Ink stains often come from pens or markers and require quick treatment to avoid permanent marks. Avoid rubbing ink stains to prevent smearing. Use a gentle solvent like 3% hydrogen peroxide or white vinegar applied with a clean cloth. Test the cleaner on an inconspicuous area first, since some fabrics react poorly to these substances. Work carefully and blot frequently, letting the cleaner sit a few minutes before lifting the stain.
- Blot the ink stain gently with a dry cloth to remove excess ink without spreading.
- Dampen a clean cloth with 3% hydrogen peroxide or white vinegar.
- Lightly dab the stain from the outside inward, avoiding rubbing.
- Let the solution sit on the stain for 5 minutes to break down the ink.
- Blot the stain with a dry cloth to lift loosened ink particles.
- If stain remains, repeat steps carefully up to two more times.
- Clean the area with mild detergent solution afterward to remove any residual solvent.
- Allow the chair to dry fully before use.
4. Choosing the Right Cleaning Products Safely
Choosing the right cleaning products for cloth chairs requires knowing your fabric type and selecting cleaners that won’t harm the material. Commercial cleaners designed for upholstery can work well when matched to your chair’s fabric code, whether it’s water-safe (W), solvent-safe (S), or a combination (WS). For water-safe fabrics, a mild mixture of liquid dish soap and warm water is an affordable, gentle option. Use about a teaspoon of soap per cup of water. Avoid overusing soap, as excess residue can attract dirt or stiffen fabric. For solvent-safe fabrics, look for alcohol-based or dry-cleaning solvent sprays. Brands like HG offer extra-strong remover sprays suitable for tougher stains, but always confirm your fabric’s compatibility first.
Homemade solutions come in handy for routine cleaning without risking damage. A mix of equal parts white vinegar and water or a small amount of baking soda in water can brighten fabric and neutralize odors. These ingredients are inexpensive and easy to find. However, they work best on water-safe materials and should be applied sparingly to avoid weakening fibers. Avoid bleach, ammonia, or harsh chemical cleaners, as these can fade colors, damage fibers, or leave harmful residues.
Testing any cleaner before full application is essential. Choose a hidden corner or the underside of the chair where staining or discoloration won’t be visible. Dampen a cotton swab or cloth with the cleaning solution and gently rub a small spot. Wait 10 to 15 minutes and check if the color remains even and the fabric texture feels unchanged. If the test area shows any color loss, bleeding, or stiffening, do not proceed with that cleaner. Testing protects your investment and ensures the cleaning process won’t cause lasting damage.
Consider the chair’s usage and conditions to choose the right product. For high-traffic chairs or those exposed to pets, a deeper clean with a steam cleaner or commercial extraction cleaner about once a year helps remove embedded dirt and allergens. Between deep cleans, routine spot cleaning with mild dish soap solutions or vinegar water keeps fabric fresh without frequent exposure to harsher chemicals. For delicate antique fabrics or very sensitive materials like silk blends, consulting a professional cleaner is safer than at-home solutions.
Use a spray bottle or apply cleaning solutions with a well-wrung cloth, avoiding soaking the fabric. Overwetting can cause water stains or shrink fabric fibers, especially on natural fibers like cotton or linen. After cleaning, blot with a dry cloth and allow the chair to air dry in a well-ventilated area away from direct sunlight, which can fade fabric. With careful selection and testing of cleaning products, plus mindful application, you can keep your cloth chairs clean without compromising their appearance or lifespan.
5. How Often and When to Deep Clean Cloth Chairs
Vacuuming cloth chairs every one to two weeks prevents dirt buildup and keeps dust from settling into the fabric. Spot clean any spills or stains immediately by dabbing gently with a damp cloth and mild dish soap mixed with distilled water, which minimizes discoloration and fabric damage. Deep cleaning, which involves shampooing or using fabric-safe cleaners and sometimes steam, should be done at least once every 12 to 18 months. Households with pets should consider deep cleaning closer to every six months due to hair and dander embedded in the fabric.
Professional deep cleaning usually includes a thorough inspection of the chair, pre-treating stains, and a deep extraction cleaning with equipment designed for upholstery. This process can cost between $100 and $300 depending on the chair size and service area. The goal is to remove deep-seated dirt, allergens, and odors to restore both look and hygiene. Results include visibly cleaner fabric and fresher smell with no lingering residues. Over-cleaning or using harsh chemicals can weaken fabric fibers or cause fading, so avoid excessive scrubbing or frequent deep cleans beyond the recommended schedule.
- Vacuum cloth chairs every 1 to 2 weeks
- Spot clean spills right away with mild soap and water
- Deep clean at least every 12 to 18 months, or every 6 months for pet owners
- Use fabric-safe cleaners and soft sponges for deep cleaning
- Consider professional upholstery cleaning for thorough deep cleans
- Let cleaning products sit 15 minutes before vacuuming and rinsing
- Repeat spot cleaning and blot dry with a clean cloth or paper towel
Deep cleaning extends the life of your fabric chairs by removing grime that surface cleaning misses. Regular vacuuming and prompt spot cleaning reduce the need for more intensive treatments. Steam cleaning can be effective at home when done carefully; ensure the fabric tolerates moisture and follow all instructions to avoid water stains or mildew. Frequent rinsing of sponges or cloths during cleaning helps prevent spreading dirt or residue. Creating a consistent cleaning timeline based on chair use and household activity supports maintaining fabric appearance and cleanliness.
Don’t let spills sit longer than 5 minutes before spot cleaning to reduce permanent stains.
6. How to Dry Fabric Chairs Properly After Cleaning
Fabric chairs typically take between 2 to 6 hours to dry thoroughly after cleaning. Drying time depends largely on how saturated the chair is and the surrounding humidity. Chairs cleaned lightly might dry closer to two hours, while those wet from deep cleaning can take up to six. Ensuring your chair dries completely within this window helps prevent mold and mildew growth.
Humidity levels play a key role in drying. Keeping indoor relative humidity below 60% greatly reduces the risk of mold forming. Higher humidity slows evaporation, leaving the fabric damp longer and inviting mold or mildew. To speed up drying, improve air circulation by opening windows or using fans directed at the chair, but avoid blowing air directly in a way that might damage the fabric. A dehumidifier can also help maintain a safe moisture level when outdoor humidity is high.
Place the chair in a well-ventilated room away from direct sunlight and heat sources. Heat or sun exposure risks fading or weakening the fabric fibers. Instead, cooler air movement combined with low humidity is safer and effective. Avoid closing doors or covering the chair while it dries, as trapped moisture increases drying time and mold risk. For example, after rinsing, position your fabric chair near a fan on low speed with a window open for fresh air exchange.
To check if your fabric chair is fully dry, feel the thickest parts of the upholstery, especially in seams and cushions. The fabric should feel cool and dry without any damp patches. A moist or cool-to-the-touch spot means it needs more drying time. You can gently press tissue paper or a clean cloth against the surface; if it picks up moisture, drying isn’t complete. Running your hand across the surface should leave no dampness behind. Once dry, vacuum the chair again to lift the fabric fibers and remove residue loosened during cleaning.
Here’s a practical checklist to follow after cleaning your fabric chair: Place the chair in a room with good airflow and humidity below 60%, avoid direct sunlight or heat, keep doors and windows open when possible, use fans or dehumidifiers if needed, check surface moisture regularly, and do not use the chair until fully dry. This routine requires no extra cost beyond household fans or a small dehumidifier, if you choose to use one. The benefits are extended chair life and reduced risk of unpleasant odors or damage caused by mold.
Different situations may need tailored approaches. For example, in house basements or areas with poor ventilation, a portable fan plus a small dehumidifier can help maintain safe humidity and speed drying. In contrast, a sunlit living room with low humidity might only require open windows and a ceiling fan for 2 to 3 hours. Always avoid heating the chair directly with devices like hair dryers, as uneven heat can shrink or warp fabric upholstery.
7. Preventing Damage and Common Cleaning Mistakes
One of the most common mistakes when cleaning fabric chairs is overwetting the material. Excess water can soak into the cushion and frame, causing mold, mildew, or distortion of the chair’s shape. To avoid this, use only enough liquid to dampen the fabric, typically no more than a tablespoon at a time. Always check the cleaning code on the fabric tag: “W” fabrics tolerate water-based solutions, while “S” or microfiber fabrics require solvent-based cleaners like rubbing alcohol to prevent damage.
Rubbing stains aggressively spreads the mess and can embed dirt deeper into the fibers. Instead, gently blot the stain with a clean, absorbent cloth. Work from the outside of the stain toward the center to prevent spreading. Let the cleaner sit for a few minutes before blotting again. For tough stains, repeat the process rather than scrubbing hard, which risks fraying or color loss.
Ignoring fabric care instructions often leads to unintended damage. Paints, solvents, or household cleaners not designed for upholstery can fade colors or weaken fibers. When damage occurs, dry the area quickly and consider spot-treating with a mild solution suitable for that fabric type. If stiffness or discoloration remains, professional upholstery cleaning may be necessary.
- Test any cleaner on a hidden area before applying to visible fabric
- Use minimal liquid to avoid soaking the chair padding
- Blot stains gently; never rub harshly
- Follow fabric cleaning codes: “W” for water-based, “S” for solvent-based cleaners
- Apply a fabric protector after cleaning to reduce future stains
- Allow chairs to air dry fully before use to prevent mold growth
- Use soft brushes or cloths instead of abrasive scrubbing tools
Fixing damage caused by improper cleaning depends on the problem. For fabric that stiffened after overwetting, lightly steam the fabric at a distance or use a handheld steamer to relax fibers. For discoloration, spot cleaning with a fabric-safe dye or professional repair services may be necessary. Avoid DIY fixes like bleach, which worsen damage.
Regularly following cleaning codes and gentle methods protects your chairs and prolongs their appearance. Taking time to properly blot stains and avoid excess moisture reduces long-term repair costs and maintains the chair’s comfort and look for years. Applying a fabric protector creates a barrier to stains, saving time and effort on future cleanings.
8. Maintaining Cloth Chairs in High-Traffic and Pet Homes
Cloth chairs in busy homes with pets and kids need extra care to stay fresh and clean. Frequent vacuuming, protective measures like sprays or slipcovers, and quick response to spills reduce damage and odors. These steps save time and keep your chairs inviting despite heavy use.
Regular Vacuuming and Hair Removal
Regular vacuuming removes dust, crumbs, pet hair, and dander before they settle into fabric fibers. Use a vacuum with an upholstery attachment to gently clean without damaging the cloth. Vacuum once or twice a week in high-traffic areas, and every few days in homes with pets.
For pet hair, a rubber brush or specialized pet hair remover works well if vacuuming misses some strands. You can also use tape or a lint roller for quick touch-ups between deep cleanings. This frequent removal helps reduce odors and prevents hair buildup that can cause stains.
Using Slipcovers or Protective Sprays
Slipcovers provide a removable layer that protects your cloth chairs from spills, dirt, and pet wear. They can be washed easily, saving your chairs from harsh cleaning often. Choose fabrics that are machine washable and fit snugly for best results.
Fabric protector sprays create a water- and stain-resistant barrier on your chair’s surface. Apply the spray on clean fabric following the manufacturer’s instructions, usually in a well-ventilated area. These sprays usually cost $10 to $25 per bottle and last several months before needing reapplication.
- Apply fabric protectant when the chair is clean and dry
- Use slipcovers in homes with toddlers or shedding pets
- Consider waterproof protectors for chairs near eating areas
- Check cleaning codes before applying any spray
- Remove slipcovers and wash monthly in active homes
- Reapply sprays every 3 to 6 months depending on use
Both slipcovers and sprays reduce stain absorption and make routine cleaning quicker and less frequent.
Immediate Spot Treatment Best Practices
Address spills and stains as soon as possible to prevent permanent damage. Blot the spill gently with a clean, absorbent cloth without rubbing to avoid spreading. Use cold water or a mild cleaning solution suited to your chair’s fabric type. Avoid soaking the fabric to prevent watermarks and long drying times.
Maintain a small cleaning kit with upholstery-safe stain removers, clean white cloths, and a soft brush nearby for spills. After blotting, air dry the spot thoroughly, or use a fan to speed drying in humid conditions. Timely spot cleaning keeps your chair fresh and can reduce the need for deep cleaning.
Use only cleaning products approved for your fabric type to avoid discoloration or damage.
Step-by-Step Action Plan for Cleaning Cloth Chairs
Follow these simple steps to clean and maintain your cloth chairs effectively at home. Stick to the schedule to keep your chairs fresh and looking their best.
- Before You Start: Check the fabric cleaning code and test your chosen cleaner on an inconspicuous spot. The fabric should stay unchanged and not discolor.
- Day 1: Vacuum thoroughly to remove loose dirt and dust. The chair’s surface should feel cleaner and look less dusty.
- Day 2: Spot clean common stains using the recommended stain remover based on fabric type. Stains should visibly lighten or disappear.
- Day 3: Deep clean the fabric using a suitable upholstery cleaner or soap solution. The overall chair fabric should look refreshed, not overly wet or saturated.
- Day 4: Dry the chair properly using fans or good airflow; avoid direct sunlight. The fabric should feel dry to the touch without damp spots.
- Week 2: Vacuum again and inspect for any missed spots or reappearing stains. Spot treat if needed to maintain cleanliness.
- Monthly Maintenance: Vacuum and spot clean as necessary, especially in high-traffic or pet areas. This prevents buildup and keeps odors away.
Frequently Asked Questions
Can I Use Regular Dish Soap to Clean Cloth Dining Chairs?
Yes, but only use a small amount diluted in water and test it on a hidden spot first to avoid fabric damage. Dish soap can help remove light stains without harsh chemicals.
How Long Should I Let Cloth Chairs Dry After Cleaning?
Let the fabric air dry completely, which usually takes 3 to 6 hours, to avoid mildew and odors. Use fans or open windows to speed up drying but avoid direct sunlight.
Can I Machine Wash Slipcovers for Cloth Dining Chairs?
Only if the care label says they’re machine washable; otherwise, spot clean to prevent shrinking or damage. Most slipcovers are spot clean only due to delicate backing materials.
Is It Safe to Use Vinegar or Hydrogen Peroxide on Fabric Stains?
Yes, diluted vinegar or 3% hydrogen peroxide can treat some stains but test a small hidden area first to prevent discoloration. Dab gently instead of rubbing to protect fibers.
How Often Should I Vacuum Cloth Dining Chairs?
Vacuum every 2 to 4 weeks to remove surface dirt and dust, which helps prevent fabric wear. Use a brush attachment and low suction to avoid stretching the fabric.
What Makes Some Fabric Chairs Harder to Clean Than Others?
Chairs with delicate, natural, or water-sensitive fabrics require special cleaners and less moisture. Synthetic fibers usually tolerate mild cleaning methods better and dry faster.
The Bottom Line
Cleaning cloth chairs well requires the right products, techniques, and timing. By testing cleaning methods first and following a clear schedule, you can avoid damage and extend your chairs’ life. Start with vacuuming and spot treating today, small steps now save you time and expense later.